Aurifil Artisan October Challenge – Bag Making

Hello everyone!! I’m here today participating in the Aurifil Artisan October Challenge – Bag Making! Yayy!!

I’m pretty excited about this challenge because I started my sewing journey with a tote bag. My daughter taught me how to sew a tote bag. I was so excited to see the finished bag. I held it up next to my daughter’s bag and laughed so hard. My handles were all wrong. My daughter said, “Mom, don’t worry, it can go on your bike handles.” I laughed even harder because I didn’t own a bike.

Since that day, I’ve been making bags and loving it.

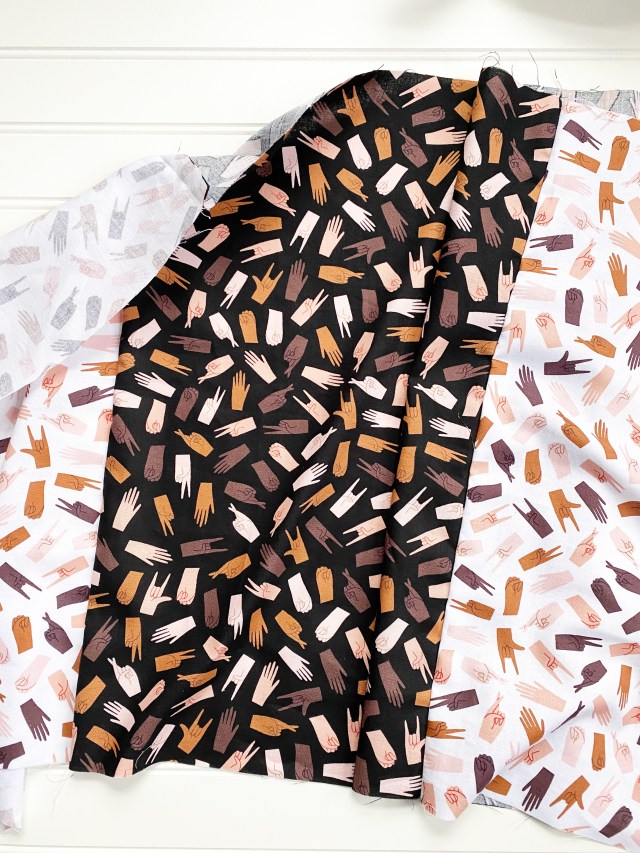
Take a look at my mini bag:


This mini bag perfect for my daughter. Her keys, money, and ID can fit in this mini bag when we are going out. Now she can put her belonging in my bag and find them when she needs them, LOL!

sashiko stitching back

Bag Elements:

I used 5 different fabric patterns. Matching up the different fabrics was fun, and I need to do it more often.

The lining is just a cute as the outside of the bag.

Inside of the bag

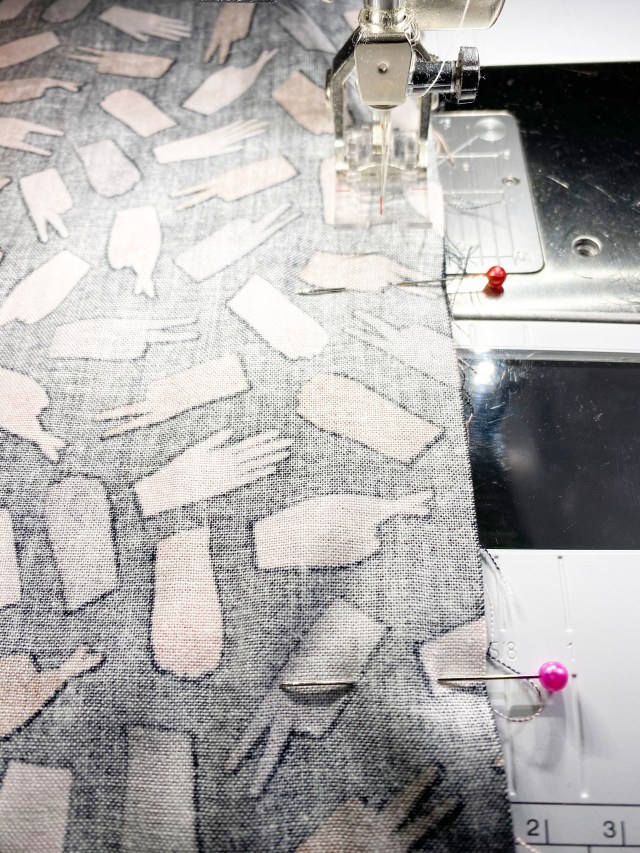
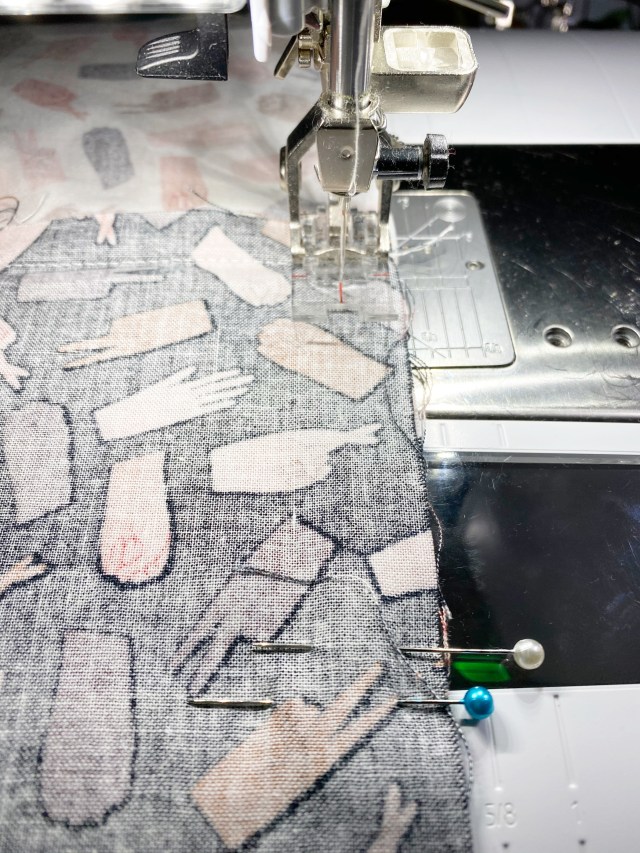
I learned how to do Sashiko stitching some time ago. I love adding it to different projects. It was a must for this one. It adds texture and dimension.

Aurifil thread is perfect for a bag like this. The different thread weights create the texture.

The beaded zipper pull is a fun element that matches the fabric perfectly.

Beads

Take a Closer Look:

Sashiko stitiching

sashiko stitching back

Making this bag was fun and took no time at all. I want to make a bigger version and possibly add a wristlet. Now that would be cute.

Pattern found in the Making No. 6 Magazine.

Thanks for stopping by!

Craft Room Destash


It’s that time again for me to make some room in my craft corner. My crafting supplies have over my house again. I have to let go allow these supplies to make someone else happy. So lets DESTASH!!!!

I’m not using my supplies like I use to and it makes no sense to hoard them in my house when they could get the love they need in a new home.

Some of the items are new and some are slightly used. The majority of stamps and dies are in their original packaging.

Here are the details:

Each package costs $60 which includes shipping.

If your interested, email me at kreativekymona@gmail.com with the following information:

→ The address you would like your package sent

→ First come, first serve.

→ Each package would be full.

→ I’ll send a PayPal invoice (which needs to be paid within 48 hours).

→ Packages will be mailed within 24 hours of payment with a tracking number that will be sent to you.

→If there’s something you looking for, in particular, let me know in the email as well.

Thanks for stopping by!


How to Create Pillow Covers with a Snap Closure

Hello everyone! I’m here today to show you how to create pillow covers with a snap closure.

I have to admit, I’ve never spent this much time in my home. The stay at home orders all of faced has given us permission to lounge on our couches more. 

That causes me to realize that I don’t have enough pillows on them for everyone to be comfortable. So, I decided to make some.

Take a look at my new Pillow Covers:

pillow covers finished product

Aren’t these cute? The colors in this fabric match perfectly with my couch.

Let’s talk about this fabric collection:

bees life fabric

Bee’s Life was designed by Tara Reed, a good friend of mine, for Riley Blake Design. This collection comes with 15 pattern prints and 1-panel print in yellow, black, and parchment. Perfect for all kinds of projects. 

Here’s how to create these pillow covers:

Materials:

Note: Some of the links below contain affiliate links.

Bee’s Life Fabric
Sewing Machine
Thread
Cutting Mat
Pins
Rotary Cutter
Plastic Snaps
Snap Pliers
Pillow Forms

Step 1: Cutting fabric

Cut one front panel to 18″ by 18″.

Cut two back panels to 11″ by 18″. 

pillow cover Cut fabric

Step 2:  Prep for sewing

To hide the raw edge of the back panel, fold over an inch on both panels. 

pillow cover edge

Press in place.

pillow cover pressing

Step 3: Sew the edge.

Sew the folded edge 1/8 inch from the edge.

pillow cover sewing edges

Repeat for the second panel.

pillow cover sewn edges

Step 4: Sew the pillow cover together

Once both of the back panel edges are sewn, lay the front panel right sides up. 

Place the back panels right sides down on top of the front panel, overlapping the sewn edges.

Pin in place.

pillow cover pin

Sew all the way around the pillow cover—no need to leave an opening because the back panel has an opening.

Turn the pillow cover inside out.

You can leave the pillow cover like this and just insert the pillow form, but adding snaps or buttons adds to the decoration. 

Step 5: Adding Plastic Snaps

Determine how many snaps you want to add to the outside flap on the pillow cover. I added five snaps.

Use the awl to create a hole where you want the snaps to go.

Place the snaps in the hole and use the snap pliers to attach them to the fabric. 

Follow the instructions that come with your snap pliers. 

pillow cover snap plier

pillow cover snaps

Step 6: Insert the pillow form

Insert the pillow form and close the snaps!

pillow cover finish product front

You’re done, and it took less than an hour. 

Now it’s your turn!

Supplies used:

bees life fabric    Bernina 570QE


Thank you so much for stopping by!

Hand to Hand Cowl + Tutorial

Hello everyone! I’m here today to show you how to create a beautiful Hand to Hand Cowl for the fall.

The cold season is upon us, and I must admit it’s not my favorite. I’m a spring and summer lady. The cold weather is not my friend. I find it harder to warm up than to cool down. So, I’m always looking for outerwear to keep me warm. 

Let’s take a look at my Hand to Hand Cowl:

Hand in hand finish product

I just love how this Cowl looks. The best part is how easy it is to make them using just a couple of fat quarters!! Yes, I know, crazy, right!

Let’s talk about this fabric collection:

hand in hand fabric

This collection celebrates common sisterhood. It comes with six patterns and two-panel options. I love the bright, bold multi-color palette that comes with this collection. Hand in hand was created by Amber Kemp-Gerstel of Damask Love. I had the pleasure of meeting Amber years ago at a craft convention in LA. Both of us were heavy in the papercraft world, so it’s nice to see her transition into the fabric world. 

Materials:

Hand in Hand fabric
Sewing Machine
Thread
Cutting Mat
Pins
Sewing Needle
Rotary Cutter

Finished Size:

29.5″ x 16.75″ 

Here’s how to create this Cowl:

Cut out 6 fat quarters from the different fabrics. I used only two prints.

Line the prints on your table into two rows of three of the fat quarters. 

With right sides together, sew the first two fat quarters on the 18″ side with a 1/2 seam allowance.

Sew the third fat quarter in the same manner to the second fat quarter in that row.

hand in hand crowl top row

Repeat for the second row. 

hand in hand bottom row

Now, place the two rows right sides together and stitch down the top of the long side with a 1/2 seam allowance. Repeat on the bottom long side.

Turn the entire piece right side out. Iron.

Now turn the piece back inside out, like your peeling a banana so that the raw edges line up right sides together. 

hand in hand turn back on itself

Pin in place, matching the seams. Leave a 3-inch hole for turning. 

hand in hand pinning

Sew in a circle with a 1/2″ seam allowance.

hand in hand sewing close

I used two pins to remind me to stop sewing here. 

hand in hand sewing

Turn the piece inside out through the 3-inch hole. 

hand in hand turning

Hand stitch the hole closed with coordinating thread. 

Now you’re done!! That was so easy, and it took an hour from start to finish. 

hand in hand finish product

Now it’s your turn!

Supplies Used:


hand in hand fabric    Bernina 570QE


Thank you so much for stopping by!