Paper Scrap Starburst Pie Chart

Third Post for the Day

I’m back again with my third post of the day.  I’m off from work today so I’m catching up with all of my posting.  It’s a great feeling to catch up on everything I needed to do.

This card is for the Papertrey Ink’s Make it Monday #162: Paper Scrap Pie Chart Challenge.  It was amazing to come up with a design for this challenge.

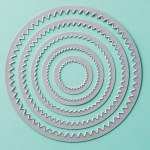
I used Stampin’ Up!’s Starburst Framelits and Lawn Fawn’s Hello Sunshine pattern paper to create my Pie Chart.  It came out so cute.

I also used Papertrey Ink’s Simple Stars for the sentiment and their Cover Plate: Stars Die.

Take a look:

Stars Shine

The purpose of this challenge was to gather all of the scrap paper that we have collected over time and “actually” use it on a card.  So I gathered all of my “Hello Sunshine”pattern paper to make my card.

My pick lemonade lawn trimmings just won’t stop twisting, lol.  I wanted my bow to look like a bow, but you get it!!!

I hope my card pass for this challenge.

Please leave me a comment, I would love to hear from you.

Supplies used:

classiccrestsolarwhtieStarburst Framelits DiePink Lemonade CordHello Sunshine Petite Paper PackCover Plate Stars DieSimple Stars Stamp SetWe R Memory Keepers Corner ChomperStampin' DimensionalsStampin' TrimmerEmbossing BuddyMelon Mambo Embossing PowderBasic Rhinestones Jewel Accents

Watercolor Embossed Thank You

Second Post for the Day

I’m back again today with a card that I made with my new Koi Watercolors.  In my last post, I introduced that set of watercolors and the colors that I used to create this card.

I stamped the “Thank You” with VersaMark and embossed it with clear embossing powder.  By doing that, I created a watercolor resistant area.  Which means the watercolor will roll off the embossed area.  It is so cool to see.  It took me awhile to create this effect but I finally got it.

Take a look:

Thank You Watercolor

I just love it.  I love how the thank you has small splotches of watercolor on it.  I could have wiped the color off the sentiment but I really loved how it looks.  I used the colors that I said I loved in my last post. Numbers 15, 19, and 23. They combine so pretty.

I decided that I wanted to add a border around the card mask before adhering it to the card base.  I used Papertrey Ink’s Stitching Lines Die.  I love them.  The die made it easier to add dimension to my card.

Please let me know what you think? I would love to hear from you.

Supplies used:

Stitching Lines DieAnother Thank You Photopolyer Stamp SetclassiccrestsolarwhtieKio WaterColors

-Kymona

Koi Watercolor Swatches

I’m back today after a couple of days off!  I’ve been working with my daughter to set up her blog.  I’m so excited about it and so is she.  She can’t wait to go live!!!  I will let all of you know when her blog goes live.

My Watercolor for Cardmarkers Online Card Class starts Monday coming and I can’t wait!  Monday, May 5th can’t come fast enough.

So in the meantime, Kristina Werner wanted us to play with all of the watercolors we have.  Our homework was to create color swatches to familiarize ourselves with the colors we have.  I have five different sets of watercolors for this class.  I want to use all of them.

My first swatch was made with my new Koi Watercolors.  It comes in a small portable case that has a removable palette inside.

Take a look:

Box and SwatchesKio Water Colors Koi Watercolor Swatches

These colors are so vibrant and pretty.  My favorite colors are numbers 15, 19 and 23!!! I used those color to create the card that is behind my swatch.  I will post that card next.

Let me know what you think.

Supplies used:

Kio WaterColorsclassiccrestsolarwhtie

-Kymona

My Daughter’s Water Splats

I’m so excited today!!!!  I have a guess designer visiting my blog.  Let me introduce my special guest.

Sanaa is a 7-year-old crafter.  She is new to the public eye.  She wanted to debut her first appearance here on the Kreative Kymona blog.  I’m so happy she choose me to showcase her.  She is also my beautiful daughter.

Sanaa wanted to play along with Papertrey Ink’s Make a Monday #161 Water Splats challenge.  She had a lot of fun creating her card.

Take a look:


IMG_5885 IMG_5886 IMG_5887 IMG_5888IMG_7224

Take a look at her final card:

Hello Sanaa

She used Papertrey Dye Ink Aqua Mist and Berry Sorbet to create her card.  Sanaa had a blast adding her Water Splats.  She was totally amazed at how the ink reacted to the water.  Once she started adding water, she couldn’t stop.  The look came out so good.

After adding the Water Splats, she die cut Lawn Fawn Hello die and Papertrey Ink’s Sketched Stars Die Collection and adhered it to her card base.

I love how her card came out.  This was her first time working with her inks and water.  She said she wants to do another card.

Supplies used:

classiccrestsolarwhtieSketched Stars Die CollectionPTI Berry Sorbet InkAqua MistScripty Hello

Wink of Stella clearTombow Multi-Purpose AdhesiveSponage Daubers


Please leave her a comment, she would love that!

-Kymona for Sanaa


Watercolor Splats

Did I tell you that I’m soooo excited about Water-coloring!!!  Well, just in case you missed it, I’m soooo excited about Water-coloring!!!!!

My water-coloring class starts next week and I can’t wait.  So in the meantime, I’m practicing using my watercolors.  I’m also waiting from my order to come in with some different types of watercolors for this class.  What class you ask, its my Online Card Class called Watercolor for card makers.  I want to learn everything there is to know about how to use water-coloring on my cards.  I also want my 7-year-old daughter to learn all about water-coloring as well. She’s taking the class with me, lol.

Today’s card is for Papertrey Ink’s Make it Monday #161: Watercolor Splats challenge.  What a great way to practice water-coloring!!! I Love It.

So, watercolor splats are a fun twist that lets you use droplets of water to do all of the work for you.  I used Papertrey dye ink’s to pull of this effect.  My order of ink’s came in today which was perfect for this card.  The colors are amazing and they do dry fast.

Take a look:

You are My...Watercolor Splats

To create these watercolor splats, I used my sponge daubers to apply the ink to my paper.  I love the textured look the sponge daubers created on my paper.

After applying each color of ink, I used my Artist’s Loft #4 paint brush soaked with water and touched my paper with the tip of the brush.  I didn’t press hard at all.

Once the water landed on the paper, the ink started to move all by itself.  To create bigger circles, I just added more water to the center of the circle.  It was fun to watch.

I can’t wait for my 8 year daughter to create her card with these splats.  She is going to be amazed.  I’ll post her card when she is done.

Supplies used:

classiccrestsolarwhtiePTI Summer Sunrise InkPTI Berry Sorbet InkPTI Tropical Teal Sponage DaubersPTI Phrase Play #1 DiePTI Phrase Play #1 Mini Stamp SetWe R Memory Keepers Corner ChomperStamp Runner Dot Adhesive

Please leave a comment below, letting me know what you think!!  I would love to hear from you.

-Kymona

Watercoloring…..

Water-coloring, oh how I love water-coloring.  It reminds me of when I was a kid in grade school.  It was so simple back then.  We grabbed a piece of paper, a brush and our crayola watercolors.  The teacher instructions were create a picture and do not make a mess.  How simple!!

Today as adults, water-coloring is about making a creation that looks perfect.  The colors must match and everything needs to look uniform.  Why aren’t things simple anymore?

Since we are adults now and things aren’t simple, I’m taking my next Online Card Class on Water-coloring.  I’m so excited about this class.  I will learn to play and create projects that are perfect, lol.

This class starts May 5 but to get all of the participants ready we were given an assignment to help prepare us for whats to come.  The assignment is to play with our watercolors so that we can feel comfortable with our supplies.

For my first assignment from Jennifer McGuire, I took my Pelikan Watercolor Opaque Paint Box and Big Hugs die cut and created a die cut of my mixed colors.  My watercolor set is from Germany.  They are made with highest quality pigments of the finest grain size.

This set includes hollowed paint tablets in the following colors: Black, Blue Green, Burnt Sienna, Carmine Red, Cobalt Blue, Cyan Blue, Flesh, French Green, Indian Yellow, Lemon, Magenta Red, Olive Green, Orange, Paynes Gray, Prussian Blue, Turquoise, Ultramarine, Umber Natural, Vermilion Dark, Violet, Yellow, Yellow Brown, Yellow Green, and Yellow Ochre. The color pans are interchangeable. A tube of Chinese White is also included.

Take a look:

Watercolor Hugs

I love these colors.  I used ultramarine, violet, and magenta red. They look so pretty together.  The Hugs die cut looks great.  It will look good on a card.  The negative space looks great too.  I will have to use that too.

My watercolors are opaque so it will take a lot of water to tune them down.  I run these colors over a black strip and you couldn’t see the black underneath.  I also embossed a sentiment with white embossing powder and applied these colors over it and you couldn’t see the sentiment, so be mindful of that.

My next assignment is to create a swatch for my watercolors.  I’ll post it as soon as I complete it.

I can’t wait to learn more about adult water-coloring!!!

Supplies used:

Pelikan Watercolorbighugsclassiccrestsolarwhtie

Please leave a comment, letting me know what you think.  I would love to hear from you.

-Kymona

NOTEbook

I’m back again with another card today.  This time it’s for CASology week 91 and the cue word is NOTE.

I thought long and hard on what type of card to make and I decided to pull out my stamps and dies from Lawn Fawn.  I used the Quinn’s Capital ABCs die and the Science of Love stamp set and die.  I had fun creating this card.  It took me a couple of trial and errors before I settled on my card.

Take a look:

Notebook

I wanted to create a card that would be different then expected.  I love white on white, its classy and clean.  I die cut the word note out of my mask layer.  Then colored my notebook with my Copic markers and adhere it next to the word cue word, note!  Kreative, I must say.

I used Copic marker E15 and R46

Supplies used:

LF589_QuinnsCapitalABCsLawnCuts_1024x1024LF597_ScienceOfLove_1024x1024LF599_ScienceOfLoveLawnCuts_1024x1024classiccrestsolarwhtieCopic MarkersWe R Memory Keepers Corner Chomper

I would love to hear from you, please leave a comment below.

Someone Like You….

I’m back again with another card for Less is More week 168 theme challenge. This weeks challenge is “Makes me smile”.  It’s simply that…something that makes you smile.

I was surfing Pinterest and came across a card that made me smile so I decided to make my own version of the card.  I used three stamp sets to create this card.

Take a look:

Someone Like You should be celebrated everyday

The sentiment and the colors on this card makes me happy.  I hope it makes you happy as well.

Please leave a comment letting me know what you think of my card.

Supplies used:

MAKE A WISHLoveThisCupcake PartyOnyx VersafineclassiccrestsolarwhtieBermuda Bay InkDaffodil Delight InkMelon Mambo Classic InkBasic Black Stampin Write MarkerPost-it Full Adhesive Roll

Gelatos Stenciling

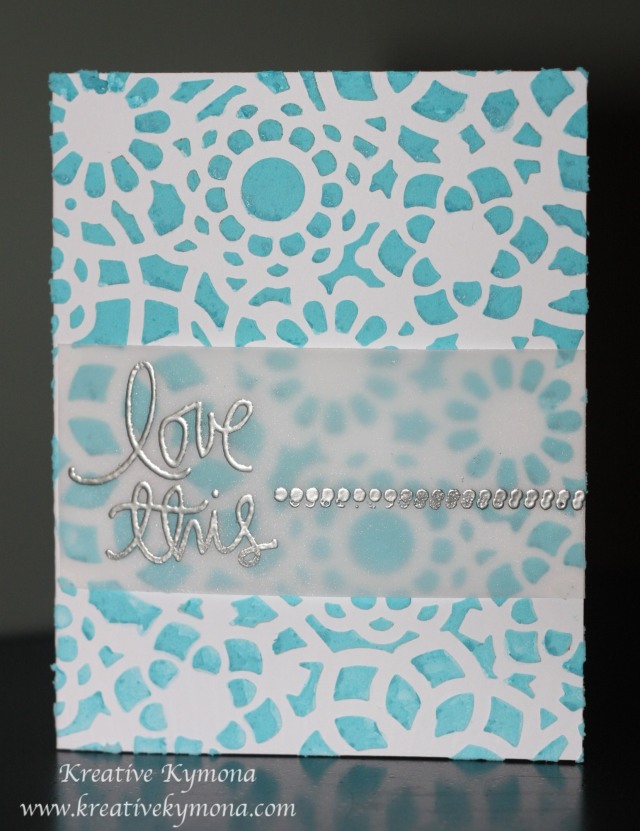
I’m back again for the 4th time with another stenciling card for Virginia’s View Challenge #2 on Stenciling.  I’m trying to get this card in before the challenge closes and that is in 1 hour in 10 minutes.

I used Faber-Castell Mix & Match Gelatos Tropical Colors and embossing paste to create my last card.  I had a lot of fun using the Gelatos.  This was my first time using them and it was easy.  It didn’t take long for the Gelatos to mix with the embossing paste to create the beautiful color on my card.

Take a look:

Love this

Pewter embossing powder is my favorite embossing powder.  It gives such a great silver look on this vellum.

Please leave a comment and let me know what you think.

Supplies used:

classiccrestsolarwhtieLoveThisCupcake Partywhitepastepalette knifeHS00828doilypewter powderWhite VellumTombow Multi-Purpose Adhesivegelatos


Shadow Stamping

This week’s challenge technique is a one layer Shadow Stamping card for Less is More.

Shadow Stamping is stamping the an image twice without re-inking the stamp.  You will see the stamp lighter the second time, which creates a shadow.

I used Stampin’ Up!’s Peachy Keen stamp set to create this effect.

Take a look:

Double Heart Enjoy

I stamped the first heart with Crisp Cantaloupe ink,  then without re-inking the stamp I stamped the heart again, giving the heart a shadow.  I repeated those steps using the Bermuda Bay ink.  I stamped the sentiment from the Simply Celebrate stamp set in Memento Tuxedo Black ink.  I added a rhinestone to finish the card off.

I am pleased with how my shadow stamping turned out.

Please leave a comment below letting me know what you think.

Supplies used:

classiccrestsolarwhtieBermuda Bay InkCrisp CantaloupePeachy KeenSimply CelebrateBasic Rhinestones Jewel Accents