How to Decorate a Pouch using Different Thread Weights

Hello everyone! Today I’m going to show you how to decorate a pouch using different weight threads.

When I first started sewing, I had no clue thread came in different weights. I thought all thread was the same until I was introduced to Aurifil.

What a game-changer!

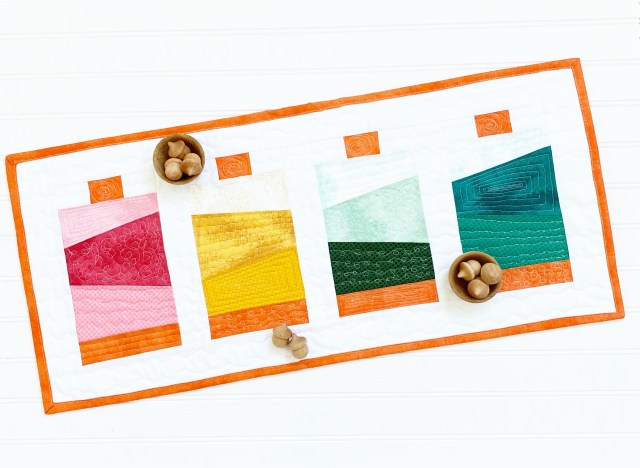
Let’s look at my decorated pouch:

Decorate Pouch with Different Thread Weights: Finished Product

The flowers sewn onto the pouch are all created by the same color but in different weights.  Yes, the weight makes a difference.

I used four different weights when making this pouch. I used natural white (2021) in the following weights: 28 wt, 12 wt, 40 wt, and 50 wt.

Decorate Pouch with Different Thread Weights: Finished Product

Let’s explore some more:

28 wt (gray spool):

It’s the second heaviest weight thread that Auriful offers and is perfect for projects such as hand applique, blanket stitch, Machine embroidery, and quilting.

12 wt (red spool):

The heaviest weight thread Aurifil offers are perfect for hand embroidery, embellishments, Sashiko, and machine art quilting.

I love how thick this thread is. Perfect for Sashiko stitching which I love.

40 wt (green spool):

Is a slightly thicker weight and is used for sewing bags, garments topstitching, and machine applique. This is slowly becoming my favorite.

50 wt (orange spool):

This is my go thread for everything, which might change. It a strong and thin thread that is flat and leaves crisp seams. It’s used for almost everything, such as EPP, machine embroidery, whole cloth, mico quilting, and needle turn applique. I love how this thread sinks into the material.

After using all of these different weights, I now understand what they look like together and will let out and try them instead of always reaching for the 50 wt.

Decorate Pouch with Different Thread Weights: Finished Product

Stitching the design:

Decorate Pouch with Different Thread Weights: Materials

  1. Thread the top thread with one of the three threads: 12 wt, 28 wt, or 40 wt.
  2. Load the bobbin with the 50 wt thread.
  3. Decide on a decorative stitch that comes with your sewing machine. On the BERNINA 570 QE, I used decorative stitch 1108.
  4. With each new decorative stitch, I switch out the different weight threads.
  5. Once the stitching is completed, make the pouch.

Decorate Pouch with Different Thread Weights: Finished Product

Such an amazing layer of texture from the different thread weights. What is your favorite thread weight? What are you most comfortable using? Is there a weight that you would love to try? I would love to hear all about it.

Supplies used:

There are some compensated affiliate links used at no cost to you. 


Thank you so much for stopping by,

The Garment District is in my Hometown

Hello everyone!! Did you know the garment district is in my hometown? Yes, I live in NY and love that there are a million and one fabric shops right at my fingertips. This brings me to why I’m here today. I wanted to show you an awesome garment district project that I had so much fun making.

Have you ever tried foundation paper piecing (FPP)? Well, let’s say it was a mind-blowing experience. This was my first time trying, and I’m totally sold. It’s an easy way to complete any project.

Let’s take a look at my mini quilt:

Garment District: Finished Product

Let’s take a look at this fabric kit:

The garment district quilt is one in a series of New York Mini Quilt Series named after some of Christopher Thompson, the designer of these series, favorite neighborhoods where culture, art, and the latest food collide. He did an amazing job on this design.

It’s full of four bright colors with an ombre look.

Here’s how to create this quilt:

Materials:

Note: Some of the links below contain affiliate links.

Garment District Mini Quilt Kit
Aurifil White Thread
Pins
Cutting Mat
Ruler
Rotary Cutter 
Quilting Ruler
Foundation Piece Paper

Garment District: Materials

Step 1: Print the pattern pieces

Print out each of the four foundation paper pieces on separate pieces of paper.

Step 2: Cut the fabric according to the pattern

Cut out each piece of fabric according to the pattern.

Garment District: Cut the fabric

Garment District: Cut the fabric

Step 3: Start the foundation paper piecing

Use a light source to place each piece of fabric on their coordinating number. Place one and two first and sew on the line that connects the two.

Garment District: Start foundation paper piecing

With the fabric in place sew on the line.

Garment District: Start the foundation paper piecing

Cut the excess fabric piece at 1/4 inch.

Garment District: Start foundation paper piecing

Repeat for each of the four pieces.

Step 4: Sew the pieces together

Follow the pattern directions on how to sew each piece together.

Garment District: Start the foundation paper piecing

Step 5: Quilt the top

Sandwich the top, batting and back to be quilted.

You can use gloves to help with the quilting,

Garment District: Quilt the top

or gripper rings. Which over is most convenient.

Garment District: Quilt the top

Step 6: Add Binding

Now it’s time to add the binding to the quilt.

Garment District: Add Binding

Now the Garment District Mini Quilt is done.

Garment District: Finished Product

Garment District: Finished Product

Garment District: Finished Product

Garment District: Finished Product

Garment District: Finished Product

Garment District: Finished Product

Foundation Paper Piecing is so much fun and easy to do. I love the look of the sharp corners. Would you give this a try? I would love to see your mini quilt.

Supplies used:

There are some compensated affiliate links used at no cost to you. 

Bernina 570QE       
Thank you so much for stopping by!

Embroidered Denim Tote Blank

Hello everyone!! February is here, and I’m pretty excited about it. There are so many things happening this month. It’s Black History Month, Valentine’s Day is in a couple of days, and it’s also National Embroidery Month.

I have so many projects in store for this month. Today, I’m sharing my brand new embroidered denim tote. It looks so cute, and it’s pretty simple to do.

Take a look at my Embroidered Denim Tote:

Live in the Moment: Finished Product

Embroidery adds character to any simple item. I love the white on dark blue.

Here’s what you need:

Materials:

Live in the Moment File
White Isacord Thread
OESD Heavy Weight Tear Away Stabilizer
OESD Expert Embroidery Scissors
Dime Target Stickers
Denim Tote Blank
Embroidery Machine
Sewing Machine

Live in the Moment: Materials

Here’s how to make this denim tote:

Step one: Download the design

Download the design in the file format that your embroidery machine uses. I’m using my Ricoma EM1010, so I downloaded the DST file format.

Step two: Hoop the tote and stabilizer

This denim tote is perfect for this project because the side seams are open, so you can hoop it with ease.

To find the center, fold the tote in have on the long side and the short side and creased the seams.

Place a sticker where the two folds met.

Use the crease lines to line up the arrows on your hoop (in my case, the holes) to make sure the fabric is centered in the hoop.

Live in the Moment: Hoop the tote and stabilizer

Attach the hoop to the machine.

Step three: Export and set up the machine

Export and set up the machine to get ready to stitch the design.

Make sure the needle is positon right above the sticker to make sure it’s centered.

Trace out the design to make sure the presser foot will not hit the hoop.

Step four: Stitch out the design

Since this design was set up to use one color, press start, and the embroidery machine will do the rest.

Live in the Moment: Stitch out the design

Live in the Moment: Stitch out the design

Step Five: Unhoop and clean up the design

Now it’s time to unhoop the blank and clean it up.

Since it’s a tote, just take your time and tear the stabilizer around the design, leaving the stabilizer inside the design.

Cut the threads that you see.

Step Six: Sew the side seams

Iron the tote.

Turn the tote inside out and sew the side seams; remember to backstitch at the beginning.

Done! Your tote is ready to go.

Live in the Moment: Finished Product

This tote is perfect to give as a gift or keep as your own.

Supplies used:

There are some compensated affiliate links used at no cost to you. 

Ricoma Embroidery Machine EM 1010    Bernina 570QE

Thank you so much for stopping by!