Hello everyone!! It’s CASology Tuesday!! We are back with another Cue Card for you!!
This week’s cue card is fun. This cue card can be interpreted in so many different ways. I can’t wait to see what everyone comes up with.
This week’s cue card:

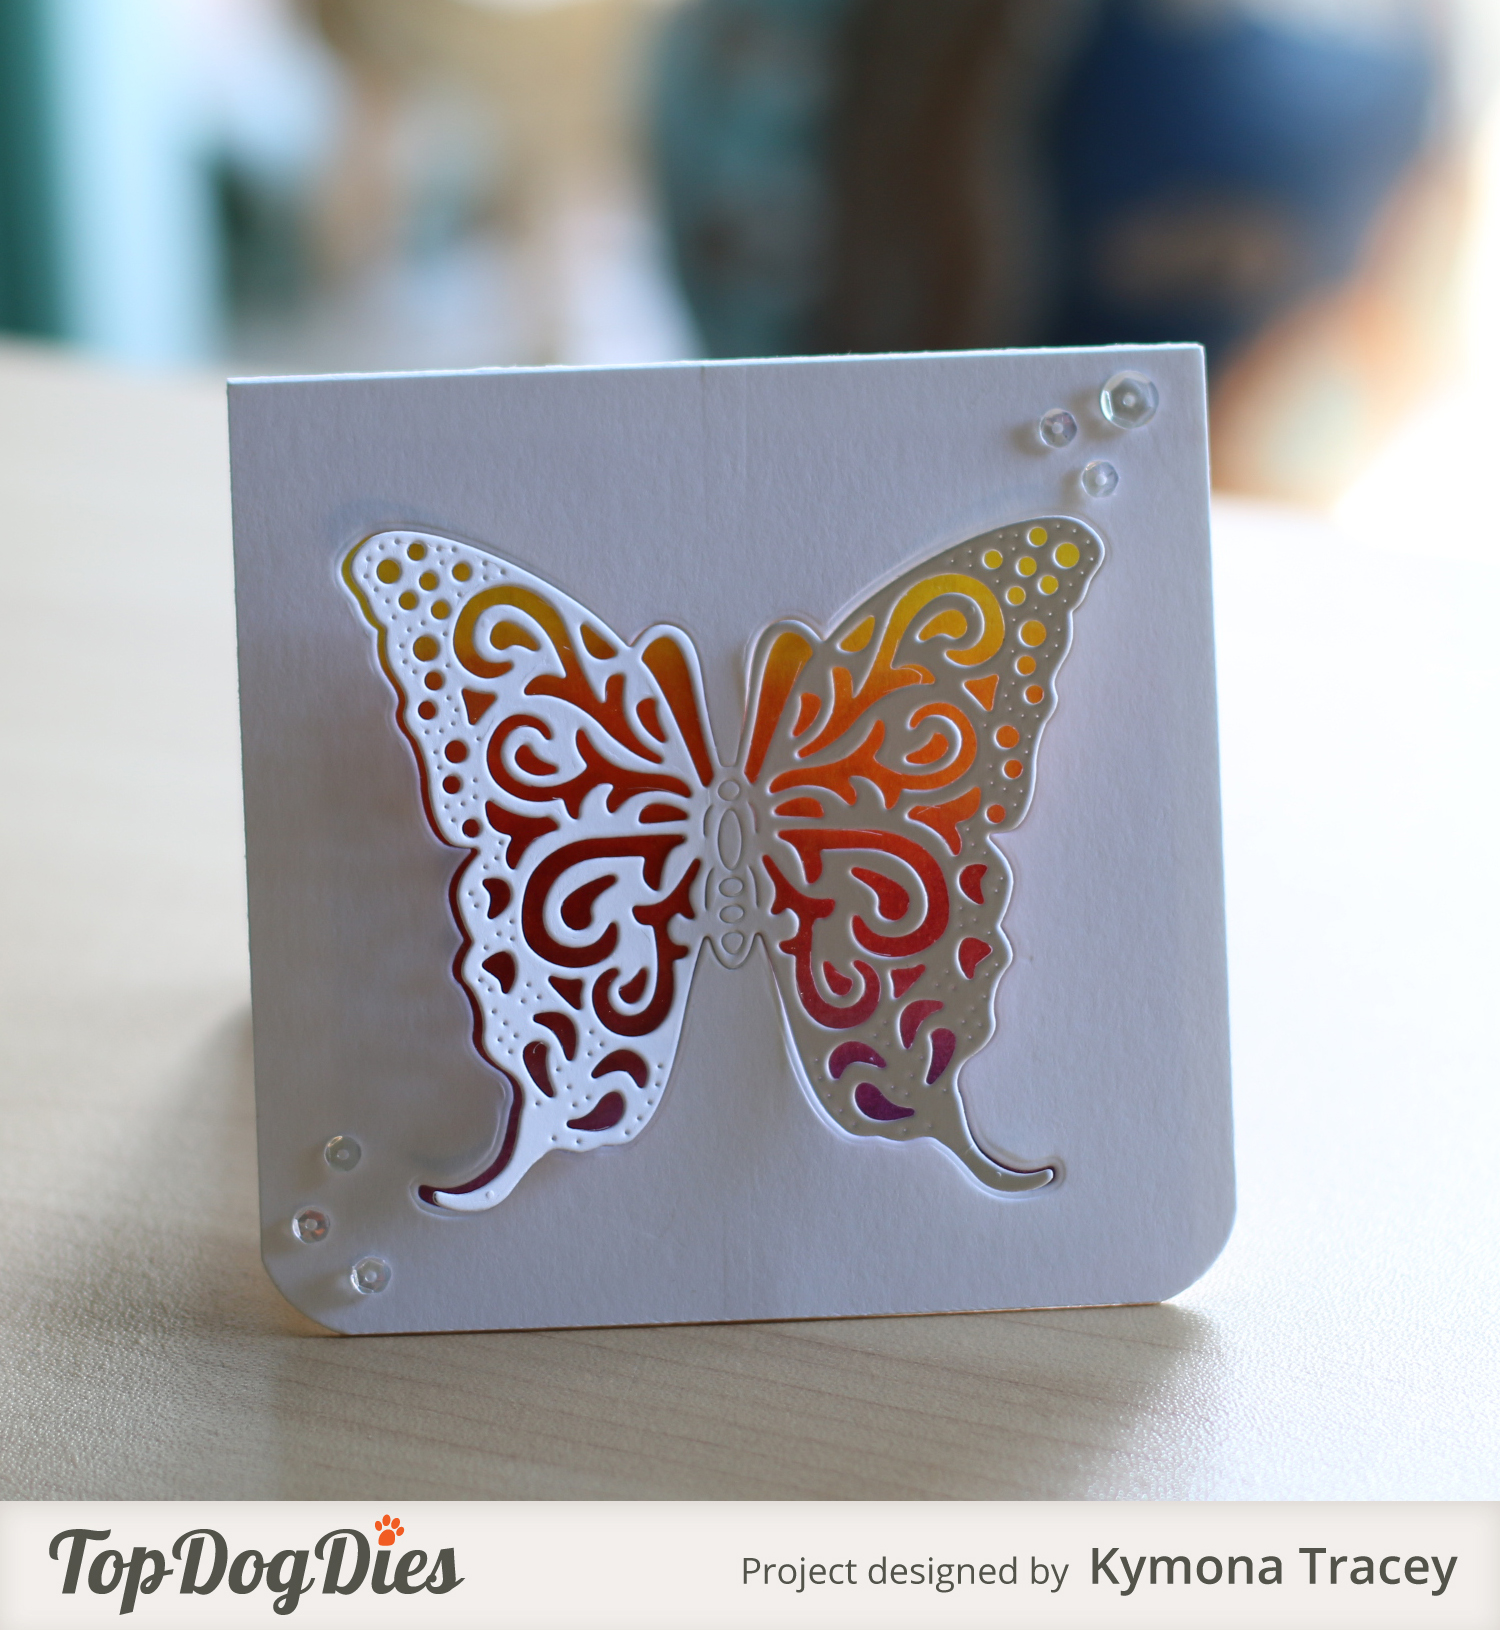
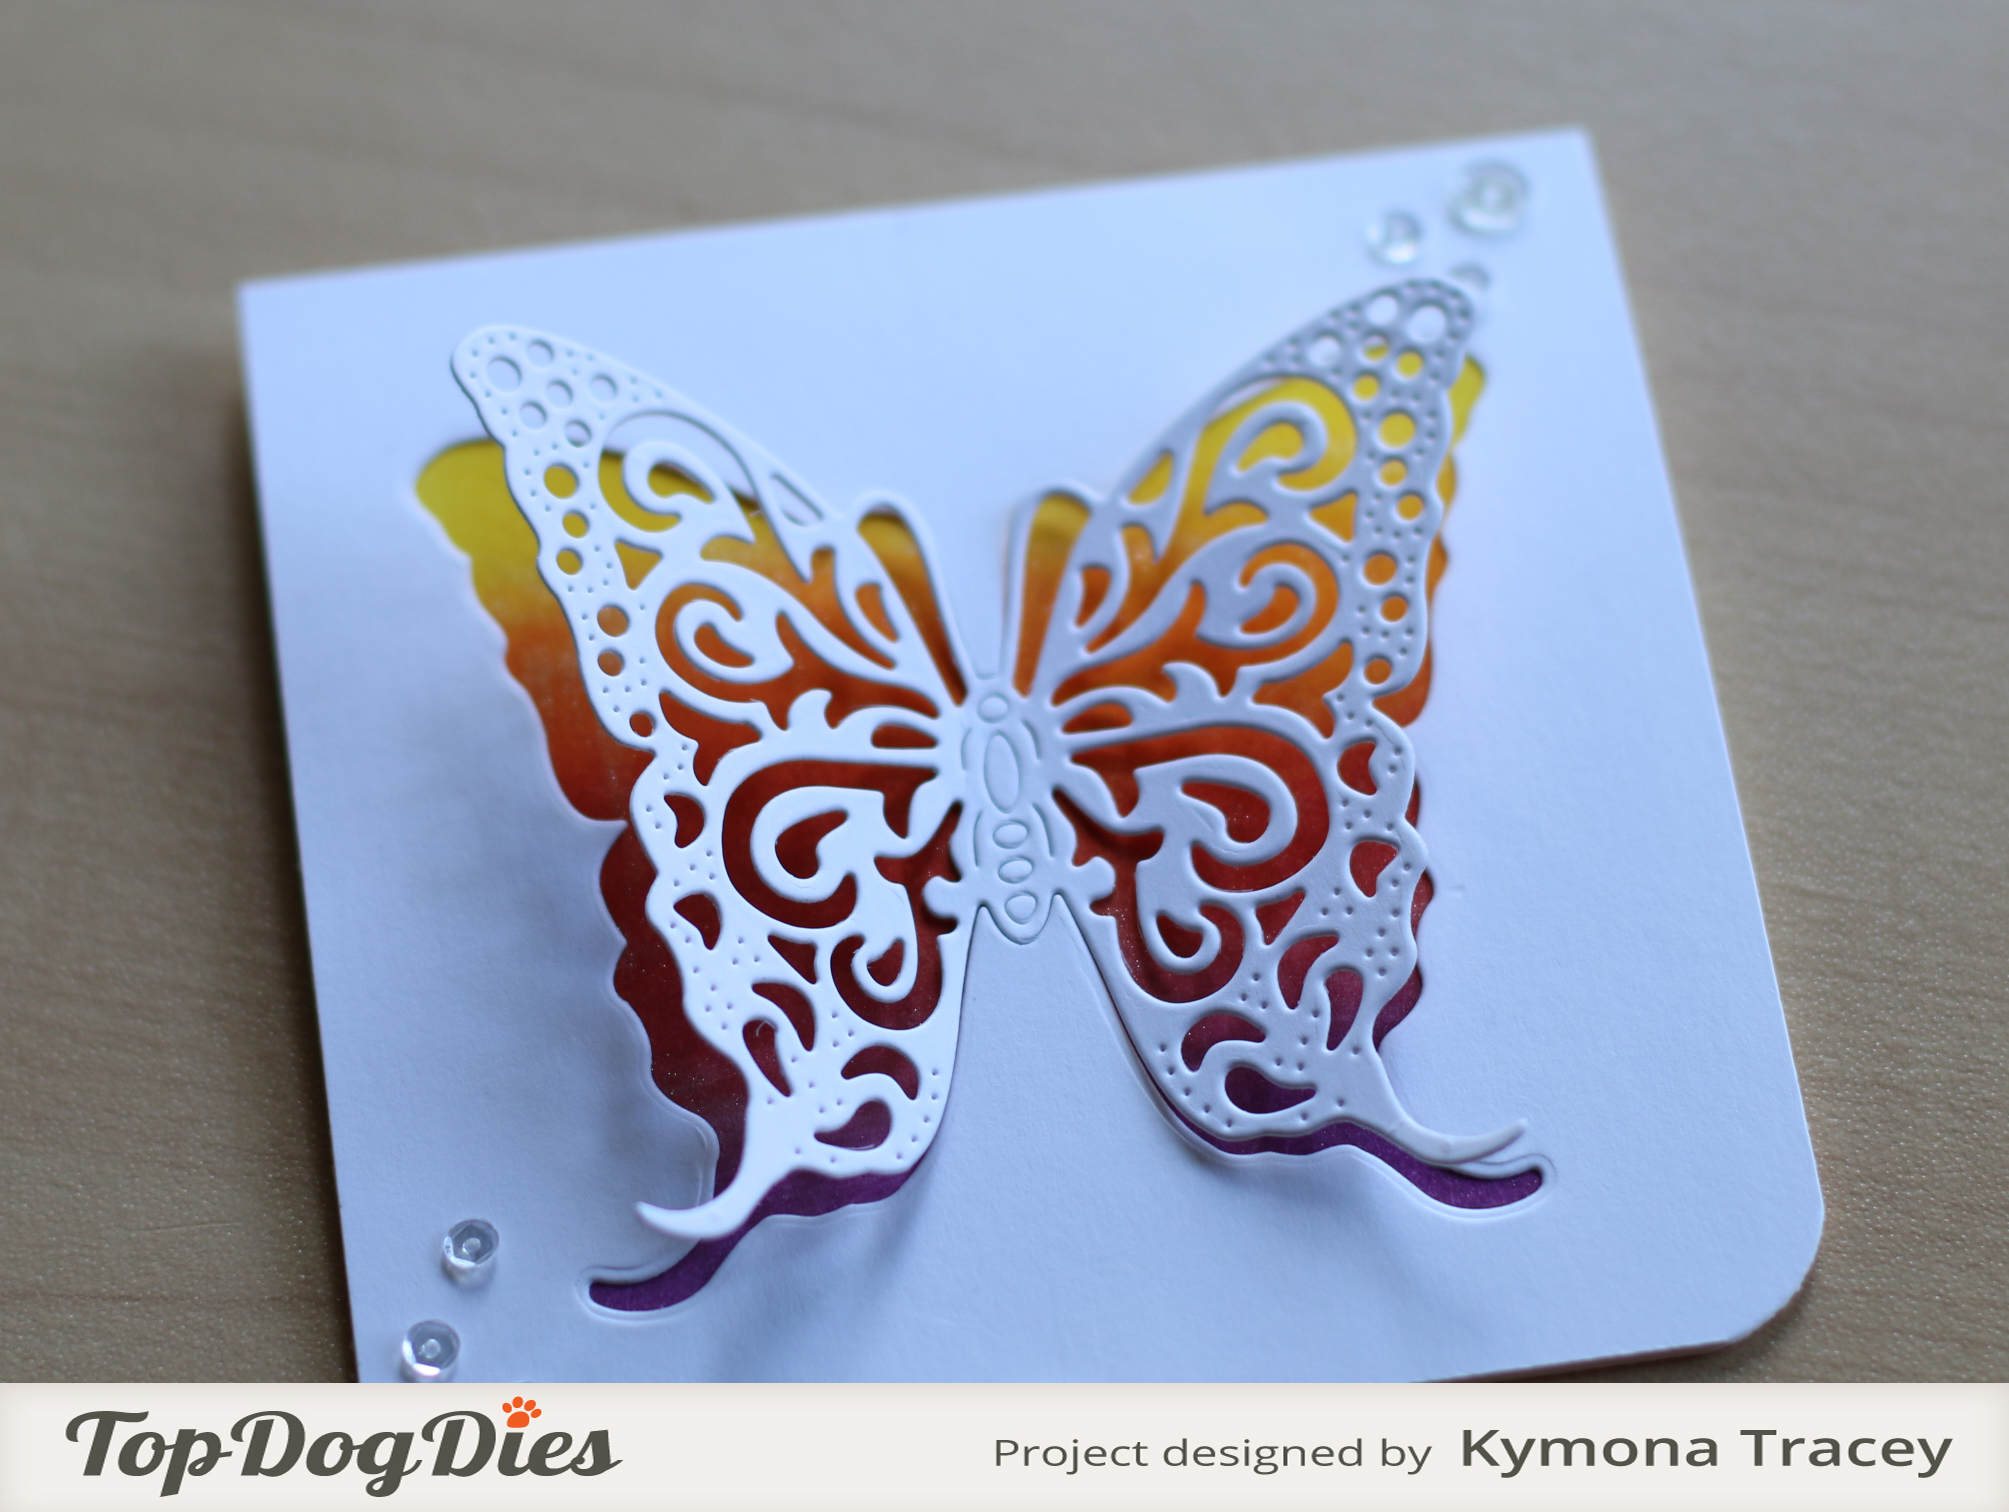
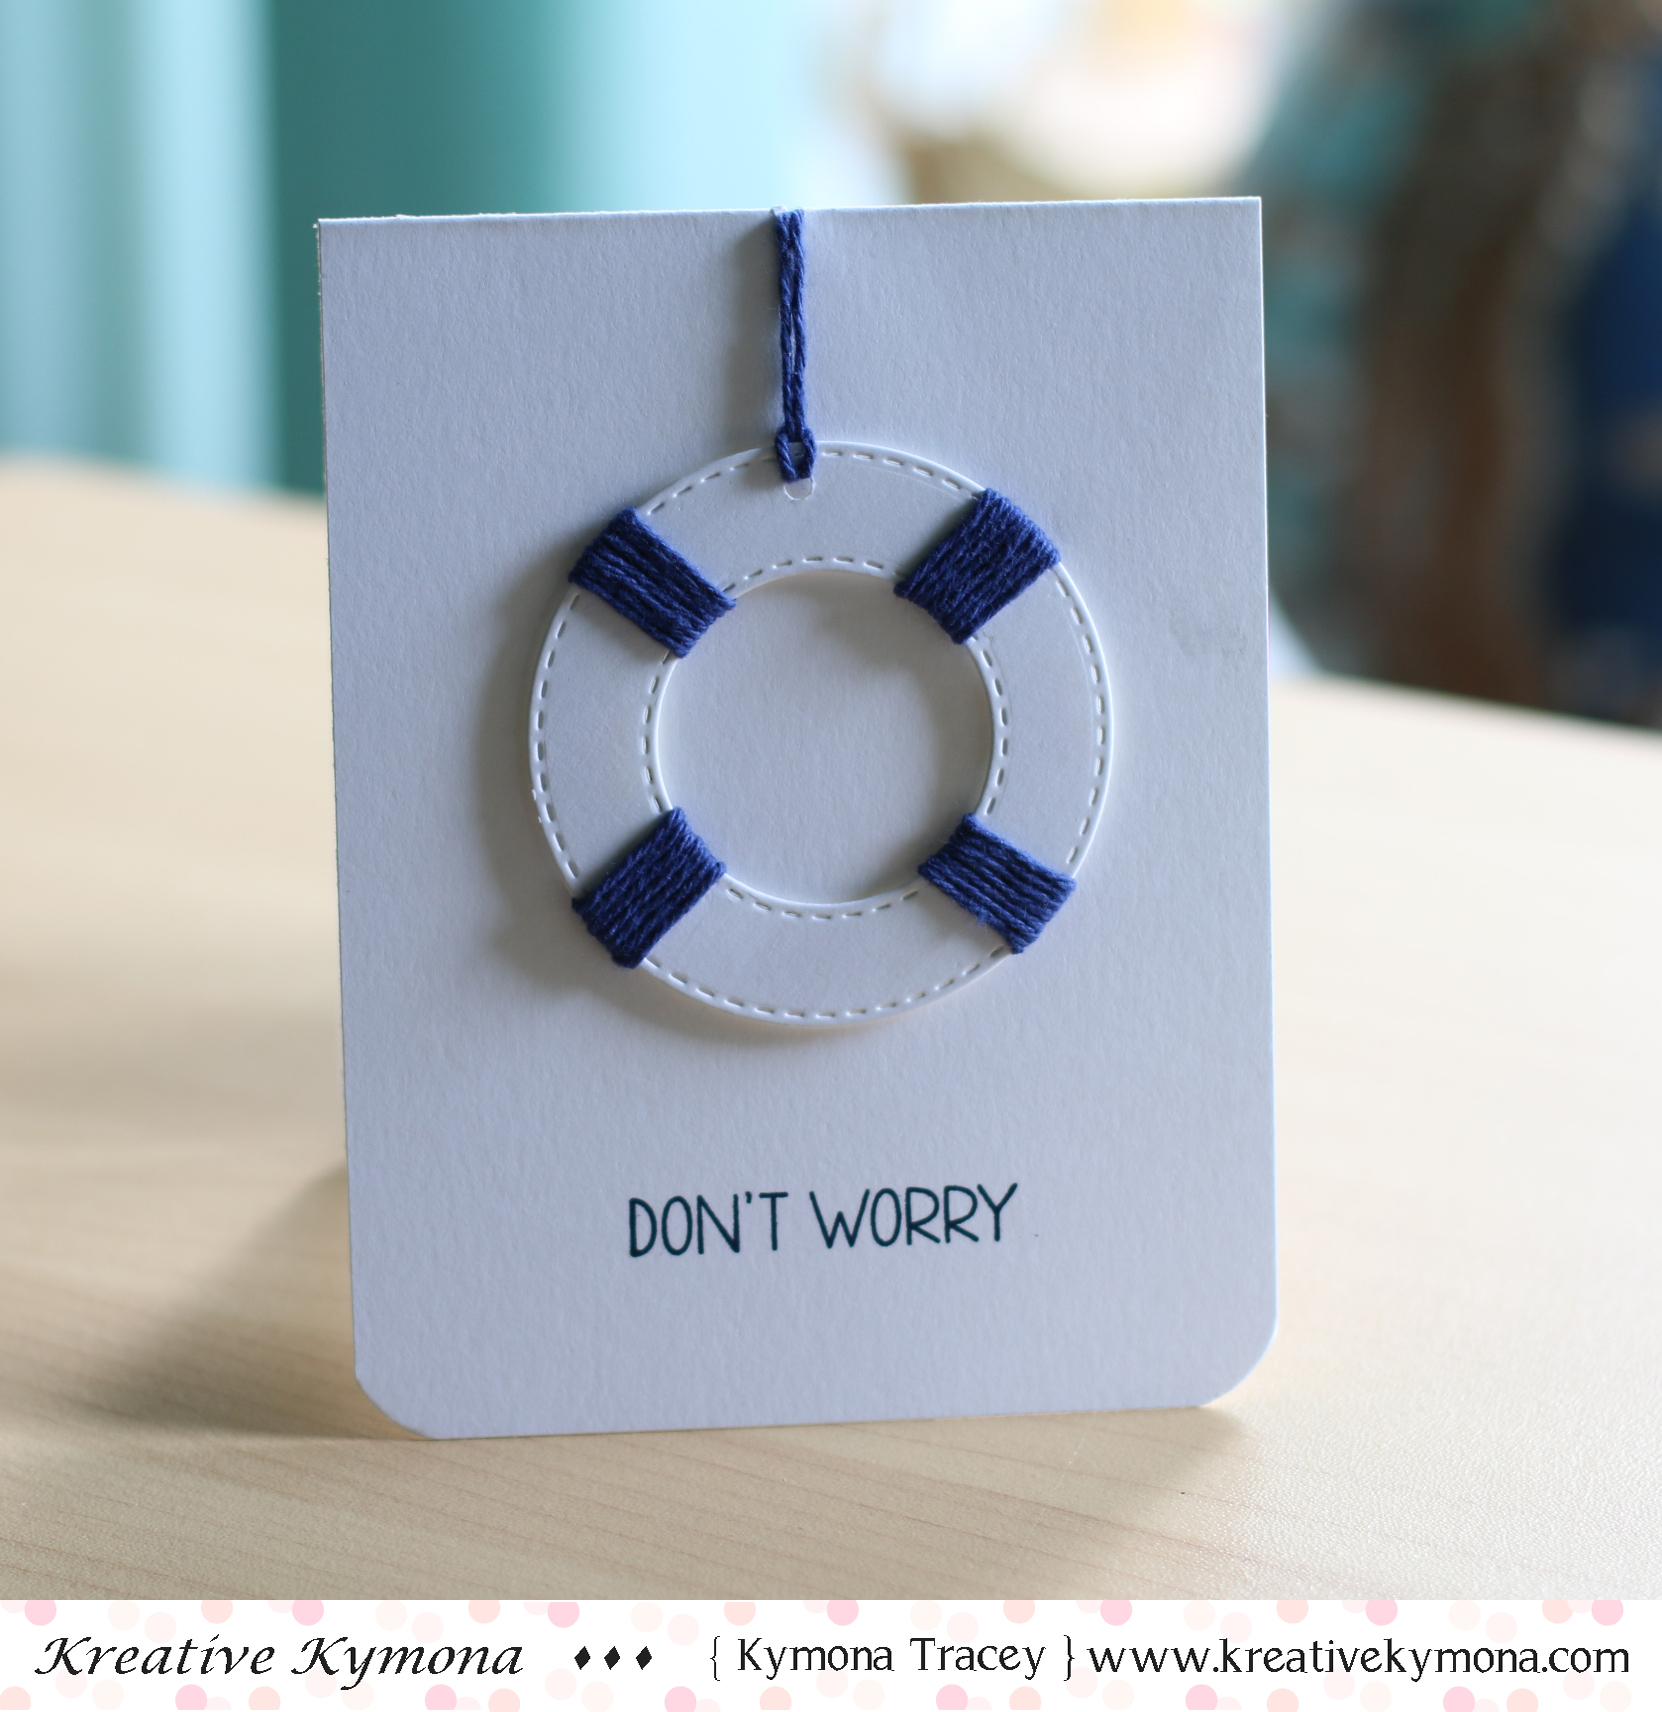
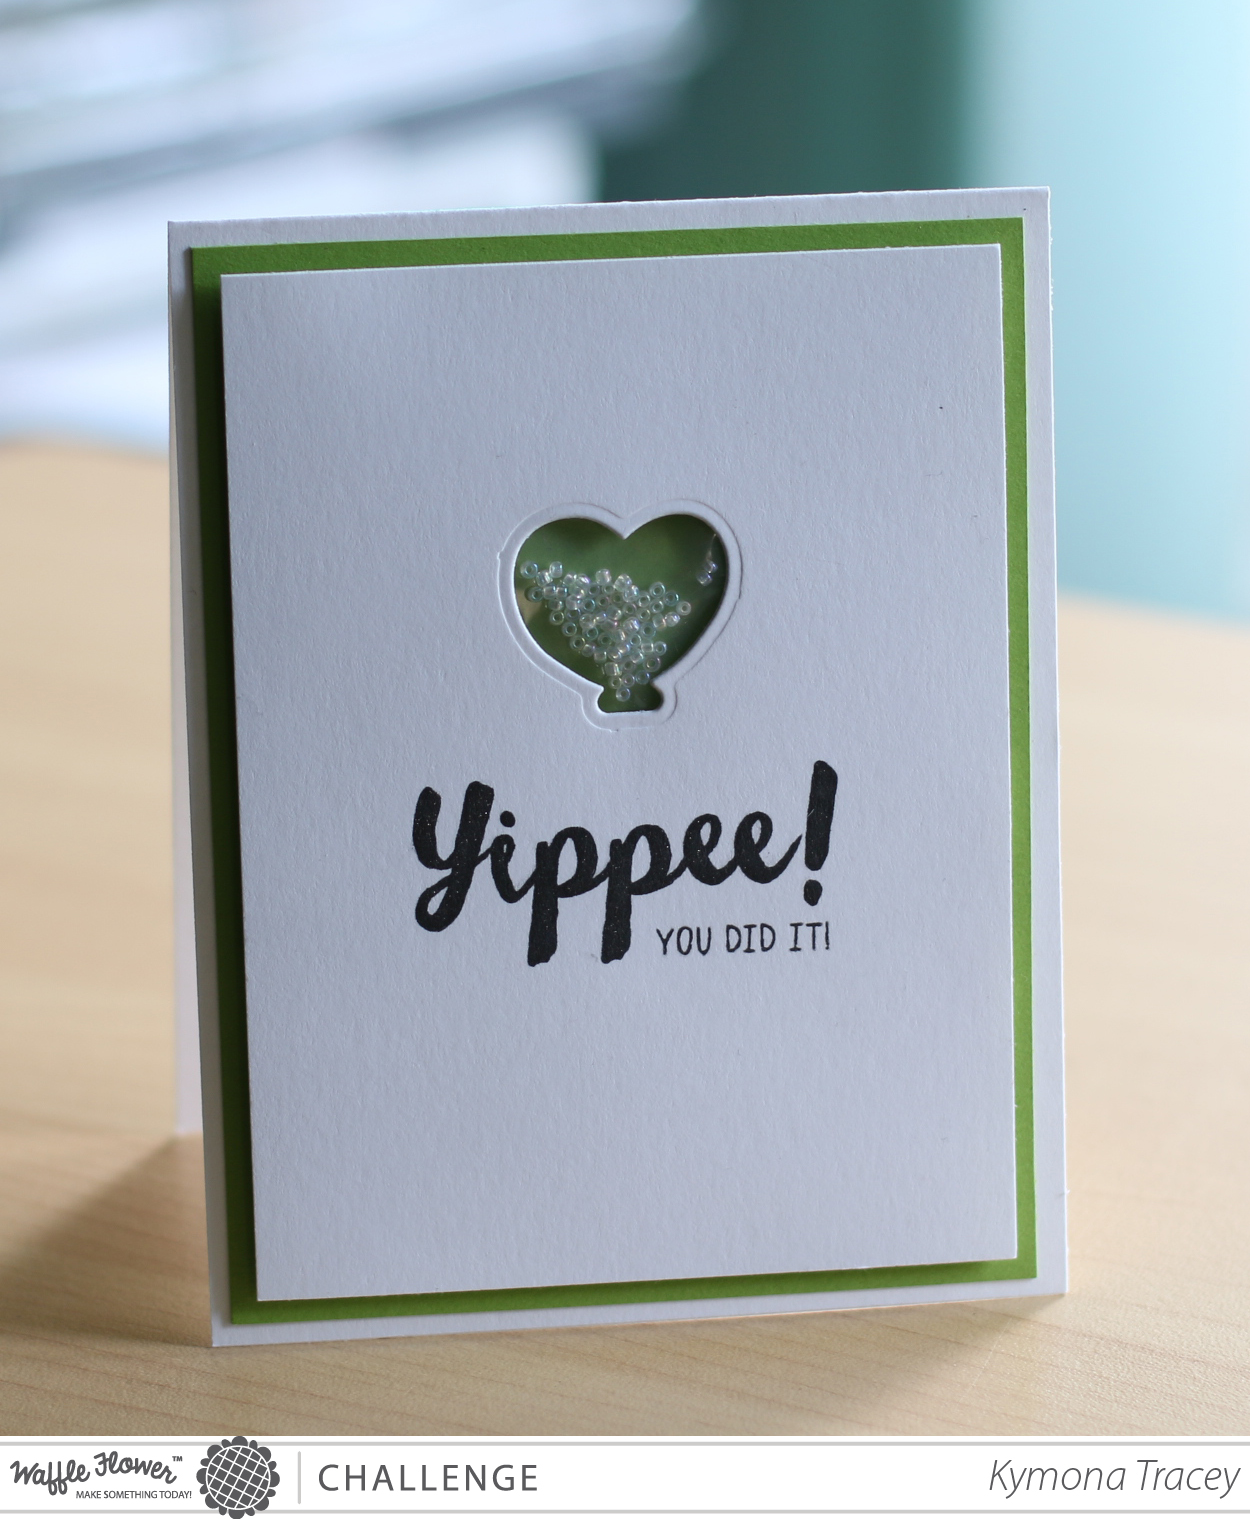
Take a look at my card:

I decided to go traditional with my card. I used Lawn Fawn Sweet Smiles stamp set and Sweet Smiles Cuts to create my card! The bubblegum goes “POP” when you blow a bubble!! I love it!
I’m participating in Kathy’s 30 Day Coloring Challenge! I colored this gum-ball machine and loved how it turned out.
I used my Copic Markers: R89, R24, R27, R29, G07, G16, YR15, Y02, B37, Rv21, Rv13 to color my focal point.
I stamped some of my gum-drops with one of the many faces in the set. So cute.
I used my Clear Wink of Stella and added shimmer to the base and top of the gum-ball machine.

I used retired Stampin’ Up! Polka dots embossing folder and embossed my card base.
I die cut my image and added it to my card base using some foam adhesive.
I stamped the sentiment from the stamp set with My Favorite Things Hybrid Ink.
I rounded the bottom corners and I was done!
Super clean and simple. What do you think? Let me know below!
Now on to the GiveAway Winner from last weeks contest!!
First let me say thanks to everyone for leaving me a comment. I really appreciate all of you!!
I used Random.org to pick the winner out of 36 entries.
The winner is:
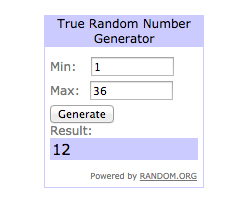
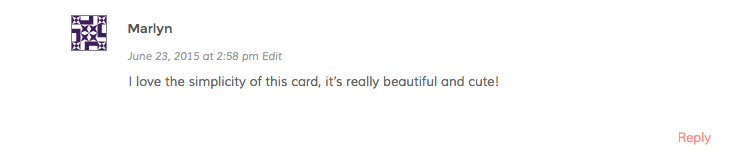
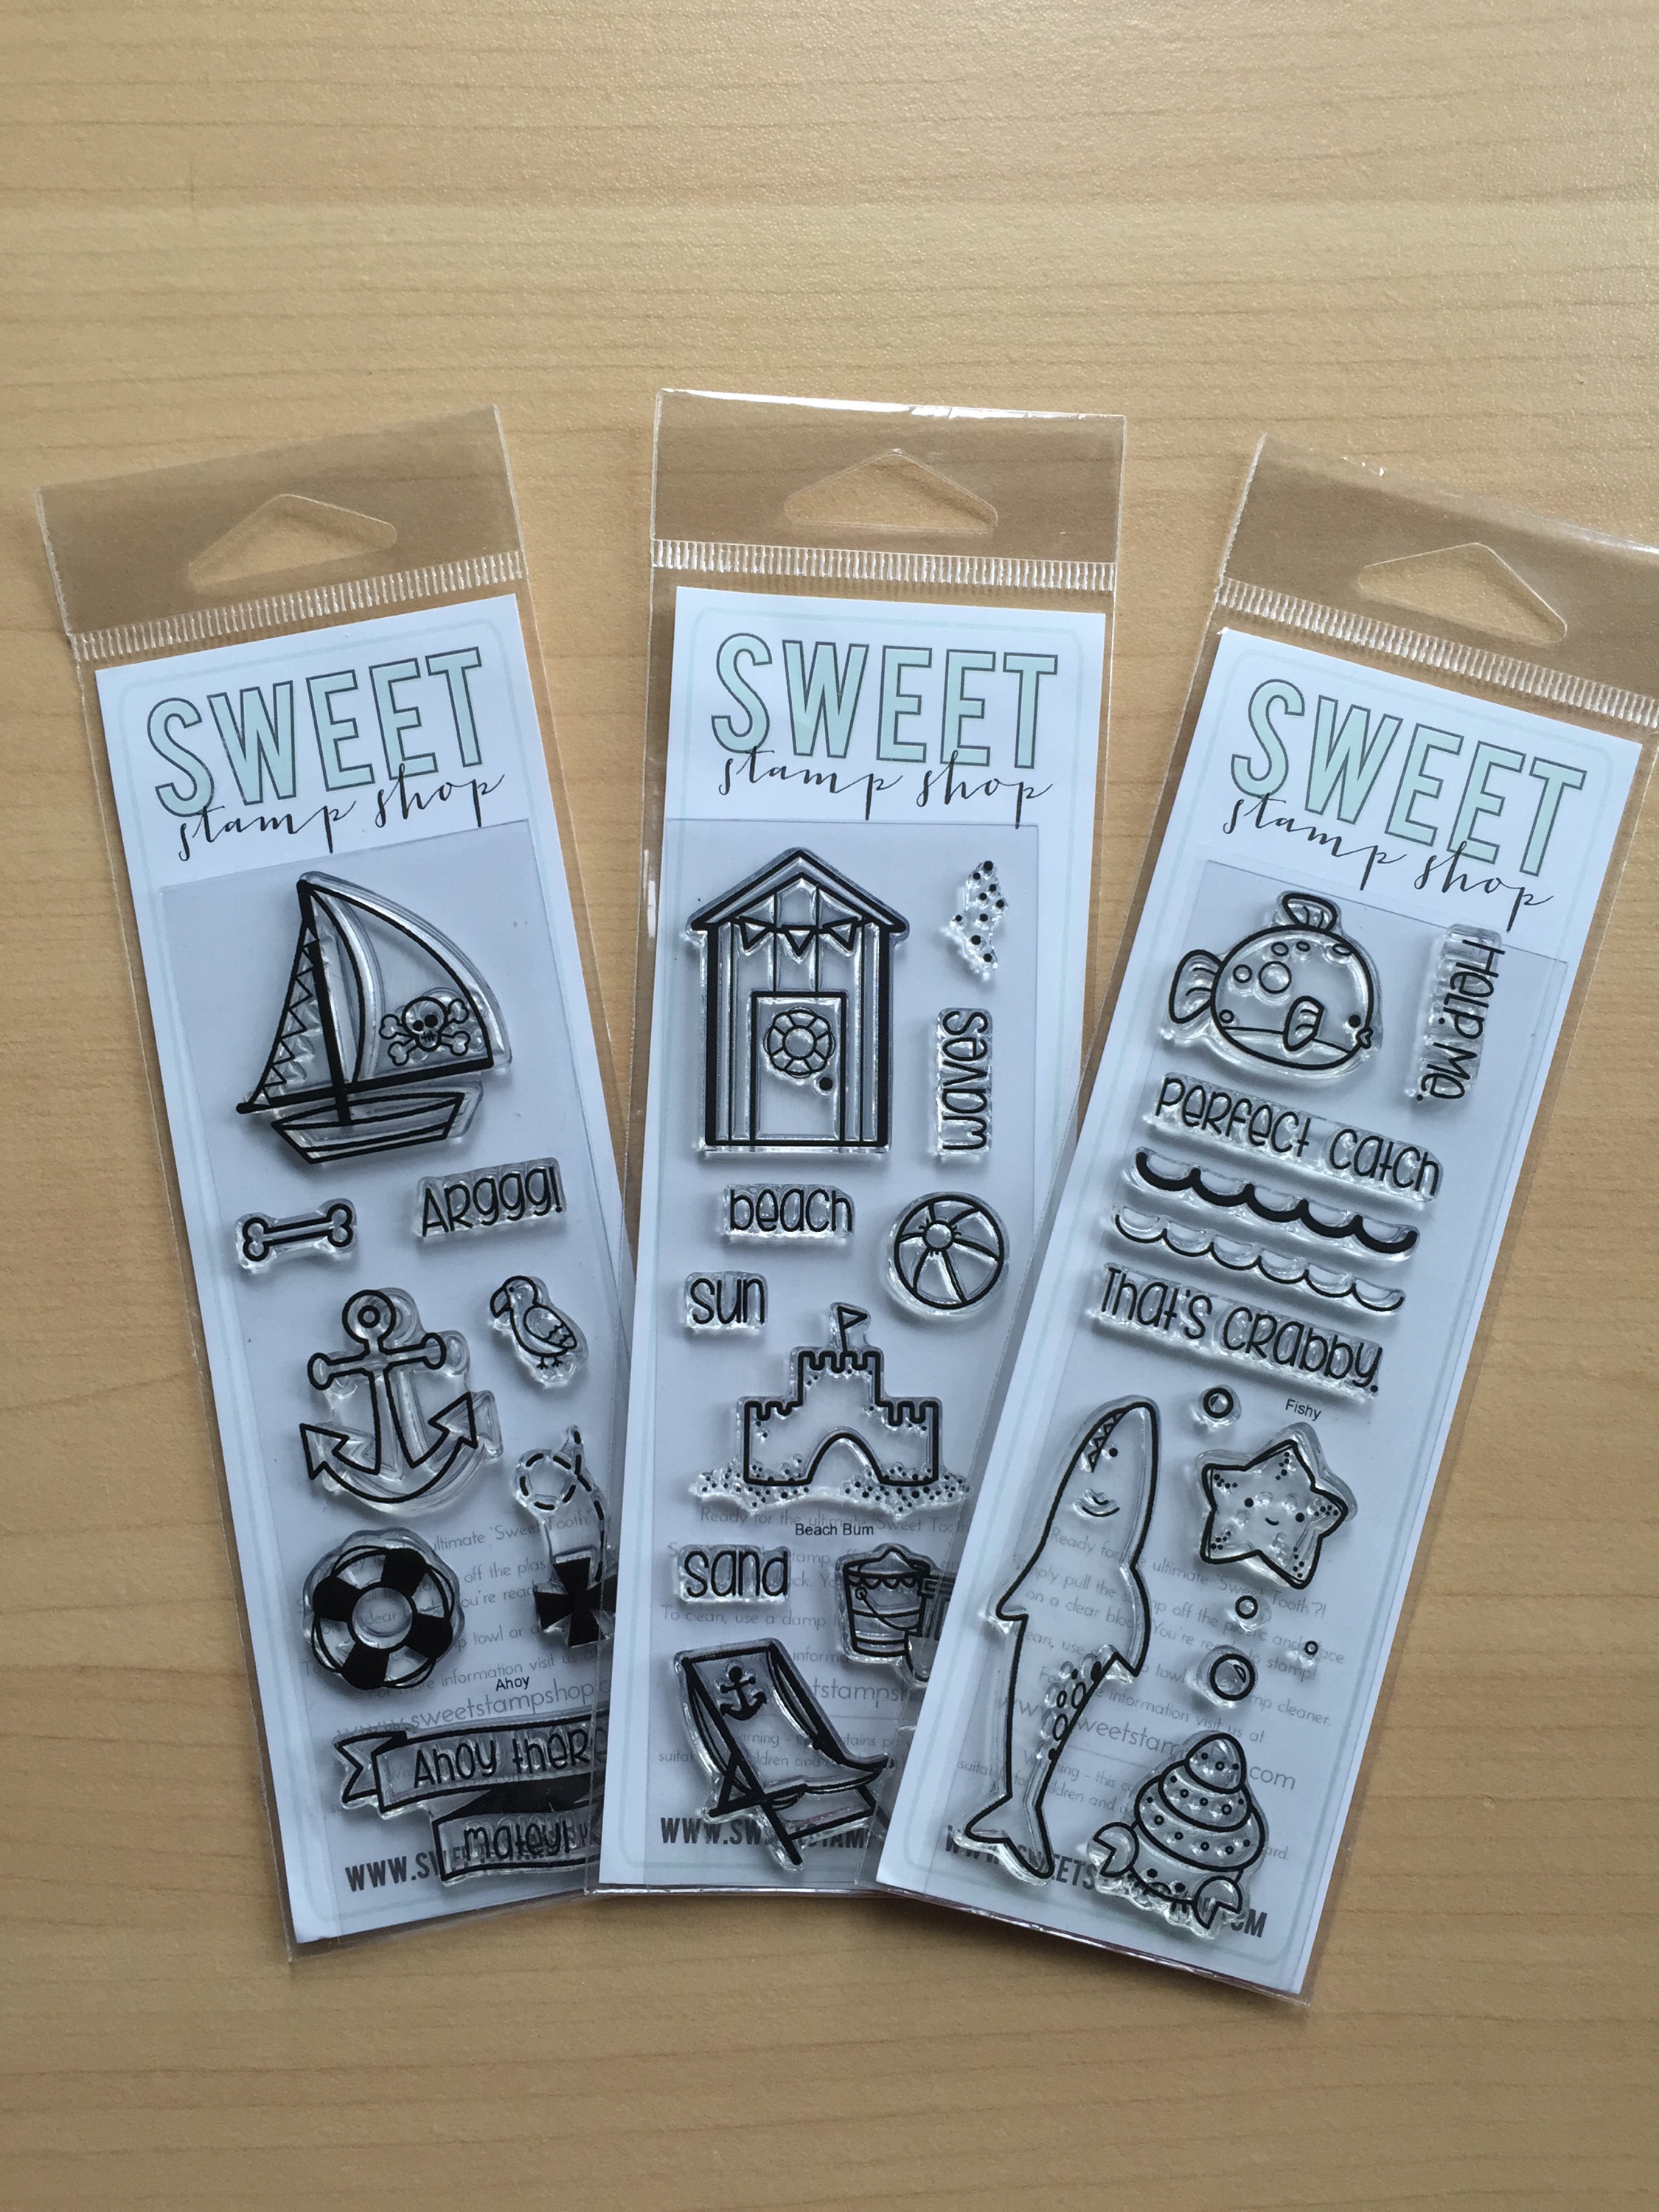
Congrats Marlyn!! You are the winner of the 3 Sweet Stamp Shop stamp sets!! Thank you for your wonderful comment!! I sent you an email.
For more inspiration, check out my fellow Design Team members blog for more awesome work.

Kymona Tracey ←Me
Our Guest Designer this week:
Our Sponsor this week is Serendipity Stamps.
Supplies used:


Thanks for stopping by!
~Kymona