{Clean and Simple} – Swoon

Hello everyone!!!  It’s CASology Tuesday!!  We are back with another Clean and Simple Cue Card just for you!!

This week’s cue card:

Take a look at my card:

For this week’s cue card I really wanted to have the Swoon affect, so I used ET Cetera Paper Glitter Paper in Champagne and Stampin Up Painted with Love DSP paired with The Stamp Market Love Die.

Take another look:

Take a look at that paper, it comes with glitter already and it doesn’t rub off in your hand.

Take an even closer look:

Now look at that bling on the die cut letters.  Swoon!!

Super simple and easy.

What do you think?

Are you inspired to play along?  Please let me know below!

For more inspiration, check out my fellow Design Team members blog for more awesome work.

Deidre Payne

Hannelie Bester

Hazel Hodgkins

Jacquie Southas

Janet Ribet

Jen Wills

Joyce Mehrberg

Judy Marino

Kymona Tracey

Melissa Chipperfield

Rachel Bergfeld

Sherrie Mannion

Guest Designer

Izzy

Supplies used:

(Thank you so much for stopping by. Compensated affiliate links used at no cost to you.  All products were personally purchased.  This post was not paid or sponsored.)


Thank you so much for stopping by!!

Charm Bracelet

Hello everyone!!!  I’m up on Craft Fantastic blog today sharing how to create a cute charm bracelet using Craft Fantastic January 2018 Kit of the Month.

Let’s take a look:

Stop on by Craft Fantastic blog and read all about how and what was used to create this bracelet.

Thanks for stopping by!!

We R Memory Keepers Square Punch Board Review

Hello everyone!!  I’m here today with the new We R Memory Keepers Square Punch Board Review!!

I love all of We R Memory Keepers punch boards. They are easy to use and convient! I needed to see for myself whether or not this one would hold up the punch board reputation.

Let’s get started:

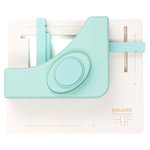
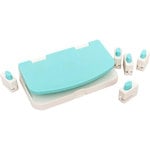
The Square Punch Board can punch squares in a lot of different sizes from 3/4 by 3/4 to 3 by 4!

No need for different handheld punches in different square sizes now.  Its all in one tool!!

Square Punch Board

Here’s how to use:

  1. Slide the guides at the top and on the side to the measurement you want.
  2. Slide the paper in into the tool along the guides and punch.
  3. The cut square will fall underneath the tool to allow you to continue cutting.

Its easy as one-two-three!!

What do I think?

I love it!! I recommend it to everyone who loves cutting out squares.

  1. This punch can cut multiple sizes with one punch vs. the handheld punches that cuts one size.
  2. It cuts rectangle too!
  3. The guides move with easy across the tool.
  4. The measurements are clearly labeled at the top, bottom and the side of the punch.
  5. The measurements are listed in inches and centimeters.
  6. The price is reasonable.
  7. The bottom has four silicone feet that stops the punch from sliding, even on top of a glass surface.
  8. The punch weights about a pound to a pound and a half.

Here’s how I used my cut pieces:

Square Punch Board

I created cards that I could use in my planners to encourage me everyday.

After I cut the different sizes, I added some stickers to each cut piece.

Then I used the Planner Pouch Board to cut the holes that match my mini planner. If you missed that review, you can view it here.

Planner Punch Board

Each card fits nice and neat in my planner.

Planner Punch Board

So what do you think?  Would you add this square punch board to your list of must have tools ?  I would love to hear from you.  Leave a comment below.

Supplies used:

(Thank you so much for stopping by. Compensated affiliate links used at no cost to you.  All products were personally purchased.  This post was not paid or sponsored. )

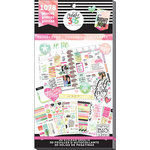
We R Memory Keepers - Square Punch Board We R Memory Keepers - Planner Punch Board        We R Memory Keepers - Planner Punch Board - Disc Punch Inserts       We R Memory Keepers - Planner Punch Board - Spiral Punch Inserts Me and My Big Ideas - Create 365 Collection - Planner - Mini - Lovely Pastels - UndatedMe and My Big Ideas - Create 365 Collection - Planner - Stickers - Value Pack - Watercolor with Foil Accents

Thank you so much for stopping by!

Altenew Die and Sticker Scrapbook Layout

Second Post for Today
If your looking for the Craft Fantastic post, click here

Hello everyone!!  I’m up on Altenew Scrapbook Blog show you how to use Altenew Scripty Words Die 2 and Altenew’s Puffy Stickers Sheets to create an Altenew Die and Sticker Scrapbook Layout.

Let’s Take a Look:

Scripty Words Die 2

To see how I created these pocket page cards with a complete tutorial head on over to Altenew’s Scrapbook Blog.

Supplies used:

(Thank you so much for stopping by. Compensated affiliate links used at no cost to you.  All products were personally purchased.  This post was not paid or sponsored. )

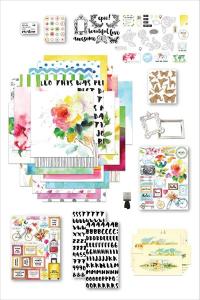
   scrapbook collection kit

Thank you so much for stopping by!!

The Ton 3rd Anniversary Release Blog Hop

Hello everyone!!!  The Ton 3rd Anniversary Release Blog Hop is underway and it’s amazing. I made it back from Creativation just in time to participate in the hop so I’m excited.

If you arrived here from The Ton blog then you are on the right track.  If you arrived here on your own, you will want to start at the beginning, The Ton blog, as to not miss any of the amazing projects!

The Ton released 22 new stamps for their 3rd Anniversary which includes up to two free gifts with purchase (Daisy Duet and Peony Notes Bundle A+B+C). For more information on The Ton’s incentive gifts, head over to the The Ton’s blog.  All new release products are available now!!

Lets jump in:

Card One:

City Building

The inspiration for this card came from an artist I met at Creativation on Monday.  His use of colors and water was amazing on a large background stamp.

So, for my first card I used the City Buildings Cling Background stamp to create a subtle multicolor background topped with a sentiment from the Seriously Amazing stamp set.

City Building

For the sentiment to pop off of the card, black embossing powder was added on top and heat set. Add a couple of gumdrops to finish the card off.

Card two:

XOXO

For my second card, I used the XOXO Mini stamp set to create a clean and simple Valentine’s Day card.

Use 4 different distress ink colors to create the pink ombre look.  Once thats done, stamp both sentiments using the MISTI and black ink.  Make sure the sentiment is dry, then stamp the sentiment again using Versamark ink.  Add black embossing powder and heat set the sentiment.

City Building

Add a couple of gumdrops to finish the card off.

So what do you think?  Are you loving The Ton’s new release?  I would love to hear what you think.

Now what’s a blog hop without a giveaway!!

Giveaway Time:

For each day of The Ton’s blog hop festivities (1/19 to 1/26), Effie is giving away a stamp set of choice to a lucky commenter. To qualify, you must leave a comment on each blog stop for the respective giveaway day for which you are entering.  The comment period for all giveaways closes on January 28, 5pm EST.

Just in case you get lost along the way, here is the lineup:

The Ton

Kymona Tracey ← you are here

Laura Jane

Dana Gong

Here is the entire schedule and blog hop order:

January 19
The Ton
Kay Miller
Vera Yates
Chris Dayton

January 20
The Ton
Brenda Noelke
Amy Kolling
Jenny Lee Yamasaki

January 21
The Ton
Janette Kausen
Lisa Harrolle
Justine Hovey

January 22
The Ton
Amy Tsuruta
Mayline Jung
Maria Peters

January 23
The Ton
Laurel Beard
Anna Kutsenko
Svetlana Pavola

January 24
The Ton
Kymona Tracey
Laura Jane
Dana Gong

January 25
The Ton
Tae Eun
Simon Hurley
Olga Matyushevskaya

January 26
The Ton
Taheerah Atchia
Eunji Jung
Isha Gupta
Sveta Fotinia

You will not be disappointed!!  Have fun hopping along!!

Supplies used:

(Thank you so much for stopping by. Compensated affiliate links used at no cost to you.  The Ton  products were given to me since I’m guest designing.  The other products were personally purchased. This post was not paid or sponsored.)


Thank you so much for stopping by!!

Altenew Year In Review Blog Hop Winner

Hello everyone!!  I’m here to announce the winner of the Altenew Year In Review Blog Hop!

Thanks to everyone who participated and left all of the wonderful comments on my blog. I wish everyone could win but I can only choose one winner.

Are you ready to see who won?  Here you go:

Congratulations, Marianne !!!  You are the lucky winner of the $40 gift certificate from Altenew!  Please contact Altenew at winner@altenew.com with the subject line “Altenew Year in Review Blog Hop Winner from Kymona Tracey Blog.

Once again, thanks to all of you for stopping by and leaving some love on my blog.

National Sticker Day 2018

photo source


Hello everyone!!  It’s National Sticker Day 2018!! Yes, they have a national sticker day, LOL!!

How many of you use stickers and what for?  I use stickers in my planner/journal.  Stickers make the pages come alive. I love the bold colors and the big bold sentiments you find in stickers books.

Today, I’m going to show you some stickers I printed and cut using my Cricut Maker!

Let’s Take a Look:

Stickers

For these stickers I used printable vinyl to create these super cute stickers.

I choose this design in design space and followed the directions.  Designs space prompts you to print with your pinter first then you bring it back to the machine and it cut the stickers out for you.

Take another look:

I love how easy this was to do and I created these whenever I want to.

What are you doing for National Sticker Day?  Do you create your own stickers or buy them from a store.  Please let me know.

Supplies used:

(Thank you so much for stopping by. Compensated affiliate links used at no cost to you.  All products were personally purchased.  This post was not paid or sponsored.)

Cricut MakerCricut® Printable Vinyl

Thank you so much for stopping by!!