How To Make A Soft Pencil Case

Hello everyone!!  I have a special guest today on my blog!  Let me introduce my daughter, the sewer to you!

She is here today celebrating National Sewing Month 2017!!

photo source

My daughter fell in love with sewing some years ago.  She was home one day bored and asked if she could learn how to sew.  I wondered were that came from but quickly found a sewing class for her.

She went to her first class twice a week after school.  The classes were pretty full.  15 students to 1 teacher. She learned the basics: how to use the machine, all of the different fabric names and how to do a basic stitch.  She created one pillow but nothing else. So she left that school and we searched for another one.

She attended the Pinner’s Conference in Atlanta back in April of this year and took 8 sewing classes and quickly fell in love again. So much so we bought the machine she used during the conference.

We arrived back home found a sewing school and she has been on the go ever since.  She decided that she wanted to start her own business. In her own words, “Mom, I want to create things that people will see all over the world”!

Totally awesome!  So she went to work!

soft pencil case

Let’s take a look at what she created:

Soft Pencil Case

She had so much fun creating her first soft pencil case.  This was the first time she add a zipper to a project.

She used a new product to her called Therm·O·Web HeatnBond Lite to bond both fabrics without the extra weight or stiffness.  She liked working with this product because it was easy to use and it was sewable.

Let’s Look Inside:

HeatnBond Lite

She uses this pencil case in school. Her friends asked her where did she get it from.  When she tells them she made it herself, they are blown away.  Now they all want one.  She is please to make one for them.

Here’s how she create this bag:

  • She cut two pieces of Waverly Cotton Fat Quarter fabrics and one piece of HeatnBond to 11 x5.5.
  • She placed the outside fabric down right side up.
  • Then she placed the zipper down, zipper side down against the fabric and sew them together.
  • Then she placed the lining fabric right side down and placed the HeatnBond down on top of it.
  • Using the iron, she fused the HeatnBond to the lining fabric.
  • After that she sewed the lining to the zipper and the outside fabric.
  • Once one side of the zipper was sewed, she did the other side.
  • Now it time to complete the bag and sew the outside edges.  Before doing that, remember to pull the zipper to the middle so you can open the bag and flip it inside out.
  • Box the corners and cut off the extra fabric.

Nice and easy.

My daughter did an amazing job and I can’t wait to see what she creates next!!

Wait Before You Go:

Therm·O·Web is having a sale.  It ends in two days, so hurry and pick up some of your favorite sewing goodies.

Supplies used:

(Thank you so much for stopping by. Compensated affiliate links used at no cost to you.  All products were personally purchased.  This post was not paid or sponsored.)

Walmart Waverly Fat Quarter Bundlesheat n bond liteblack zipper


Thank you so much for stopping by!!

Altenew September 2017 Release Blog Hop Day 2 + Giveaway

Hello everyone and welcome to Altenew’s September 2017 Release Blog Hop!! Today we are showcasing the all of the new Stamps, Dies and Re-inkers.  If you’ve arrived here from the talented Agnieszka Malyszek blog, then you are on the right track. If you arrived here on your own, then you will want to start at the beginning, the Altenew Scrapbook Blog so that you don’t miss a thing!

Take a look at my layout:

Altenew Coffee with a Splash

I love how this layout turned out.  The funny thing is I do not drink coffee, LOL!!!  I’m a tea lover but I totally love sending out mug swap packages to individuals who do love coffee.

Coffee with a Splash

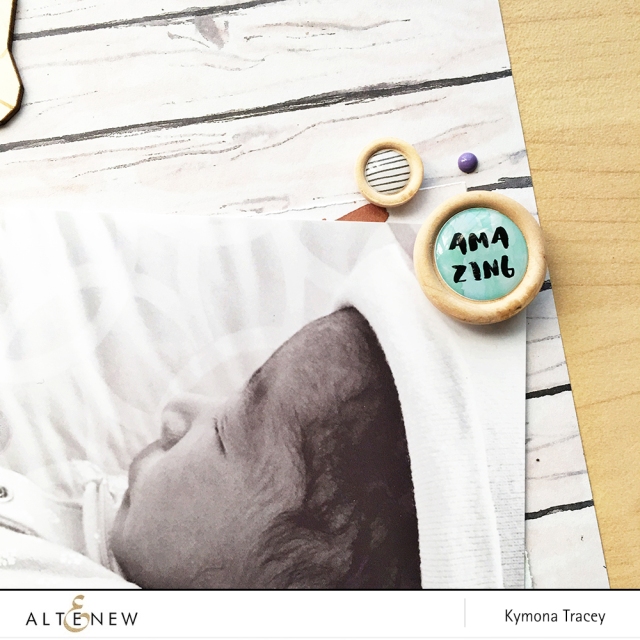
I stamped Altenew Coffee with a Splash stamp set with Altenew Coffee Break Oval Ink set on pattern paper from Altenew Reflection Scrapbook Collection.  Super fun page!!

Here’s how to create this page:

Using the Memory MISTI, stamp the coffee splatters randomly on the right side of the pattern paper using all four colors from the Coffee Break Oval Ink set.

Use the Memory MISTI again to stamp all three sentiments at once.

Coffee with a Splash

Round the photo corners using the We R Memory Keepers Corner Chomper.

For added texture, add a piece of coffee ribbon on the left side to the photo.

Coffee with a Splash

Adhere the photo to the pattern paper using foam squares.

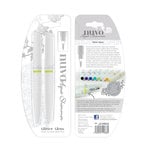
To finish the page off, use Nuvo Aqua Shimmer Glitter Gloss to all of the splatters.  It adds dimension.

Coffee with a Splash

Let’s take another look:

Coffee with a Splash

So what do you think?  I would love to hear from you below.

What is a blog hop without an amazing gift? Yayyy!!

Prizes

  • Altenew is giving away a $50 gift certificate to THREE lucky winners! Please leave a comment on the Altenew Scrapbook Blog by Thursday, October 5 at 11:59pm EDT for a chance to win. The winners will be announced on the Altenew Scrapbook Blog on Saturday, October 7th.
  • In addition I have a $30 gift certificate to giveaway from comments left on this post by Thursday, October 5th at 11:59pm EDT for a chance to win.

    Next Stop on this Blog Hop is the talented:

Virginia Lu

You do not want to miss out on her amazing creations!!

Just in case you lose your place along the way, here is the complete list of participants so that you can find your way back:

Altenew Scrapbook Blog

Kristina Werner

Laura Bassen

Erum Tasneem

Agnieszka Malyszek

Kymona Tracey ←you are here

Virginia Lu

Keeway Tsao

Yoonsun Hur

Marika Rahtu

Reiko Tsuchida

Therese Calvird

Terhi Koskinen

Supplies used:

(Thank you so much for stopping by. Compensated affiliate links used at no cost to you.  All products were personally purchased.  This post was not paid or sponsored.)

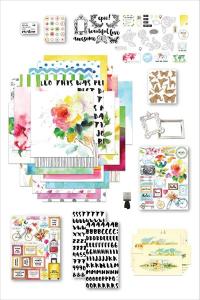
Altenew Coffee with a Splash scrapbook collection kitMemory MISTI 12 x 12 - Most Incredible Stamp Tool Invented Tonic Studios - Nuvo Collection - Aqua Shimmer - Glitter Gloss - 2 PackWe R Memory Keepers - Crop-A-Dile - Corner Chomper Tool

Thank you so much for stopping by!!

{Clean and Simple} – Fortune

Hello everyone!!!  It’s CASology Tuesday!!  We are back with another Clean and Simple Cue Card just for you!!

This week’s cue card:

Take a look at my card:

When I saw this cue card I wondered what I was going to create. I didn’t have a stamp set that represented it. So, I looked for a digital image to help with my creativity.  I downloaded the image and used Photoshop to add color and to type the text.

Nice, simple and easy.  What do you think?  Are you inspired to play along?  Please let me know below!

For more inspiration, check out my fellow Design Team members blog for more awesome work.

Deidre Payne

Hannelie Bester

Hazel Hodgkins

Jacquie Southas

Janet Ribet

Jen Wills

Joyce Mehrberg

Judy Marino

Kymona Tracey

Melissa Chipperfield

Rachel Bergfeld

Sherrie Mannion

Guest Designer

Jen M.

Supplies used:

(Thank you so much for stopping by. Compensated affiliate links used at no cost to you.  All products were personally purchased.  This post was not paid or sponsored.)

Thank you so much for stopping by!

UWF Poppy Field Blog Hop

Poppy Field Stamp Set

Hello everyone and welcome to the UWF Poppy Field Blog Hop!! Today we are showcasing a stamp set collaboration between Altenew and Ellen Huton.  If you’ve arrived here from the talented Kittie Caracciolo blog, then you are on the right track. If you arrived here on your own, then you will want to start at the beginning, the Altenew Card Blog so that you don’t miss a thing!

Take a look at my layout:

Poppy Field Stamp Set

Say hello to my new niece Savannah!!  I wanted to showcase her today along with the new Poppy Field Stamp set because both of them are beautiful.


Poppy Field Stamp SetI used Altenew Reflection Scrapbook Collection, Altenew Evergreen Ink, Altenew Jet Black Ink, Altenew Cosmic Berry Ink, Altenew Puffy Heart Ink, Altenew Warm Sunshine Ink, Altenew Caramel Toffee Ink along with Poppy Field Stamp and Die Set.

Here’s how to create this page:

I decided on which photo I wanted to use and converted into black and white.

Then I cut a piece of cardstock a little bit bigger then the photo so that it peeks out from behind the photo.

Using the edge of the scissors, rub it over the edge to create a distress look.  Using the bone folder, bend the edges.

Cut two strips of the same cardstock and sew the strips the bottom of the layout.

Altenew Reflection Scrapbook Collection

Using the photo and the background cardstock as a guide, use Altenew Evergreen Ink to create some watercolor platters on the layout.

Altenew Evergreen Ink

Once that dries, adhere the cardstock and photo to the layout.

Stamp the flowers using coordinating inks, die cut them out and adhere them to the base of the photo.

Poppy Field Stamp and Die Set

Next, add different types of embellishments that coordinate with the layout.

Altenew Scapbook Reflection Collection

To stamp the sentiment, use the Memory MISTI so that the placement is perfect.

Memory Misti

Let’s take another look:

Altenew Reflection Scrapbook Collection

So what do you think?  I would love to hear from you below.

What is a blog hop without an amazing gift? Yayyy!!

Prize:

To celebrate two randomly selected commenters will win a $30 gift certificate to the Ellen Hutson shop and two commenters will win a $30 gift certificate to the Altenew shop. To enter just leave a comment on the Ellen Hutson Classroom blog or the Altenew blog by 12pm PST on Wednesday, September 27th.

Next Stop on this Blog Hop is the talented:

Laurel Beard

You do not want to miss out on her amazing creations!!

Just in case you lose your place along the way, here is the complete list of participants so that you can find your way back:

Altenew Card Blog

The CLASSroom

Carissa Wiley

Lilith Eeckles

Carly Tee Minner

Lydia Evans

Carolyn Peeler

Erum Tasneem

Heather Campbell

Nicole Picadura

Julia Stainton

Therese Calvird

Kittie Caracciolo

Kymona Tracey ←you are here

Laurel Beard

Svitlana Shayevich

Lisa Adametz

Sandy Allnock

Sharon Harnist

Supplies used:

scrapbook collection kit  Poppy Field Die Set    Poppy Field Stamp set Poppy Field Stamp and Die SetMemory MISTI 12 x 12 - Most Incredible Stamp Tool Invented Altenew Cosmic Berry InkAltenew Puffy Heart Ink Altenew Warm Sunshine Ink Altenew Caramel Toffee Ink

Thank you so much for stopping by!!

The Cricut Shoulder Bag

Hello everyone!!  I’m here today to sharing a cute product that was brought to my attention a couple of weeks.  Its the Cricut Shoulder Bag in this pretty tweed material.

Take a look:

Tweed Shoulder Bag

Wow, right!  When I first saw this bag, I knew I need to have it especially since I just bought the Cricut Easy Press weeks ago with no place to store it.  So, I bought it.

Tweed Shoulder Bag

I love the look of this tweed shoulder bag.

Let’s take a closer look:

Tweed Shoulder Bag

The bag comes with two outside pockets in the front that snap with magnets that you can’t see.

It has an open space in the back to slide onto your luggage handle when traveling.

It also comes with a long strap that is removable.

Tweed Shoulder Bag

The inside has two pockets: a zipper pocket for smaller items and a padded pocket to hold a laptop or tablet.

As a matter of fact, the Cricut BrightPad can fit in there as well. Its well padded to keep it safe.

Here is what I will use my bag for:

Tweed Shoulder Bag

My work space is very limited so I need a secure place for my EasyPress.  Keeping it in the box was out of the question, so when I saw the bag, I knew it would work.

Tweed Shoulder Bag

Perfect!!  It fits with no problem.  I still have room to add supplies if I needed to take this baby on the go.

This bag will fit right in my closet out of the way. I can pull it out when I need it with no problem.

I’m excited about this find.  All it needs now is the perfect quote in iron-on vinyl or iron-on foil.  I will think about what I want it to say and add it later.  I will post about it when its done.

Even if:

If you do not have a Cricut EasyPress or BrightPad, you could use this bag to hold all of your crafting needs.

So, what do you think?  This bag is perfect for all of your crafting needs, on the go or at home.  What would you put in this bag?

Supplies used:

Tweed Shoulder Bag Iron-on Foil  Cricut EasyPressiron-on vinylBrightPad

Thank you so much for stopping by!!


{Clean and Simple} – Big

Hello everyone!!!  I’m back with another Clean and Simple Cue Card just for the CASology Challenge!!

This week’s cue card:

 Take a look at my card:

many thanks turnabout stamp set

When I saw this week’s cue card, I thought of Concord & 9th newest stamp set called Many Thanks Turnabout. The big thanks is perfect for this cue card.

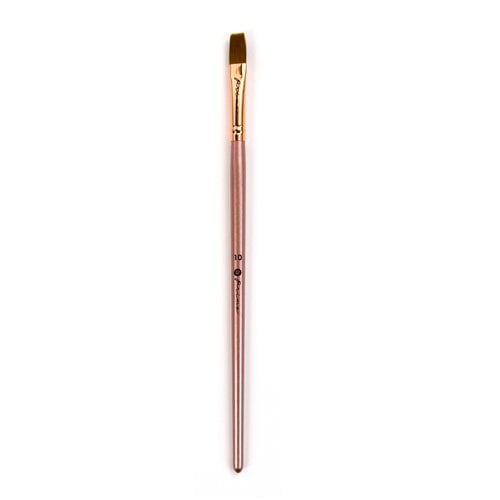
I used Prima Decadent Pie Confection Watercolor to add the pretty goldish color (27) to cardstock first, using Prima Watercolor Flat 10 Brush. Once it dries, I stamped the big thanks right on top using Clearsnap Archival Black Ink.

To finish the card off, I used We R Memory Keepers Corner Chomper to round all four colors.

Nice, simple and easy.  What do you think?  Are you inspired to play along?  Please let me know below!

Don’t forget to play along with us this week.  You have until Monday at 12noon to enter.  The sponsor this week is STAMPlorations.

Supplies used:

(Thank you so much for stopping by. Compensated affiliate links used at no cost to you.  All products were personally purchased.  This post was not paid or sponsored.)
Many Thanks Turnabout stamp set Prima - Watercolor Confections - Decadent Pies Prima - Mixed Media - Water Color Brush - Flat 10We R Memory Keepers - Crop-A-Dile - Corner Chomper Tool

Thank you so much for stopping by!!

Fun Scrapbook Title

Hello everyone!!  I’m up on Altenew’s Scrapbook Blog today showing you how to create a fun scrapbook title using Altenew’s Reflection Scrapbook Kit.

Here’s a sneak peek:

To see how I created this accordion mini album with a complete tutorial, head on over to Altenew’s Scrapbook Blog.  I can’t wait to see what you think!

Supplies used:

(Thank you so much for stopping by. Compensated affiliate links used at no cost to you.  All products were personally purchased.  This post was not paid or sponsored. )

scrapbook collection kit 

Thanks for stopping by!!

What is the Cricut EasyPress?

Hello everyone!!  I’m here today to share with you a brand new toy that I discovered they other day.  The new Cricut EasyPress.  What is the Cricut EasyPress you ask?  Well let me tell you.

Lets take a look at it:

Shop new arrivals from Cricut!
The Cricut EasyPress is the best heat press to use when applying an iron-on to different materials!!

Here’s the scoop:

  • You can set the temperature and timer for different materials.
  • The highest temperature is 350°F (180°C).
  • It comes with a reference guide for the different materials.
  • The plate is 9 x 9 inch, which is great for large or layered iron-on projects.
  • The flat plate allow you to add even heat thought the design.
  • No press cloth need for most materials.
  • Super simple and easy to use.
  • Once your setting are set, the machine beeps to let you know its ready.
  • It also beeps to let you know when your done.
  • Its lightweight and portable.
  • It’s a great addition to have with your cutting machine.
  • It comes with a resting base.
  • It has an auto-shutoff feature.

Totally awesome tool with great features.  When I saw this tool, I knew I wanted to give it a try.  I have so many different types of vinyl in my house from different craft fairs, that I figured I could try it.

Lets take a look at what I created:

Cricut EasyPress

I used the Cricut EasyPress with Cricut Gold Iron-on Foil to create this t-shirt for my crew to wear while we are at Creativation this coming January.

I set the machine to 295°F (145°C) for 35 sec.  The word is pretty long so I press twice paying attention to where the press landed so that I wasn’t over pressing any particular part of the foil.

It took me 70 secs total to set this word on this shirt with no worries of the foil not setting.

I ended up creating 5 shirts in less then 30 minutes from start to finish.

I have to say, I’m super happy with my purchase. Now I can’t wait to create more things using vinyl. I hope to have a video up soon.

Would you like to try the Cricut EasyPress?  I highly suggest it!

You can get your Cricut EasyPress here and Gold Iron-on Foil here.

Supplies used:

(Thank you so much for stopping by. Compensated affiliate links used at no cost to you.  All products were personally purchased.  This post was not paid or sponsored. ) 

Cricut EasyPress Iron-on Foil

Thank you so much for stopping by!!


{Clean and Simple} – Cake

Hello everyone!!!  It’s CASology Tuesday!!  We are back with another Clean and Simple Cue Card just for you!!

This week’s cue card:

Take a look at my card:

Right at Home Sweet Birthday Stamp set

For this card, I wanted a fun card shape since the cue card is cake.  So I used Pretty Pink Posh Scallop Circle Tag die to cut out two pieces of watercolor paper.

Scoring the second die at the top of the tag and adding adhesive will allow you to create a card.

Stamp the the cake image from Right At Home Sweet Birthday on the front and the sentiment inside the card using Colorbox Jet Black Ink.

Right At Home Sweet Birthday Stamp set

I used Jane Davenport Mermaid Markers to watercolor in the image.

Cards in all sizes are fun!!!

Nice, simple and easy.  What do you think?  Are you inspired to play along?  Please let me know below!

For more inspiration, check out my fellow Design Team members blog for more awesome work.

Deidre Payne

Hannelie Bester

Hazel Hodgkins

Jacquie Southas

Janet Ribet

Jen Wills

Joyce Mehrberg

Judy Marino

Kymona Tracey

Melissa Chipperfield

Rachel Bergfeld

Sherrie Mannion

Guest Designer

Claire

Supplies used:

(Thank you so much for stopping by. Compensated affiliate links used at no cost to you.  All products were personally purchased.  This post was not paid or sponsored.)

Right At Home SWEET BIRTHDAY Clear Stamp SBJULY16*

Thank you so much for stopping by!!