Hello everyone!! I’m here today to show you how to create flannel floor pillows with an invisible zipper. Floor pillows, you say? Yes, I recently refinished my hardwood floor and wanted to provide my nieces and daughter with a place to sit comfortably when hanging out.
Floor pillows are easy to sew, and with a zipper, you can even wash it when it gets dirty. Now, that is a great reason to make some.
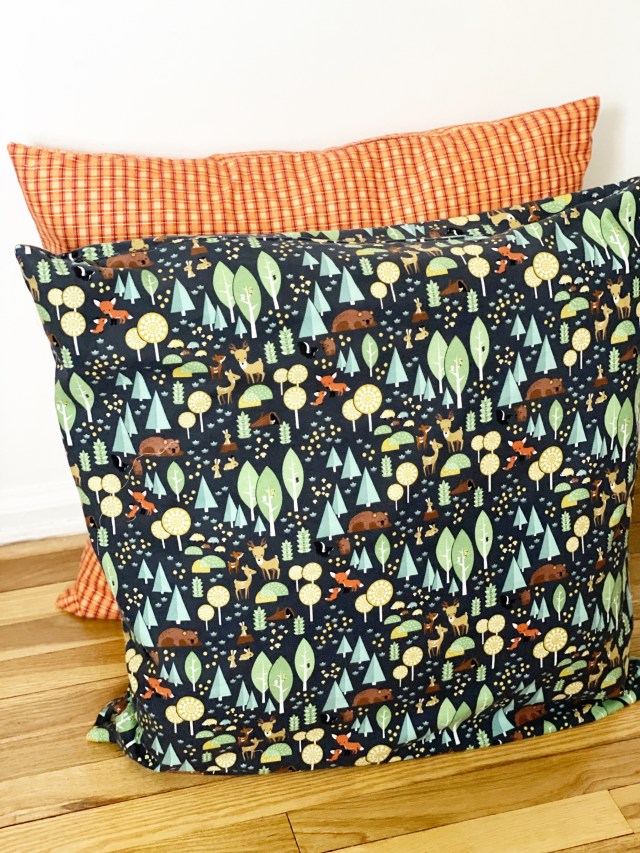
Let’s take a look at my floor pillows:

What do you think? Aren’t they cute? My nieces and daughter will enjoy these.
Let’s take a look at this fabric collection:
This cozy and soft flannel collection was created by Ben Byrd for Riley Blake Design. It comes in a palette of earth tones – green, orange, brown, navy, and parchment. Some prints have forest animals and trees.

It’s full of fun and playfulness.
Here’s how to create these pillows:
Materials:
Note: Some of the links below contain affiliate links.
Woodland Flannel Fabric
Aurifil White Thread
Pins
Cutting Mat
Ruler
Rotary Cutter
Quilting Ruler
Matching Invisible Zipper
Pillow Form
Instructions
1/2 inch seam allowance unless otherwise noted.
Step 1: Measure Pillow Form
Measure the pillow form to determine how big you want to make your pillow cover. If you’re going to make your own pillow form, determine what size you want the pillow.
Step 2: Cut the fabric
Cut 2 pieces of the woodland fabric to the size of your pillow form.
For the orange pillow, I made the pillow form 30 inches by 30 inches. The blue pillow, the pillow form is 27 inches by 27 inches. I cut the fabric according to these measurements.
Step 3: Mark the fabric for zipper placement
Place your zipper teeth up (remember this is an invisible zipper) at the raw edge of the fabric in the center.
With a pen, mark the fabric where the zipper teeth begin and behind the zipper stopper.
Remove the zipper.
Step 4: Prepare the zipper casing
With right sides together, sew a straight stitch to the first marked line and backstitch. Without cutting the thread, increase your stitch length to 5.0, stitch a basting stitch to the second line, and backstitch again. Without cutting the thread again, decrease your stitch length back to the original length and continue stitching to the end.
Finger press the seams open.

Find the line you drew and place the zipper back in place with the zipper teeth up. Make sure the zipper teeth are in the center.

Step 5: Sew the zipper in place
If your machine comes with an invisible zipper foot, attach that to your machine. If you only have a zipper foot, use that.
Start sewing at the beginning of the zipper tape. You want to stitch as close to the zipper teeth as possible.

Repeat on the other side of the zipper.
Note for the invisible zipper foot: when you sew the other half of the zipper, open the basting stitch so that the foot does not butt up against the zipper foot.
Once your zipper is sewn in place, open and close the zipper to ensure the fabric does not get in the way.

Step 6: Sew the pillow cover closed
Open the zipper halfway, and with right sides together, sew the three remaining sides.
Step 7: Turn and insert the pillow form
Trim the edges of the fabric if it shifted and round the corners to reduce bulk.
Turn inside out and insert the pillow form.
Enjoy your floor pillow!
How many pillows will you make? I would love to see your pillows.
Supplies used:
There are some compensated affiliate links used at no cost to you.


Thank you so much for stopping by!

