How to Sew and Embroider a Web Collar and Leash

Hello everyone!! Today, we’re diving into the world of sewing and embroidery to guide you through the process of making a web collar and leash for your beloved four-legged friend. Not only will this project result in a practical accessory for your pet, but it also provides an opportunity for creative expression and customization. So, gather your materials, unleash your creativity, and let’s embark on this crafting adventure together!

Materials Needed:

  • Cotton Webbing
  • Snap Buckle
  • Metal D-Ring
  • Slide Lock
  • Thread: all-purpose & embroidery
  • Embroidery Needle 75/11
  • Foam
  • Rotary Cutter & Mat
  • Ruler
  • Pins
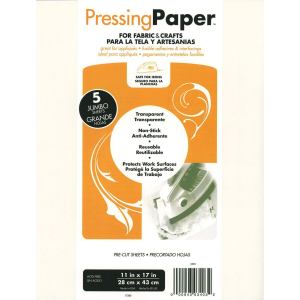
  • Lightweight Tear-away Stabilizer
  • Tear-away Stablstick Stabilizer
  • Water Soluble Topping
  • Sewing Machine
  • Embroidery Machine
  • Specialty Hoop: Belt Hoop for multi-needle machines
  • Store-bought leash

Making the Collar

Measure and Cut
1. Measure your pet’s neck to determine the size of the collar.
2. For this collar, one piece of cotton webbing was cut to 26″ long for a small dog.

Create the Design
1. Use the built-in fonts in your embroidering software to spell out your pet’s name. If you have a font that supports foam, use that to create puffy letters.
2. Add other designs from your embroidery library if you like.

Stitch Out The Design
1. Find the center of the collar and place a stitch sticker to identify it.
2. Hoop the Lightweight tear-away stabilizer and the cotton webbing in the belt hoop.


3. If you don’t have a belt hoop, hop a piece of tear-away stablestick stabilizer.


4. Place the webbing on the stablstick in the center.
5. Pull up the design on the embroidery machine screen, set the speed, choose the automatic/manual function, choose the different thread colors and hoop size, and then trace out the design to ensure the needle will not hit the hoop while it stitches out.
6. Stitch out the design.
7. Remove the hoop from the machine and the fabric from the hoop.
8. Trim the thread ends and the stabilizer on the back.

Construct the Collar
1. Feed 2 inches of webbing through the slide lock, ensuring the embroidered side is in the correct direction.


2. Stitch together in the shape of a square.
3. Feed the webbing through the buckle so the embroidery faces the outside.


4. Feed the webbing through the slide lock again. The buckle will be enclosed.


5. Pull the webbing through the D-Ring and the snap side of the buckle.

 
6. Feed the webbing 4 inches back through the second opening closer to the chip part of the buckle.


7. Pull the webbing around the D-Ring and through the opening, bringing the webbing back to the buckle and clip.


8. Sew through the three layers of webbing in 3 straight lines. This will keep the D-Ring in place.

Stitching out the Store Bought Leash
1. Use the same design for the collar, hoop the leash, and stabilizer if your are using the belt hoop or hoop the stablstick and place the leash in the center of the hoop.
2. Follow the instructions for stitching out the collar. 

    Yayyy, isn’t this collar and leash super cute.

    Dog Collar Safety Tips!
    1. Make sure your dog’s collar fit and size are correct.
    2. Always remove the collars and leash during playtime, at home, and in crates.
    3. Yanking or jerking a leash can injure your pet.
    4. Keep your leash in good shape.

    I hope you make one or two from your beloved pets.

    See you next time!
    Kymona

    Destashing Again!!

    It’s that time again for me to make some room in my craft corner.  I have to let go and allow these supplies to make someone else happy. So let’s DESTASH!!!!

    Some of the items are new, and some are slightly used.

    Destash Boxes

    Here are the details:

    Each package costs $65, which includes shipping.

    If you are interested, email me at kreativekymona@gmail.com with the following information:

    → The address you would like your package sent.

    → First come, first serve. These boxes are ready to go.

    → Each box is full of stamps, dies, and other surprises.

    → Pay Paypal friends and family.

    → Packages will be mailed within 24 hours of payment with a tracking number sent to you.

    Thanks for stopping by!

    Fabric Placemat and Coasters

    Hello everyone! Kymona here with a new project for you, fabric placemat and coasters using fabric that is all about coffee.

    Let’s take a look at a fabric placemat and coasters:

    Super cute table setting for guests when they come over. A place for their mug and snacks without making a mess or leaving rings on the table.

    These are easy to make and do not require a lot of fabric.

    Fabric Collection:

    Coffee Chalk by J. Wecker Frisch for Riley Blake Design is a brewed collection for coffee lovers. The prints contain nostalgic coffee pots, coffee cup border strips, dots, beans, swirls, and text.

    Coffee Chalk Fabric

    This collection has 30 prints and about 5 colorways.

    Here’s what you need to create the placemat and the coasters:

    Materials:

    Note: Some of the links below contain affiliate links.

    Coffee Chalk Collection
    Aurifil Thread
    bernette 77
    Cutting Mat
    Rotary Cutter

    Placemat:

    Top, batting, and backing fabric: 13 inches by 10.5 inches
    Binding: 2 strips

    Coasters:

    Top, batting, and backing: 5.5 inches

    The placemat is made by creating a quilt sandwich, quilting it, and adding the binding.

    The coasters are made but placing the backing fabric down right sides up, then the top fabric right sides down, then the batting.

    Clip them and stitch around using a 1/4 inch. Leave a hole for turning.

    After turning, stitch 1/8 inch around the entire coaster closing the hole.

    Coffee Chalk


    Coffee Chalk

    Coffee Chalk

    What do you think?

    Will you try to make your own placemat and coaster? I would love to see them.

    Supplies used:

    Coffee Chalk Fabric    

    Thank you so much,

    Needle and Thread Case

    Hello everyone! It’s Happy National Sewing Month! Yayyy! That means I will dedicate at least 30 minutes a day to sewing and practicing my skills all month long.

    Let’s start off with a super cute needle and thread case. I love sewing on the go, so having a cute case to carry all of my supplies in is perfect for me.

    Let’s take a look at my new needle and thread case:

    Needle and Thread Case: finish product

    Cute shape, right?! I love the shape of these thread and needle cases.

    Let’s take a look inside:

    Needle and Thread Case: finish product

    You can add your favorite threads and needles and keep them safe. The best part is the pattern is a free pattern from Sharon Holland!

    Let’s take about this fabric:

    This fabric collection is called Community from Rachel Erickson of Citrus & Mint Designs for Riley Blake Designs.

    Rachel created this collection to react to the widespread hurt and divisiveness felt during the Covid-19 pandemic and the Black Lives Matter movement. Both events left her wanting more unity, love, and diversity in the world and her desire to go outside, travel, and be surrounded by people again.

    This collection comprises 24 different prints in colors like green, honey, orchid, coral, blush, blue, mint, and cream.

    Here’s what you need to create your own thread and needle case:

    Materials:

    Note: Some of the links below contain affiliate links.

    Community Fabric
    Needle Case Pattern by Sharon Holland
    HeatNBond
    Felt
    Elastic
    bernette 77
    Cutting Mat
    Rotary Cutter
    Matching Thread Color
    Pearl Snap
    Snap Tool

    Follow the pattern’s direction on how to make these. The pattern is easy to follow, and you can make a bunch of these in no time.

    The finished size is 5 inches by 4inches, so you can make a couple of these out of two different fat quarters.

    I love how these smaller thread sizes fit in this case.

    Needle and Thread Case: finish product

    Perfect for sashiko and embroidery thread as well.

    Needle and Thread Case: finish product

    Adding a pearl snap adds a finishing touch.

    Needle and Thread Case: finish product

    I love how the case holds its shape when it’s open.

    Needle and Thread Case: finish product

    I’m totally in love with these thread and needle cases. Very different from the traditional needle books.

    So, tell me what you think?

    Will you try and make your own thread and needle cases? I would love to see them.

    Supplies used:

    Note: Some of the links below contain affiliate links.

    Community    

    Thanks for stopping by!

    Easy Modern Throw Quilt with Painter’s Watercolor Swirl

    Hello everyone! Today, I’m with an easy modern throw quilt with Painter’s Watercolor Swirl fabric by J. Wecker Frisch.

    Let’s take a look at my modern quilt:

    modern quilt: painter's watercolor swirl

    I love how easy and fun this quilt was to make. I used Riane Elise’s Companion pattern from her book Inheritance to make this quilt.

    The simplicity and contrast of this throw quilt are amazing to see.

    Fabric Collection:

    Painter’s Watercolor Swirl by J. Wecker Frisch for Riley Blake Design contains 37 beautiful colors from dark to light hues.

    Here’s how I created this throw quilt:

    Materials:

    Note: Some of the links below contain affiliate links.

    Painter’s Watercolor Swirl Fabric
    Companion Pattern by Riane Elise
    bernette 77
    Cutting Mat
    Rotary Cutter
    Matching Thread Color

    Follow the patterns directions for cutting and piecing. I

    What I love about this throw quilt is that there is no binding. Yes, you can make a quilt without binding, and it still looks great. I got the idea from The Willow Market.

    To achieve this, you just sandwich the pieces right sides together and sew them together, leaving a six-inch hole for turning.

    modern quilt: painter's watercolor swirl

    Once you turn the quilt inside out, it’s time to quilt it. Draw lines on the top of the quilt, 4 inches apart. Then follow them while stitching.

    modern quilt: painter's watercolor swirl

    Once you stitch all of the lines, your quilt is done.

    modern quilt: painter's watercolor swirl

    I love the look of the two warm colors together.

    What do you think?

    Will you try to make your own modern throw quilt? I would love to see them.

    Supplies used:


    Thank you so much,

    I Made Leggings and a Shirt using Jersey Knit Fabric

    Hello everyone, I made leggings and a shirt using jersey knit fabric by EttaVee!!

    Yes, I sewed a pair of cute leggings and a shirt for myself, and I’m so excited. Ever since I started sewing bags 4 years ago, I knew I wanted to start making my own clothes. I made one or two things in a class but nothing by myself until now.

    These leggings are the first item that I’ve made without the help of a video or a class. I read the pattern and prayed, LOL!

    Let’s take a look at my jersey knit leggings and shirt:

    Jersey Knit Leggings: Finished Product

    Yes!! I love them!

    Jersey Knit Shirt: Finish product

    Fabric Collection:

    When I saw Riley Blake Designs new jersey knit collection included designs by EttaVee, I knew I had to make something. I follow Jessi (@ettavee) on Instagram and love her painting. They are bright, full of color, and very distinct. You can spot her work anywhere.

    This collection includes marble, swirls, flowers, and brush strokes in browns, blues, pinks, black, white, and teals.

    Jersey Knit EttaVee

    Jersey Knit EttaVee

    Jersey Knit EttaVee

    This collection has 10 different prints. Perfect for making leggings, shirts, dresses, and more.

    Here’s how I create these jersey knit leggings and shirt:

    Materials:

    Note: Some of the links below contain affiliate links.

    Jersy Knit by EttaVee
    Jalie Stella 4023 Pattern
    Jalie BOBBIE V-Neck Top
    bernette 77
    Cutting Mat
    Rotary Cutter
    Polyester Thread
    Jersey Needles

    All you have to do is follow the instructions that came with the pattern. It was so easy to follow. The instructions include how to stitch on a sewing machine and serger.

    I used my sewing machine since many people do not have a serger.

    Gather your supplies and get ready to start sewing.

    Starting with the leggings.

    Jersey Knit Leggings

    Trace your pattern piece and lay it down on the fabric.

    Jersey Knit Leggings: Cutting the pattern

    Cut out the pattern.

    Jersey Knit Leggings: Cutting the pattern

    Jersey Knit Leggings

    If you’re not using a serger, this is how the stitching should look.

    Jersey Knit Leggings: Stitch the fabric together

    Check out these leggings!

    Jersey Knit Leggings: Finished Product

    Perfect fit!

    Jersey Knit Leggings: Finished Product

    I can’t get enough of these leggings!

    Jersey Knit Leggings: Finished Product

    Now for the shirt!

    Cut out all of your pattern pieces.

    Jersey Knit Shirt: Pattern pieces

    Jersey Knit Shirt: Pattern pieces

    Pin each piece according to the pattern and stitch.

    Jersey Knit Shirt: Stitch the pieces together

    Jersey Knit Shirt: Stitch the pieces together

    Jersey Knit Shirt: Stitch the pieces together

    Here’s my finished shirt!

    Jersey Knit Shirt: Finish product

    Jersey Knit Shirt: Finish product

    Now I have two new garments in my closet that I made myself! The fabric is so soft and fits perfectly.

    What do you think? Will you try to make your own jersey knit leggings and shirt? I would love to see them. If not, what would you make with this pretty fabric?

    Supplies used:

    Jersey Knit EttaVee Jalie Bobbie pattern    

    Thanks for stopping by!

    Dream Glasses Cases

    Hello everyone!! Do you wear glasses or sunglasses? Well, you are going to love these  Dream Glasses Cases I created.

    I have a million and one pair of glasses for different outfits and my different moods. I’m not sure why -wait, I do know why I love the way they look. Glasses have become such a fashion statement piece that you can’t help but have 2 or more! LOL!

    The fabric I used is perfect for this project because it’s colorful and fun.

    Let’s take a look at my Dream Glasses Cases:

    Glasses Cases: Finish product

    You can’t tell me these aren’t cute.

    Glasses Cases: Finish product

    Fabric Collection:

    Dream is a color-packed fabric collection designed by Krisy Lea for Riley Blake Designs. This collection is filled with a full spectrum of colors and features soft, rounded dreamy shapes – rainbow, clouds, hearts, and raindrops!

    It is fun and brights any room.

    Dream

    This collection has 24 colorful prints that you can use to make glasses cases, pillows, pajamas, bags, and more.

    Here’s how to create the Dream Glasses Cases:

    Materials:

    Note: Some of the links below contain affiliate links.

    Dream Fabric Collection
    Free Glasses Case Pattern/Template
    Quilting Ruler
    Sewing Machine
    Thread
    Cutting Mat
    Rotary Cutter
    Snaps and Setter

    Since I used a pattern/template that isn’t mine, I will show you via photo how I created these glasses cases!

    Cut your fabric.

    Dream Glasses Cases: Cut fabric

    Add Interfacing and stitch the bottom.

    Glasses Cases: Add Interfacing

    Place the two pieces inside of each other.

    Glasses Cases: Stitch and Put together

    Stitch the top

    Glasses Cases: Stitch and Put together

    Turn inside out.

    Glasses Cases: Turn inside out

    Add snaps.

    Glasses Cases: Add snaps

    Nice and easy. You can make these in no time.

    One snap glasses case!

    Glasses Cases: Finish product

    Flat glasses case!

    Glasses Cases: Finish product

    Two snap glasses case!

    Glasses Cases: Finish product

    Glasses Cases: Finish product

    Glasses Cases: Finish product

    Enjoyable glasses cases!


    So what do you think? Fun glasses deserve to have fun glasses cases!!

    Are you going to make your own? I would love to see them.

    Supplies used:

    Dream Bernina 570QE


    Thanks for stopping by!

    Hexi Pillow Cushion Tutorial

    Hello everyone!! Today I have a cute Hexi Pillow Cushion tutorial to share with all of you. The fun part is the fabric! It has Santa Claus on it {smile}!

    Yes, Christmas in June! It’s time to get ready for all things Christmas.

    Let’s take a look at my Hexi Pillow Cushion:

    Hexi Pillow Cushion: Finish product

    Are you tickled pink like me?  Look at that button. It’s made of fabric too. I had fun making this pillow, but the button is my favorite.

    Hexi Pillow Cushion: Finish product

    Wait, I have another goody for you. One of these pillows is waterproof and stain-resistant. I created these pillows for my niece when she goes outside. She loves sitting on the front step, and my mother always tells her not to sit on the cold concrete, so I made her a pillow for that purpose.

    Hexi Pillow Cushion: finished product

    Before I share how I made the pillow waterproof and stain-resistant, let’s learn about this fabric collection.

    Fabric Collection:

    This fabric collection is called Warm Wishes by Simple Simon and Company for Riley Blake Designs. There are 21 prints full of snowmen, wrapped presents, candy canes, and more. It’s full of love and warmth that you get from family around the holiday.

    Warm Wishes Fabric Collection

    Here’s how to create the Hexi Pillow Cushion:

    Materials

    Note: Some of the links below contain affiliate links.

    Warm Wishes Fabric
    Creative Grid 60 Degree Triangle 8-1/2 in Quilt Ruler
    Hobbs Poly-Down Batting
    Sewing Machine
    Thread
    Cutting Mat
    Rotary Cutter
    HeatnBond Liquid Vinyl
    Foam Brush
    Dritz Cover Button Kit
    Scissors
    Poly-Fill Beads
    HeatnBond Pressing Paper

    Step One: Cutting fabric

    Cut 2 triangles from 3 different fabric prints.

    Hexi Pillow Cushion: Cutting the triangles

    Step Two: Sew the triangles

    Sew the first three triangles together, pressing the seam allowance to the dark fabric.

    Repeat with the next three triangles.

    Sew the two pieces together.

    Step Three: Cut the batting

    Place the hexi piece on top of a piece of batting and cut 2inch past the hexi piece on all four sides.

    Step Four: Stitching the two pieces together

    Stitch in the ditch for every triangle.

    Stitch 1/4 inch from the center stitch on both sides.

    Hexi Pillow Cushion: stitching the two pieces together

    Hexi Pillow Cushion: stitching the two pieces together

    Step Five: Trim the excess batting

    Trim the excess batting from the entire piece.

    Hexi Pillow Cushion: trimming the excess batting

    Serge or zig-zag the edge for easy turning.

    Hexi Pillow Cushion: trimming the excess batting

    Step Six: Cut the back piece

    Cut the back piece by laying the front panel on top.

    Step 7: Sew the front and back together

    With right sides together, sew using a 1/4 inch seam allowance. Leave a 4-inch hole so you can add the poly-fill beads.

    Hexi Pillow Cushion: Stitch the front and back together

    Step 8: Turn and Fill with Poly-Fill Beads

    Turn the fabric inside out and use a point turner to push out the corners.

    Hexi Pillow Cushion: HeatNBond Liquid Vinyl

    Fill the fabric with the poly-fill beads. Do not fill it up completely because you need to sew the edges and add the button.

    Hexi Pillow Cushion: Turn and fill with Poly-Fill Beads

    Use your judgment on how much to add.

    Step 9: Close the pillow

    Stitch the pillow closed by hand or machine depending on the amount of filling you have inside the pillow.

    Step 10: Adding the button

    Use Dritz Cover Button Kit to make a fabric button.

    Hexi Pillow Cushion: Fabric Button Hexi Pillow Cushion: Fabric Button

    Thread a long needle, push it in the center of the pillow from the back, and bring it out of the front.

    Push the needle through the button notch and then back down the center of the pillow, pulling it from the back.

    Hexi Pillow Cushion: Adding a button

    Pull the thread tight, tie a knot, and cut the threads, leaving an inch of thread.

    Yay, you did it!

    Hexi Pillow Cushion: finished product

    Do you want to make your pillow waterproof and stain-resistant?

    Here are the extra steps:

    After step 6, protect your workstation with pressing paper.

    Use a foam brush and apply a thin coat of HeatnBond Liquid Vinyl on the front and back pieces.

    Hexi Pillow Cushion: Waterproof and Stain Resistant

    Let it dry for 30-45 minutes.

    Once the pieces dry, cover them with pressing paper and press on medium heat and no steam.

    Hexi Pillow Cushion: HeatNBond Liquid Vinyl

    Apply a second coat and repeat the steps above.

    Once the second coat dries, start back at step 7 till the end.

    Now you can sit outside on the concrete or grass with your new pillow.

    Supplies used:


    Warm Wishes Fabric Collection Bernina 570QE HeatnBond VinylPressing Paper

    Altenew Adventures Ahead Stamps/Dies/Stencils/More Collection Release Blog Hop + Giveaway

    Hello, and welcome to Altenew Adventures Ahead Blog Hop!! Today we are showcasing a brand new stamp set. If you arrived here from the talented blog, Mindy Eggen, then you are on the right track. If this is your first stop, then you will want to start at the beginning, the Altenew Card Blog.

    Let’s take a look at my stamped napkins:

    Say Yes Napkins

    LOL stamped napkins, who would have thought. I surely did. I picked up these napkins the other day for my family’s upcoming backyard movie night.

    I loved the colors; they reminded me of the Caribbean sky, but they are pretty plain, so I decided to jazz them up with this fun sentiment.

    Say Yes Napkins

    Now that the world is opening back slowly, we are saying yes to new adventures as a family.

    Say Yes Napkins

    What new adventures are you saying yes to? I would love to hear from you.

    What is a blog hop without an amazing gift? Yayyy!!!

    Prizes:

    $300 in total prizes! To celebrate this release, Altenew is giving away a $50 gift certificate to 2 lucky winners and a $25 gift certificate to 8 winners! Please leave a comment on the Altenew Card Blog and/or each designer’s blog post on the blog hop list below by 06/09/2021 for a chance to win.

    Altenew will draw 10 random winners from the comments left on each stop of this blog hop and announce the winners on the Altenew Winners Page on 06/11/2021.

    Next Stop on this Blog Hop is:

    Laura Bassen

    You do not want to miss out on her amazing creations!!

    Just in case you lose your place along the way, here is the complete list of participants so that you can find your way back:

    Altenew Blog

    Jennifer McGuire

    Terri Koszler

    Erum Tasneem

    Jenny Colacicco

    Norine Borys

    Vicky Papaioannou

    Jaycee Gaspar

    Seeka

    Amber Rain Davis

    Erin Thompson

    Tenia Nelson

    Natasha Davies

    Bridget Casey

    Karen Brown

    Laurie Willison

    Kelly Griglione

    Agnieszka Małyszek

    LauraJane

    Lilith Eeckels

    Maryam Perez

    Carol Hintermeier

    Therese Calvird

    Amanda Baldwin

    Verity Biddlecombe

    Emily Midgett

    Raquel Bowman

    Sande Woodson

    Nicole Watt

    Anna Mahtani

    Virginia Lu

    Sandhya Iyer

    Michelle Short

    Victoria Calvin

    Nathalie DeSousa

    Keren Baker

    Reiko Tsuchida

    Patricia Roebuck

    Mindy Eggen

    Kymona Tracey ←here you go

    Laura Bassen

    Tania Ahmed

    Zinia Redo

    Vicki Finger

    Joylita Dsouza

    Preeti Chandran

    Supplies used:

    Thank you so much for stopping by. Compensated affiliate links are used at no cost to you. The Altenew products were given to me since I’m on the design team. The other products were personally purchased. This post was not paid or sponsored.

    black ink

    Thanks for stopping by!

    Holly Holiday Crazy Pouch

    Hello everyone!! I’m here today to show you my new holly holiday crazy pouch I created using some new fabric from Riley Blake Design!

    I love making pouches, they are easy to make, and they make fabulous gifts. I know for many people working with the zipper is challenging, but it shouldn’t be. You have to get over that fear and just do it. Zippers are fun to work with, and they make any project that much more FABULOUS!

    Let’s take a look at my holly holiday crazy pouch:

    Holly Holiday Crazy Pouch: Finished Product

    Cute right! Check out that patchwork. Isn’t it fantastic?! Guess what I didn’t use a pattern or ruler to accomplish this. I used a piece of fusible paper.

    Holly Holiday Crazy Pouch: Finished Product

    Yes, it’s a fusible paper called Crazy Quilt Paper by Lori Holt for Riley Blake Design. It is so EASY to use. I love it. As a matter of fact, the designer of this fabric collection, Christopher Thompson, introduced me to this fun way to patchwork.

    Let’s talk about this fabric collection:

    This collection is called Holly Holiday. It is full of a bright, bold palette of red, green, pink, and charcoal. Tons of festive florals, Santa faces, snowflakes, holly, geometric trees, and text prints that will warm your holiday heart.

    Holly Holiday Fabric Collection

    This collection has 24 prints. I love all of the pretty pinks, reds, and whites.

    Here’s how to create the holly holiday crazy pouch patchwork:

    Materials:

    Note: Some of the links below contain affiliate links.

    Holly Holiday Fabric
    Crazy Quilt Paper 10″ x 10″
    Lori Holt Trim It Ruler 8.5″ x 8.5″ 
    Creative Grid Perfect 10 Ruler
    Sewing Machine
    Thread
    Cutting Mat
    Rotary Cutter
    Clips

    Step One: Cutting fabric

    Cut (5) different 10-inch squares out of the fabrics you selected for the patchwork.

    Cut 3 pieces of fabric using the 8.5-inch ruler for the back of the pouch.

    Step Two: Prepare the fabric

    Note: the instructions are on the packaging on how to use the crazy paper

    Take one crazy quilt paper and press each paper shiny side down on the right side of the 10-inch fabric square.

    Cut the line marked “cut first,” then cut the line marked “cut second.”

    Then make the rest of your cuts according.

    Step Three: Sewing the front panel

    Now that each piece is cut mix up the numbers and pull 5 different pieces.

    Start with numbers 2 and 3, pull the paper off, and sew them together using a 1/4 inch seam allowance.

    Then sew number 1 to that piece.

    Then sew 4 and 5 together.

    Finish it off by sewing the two bigger pieces together.

    Step Four: Trim the square

    Use the 8.5-inch ruler and trim the square.


    Step Five: Sew the pouch together

    Using your favorite pouch pattern, sew the pouch using the patchwork panel and the back panel.

    Completed pouch!

    Now it’s your turn!


    Supplies used:


    Holly Holiday Fabric Collection      Bernina 570QE
    Thank you so much for stopping by!