
Shake, Shake, Shake That Card! It’s blog hop time again at Top Dog Dies. We have a whole lotta shaking going on this time for our blog hop. Shaker Cards! They are always a fun card to receive and make.
To add extra fun to our blog hop…we are offering up a prize! Three winners will receive the New Top Dog Dies Hot Air Balloon Die Set. For your chance to win, enter your email address below by 5/20/15. Winners will be posted on the Top Dog Dies blog after 5/20/15.
Here’s how it works…
Visit each blog on the hop in order. Each Design Team member has created a special shaker card using dies from Top Dog Dies. Visit each blog, check out the shaker projects and leave your comments. I’ve listed all of the participants below for your convenience. Don’t forget to enter to win.
So lets get start!!!
If you arrived from the fabulous Marcia Dehn-Nix then your on the right path. If you didn’t please start at the talented Piali Biswas blog as to not miss any of the blogs and your chance to win our awesome prize.
Take a look at my card:

I love making shaker cards but in the past they use to be so cumbersome with the foam tape and all. Now that I have the We R Memory Tool Fuse, making shaker cards are a breeze!! No bulk and no foam tape.
Thank you Jennifer McGuire for this amazing tip!!
You want to know how I created this?
Here you go:
1. I trimmed my card panel slightly smaller then my card base.
2. I used Top Dog Dies Heart Doily Die to cut a heart in the center of my card panel.
3. I used the negative and saved the heart shape for another card.
4. To create my shaker pocket, I used the heart die and placed it on my plastic window sheet.
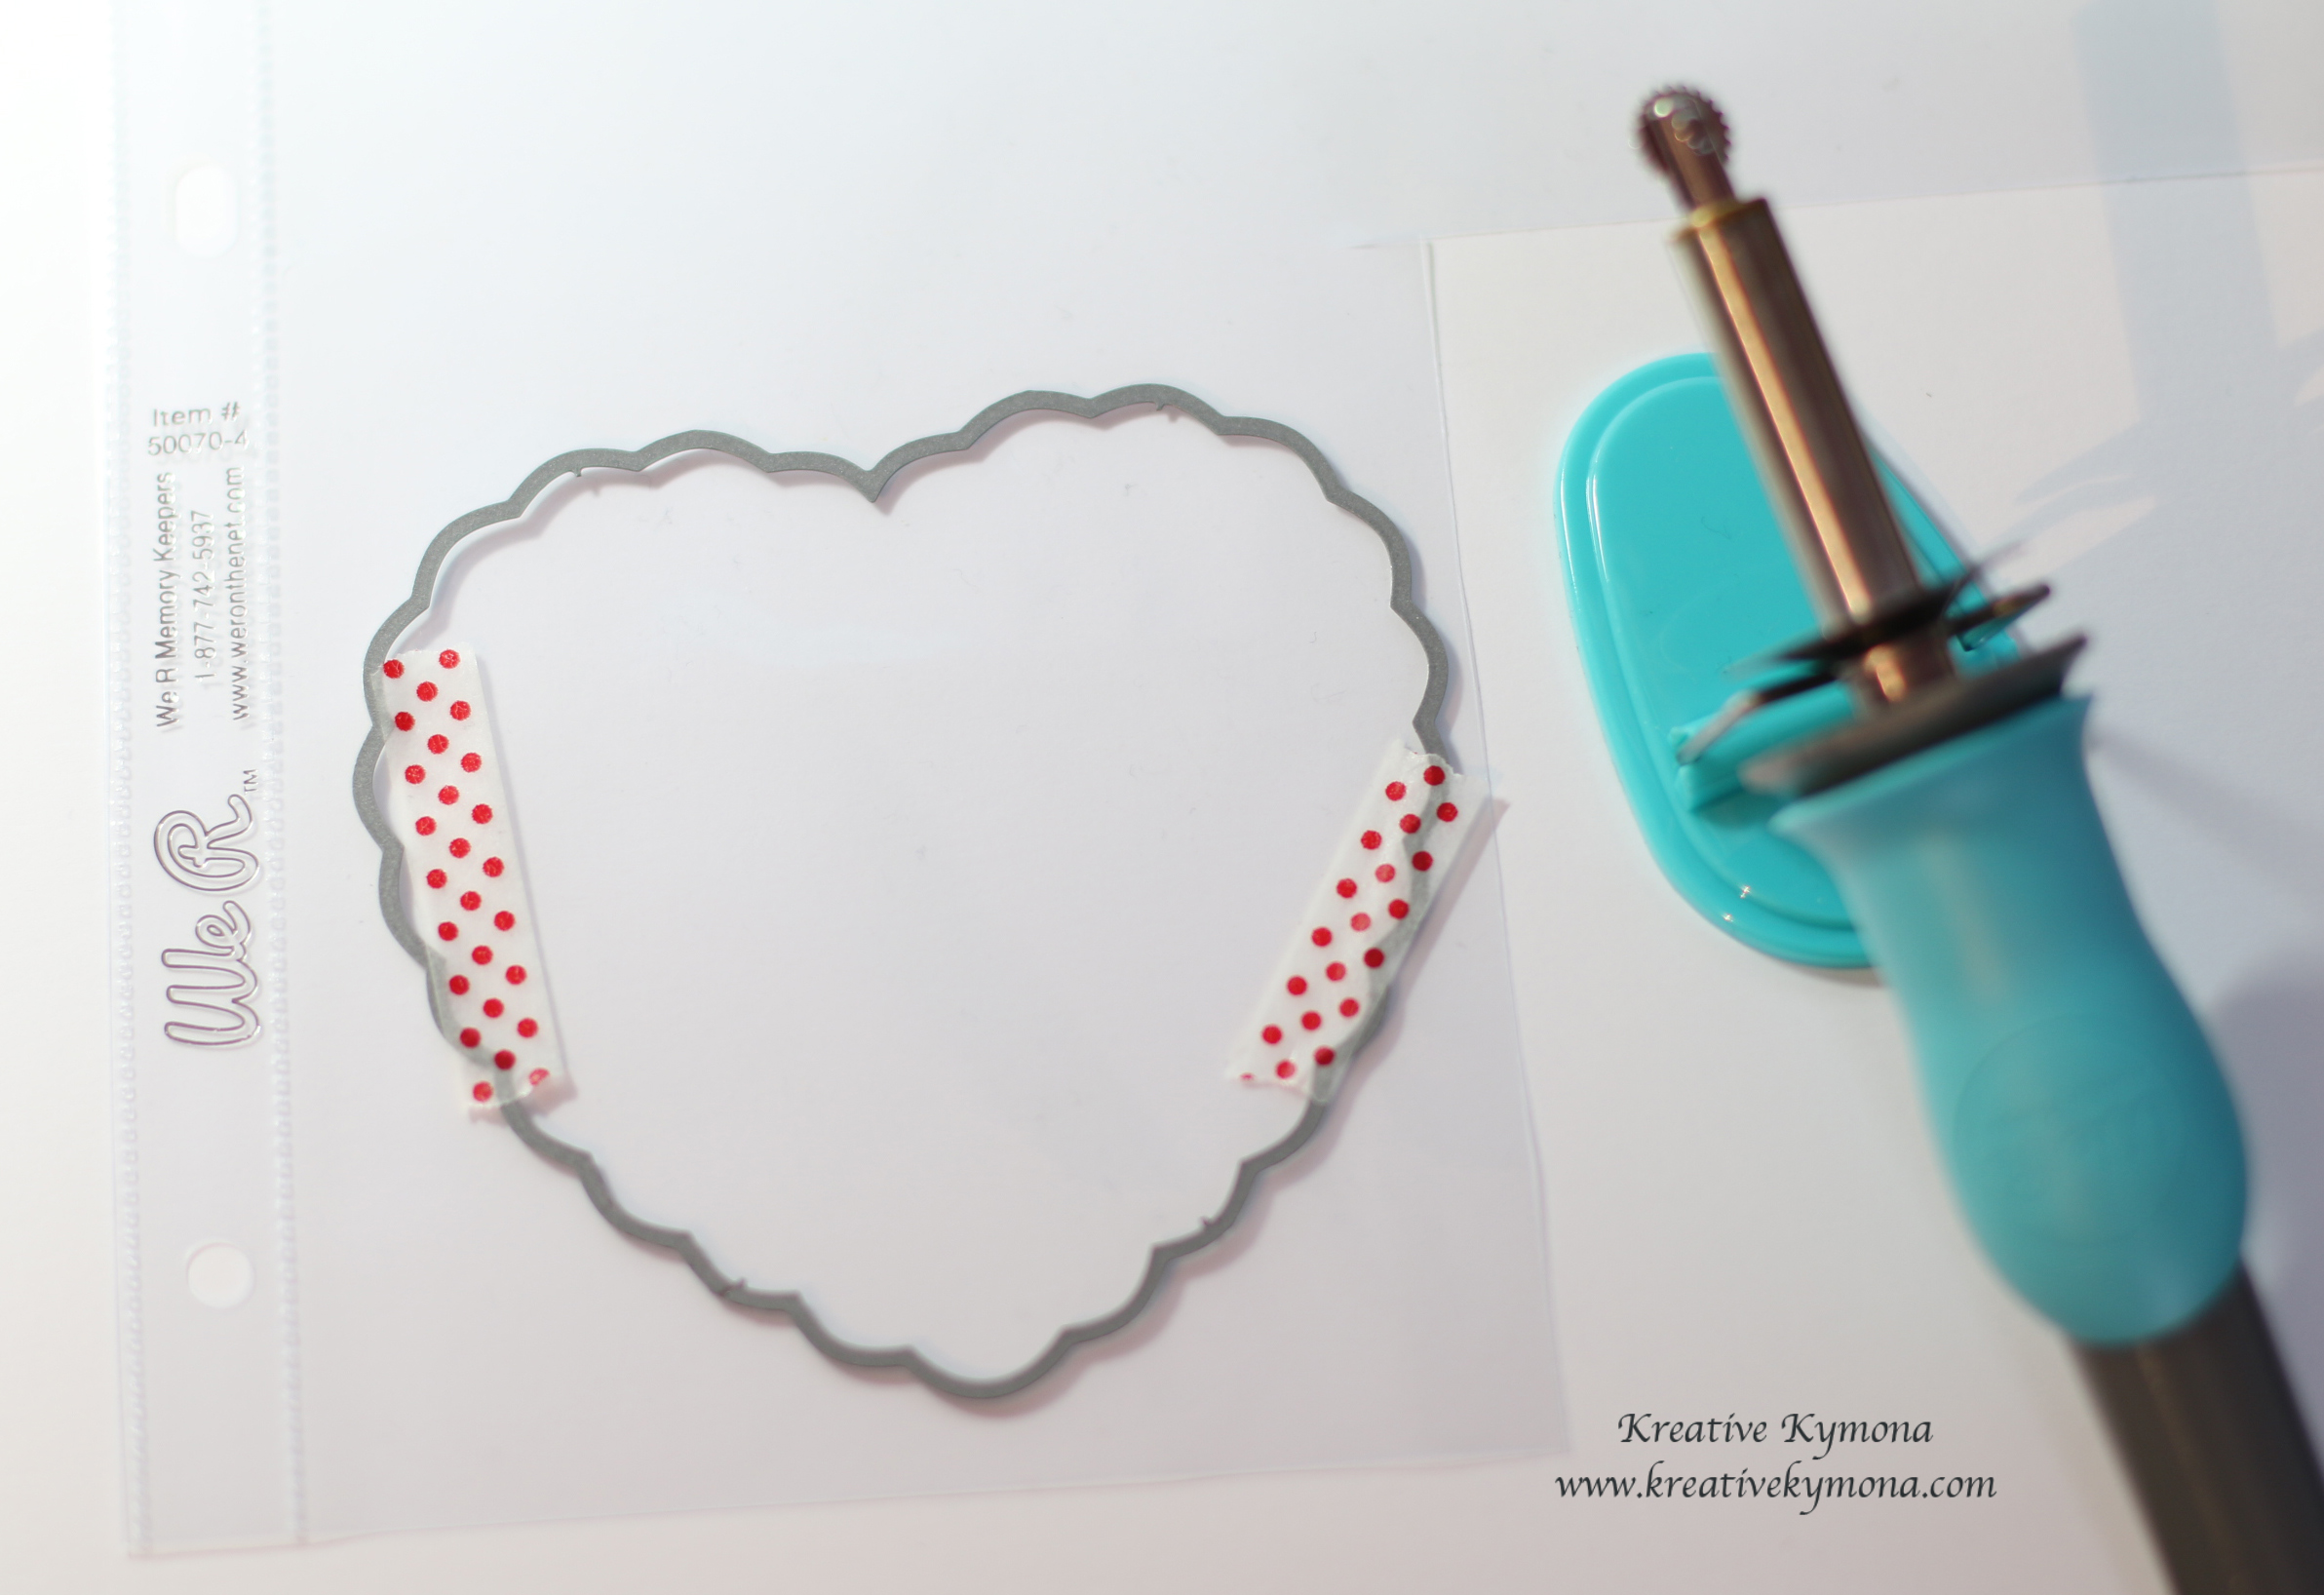
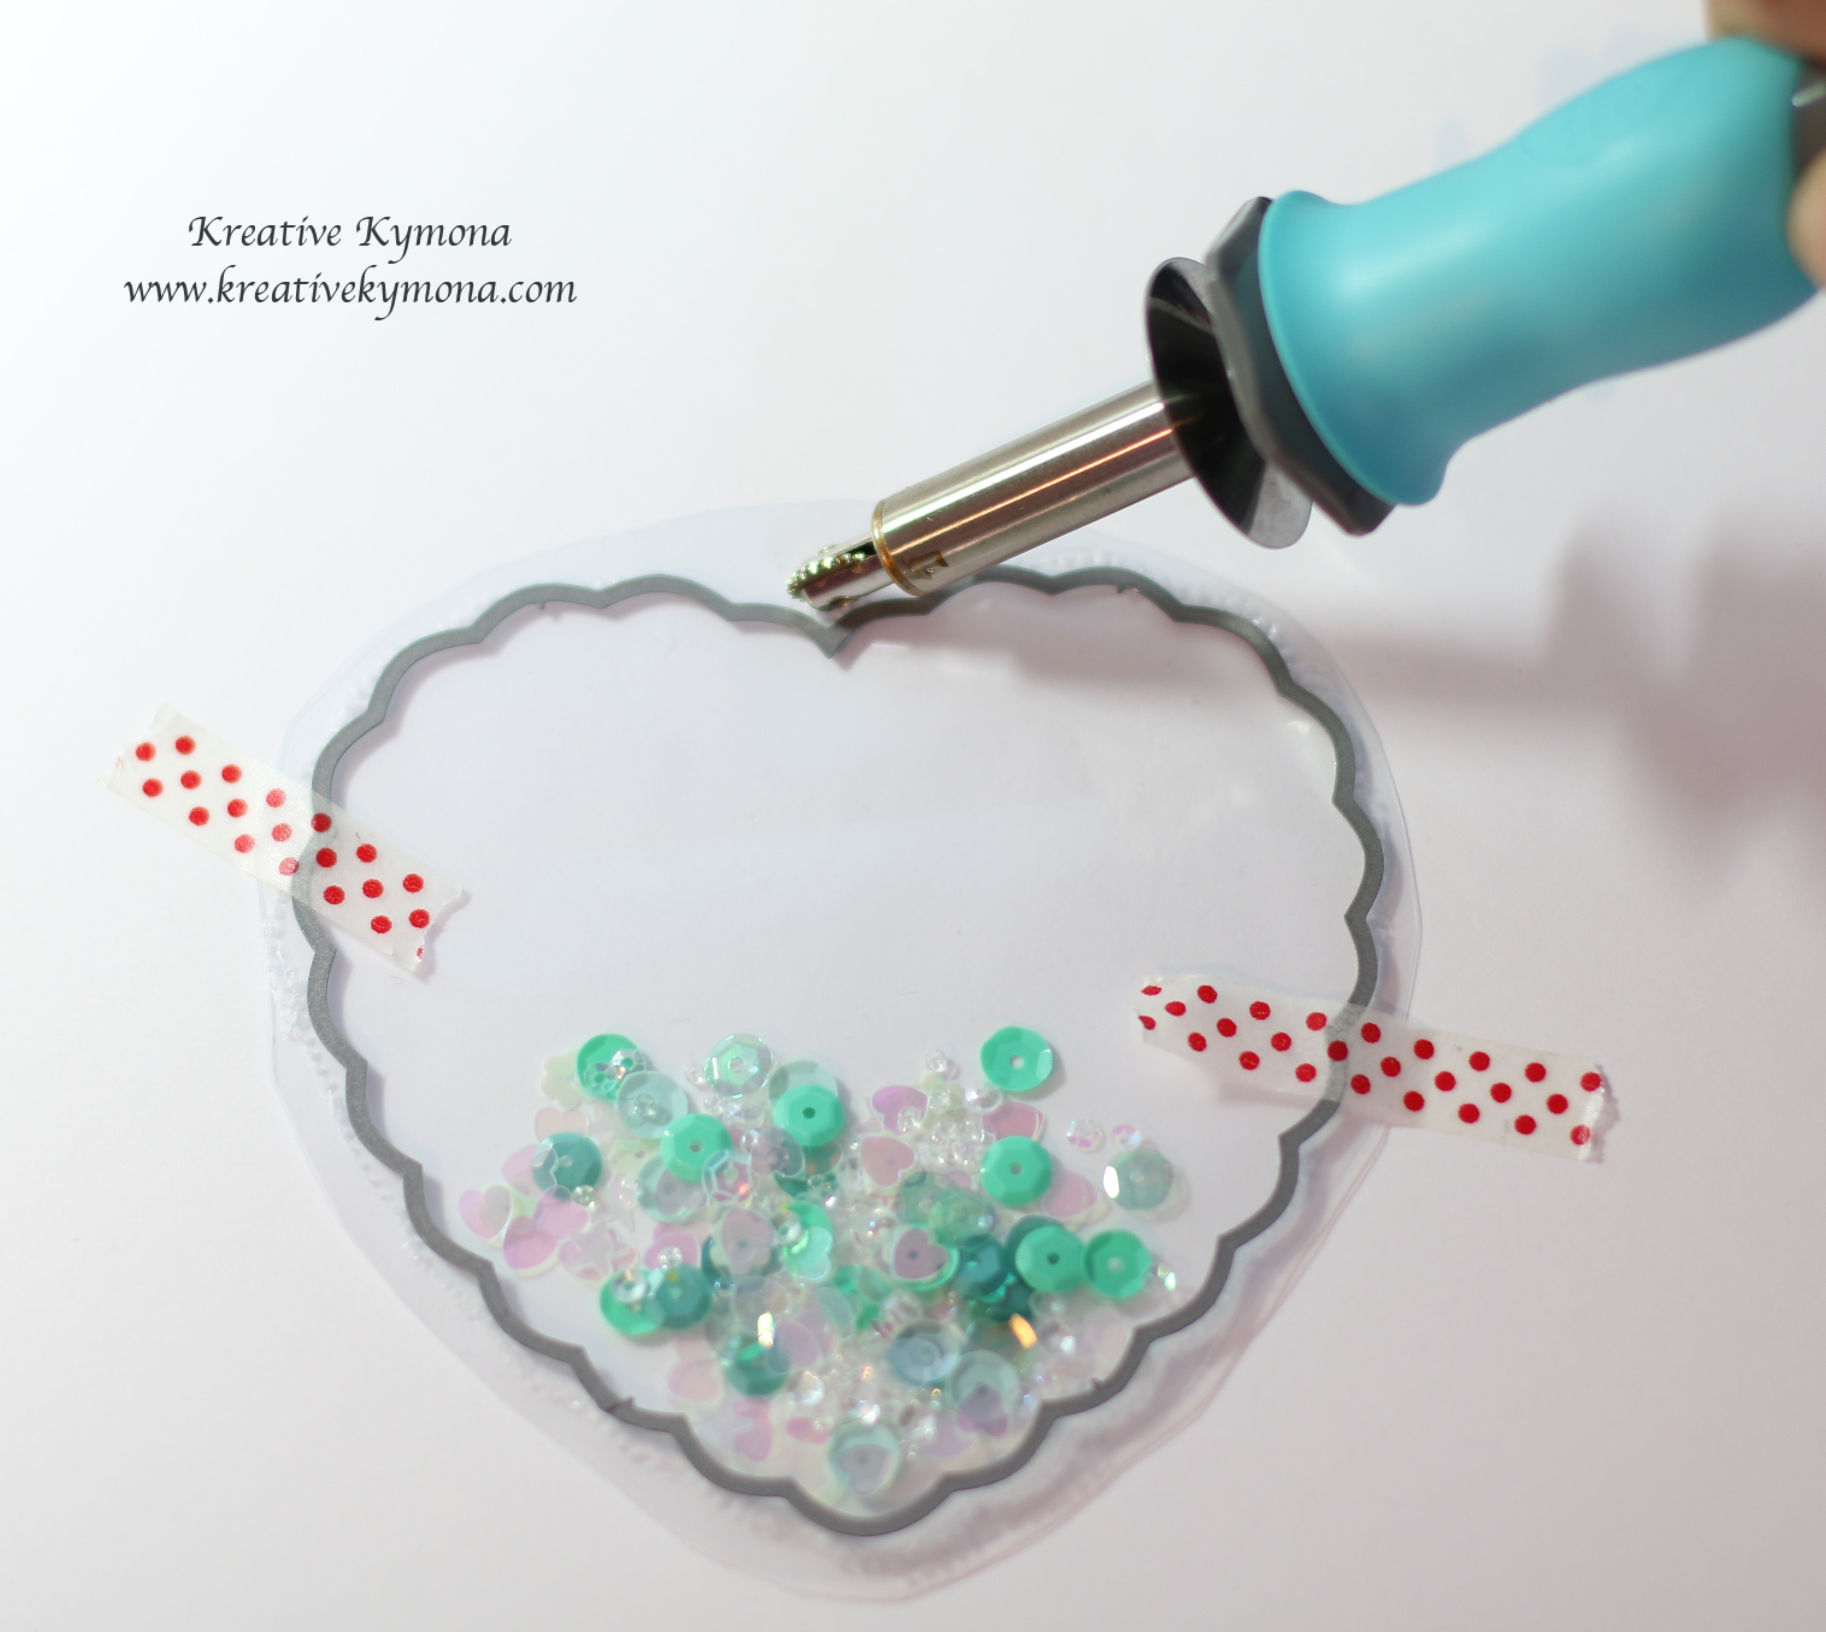
5. I used the fuse tool and traced around the outside of the die to seal the plastic together, leaving a small portion open to add the sequin.

6. I add Lucy Adams Phosphorescence sequin from Lucy’s Card Little Things Collection to my shaker pocket.

7. I lined up the heart die with the shaker pocket and used the fuse to close up the hole in my shaker pocket.
8. I trimmed off the excess plastic around the heart.
9. I die cut my Studio Calico pattern paper, which is the NYC skyline, with the same heart die and adhered it the card base.
10. I used Mama Elephant Good Times Stamp Set to stamp my sentiment with My Favorite Things Hybrid Ink.
12. I adhered the shaker pocket to the back of the card panel with adhesive.
13. I wanted the card panel to lift off of the card base so I added Stampin’ Up! Dimensionals and adhered the card panel the card base.
Super easy to create!! This has to be my all time favorite card to make now that its so easy.
Now on to talented Nicki Sheck for her fun shaker card!!
Just in case you missed someone or need to start over, I’ve listed my fellow design team members blog for your convenience.
Piali Biswas
Natalie Dever
Marcia Dehn-Nix
Kymona Tracey ← You’re here
Nicki Sheck
Jeanne Jachna
Vickie Zimmer
Kelly Griglione
Now all I need you to do is fill out the form below for your chance to win. Super easy and exciting.

Supplies use:


Happy Hopping and Shaking!
Thanks for stopping by!
~Kymona

Hi Kymona! Wonderful dreamy scene inside your shaker!
Awesome shaker!
I love shake card!!! The photo of your shake is very beautiful. I love♥NYC too 😉
Hey Eva!! Thank you so much for your sweet comment. When I saw that pattern paper, I knew I had to use it. I love that skyline!
This is such an awesome project and I really love how it turned out – THANKS so much for all the great ideas and tips you shared!! You are awesome!!
so beautiful!!!
Hey Vanessa! Thank you so much for your kind comment.
I really loved this shaker with the city skyline behind the heart. But, I’m confused…did you leave the die in the card?
Hey Lois!! Thank you for your kind comment. No, I only used the die as a guide to create the shaker pocket and to cut the heart shape out of my card panel!! I hope that helps. Sorry for the confusion.
So creative, love it.
Hey Ann! Thank you so much for your kind comment.
I have to go back and read Jennifer’s blog about the fuse tool!! Your cars is amazing!!
Hey Pam!!! Thank you so much for your kind comment. Yes, once you see Jennifer’s video you will see why you need this tool. It is a must have now in my craft room.
love it. so much better than foam. back ground paper is nice.
I love the NYC themed patteren paper. This is a super cool card I’d love to receive in the mail. It looks like a framed photograph!
Great card! You all are giving me wonderful ideas. Fun Blog hop.
THats Awesome… TFS… Happy Crafting!!!
I just LOVE the sparkle and color pop of the sequins against the gray city scene. Wow!
What a clever way for sealing the heart. Haven’t made a shaker card as yet and will come back for this tutorial. Thank you
Love the background scene!
Beautiful card!! I love how you used the picture in the shaker card, it’s just beautiful. I’m also glad that I linked up to your blog because I had seen the fuse tool and wondered how it could be used. I will have to purchase one of these.
What a great technique!
Thank you fir introducing the fuse tool. This looks like a really useful tool!
Love this with the city background! So fun!
Love shaker cards
Very cool with the NYC skyline in the shaker.
really cool. great instructions
Thanks so much for this idea!! I am going to take a copy of my cottage beach scene and use shades of blue sequins. I wonder if I could do the fusing of the plastic sheets with my woodburning tool?
Awesome shaker card. Love the skyline in the background… great way of using the fuse tool.
Oh my that is a beautiful card!! Thank you for sharing and the details of how it was made and that tool I am going to have to look into as I want to learn to make shaker cards and that does seem so much easier!
Love this. Will have to try it
This card is awesome! Thanks for Sharing!
Love your card and the tutorial. I will have to check out the products you used.
I love this fabulous city skyline scene in your shaker! Beautiful!
Love this one! It would be great with a real travel photo inside there as well. And thank you for the directions…I just got a Fuse and this is the perfect thing to play with it.
I love city skylines; your card is great!
Creative take on a shaker card. LOVE it.
Hey Sharon!! Thank you for your kind comment.
Such a fun idea! So cute!
Hey Terry! Thank you so much for your sweet comment.
Love the skyline!
Hey Rubina!! Thank you for your kind comment.
Nice shaker card for friends living in the city. Love the shaker cards.
Hey Jacqueline!! Thank you so much! I live in NY so its so pretty to look at. I’m in the city all the time so I take this scene for granted.
Great card. The city skyline behind the confetti is a terrific idea.
Hey Pat!! Thank you so much for your wonderful comment.
I love this idea! Need to do a Houston one!
Hey Cathie!! Thank you so much for your wonderful comment. If I fine a Houston skyline, its all yours!!
Love the card. I had heard of the tool. Now I really want one. This will make card making easier.
Great job and tut!
Hey Lisa!! Thank you so much for your wonderful comment. Yes, this tool is a must have. Heads up, I might do a giveaway if I can get my hands on another one.
Awesome idea!
Hey Peggy!! Thank you so much!!
WOW!! Stunning and BEAUTIFUL!!
Have a wonderful day,
Migdalia
Crafting With Creative M
Hey Migdalia!! Thank you so much for your wonderful comment!!
Your choice of those beautiful color sequins set off the black and white photo is absolute perfection!
Hey Renee!! Thank you so much for your wonderful comment.
Love this awesome shaker card!
Hey Celeste! Thank you so much for your sweet comment.
Wow what a great skyline an to show the glitz and glamour of New York. Thanks for shaaring.
Hey Shona! Thank you so much for your wonderful comment. Yes, when I saw that paper I know I had to use it for this project!!
I love the scene you’ve created with this card. Very meaningful. But I also love the tutorial you gave and the information on the We r”Memory Makers Fuse kit….. wow I never knew this neat tool existed. Something else on my wish list! Thanks so much!
Hey Penny!! Thank you so much for your wonderful comment. You’re welcome and I hope this inspires you to create your own shaker card. Yes, that Fuse tool is a must have. I hope you get it soon. Hold tight, since a lot of people didn’t know about this tool, I’m going to try to get my hands on another one and do a giveaway!! Let me see what I can do!
Love the tutorial. Great card.
Hey Cindy!! Thank you for your wonderful comment.
So pretty. I wish I had a fuse.
Hey Lynnette!! Thank you so much for your sweet comment. Oh, you have to get a fuse!! Its totally amazing.
Your shaker is beautiful. Thanks for sharing.
Crafty hugs,
Dawn
DesignsByDragonfly.blogspot
Hey Dawn!! Thank you so much for your wonderful comment.
Great step by step! Beautiful card.
Hey Jill!! Thank you for your kind comment. I hope you give this technique a try!!
Wonderful shaker card and oh so pretty!
Hey Evelyn! Thank you so much for your wonderful comment.
Cool shaker card! Never made one before but with that tool, it sounds easy. What an imagination you must have to think of that design.
Hey Shirley!! Thank you so much for your wonderful comment. Oh man, you have to try and make a shaker card. Its so much fun and with this tool, you can really make tons of them easily!! I hope you give it a try.