Baby Hats, 2 Ways!

Hello everyone! I’m here today with a super cute project, baby hats, yay!! It’s getting colder, and we definitely want to make sure our little ones’ heads are covered at all times. 

Do you remember those hats babies are given in the hospital when they are born? They were striped make out of a loose-knit material. Well, the ones I’m going to show you today are much more stylish and super easy to make.

Let’s take a look at these baby hats, 2 different ways:

Baby Hat Designer Knit: Finished Product

How cute are these? They are warm too. This knit fabric is amazing and fun. 

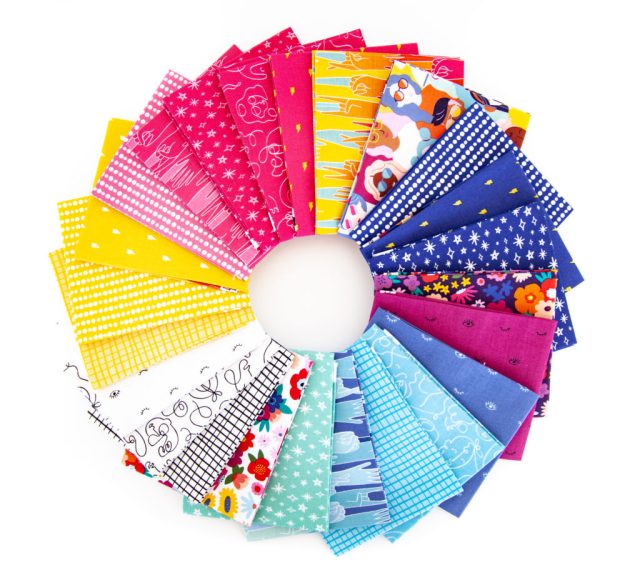
Let’s take about this fabric collection:


These prints are apart of the Cute Cuddle Knit collection for Riley Blake Designs. They are a stretch cotton jersey knit fabric with about a 50% four-way stretch for added comfort and ease. They have 36 different knits in this collection. 

Both hats are a perfect match for this fabric collection. I have to be honest with you, I wanted to make a ton of baby clothes with this fabric to go along with these hats, but that’s a conversation for my next blog post. Let’s just say I’m still ripping out a sleeve, LOL!! Stay tuned for that. 

Now, back to the hats!
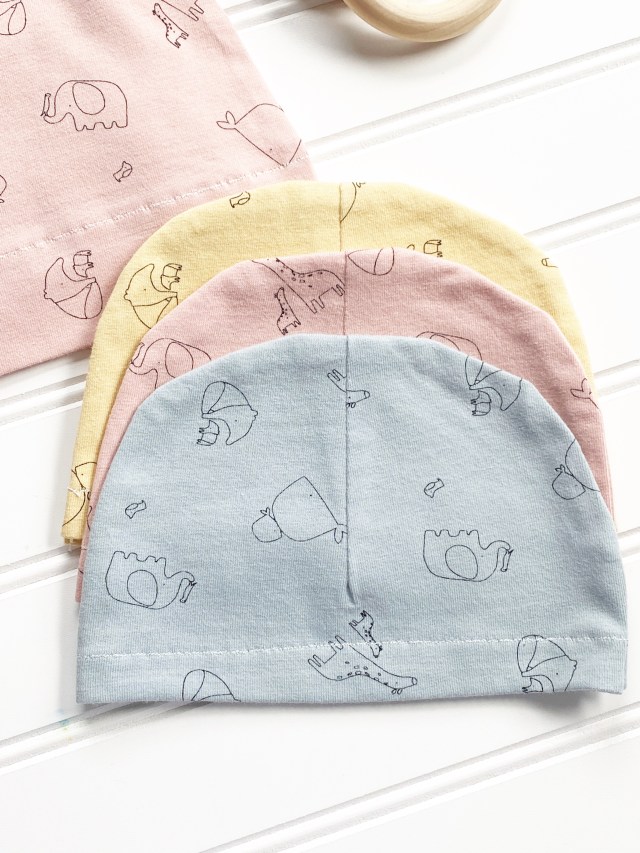
Basic Baby Hat:

This hat is so the easiest hat to make, and you can make tons of them in an hour or so. I used a free pattern from Dana at MadeEveryDay. You can find it here.

Baby Hat Designer Knit: Finished Product

I love this pattern because of the dart that you create in the hat. It gives the hat more structure. 

Baby Hat Designer Knit: Finished Product

Knotted Baby Hat:

Check out that knot! 

Baby Hat Designer Knit: Finished Product

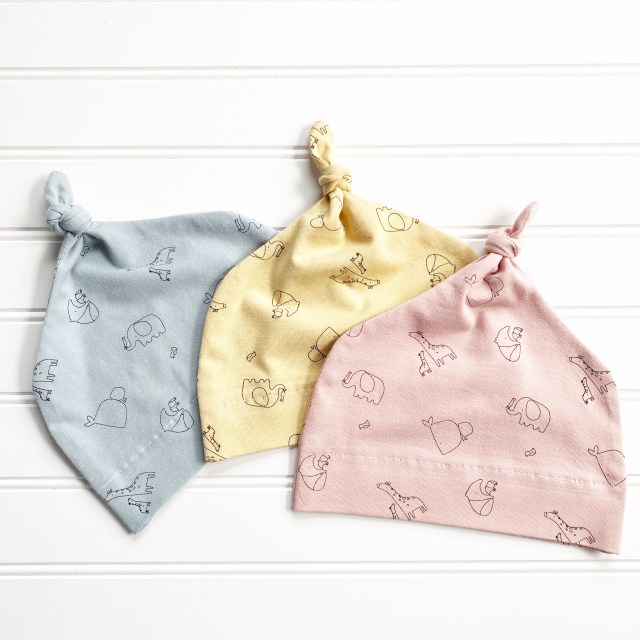
Now, this hat is fun. Instead of the dart, just alter the pattern by adding a tube to the top of the pattern, sew and tie the top.


Baby Hat Designer Knit: Finished Product

These are perfect gifts to give a mom to be for the baby’s stay in the hospital. It beats the one the hospital gives you. Perfect for those first pictures. LOL!

Take another look:

Baby Hat Designer Knit: Pair

Baby Hat Designer Knit: Pair

Baby Hat Designer Knit: Pair


So what do you think? Would you make these hats for a loved one, as a gift, or for your own baby? Please let me know.

Supplies used:

There are some compensated affiliate links used at no cost to you. 

  Bernina 570QE       


Thank you so much for stopping by!

GRL PWR Tote Bag and Pouches

Hello everyone! I’m here today with a brand new GRL PWR Tote Bag and Pouches! This fabric collection is so vibrant and full of joy. It was fun cutting into and creating.

I’m always in need of totes and pouches, especially since we cannot use plastic bags here in NYC. So why not go to the store with a fashionable tote or pouch! On top of that, it says GRL PWR, which makes a statement everyone I go.

Let’s take a look at my reversible bag and pouches:

Tell me these aren’t cute! I’m so giddy. The best part is the tote is reversible. Yes, you can turn it inside outside.

Let’s talk about this fabric collection:

Grl Pwr is a fantastic fabric collection from Amber Kemp-Gerstel. This collection celebrates Amber’s love of quirky, colorful patterns and the beauty of diversity. This fabric collection is made up of 24 pattern prints.

Tote:

I used a free pattern created by Very Shannon called the Reversible Box Tote. You can find the pattern here. To create this bag, follow the direction in the pattern.

I will share my process photos below:

Prepare the pattern and cut your fabric.


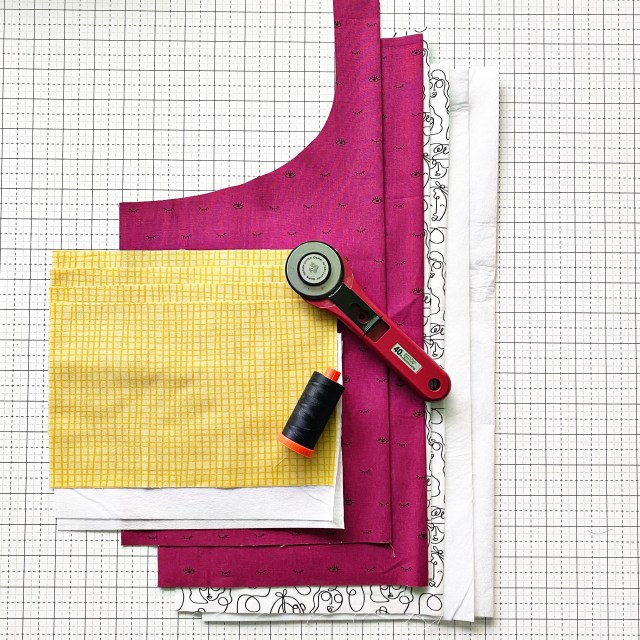
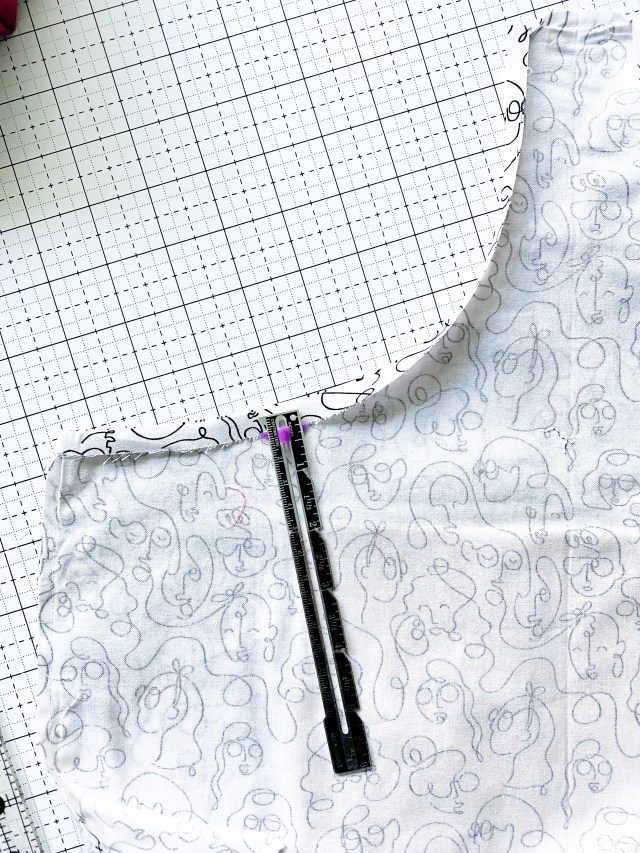
Here are the cut pieces and thread. I changed my mind and went with white thread instead.
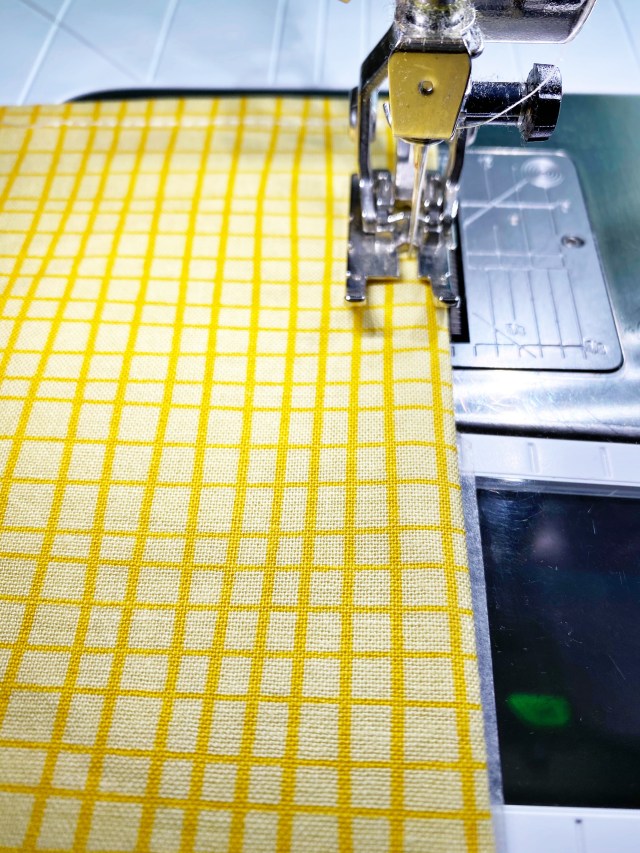
Sew the pocket.

You should have two pockets—one for the outside of the bag and one inside the bag.

Sew the pocket to the exterior fabric.

Sew the exterior and interior pieces together according to the pattern—Box the corners.

Now it’s time to put the bag together.

Fold the top edges down on both pieces.

Sew them together.

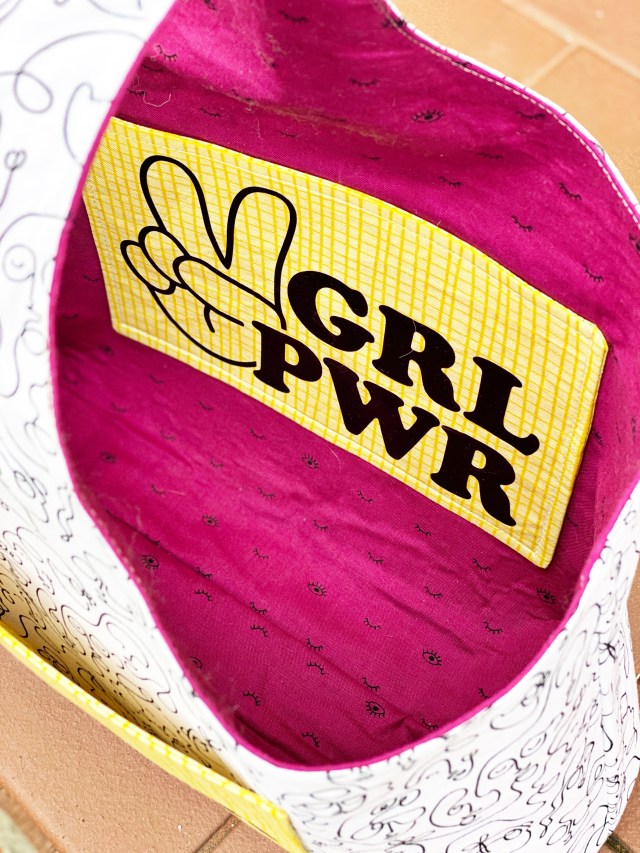
Once the bag is complete. Add a design to both pockets.

Let’s take another look:

Pouches:

For these pouches, cut the fabric, lining, and fusible fleece to 5 inches x 10 inches.

I used this beautiful colorful fabric for these pouches.

They are simple pouches with a plastic zipper.

Inside has a matching print.


The tote and pouches turned out so beautifully. The fabric is a perfect selection for this. What will you create?

Supplies used:

There are some compensated affiliate links used at no cost to you. 

Bernina 570QE       
Thank you so much for stopping by!

End of Year Organizing

Hello everyone!!  End of year organizing can be a pain but its necessary. It’s refreshing to start a new year with things in place.

Today I’m going to show you how I organize all of my metal stamping jewelry pieces and tools using Deflecto’s Stackable Caddy Organizer and Caddy Storage Tray.

Let’s take a look:

stackable caddy


I started metal stamping two years ago, and my supplies have grown tremendously. My supplies were all over the place- in drawers, baskets, handmade pouches- everywhere.

It was getting on my nerves, really. So I decided for the new year, all of my jewelry making supplies needed to be in one handy place so that I can create without looking in a million different places.

The stackable caddy organizer and tray was my first choice.

Here’s why:

  • It has multiple units that can be conveniently stacked and locked using the lift and lock feature. When I take each compartment out of the frame, I can stack them nicely to the side of my desk for easy access.

stackable caddy

  • It has three different compartment sizes-small, medium, and large. All of my supplies come in different sizes, so this feature is excellent for holding the tools, jewelry pieces, and accessories separately.

stackable caddy tray

  • The removable storage containers feature hinged, snap-tight lids for convenience.
  • I love the lids because I know for sure my jewelry pieces are safe and secure inside of each bin.

Stackable Caddy Organizer

  • It’s great for on-the-go storage.
  • The caddy storage tray fits neatly inside the large storage container. It has ten medium compartments and one large compartment.

Stackable Caddy Tray

  • All of my small jewelry pieces fit so neatly in these compartments. Since I use these the most, it makes sense that they are right on top for me to see.

Caddy Tray

Sooooo, tell me what you think? Are you still looking for a way to store and organize your supplies? I hope I was able to help you make up your mind.

I’ve used these caddy’s to store other items as well, to see how I organize my journal supplies check out this post as well.

Supplies used:

(Thank you so much for stopping by. Compensated affiliate links are used at no cost to you. The Deflecto products were given to me since I’m on the design team. The other products were personally purchased. This post was not paid or sponsored.)

Deflecto - Caddy Storage Tray Deflecto - Stack 'n Go - Caddy Wheel Base Deflecto - Stackable Caddy Organizer Bundle Deflecto - Small Caddy Organizer Compartment Deflecto - Medium Caddy Organizer Compartment Deflecto - Large Caddy Organizer Compartment

Thank you so much for stopping by!

Altenew December 2019 Ink Release Blog Hop + Giveaway

Hello, and welcome to Altenew’s December 2019 Ink Release Blog Hop!! Today we are showcasing brand new inks. If you arrived here from the talented blog, Ashley Tucker then you are on the right track. If this is your first stop, then you will want to start at the beginning, the Altenew Card Blog.

Take a look at my Polka-dot Embroidery Hoop:

Who doesn’t love polka-dots? Especially purple polka-dots. I used Altenew’s Sugarplums Ink Cubes.

Here’s how to create this home decor:

  1. Cut a piece of linen fabric bigger than the hoop.
  2. Use a sponge dabber and randomly stamp the lighter color (Pale Mauve) first.
  3. Followed by Amethyst, Grape Agate and Plum. 
  4. While the ink dries, use an electric cutter to cut out a foil iron-on.
  5. Iron-on the sentiment in the middle of the stamped fabric.
  6. Hoop the fabric very taut.

This was fun to create and look at.

What is a blog hop without an amazing gift? Yayyy!!!

Prizes:

To celebrate this release, Altenew is giving away a $30 gift certificate to 6 lucky winners! Please leave a comment on the Altenew Card Blog and/or Altenew Scrapbook Blog by 12/11/2019 for a chance to win.

We’ll also draw a winner to receive a $15 gift certificate from the comments left on each designer’s blog on the blog hop list below. All winners will be announced on the Altenew blogs on 12/14/2019.

Next Stop on this Blog Hop is:

Ashlea Cornell

You do not want to miss out on her amazing creations!!

Just in case you lose your place along the way, here is the complete list of participants so that you can find your way back:

Altenew Card Blog

Vicky Papaioannou

Norine Borys

Kelly Griglione

Nathalie DeSousa

Caly Person

Jaycee Gaspar

Emily Midgett

Zinia Redo

Maryam Perez

Jenny Colacicco

Virginia Lu

Jessica Frost-Ballas

Altenew Scrapbook Blog

Keeway Tsao

Jen Schow

Amber Rain Davis

Laurie Willison

Lilith Eeckels

LauraJane

Therese Calvird

Mindy Eggen

Svitlana Shayevich

The Hedgehog Hollow

Reiko Tsuchida

Teri Wilson

Agnieszka Malyszek

Kelly Janes

Nicole Watt

Erum Tasneem

Ashley Tucker

Kymona Tracey

Ashlea Cornell

Supplies used:

(Thank you so much for stopping by. Compensated affiliate links are used at no cost to you. The Altenew products were given to me since I’m on the design team. The other products were personally purchased. This post was not paid or sponsored.)

Cricut Maker

Thank you so much for stopping by!