End of Year Organizing

Hello everyone!!  End of year organizing can be a pain but its necessary. It’s refreshing to start a new year with things in place.

Today I’m going to show you how I organize all of my metal stamping jewelry pieces and tools using Deflecto’s Stackable Caddy Organizer and Caddy Storage Tray.

Let’s take a look:

stackable caddy


I started metal stamping two years ago, and my supplies have grown tremendously. My supplies were all over the place- in drawers, baskets, handmade pouches- everywhere.

It was getting on my nerves, really. So I decided for the new year, all of my jewelry making supplies needed to be in one handy place so that I can create without looking in a million different places.

The stackable caddy organizer and tray was my first choice.

Here’s why:

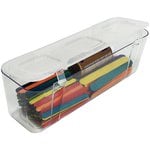
  • It has multiple units that can be conveniently stacked and locked using the lift and lock feature. When I take each compartment out of the frame, I can stack them nicely to the side of my desk for easy access.

stackable caddy

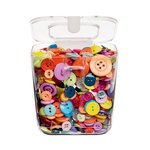
  • It has three different compartment sizes-small, medium, and large. All of my supplies come in different sizes, so this feature is excellent for holding the tools, jewelry pieces, and accessories separately.

stackable caddy tray

  • The removable storage containers feature hinged, snap-tight lids for convenience.
  • I love the lids because I know for sure my jewelry pieces are safe and secure inside of each bin.

Stackable Caddy Organizer

  • It’s great for on-the-go storage.
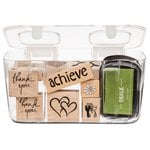
  • The caddy storage tray fits neatly inside the large storage container. It has ten medium compartments and one large compartment.

Stackable Caddy Tray

  • All of my small jewelry pieces fit so neatly in these compartments. Since I use these the most, it makes sense that they are right on top for me to see.

Caddy Tray

Sooooo, tell me what you think? Are you still looking for a way to store and organize your supplies? I hope I was able to help you make up your mind.

I’ve used these caddy’s to store other items as well, to see how I organize my journal supplies check out this post as well.

Supplies used:

(Thank you so much for stopping by. Compensated affiliate links are used at no cost to you. The Deflecto products were given to me since I’m on the design team. The other products were personally purchased. This post was not paid or sponsored.)

Deflecto - Caddy Storage Tray Deflecto - Stack 'n Go - Caddy Wheel Base Deflecto - Stackable Caddy Organizer Bundle Deflecto - Small Caddy Organizer Compartment Deflecto - Medium Caddy Organizer Compartment Deflecto - Large Caddy Organizer Compartment

Thank you so much for stopping by!

Deflecto’s Stackable Caddy Organizer Giveaway


Deflecto Stackable Caddy Organizer

Thanks to everyone who participated and left all of the wonderful comments on my blog. I wish everyone could win but I can only choose one winner.

Are you ready to see who won?  Here you go:

Congratulations, FeM!!!  You are the lucky winner of the Stackable Caddy Organizer from Deflecto!  Please email me back so that I could get your mailing address to have your caddy sent to you from Deflecto.

Once again, thanks to all of you for stopping by and leaving some love on my blog.


Celebrating National Children’s Craft Day with Deflecto’s Caddy + Giveaway

Hello everyone!! I’m super excited about today because its National Children’s Craft Day and for those of you how know me, knows how much I love crafting with my little ladies!!

Today we are going to show you how we craft using our Deflecto Stackable Caddy Organizer!  My little ladies love them for several reason!!

Here’s why:

Deflecto Stackable Caddy Organizer

  1. The caddy’s are clear so my little ladies and I can see what we need without opening the containers.
  2. The containers come in different sizes so each one of my nieces can store different types of craft supplies.
  3. All of the containers are removable, which allows them to move around the table or the house with carrying the entire caddy.
  4.  Personalizing the caddy with labels or decorating them with embellishments is easy and fun.
  5. Each caddy stacks on top of each other neatly and locks in place.
  6.  With the wheel bass add, we can travel with all of them together safe and securely.

Let’s take a look:

My daughter, nieces and I craft every weekend. They are always heading straight for my good craft supplies so I had to get them their own goodies. Starting with a Deflecto Stackable Caddy.

That way they could store all of their stuff in one place.

Stackable Caddy Organizer

My niece decided to use her caddy to store all of her lego pieces.  She stored the pieces in each of the containers based on the community’s name. She loves opening and closing each container. The sound it makes, makes her laugh.

stackable caddy

Using scrapbooking supplies, she decorated her caddy with flowers, hearts, butterflies and wood veneer.

stackable caddy

My daughter wanted a place to store all of her stamping supplies.  She use to keep them in her desk draw but need the space for her school work so the caddy came in handy for her.

deflecto caddy organizer

She decided not to decorate her caddy. Being able to see into it from the top and sides works for her.

deflecto stackable caddy

My older niece loves working with scrapbook embellishments. Stickers, tags, wood veneer, pens and color pencils in her planner.

deflecto caddy organizer

This little lady was particular in decorating her caddy. All of the pieces need to match. She took her time decorating. She adhered all of the die cut pieces with her new hot glue gun. She couldn’t wait to use it, LOL!!

deflecto caddy organizer

One of my caddies is full of sewing notions. I’ve accumulate a lot of sewing gadgets and needed a storage option that is portable.

So every weekend my living room looks like this. I recently bought a huge sew table and it perfect for all 4 of us to craft and not get in the way of each other.

When we our crafting time comes to an end, we stack the caddies together and attach the wheel base.

deflecto stackable caddy

This portable stackable caddy system sits nice and neat in a corner of my craft room.

So what do you think? What would you store in your caddy? Would you use it at home mostly or on the go. I would love to hear.

Guess what!!!  Giveaway Time!!

I’m giving away a Deflecto Stackable Caddy Organizer to ONE lucky winner!!  Please leave a comment below telling us what you would store in your caddy if you won by Sunday, March 18, 2018 at 11:59pm EST.  The winner will be announced on Tuesday, March 20th, 2018.

Where can you buy a Caddy?

Hobby Lobby sells Deflecto Stackable Caddy Organizer in their stores and online for $24.99.  With their 40% coupon, the caddy will cost you 14.99 plus tax.  You can’t beat that!!

So what are you waiting for!!  Head on over to Hobby Lobby to pick up one for yourself and you will instantly fall in love.

Supplies used:

Deflecto Stackable Caddy Organizer

Thank you so much for stopping by!!

Sewing with Deflecto

Hello everyone!!  I’m here today sharing to share how I sewing with Deflecto’s Interlocking Single Tilt Bin – 4 Pack on my new sewing table.

Let’s Take a Look:

Tilt Bins

I recently started sewing and I must say I love it. So, you know with a new craft comes a lot of new must have products.
I’ve collected all of Dritz buttons, grommets, snaps, tools and much more for the bags I’ve learned to sew. These small pieces were kept in bags and bins that I can’t just see. So, what have I done?  Bought more of the same items because I didn’t remember what I already had in my stash.
So this amazing Interlocking Single Tilt Bin come in super handy for the dilemma I’m facing.
It sits right on top of my new sewing desk. I’m able to see into each bin and see what I have and what I need for my sewing projects.

Let me share why I love these bins:

1. The front is clear.
2. You can stack them on top of each other or side by side.
3. They are portable.
4. You can mount them on the wall or leave them on a desk.
5. The clear bins can be removed for cleaning.
6. Each bin is 4-3/4″ W x 5-1/2″ H x 4-7/8″ D
My new sewing experience will be easier this year.  All of my important supplies all in one place.
So what do you think? How will you organize your crafting supplies? I would love to hear from you.

Supplies used:

Thanks for stopping by, I hope you were inspired here today.


Love Makes The World Go Round

Hello everyone!!  I’m here today sharing this super cool Deflecto Pink Border frame!  Yes, I know your wondering frame from Deflecto.  The company that specializes in organizational storage.  Yes, them.  They also sell a line of frames, table top stands all items that can be used in a craft room, living room, office or a store.

Let me show you:

Deflecto Pink Border Frame

This pink frame is perfect to hold reminder signs that you could see every day.  Positive reinforcements are powerful when you are able to see and/or hear them everyday.

Since its February and love is on everyone’s mind, I thought it was fitting to remind everyone who walks in my living room that “Love Makes the World Go Round”!

Here’s how I created this frame:

I cut a piece of Stampin UP! Painted With Love DSP to 8.5 by 11 and inserted into the back of the frame so that you could see the pretty foil design.

I used the Cricut Maker and Cricut Design Space to create Cricut’s Midnight Vinyl design that is on the outside of the frame.

Once the vinyl is cut, use Cricut’s New Transfer Tape and Cricut’s Scraper to adhere the sentiment and image as one piece to the front of the frame.

Nice and easy!!

Supplies used:

(Thank you so much for stopping by. Compensated affiliate links used at no cost to you.  All products were personally purchased.  This post was not paid or sponsored. )

A portion of Deflecto’s pink product proceeds go the fight against breast cancer.

  Cricut MakerCricut® Midnight VinylNEW Cricut® Transfer TapeCricut® Tools Scraper and Spatula

Thank you so much,

How to Create a Magnetic Tray

Hello everyone!!  I’m here today sharing how to create a magnetic try using Deflecto’s Craft Magnetic Sheets.

Let’s Take a Look:

I created this tray for my new office at my new job.  I’m so thankful for my new job and my new opportunity at a new hospital closer to home.  You can’t bet that.

Each morning I will write a note to myself documenting what I’m thankful for.  I will complete one for each day so at the end of the month, I will add them to my grateful notebook.

Here’s How I Created This Tray:

I collected all the supplies that I needed to create this tray:

Deflecto Magnetic Sheets
Deflecto’s VersaGrip Magnetic Sign Holder
Warm and Cozy Pattern Paper

Craft Fantastic Glass pieces
Tombow Tape Runner
Wilson Cookie Sheet

To start, measure the cookie sheet so that the pattern paper can be cut to that size.

Cut the pattern paper and the magnetic sheet to 12 x 7.

Add adhesive to the back of the pattern paper using  Tombow Permanent Adhesive Plus.  Once that is done, adhere the paper onto the magnetic sheet.

Once that is done, adhere the paper onto the magnetic sheet.

Place the large mat inside the tray.

Once that is done, create sentiment magnetics and place them on the tray.

For the notepad magnetic holder, pull use Deflecto’s VersaGrip Magnetic Sign Holder.  Take your time and pull the long metal pieces out and clip the clip to the magnetic base.

Glass magnets can be created using the magnetic craft sheets.

Nice and easy!!

Let’s take another look:

So what do you think? Would you create a magnetic tray for your home or office? I would love to hear from you.

Thanks for stopping by, I hope you were inspired here today.

Supplies used:

(Thank you so much for stopping by. Compensated affiliate links used at no cost to you.  All products were personally purchased.  This post was not paid or sponsored.)

Pebbles - Warm and Cozy Collection - 6 x 6 Paper Pad

Thanks for stopping by!

Back to School Organizing with Deflecto

Hello everyone!!  I’m here today with Deflecto’s Stackable Cube Organizer X-Divider!!!  This cube is perfect for back to school organizing.

Regular pens and pencils are always hard to find in my house.  I’m continually looking for one. (My craft supplies can’t be used for everyday writing, LOL!)  So I decided to use the stackable cube to organize all of my daughter’s excess school supplies.

Let’s take a look:

stackable cube organizer

I love how organized all of these pens, pencils, markers, and scissors look!  No one in my house can say they can’t find a pen or a pencil.  They are all in one place, nice and neat.

Take a closer look:

stackable cube organizer

Here are some fun facts about his stackable cube organizer:

  1. It’s transparent!  You can see exactly what is in this organizer.
  2. It’s perfect for pens, pencils, scissors, markers, crayons, etc.
  3. It is stackable.  It comes with clips that allow you to clip two or more cubes together.
  4. The x divider is removable.

Here’s how I decorated the organizer:

I used the Brother ScanNCut to design and cut out vinyl to add the names of each item on all four sides.

Super easy, clean, and simple.

stackable cube

So what do you think? How will you organize your back to school supplies? I would love to hear from you.

Thanks for stopping by, I hope you were inspired here today.

Supplies used:

(Thank you so much for stopping by. Compensated affiliate links used at no cost to you.  All products were personally purchased.  This post was not paid or sponsored.)

Deflecto - Stackable X Divided Clear Storage Organizer - 6 x 6         

Thank you so much for stopping by!!

Deflecto’s Caddy Wheel Base

Hello everyone!!  I’m here today with Deflecto’s Caddy Wheel Base!!!  Yes, the long awaited wheel base to go with their fabulous Caddy Organizer!!

When I saw the Caddy Wheel Base at Creativation back in January, I couldn’t wait to get my hands on one.  I could push my supplies across my living room floor without any problems. LOL!!

Lets take a look:

Caddy Wheel Base

When all my little ladies are spending time with me we craft on my living room floor so my caddy on wheels makes it easier for us to share the supplies with out making a mess.

Take a closer look:

Deflecto Caddy Wheel Base

Here are some facts about the Caddy Wheel Base:

  1. The wheels swivel that lets you move an entire stack of supplies safely and easily.
  2. It moves easily on carpet.
  3. It has a lift and lock tab that secures multiple Caddy Organizers to the Caddy Wheel Base.Deflecto Caddy Wheel Base
  4. You stack as many caddy’s as you have that your able to push or pull.
  5. Its perfect for scrapbooking crops or any craft retreat.  No table space needed.
  6. The Caddy Organizer is sold separately.

I can’t wait to get more caddies so that I can have all of my supplies all in one place.

While at Creativation, I had so much fun pushing a stack of Caddy’s around the convention floor.

Check it out:

Stacked Deflecto Caddy Organizers

That’s 6 caddy’s on the wheel base!!

Think about all of the supplies you could have in 6 caddy’s with you on a craft trip!!

So what do you think? Where will you use your Caddy Wheel Base loaded with Caddy Organizers?  I would love to hear from you.

Thanks for stopping by, I hope you were inspired here today.

Supplies used:

(Thank you so much for stopping by. Compensated affiliate links used at no cost to you.  All products were personally purchased.  This post was not paid or sponsored.)


Deflecto - Stack 'n Go - Caddy Wheel Base      Deflecto - Caddy Organizer with Small Medium and Large Compartments - White

How to Create a Calendar using Deflecto’s Pouches

Hello everyone!!! I’m here today to show you how to create a calendar using Deflecto’s Pouches.

These pouches come in a 7-3/8 x 6 inch size and are package 5 to a pack.  They can we used for tons of things: a recipe card holder, picture holder, display piece or even a banner!!

I created a flip calendar.  Lets take a look:

deflecto flexible pouch

I used 6 pouches to create this cute calendar.  Two months in one pouch.

Here’s how:

I used the Cinch to punch evenly spaced holes in each pouch.

deflecto flexible pouch

Then I created a cover and put the book to together.

Create your calendars and add them to the pouches.

Deflecto flexible pouches

Before you put all of the calendars inside their pouches, use an enamel dot to make off important dates.

Nice and simple!! I keep this calendar on my desk so that I do not miss another birthday.

So what do you think? Will you use the flexible pouches to create a calendar for yourself?  I would love to hear from you.

Thanks for stopping by, I hope you were inspired here today.

How to Display Fatherly Love with Deflecto Display Blocks

Hello, everyone!!! I’m here today to show you a how to display fatherly love with Deflecto’s Acrylic Display Blocks and Square Risers.

Father’s Day is around the corner and Dad’s are pretty easy going when it comes to gifts. At least my dad.  He is older now and just wants some peace and quit.  All of his children are all grown so its his time to rest!!  Or so he thinks, LOL!!
This year I decided to give him a gift that matches my mom’s gift.  Pictures of his grown children displayed differently.
Let’s take a look:
deflecto blocks and risers

This display will set on his desk in his room.  I can’t wait for him to see it.  He sits there to read his paper and write out his lotto numbers.  Now he will see his children there to as well.

Let’s take a look at these cute Deflecto projects closer:

First up are the Acrylic Display Blocks.

deflecto blocks and risers
  • They come in two sizes: 4 x4 and 3 x 3.
  • They are highly polished, clear solid blocks.
  • They can be used as a paper weight, a display tray or a turned into a shadow box like display (which is what I did above).

I simple adhered the photo to the back of the block and added stickers to decorate it.

Second up are the Acrylic Display Risers.

  • They come in a set of three.
  • They differ in size so that they fit right underneath each other for storage.
  • The sizes are 9″ x 5.75″, 8.50″ x 5″ and 8″ x 4″.
  • Made of heavy duty clear polished acrylic.
  • Great for displaying anything in your home or office.

I decorated them with a sticker that wasn’t to overbearing that my father would appreciate.  The display blocks fight right on top nicely.

I know my dad will be surprised by his fathers day gift.  Something different that will make him smile.

Both projects are nice clean and simple!!

So what do you think? Will you use the blocks or the risers to display items in your home or office? I would love to hear from you.

Thanks for stopping by, I hope you were inspired here today.