Altenew Whimsical Wonder Stamps/Dies/Stencils/Embossing Folders Collection Release Blog Hop + Giveaway

Hello, and welcome to Altenew Whimsical Wonder Blog Hop!! Today we are showcasing brand new stamps, dies, stencils, and embossing folders. If you arrived here from the talented Dana Joy blog, then you are on the right track. If this is your first stop, then you will want to start at the beginning, the Altenew Card Blog.

Let’s take a look at my tea pouches:Tea for Two


This stamp set is called Tea for Two.

Tea for Two

What is a blog hop without an amazing gift? Yayyy!!!

Prizes:

To celebrate this release, Altenew is giving away a $100 gift certificate to 1 lucky winner and a $25 gift certificate to 8 winners! Please leave a comment on the Altenew Card Blog and/or each designer’s blog post on the blog hop list below by 04/11/2021 for a chance to win. 

Altenew will draw 9 random winners from the comments left on each stop of this blog hop and announce the winners on the Altenew Winners Page on 04/13/2021.

Free Gift Promotion:

Here are THREE ways to get a FREEBIE to kickstart your creativity! Free gifts will be added to your cart automatically.

  • Get a FREE brand new Whimsical Wonder Stamp & Die Release Inspiration Guide (worth $5.99) with every order of high-value Whimsical Wonder release bundles. Shop HERE! *Exclusions apply.

  • Get a FREE brand new Creative Jump Start Class with every order from the new Storybook Fantasy release collection from 04/05/2021 through 04/11/2021. Shop HERE!

  • Get a FREE brand new Whimsical Wonder Stamp & Die Release Mini Inspiration Guide with every order from 04/05/2021 through 04/07/2021. Shop HERE!

Next Stop on this Blog Hop is:

Svitlana Shayevich

You do not want to miss out on her amazing creations!!

Just in case you lose your place along the way, here is the complete list of participants so that you can find your way back:

Altenew Card Blog

Nicole Watt

Jaycee Gaspar

Norine Borys

LauraJane

Emily Midgett

Verity Biddlecombe

Nathalie DeSousa

Amanda Baldwin

Laurie Willison

Terri Koszler

Amber Rain Davis

Dana Joy

Kymona Tracey

Svitlana Shayevich

Michelle Short

Maryam Perez

Simon Hurley

Agnieszka Małyszek

Tania Ahmed

Zinia Redo

Therese Calvird

Virginia Lu

Tenia Nelson

Lilith Eeckels

Reiko Tsuchida

Ardyth Percy-Robb

Carol Hintermeier

Jenny Colacicco

Joylita Dsouza

Keren Baker

Sandhya Iyer

Seeka

Teresa Litchfield

Tricia Schaden

Yoonsun Hur

Tea for Two

Supplies used:

(Thank you so much for stopping by. Compensated affiliate links are used at no cost to you. The Altenew products were given to me since I’m on the design team. The other products were personally purchased. This post was not paid or sponsored.)

Thank you so much for stopping by!

How to Create a Denim Pillow Sham with English Paper Piecing Hexagons

Hello everyone! I’m here today to show you how to create a denim pillow sham with English Paper Piecing Hexagons. Yes, I’m trying new things. The weather calls for it, LOL.

Springtime has arrived, and I couldn’t be happier. I love the smell of flowers, the birds chirping, and the warmer weather. Better weather calls for new skills and fun stuff.  Don’t you agree? So when Auriful asked their Artisans to create a project using English Paper Piecing (EPP), I was eager to learn.

So, let’s jump into English Paper Piecing.

English Paper Piecing is a hand quilting method that allows quilters to sew intricate and complex shapes with acrylic and paper templates. EPP involves using these templates to stabilize fabric before sewn together to form blocks, sewn together to make quilts, or whatever your heart desires.

It is most effective for shapes that do not have long straight sides and will require numerous set-in corners, such as hexagons.

Let’s take a look at my Denim Pillow Sham with English Paper Piecing Hexagons:

English Paper Piecing Hexagons: Finish Product


I love this!! It was therapeutic to create. Sewing by hand relaxed me so much. It went by fast too.

Creating those hexagons would be hard if the English Paper Piecing method was not used. The edges of these hexagons are nice and clean because they are neatly folded underneath.

Interesting right? Want to learn more? Great, I’m going to show you.

Here’s how you create this Denim Pillow sham with English Paper Piecing Hexagons:

Materials:

Aurifil Monofilament Thread
1-1/4 inch Hexagons Acrylic Template
1-1/4 inch Hexagons Small Pack Paper Pieces
Sewline Glue Pen & Refill
Fabric -Tilda Chambray
Clover Gold Eye Applique Needles, No. 9
Best Press Spray Starch
Iron
Denim fabric
Quilting Ruler 3 Inches
Small Cutting Mat
Rotary Cutter
16 inch Pillow Form

English Paper Piecing Hexagons: Materials

Let’s get to work:

Step One: Cutting the Hexagons

Cut 3-inch squares out of the different fabrics you choose. I cut 15.

English Paper Piecing Hexagons: Cutting out the Hexagons

I do this to make it easier to stack my fabric in smaller pieces than dealing with the entire fat quarter or yardage.

Then I stack the squares on top of each other and cut the hexagons out using the acrylic ruler.


English Paper Piecing Hexagons: Cutting out the Hexagons


Step two: Glueing the hexagon paper template

English Paper Piecing Hexagons: Glueing the hexagon paper templates

Now, place the paper hexagon template on the wrong side of the fabric and glue the sides down.

English Paper Piecing Hexagons: Glueing the hexagon paper templates

Do not let the glue touch the edge of the paper. You do not want glue on your needle.

English Paper Piecing Hexagons: Glueing the hexagon paper templates

Turn the edges over so that they stick on the glue.

English Paper Piecing Hexagons: Glueing the hexagon paper templates

Step three: Stitch them together

The fun begins now! Decide on the pattern you want to create.

English Paper Piecing Hexagons: Stitch them together

Start with two pieces and whipstitch two sides together using a small needle and Aurifil Monofilament thread. That way, you don’t see my stitches.

English Paper Piecing Hexagons: Stitch them together

Continue doing that until you have all of your pieces stitch together.

Once you’re done, take the paper out of each hexagon. They will come out with ease and stay in shape.

If you want, you can starch and iron them.

English Paper Piecing Hexagons: Stitch them together

This took me about 30 minutes to do with stopping to rethread my needle. Easy and very therapeutic to do.

Now it’s time to attach this piece to the denim fabric.

Step Four: Cut the denim fabric

The pillow form is 16 inches so cut the pillow front to 16 inches by 16 inches.

Cut two back panels to 16 inches by 10 inches. This will create the opening in the back.

English Paper Piecing Hexagons: Cut the denim fabric

Step Five: Attach hexagon to the denim fabric

You can sew this panel on the fabric, but I decided to use my sewing machine to complete the task.

Place the hexagon panel on the front of the denim front piece and pin.

English Paper Piecing Hexagons:Attach hexagon to the denim fabric

Add the Monofilament thread as the top thread in your sewing machine.

If your machine comes with an applique foot, use that. I’m using the #20C foot that comes with my BERNINA 570 QE sewing machine.

English Paper Piecing Hexagons: Attach hexagon to the denim fabric

Blanket stitch the entire piece.

Step Six: Sew the pillow sham

With the panel in place, it’s time to sew the pieces together.

For the back pieces, turn the 10-inch side over 1/2 and sew in place. Repeat for the second piece.

Place the front panel right-side up first.

Then place one of the back panels right sides down, matching the raw edges.

Now place the second-panel right-side down, matching the raw edges.

Both sewn edges should be in the middle and on top of each other.

Sew the entire pillow sham closed using a 1/2 inch seam allowance.

If your hexagons hangover, trim them off. Trim the corners to reduce bulk.

You can zig-zag the edges if you want but not needed since no one will see it.

Turn the pillow sham inside out and push out the corners.

English Paper Piecing Hexagons: Sew the pillow sham

Insert your pillow form, and you’re done!

English Paper Piecing Hexagons: Sew the pillow sham

Beautiful right!

English Paper Piecing Hexagons: Finish Product

Now it’s time to make the matching pillow. The best thing about this pillow sham is it’s WASHABLE!!!

It’s your turn now to give this project a try. Will you? I would love to hear all about it.

Supplies used:


Thank you so much for stopping by!

How to Make An in-the-Hoop BERNINA Pincushion

Hello everyone! I’m here today to show you how to make an in-the-hoop BERNINA pincushion. It is National Quilting Month, and quilters use many pins; I figured this would be a fantastic project to try out.

Pincushions are small, stuffed cushions, typically 3-5 cm across, used in sewing to store pins or needles with their heads protruding to take hold of easily, collect them, and keep them organized. They come in all forms. Today we are making small pillow pincushions.

Let’s take a look:

In the Hoop BERNINA Pincushion: Finished Product

Are you excited as much as I am? I love these pincushions. They are perfect since my favorite sewing machine is the BERNINA 570 QE!!!!

In the Hoop BERNINA Pincushion: Finished Product

Here’s how to make them:

Material:

Bernina Love Pincushion Embroidery File
OESD PolyMesh Stabilizer
Isocard Black Thread – 0020
Isocard Red Thread – 1902
Expert Point & Press Tool 
Embroidery Tape
Basting Adhesive
Polyfill

In the Hoop BERNINA Pincushion: Materials

Instructions

You will find the complete step-by-step instructions when you download the file.

Step 1: Cut fabric

Cut 2 pieces of fabric for the front and back of the pincushion.

Cut 2 pieces of fabric for the pincushion pillow form.

Cut a piece of PolyMesh stabilizer bigger than the hop.

Step 2: Prepare hoop and select the design

Hoop a piece of PolyMesh stabilizer by itself.

Select the design you want to use and load it into your machine.

Step 3: Stitch out the design

Stitch the placement line.

In the Hoop BERNINA Pincushion: Stitching out the design

Either spray basting adhesive or tape down the front fabric centered of the placement line.

Stitch out the design. Changing colors when directed.

In the Hoop BERNINA Pincushion: Stitching out the design

In the Hoop BERNINA Pincushion: Stitching out the design

In the Hoop BERNINA Pincushion: Stitching out the design

In the Hoop BERNINA Pincushion: Stitching out the design

In the Hoop BERNINA Pincushion: Stitching out the design

Step 4: Adding the pincushion backing

There are two pieces to the back of the pillow.

In the Hoop BERNINA Pincushion: Adding the pincushion backing

In the Hoop BERNINA Pincushion: Adding the pincushion backing

Fold both according to the instruction and place them down on the stitch placement lines.

Stitch the back of the pillow on.

Step 5: Finish the pincushion

Remove the project from the hoop.

In the Hoop BERNINA Pincushion: Finish the pincushion

Trim the project 1/4 inch from the seam line.

In the Hoop BERNINA Pincushion: Finish the pincushion

Turn the pincushion inside out.

Use a point turner to push the corners out.

Step 6: Sew a pillow form

Take the extra two pieces of fabric cut for the pillow form and sew them together using a 1/4 inch seam allowance.

Leave a 2-inch opening.

Turn inside out, push out the corners, and stuff with polyfill.

Stitch the opening closed and place the pillow form inside of the pincushion cover.

In the Hoop BERNINA Pincushion: Finished Product

In the Hoop BERNINA Pincushion: Finished Product

Finished!!

How amazing are these!

In the Hoop BERNINA Pincushion: Finished Product

In the Hoop BERNINA Pincushion: Finished Product

These would look so cute right up on your sewing machine. You can also make tons of these to give away to people you love.

So what do you think? Will you create your own BERNINA pincushions? I would love to know and please share your finished products.

Supplies used:

There are some compensated affiliate links used at no cost to you. 

BERNINA Pincushion

Thank you so much for stopping by!!

How to Create Flannel Floor Pillows with an Invisible Zipper

Hello everyone!! I’m here today to show you how to create flannel floor pillows with an invisible zipper.  Floor pillows, you say? Yes, I recently refinished my hardwood floor and wanted to provide my nieces and daughter with a place to sit comfortably when hanging out.

Floor pillows are easy to sew, and with a zipper, you can even wash it when it gets dirty. Now, that is a great reason to make some.

Let’s take a look at my floor pillows:

What do you think? Aren’t they cute? My nieces and daughter will enjoy these.

Let’s take a look at this fabric collection:

This cozy and soft flannel collection was created by Ben Byrd for Riley Blake Design. It comes in a palette of earth tones – green, orange, brown, navy, and parchment. Some prints have forest animals and trees.

It’s full of fun and playfulness.

Here’s how to create these pillows:

Materials:

Note: Some of the links below contain affiliate links.

Woodland Flannel Fabric
Aurifil White Thread
Pins
Cutting Mat
Ruler
Rotary Cutter 
Quilting Ruler
Matching Invisible Zipper
Pillow Form

Instructions

1/2 inch seam allowance unless otherwise noted.

Step 1: Measure Pillow Form

Measure the pillow form to determine how big you want to make your pillow cover. If you’re going to make your own pillow form, determine what size you want the pillow.

Step 2: Cut the fabric

Cut 2 pieces of the woodland fabric to the size of your pillow form.

For the orange pillow, I made the pillow form 30 inches by 30 inches. The blue pillow, the pillow form is 27 inches by 27 inches. I cut the fabric according to these measurements. 

Step 3: Mark the fabric for zipper placement

Place your zipper teeth up (remember this is an invisible zipper) at the raw edge of the fabric in the center.

With a pen, mark the fabric where the zipper teeth begin and behind the zipper stopper.

Remove the zipper.

Step 4: Prepare the zipper casing

With right sides together, sew a straight stitch to the first marked line and backstitch. Without cutting the thread, increase your stitch length to 5.0, stitch a basting stitch to the second line, and backstitch again. Without cutting the thread again, decrease your stitch length back to the original length and continue stitching to the end.

Finger press the seams open.

Find the line you drew and place the zipper back in place with the zipper teeth up. Make sure the zipper teeth are in the center.

Step 5: Sew the zipper in place

If your machine comes with an invisible zipper foot, attach that to your machine. If you only have a zipper foot, use that.

Start sewing at the beginning of the zipper tape. You want to stitch as close to the zipper teeth as possible.

Repeat on the other side of the zipper.

Note for the invisible zipper foot: when you sew the other half of the zipper, open the basting stitch so that the foot does not butt up against the zipper foot.

Once your zipper is sewn in place, open and close the zipper to ensure the fabric does not get in the way.

Step 6: Sew the pillow cover closed

Open the zipper halfway, and with right sides together, sew the three remaining sides.

Step 7: Turn and insert the pillow form

Trim the edges of the fabric if it shifted and round the corners to reduce bulk.

Turn inside out and insert the pillow form.

Enjoy your floor pillow!

How many pillows will you make? I would love to see your pillows.

 Supplies used:

There are some compensated affiliate links used at no cost to you.

 Bernina 570QE       

Thank you so much for stopping by!

Altenew Storybook Fantasy Stamps/Dies/Stencils/Embossing Folders Collection Release Blog Hop + Giveaway

Hello, and welcome to Altenew StoryBook Fantasy Blog Hop!! Today we are showcasing brand new stamps, dies, stencils, and embossing folders. If you arrived here from the talented blog, Seeka, then you are on the right track. If this is your first stop, then you will want to start at the beginning, the Altenew Card Blog.

Let’s take a look at my small pouch:

Stamping on fabric is fun, and I love to do it. You can create your own fabric pattern that no one else will have.

This is the perfect pouch for pretty pens and fabulous pencils. I love taking notes in the books that I read. Do you?

The stamp set that I used is called Tall Tale and it’s perfect for all book lovers like myself. This stamp set is one of the many great sets from today’s release.

What is a blog hop without an amazing gift? Yayyy!!!

Prizes:

$300 in total prizes! To celebrate this release, Altenew is giving away a $50 gift certificate to 2 lucky winners and a $20 gift certificate to 10 winners! Please leave a comment on the Altenew Card Blog and/or each designer’s blog post on the blog hop list below by 03/15/2021 for a chance to win. Altenew will draw 12 random winners from the comments left on each stop of this blog hop and announce the winners on the Altenew Winners Page on 03/17/2021.

Next Stop on this Blog Hop is:

Teresa Litchfield

You do not want to miss out on her amazing creations!!

Just in case you lose your place along the way, here is the complete list of participants so that you can find your way back:

Altenew Card Blog

Laura Bassen

Jaycee Gaspar

Amanda Baldwin

Emily Midgett

LauraJane

Nicole Watt

Vicky Papaioannou

Norine Borys

Nichol Spohr

Erum Tasneem

Jennifer McGuire

Therese Calvird

Yoonsun Hur

Svitlana Shayevich

Barb Engler

Virginia Lu

Michelle Short

Lilith Eeckels

Terri Koszler

Tania Ahmed

Jenny Colacicco

Laurie Willison

Seeka

Kymona Tracey

Teresa Litchfield

Reiko Tsuchida

Karen Brown

Amber Rain Davis

Rachael Shedeed

Maryam Perez

Tenia Nelson

Katrina Howe

Agnieszka Małyszek

Keren Baker

So what do you think? Would you create your own stamp fabric then turn it into something beautiful? I would love to see it.

Supplies used:

(Thank you so much for stopping by. Compensated affiliate links are used at no cost to you. The Altenew products were given to me since I’m on the design team. The other products were personally purchased. This post was not paid or sponsored.)

Thank you so much for stopping by,

How to Create a Quilted Candy Pouch Tutorial

Hello everyone!! I’m here today to show you how to create a cool quilted candy pouch that seems to be all the craze on my Instagram feed.

These pouches are easy to make and involves some quilting which is always fun. My daughter and nieces love when I make these for them. People think they have candy in them, but they don’t. They keep their money, phone, and whatever young ladies carry in their bookbags.

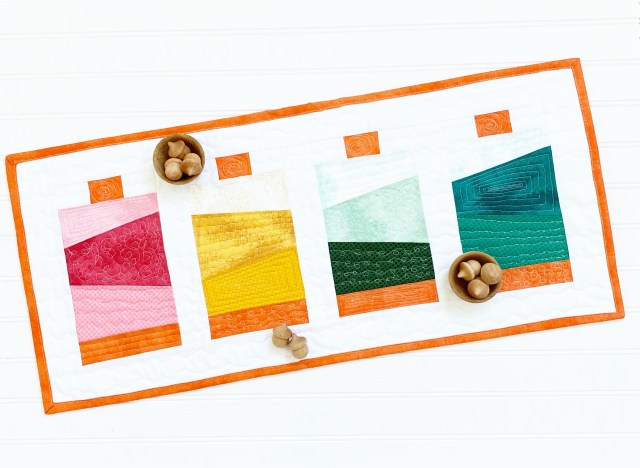
Take a look at these cute candy pouch:

Candy Pouch: Finished Product


Cute right?  We think so over here.

Here’s how you make it:

Materials:

Your Favorite Candy Bag
Thermoweb HeatnBond Vinyl
Aurifil Thread 2024
Quilting Ruler
Cutting Mat
Rotary Cutter
Lining Fabric
Batting
Plastic Zipper
Sew Machine

Candy Pouch: Materials

Step one: Cut the candy bag

The bag’s size is determined by how much you cut off the sides, top, and bottom.

I cut very little to preserve most of the bag.

This candy bag has a sealed side that is about half an inch wide. I cut right up against that on both sides. I’m starting with the right side.

Candy Pouch 5: Cut the candy bag

Candy Pouch 5: Cut the candy bag

I cut the left side, but I didn’t cut far enough.

Candy Pouch 5: Cut the candy bag

So I cut again, this time only a slither.

Candy Pouch 5: Cut the candy bag

Now it’s open.

Candy Pouch 5: Cut the candy bag

The top of this bag has the ziplock seal, so do the same and cut right below that.

Candy Pouch 5: Cut the candy bag

The bottom is a bit tricky because it has a square bottom so that it could stand up. So we have to be careful how we cut this. Remember we want to save most of the bag.

Start by cutting a slither at the bottom. It will separate the front and bag of the bag.

Candy Pouch 5: Cut the candy bag

Next, open the bottom to make sure the cut opened the bottom of the bag.

Candy Pouch 5: Cut the candy bag

Once you see the cut, take your time and use a scissor and cut the bottom off at the corners where they met.

Like this, repeat on the three remaining sides.

Candy Pouch 5: Cut the candy bag

Congrats, you have a front and bag panel to make your bag.

Candy Pouch 5: Cut the candy bag

Step Two: Apply vinyl

Lay the top of the candy bag on top of the vinyl and cut the vinyl bigger than the candy bag.

I do this just to make sure the entire candy bag is covered.

Candy Pouch: Apply Vinyl

Peel the paper off of the vinyl and adhere the vinyl to the front of the candy bag.

Candy Pouch: Apply Vinyl

Cut the excess around the edges off. Make sure you do this before you move onto the next step. You will make a mess of your ironing board if you don’t.

Candy Pouch: Apply Vinyl

This is where the magic happens!

Place the paper backing you peeled off back on top of the vinyl cover candy bag, and heat set it.

Follow the manufactures instructions.

Candy Pouch: Apply Vinyl

You now have a sewable candy bag front and back!!

It’s Sewing Time!!!

Step Three: Create a Quilt Sandwich

Place the candy bag front on top of the lining fabric and cut a piece bigger than the candy bag.

Candy Pouch: Create a quilt sandwich

Cut a piece of batting that will sandwich between the front and the lining. You want to see all three layers.

When you quilt this, the layers might shift, you want to make sure you catch all of the layers that is why we cut each layer bigger than the first. Repeat for the back of the bag.

Candy Pouch: Create a quilt sandwich

Step Four: Quilt both pieces

Place the quilt sandwich under the presser foot lining up the right edge of the candy bag with the presser foot’s edge.

I used my patchwork foot because it’s easier for me, and that is what was attached to my machine at the time.

Candy Pouch: Quilt both pieces

Once the first quilted line is down, I attached the ruler guide to equally space out the lines.

If you don’t have a ruler guide, you can use the presser foot as the guide. Just line the right edge up with the previous line to ensure accuracy.

Quilt the entire front and repeat for the back.

Excellent, now you have two quilted pieces.

We are in the home stretch now.

Step 5: Sew the bag

Trim all four edges. Repeat for the second piece.

Make sure both pieces are the same size.

Candy Pouch: Sew the bag

Now you can measure the top of the bag to determine what size zipper you should use.

My bag measured 7 7/8 inches by 8 1/8 inches.

I used a 12-inch zipper. I didn’t have anything smaller.

Candy Pouch: Sew the bag

I prepare my zippers by folding back the zipper tabs in the front and sewing them in place.

Candy Pouch: Sew the bag


Candy Pouch: Sew the bag

I unzip the zipper so that I don’t have to worry about the zipper pull.

I place the zipper face down on the top of the candy bag, lining the zipper’s edge to the edge of the bag.

Candy Pouch: Sew the bag

After you sew the zipper in place, close the zipper. Fold the closed zipper back so that the top of the bag folds back like the picture below.

Candy Pouch: Sew the bag

Use your hand to press the front of the backdown. You would normally iron this, but you can’t because of the vinyl.

Topstitching will keep the bag folded at the top.

Place the edge of the presser foot up against the fold and stitch straight down. You can change your stitch length but remember to change it back before you sew the other side of the bag.

Candy Pouch: Sew the bag

Place the front of the bag, right sides together with the back of the bag.

Line the zipper edge with the edge of the back panel of the bag. Make sure the right side edge of the bag is lined up as well.

Candy Pouch: Sew the bag

Stitch the zipper in place.

Candy Pouch: Sew the bag

As you get closer to the zipper pull, lift the presser foot with the needle down and pull the zipper pull out of the way. Continue stitching to the end.

Candy Pouch: Sew the bag

Fold the zipper back to create the fold on the top of the back of the bag.

Candy Pouch: Sew the bag

Topstitch this side of the bag.

Candy Pouch: Sew the bag

This is what your bag should look like now.

Candy Pouch: Sew the bag

Open the zipper half-way at this point. Make sure you do not skip this step. If you do, you will sew the bag shut. 

Now, fold the bag right sides together and sew from one side, around the bottom, and back up to the top—backstitch at the beginning and the end.

Candy Pouch: Sew the bag

Step Six: Clean up and turn inside out

At this point, if your zipper extends out, cut it off.

Candy Pouch: Sew the bag

Candy Pouch: Sew the bag

Cut corners and trim the edges if they don’t match up.

Candy Pouch: Sew the bag

Now turn the bag inside out.

Candy Pouch: Sew the bag

You will have to play with the corner a bit because of the vinyl touching each other. Just take your time and ease it out.

Candy Pouch: Sew the bag

Done!!! Now it’s your turn to make one!

Here are other bags I’ve made:

Candy Pouch: Finished Product

Candy Pouch: Finished Product

Candy Pouch: Finished Product

What do you think? Will you make a couple for yourself, family, and friends. Let me know.

Supplies use:

Bernina 570QE

Thanks for stopping by,


How to Decorate a Pouch using Different Thread Weights

Hello everyone! Today I’m going to show you how to decorate a pouch using different weight threads.

When I first started sewing, I had no clue thread came in different weights. I thought all thread was the same until I was introduced to Aurifil.

What a game-changer!

Let’s look at my decorated pouch:

Decorate Pouch with Different Thread Weights: Finished Product

The flowers sewn onto the pouch are all created by the same color but in different weights.  Yes, the weight makes a difference.

I used four different weights when making this pouch. I used natural white (2021) in the following weights: 28 wt, 12 wt, 40 wt, and 50 wt.

Decorate Pouch with Different Thread Weights: Finished Product

Let’s explore some more:

28 wt (gray spool):

It’s the second heaviest weight thread that Auriful offers and is perfect for projects such as hand applique, blanket stitch, Machine embroidery, and quilting.

12 wt (red spool):

The heaviest weight thread Aurifil offers are perfect for hand embroidery, embellishments, Sashiko, and machine art quilting.

I love how thick this thread is. Perfect for Sashiko stitching which I love.

40 wt (green spool):

Is a slightly thicker weight and is used for sewing bags, garments topstitching, and machine applique. This is slowly becoming my favorite.

50 wt (orange spool):

This is my go thread for everything, which might change. It a strong and thin thread that is flat and leaves crisp seams. It’s used for almost everything, such as EPP, machine embroidery, whole cloth, mico quilting, and needle turn applique. I love how this thread sinks into the material.

After using all of these different weights, I now understand what they look like together and will let out and try them instead of always reaching for the 50 wt.

Decorate Pouch with Different Thread Weights: Finished Product

Stitching the design:

Decorate Pouch with Different Thread Weights: Materials

  1. Thread the top thread with one of the three threads: 12 wt, 28 wt, or 40 wt.
  2. Load the bobbin with the 50 wt thread.
  3. Decide on a decorative stitch that comes with your sewing machine. On the BERNINA 570 QE, I used decorative stitch 1108.
  4. With each new decorative stitch, I switch out the different weight threads.
  5. Once the stitching is completed, make the pouch.

Decorate Pouch with Different Thread Weights: Finished Product

Such an amazing layer of texture from the different thread weights. What is your favorite thread weight? What are you most comfortable using? Is there a weight that you would love to try? I would love to hear all about it.

Supplies used:

There are some compensated affiliate links used at no cost to you. 


Thank you so much for stopping by,

The Garment District is in my Hometown

Hello everyone!! Did you know the garment district is in my hometown? Yes, I live in NY and love that there are a million and one fabric shops right at my fingertips. This brings me to why I’m here today. I wanted to show you an awesome garment district project that I had so much fun making.

Have you ever tried foundation paper piecing (FPP)? Well, let’s say it was a mind-blowing experience. This was my first time trying, and I’m totally sold. It’s an easy way to complete any project.

Let’s take a look at my mini quilt:

Garment District: Finished Product

Let’s take a look at this fabric kit:

The garment district quilt is one in a series of New York Mini Quilt Series named after some of Christopher Thompson, the designer of these series, favorite neighborhoods where culture, art, and the latest food collide. He did an amazing job on this design.

It’s full of four bright colors with an ombre look.

Here’s how to create this quilt:

Materials:

Note: Some of the links below contain affiliate links.

Garment District Mini Quilt Kit
Aurifil White Thread
Pins
Cutting Mat
Ruler
Rotary Cutter 
Quilting Ruler
Foundation Piece Paper

Garment District: Materials

Step 1: Print the pattern pieces

Print out each of the four foundation paper pieces on separate pieces of paper.

Step 2: Cut the fabric according to the pattern

Cut out each piece of fabric according to the pattern.

Garment District: Cut the fabric

Garment District: Cut the fabric

Step 3: Start the foundation paper piecing

Use a light source to place each piece of fabric on their coordinating number. Place one and two first and sew on the line that connects the two.

Garment District: Start foundation paper piecing

With the fabric in place sew on the line.

Garment District: Start the foundation paper piecing

Cut the excess fabric piece at 1/4 inch.

Garment District: Start foundation paper piecing

Repeat for each of the four pieces.

Step 4: Sew the pieces together

Follow the pattern directions on how to sew each piece together.

Garment District: Start the foundation paper piecing

Step 5: Quilt the top

Sandwich the top, batting and back to be quilted.

You can use gloves to help with the quilting,

Garment District: Quilt the top

or gripper rings. Which over is most convenient.

Garment District: Quilt the top

Step 6: Add Binding

Now it’s time to add the binding to the quilt.

Garment District: Add Binding

Now the Garment District Mini Quilt is done.

Garment District: Finished Product

Garment District: Finished Product

Garment District: Finished Product

Garment District: Finished Product

Garment District: Finished Product

Garment District: Finished Product

Foundation Paper Piecing is so much fun and easy to do. I love the look of the sharp corners. Would you give this a try? I would love to see your mini quilt.

Supplies used:

There are some compensated affiliate links used at no cost to you. 

Bernina 570QE       
Thank you so much for stopping by!

Embroidered Denim Tote Blank

Hello everyone!! February is here, and I’m pretty excited about it. There are so many things happening this month. It’s Black History Month, Valentine’s Day is in a couple of days, and it’s also National Embroidery Month.

I have so many projects in store for this month. Today, I’m sharing my brand new embroidered denim tote. It looks so cute, and it’s pretty simple to do.

Take a look at my Embroidered Denim Tote:

Live in the Moment: Finished Product

Embroidery adds character to any simple item. I love the white on dark blue.

Here’s what you need:

Materials:

Live in the Moment File
White Isacord Thread
OESD Heavy Weight Tear Away Stabilizer
OESD Expert Embroidery Scissors
Dime Target Stickers
Denim Tote Blank
Embroidery Machine
Sewing Machine

Live in the Moment: Materials

Here’s how to make this denim tote:

Step one: Download the design

Download the design in the file format that your embroidery machine uses. I’m using my Ricoma EM1010, so I downloaded the DST file format.

Step two: Hoop the tote and stabilizer

This denim tote is perfect for this project because the side seams are open, so you can hoop it with ease.

To find the center, fold the tote in have on the long side and the short side and creased the seams.

Place a sticker where the two folds met.

Use the crease lines to line up the arrows on your hoop (in my case, the holes) to make sure the fabric is centered in the hoop.

Live in the Moment: Hoop the tote and stabilizer

Attach the hoop to the machine.

Step three: Export and set up the machine

Export and set up the machine to get ready to stitch the design.

Make sure the needle is positon right above the sticker to make sure it’s centered.

Trace out the design to make sure the presser foot will not hit the hoop.

Step four: Stitch out the design

Since this design was set up to use one color, press start, and the embroidery machine will do the rest.

Live in the Moment: Stitch out the design

Live in the Moment: Stitch out the design

Step Five: Unhoop and clean up the design

Now it’s time to unhoop the blank and clean it up.

Since it’s a tote, just take your time and tear the stabilizer around the design, leaving the stabilizer inside the design.

Cut the threads that you see.

Step Six: Sew the side seams

Iron the tote.

Turn the tote inside out and sew the side seams; remember to backstitch at the beginning.

Done! Your tote is ready to go.

Live in the Moment: Finished Product

This tote is perfect to give as a gift or keep as your own.

Supplies used:

There are some compensated affiliate links used at no cost to you. 

Ricoma Embroidery Machine EM 1010    Bernina 570QE

Thank you so much for stopping by!

Hugs and Kisses Embroidered Tea Towels

Hello everyone! Happy New Year to all of you! I’m so happy to see all of you in 2021. I’m here today to share my new Hugs and Kisses Embroidered Tea Towels.

I know it’s just January, but Valentine’s Day is really right around the corner. So, why not get ready, now? Why not decorate the house with cute valentine’s day decor or dress up with love on your mind. For the next couple of posts, I will share with you a bunch of different Valentine’s Day goodies.

Ready? Let’s go!

Take a look at my Hugs and Kisses Embroidered Tea Towels:

Hugs and Kisses Embroidered: Finished Product


I love how these turned out. The colors are amazing and I love how they aren’t the traditional red and white either. These will look great in any home.

Here you go:

Materials

Hugs and Kisses Embroidery File
OESD PolyMesh CutAway White
OESD Expert Embroidery Scissors
Isacord Thread Corsage 1840
Isacord Thread Baccarat Green 5115
Isacord Thread Bright Ruby 2300
Isacord Thread Black 0020
Dime Target Stickers
Ricoma EM1010
Tea Towel Blanks

Here’s How to Make Them:

Step one: Download the design

Download the design in the file format that your embroidery machine uses. I’m using my Ricoma EM1010 so I downloaded the DST file format.

Step two: Adjust the design size and orientation to fit your hoop

I want the design to stitch out in the middle of the tea towel, I adjusted the size to fit the middle section of the tea towel.

I also turned my design upside down so that it will stitch out in the correct orientation. That is because I want the excess tea towel to fall in front of the bobbin case, not behind it.

Step three: Export the design

Depending on the embroidery software your using, export the design to your flash drive according to that software instruction.

Step four: Hoop the tea towel

Hugs and Kisses Embroidered: Hoop the tea towel

Decide on where you want the design to stitch out.

Find the center of the area by folding the tea towel in half longways and by the short side.

Hugs and Kisses Embroidered: Hoop the tea towel

I use sticker dots instead of making the center with a pen. It’s removable and does not leave a mark at all.

Hugs and Kisses Embroidered: Hoop the tea towel

Place the bottom of the hoop down first. Then place the Polymesh stabilizer on top of that.

Hugs and Kisses Embroidered: Hoop the tea towel

Next up is the tea towel, take your time as to not move the stabilizer, and place it straight and even. The last step is to place the top of the hoop over the sandwich, lining up the fold markings on the tea towel with the markings on the hoop.

Hugs and Kisses Embroidered: Hoop the tea towel

Do not pull or stretch the towel because that could cause the stitches to pucker.

Make sure the stabilizer is hooped on all sides.

Step five: Stitch out the design

Set the machine to stitch out the design according to your machine’s instructions.

Hugs and Kisses Embroidered: Stitch out the design

Having a multi-needle machine makes it easier to do a thread color change with ease.

Hugs and Kisses Embroidered: Stitch out the design

Hugs and Kisses Embroidered: Stitch out the design

Totally amazing design! It looks amazing on this white tea towel.

Hugs and Kisses Embroidered: Stitch out the design

This design has over 20,000 stitches and it took 30 minutes to stitch out at a speed of 750.

Step Six: Unhoop and clean up the design

Now it’s time to unhoop the tea towel and clean it up.

Hugs and Kisses Embroidered: Unhoop and clean up the design


Since a cut-away stabilizer was used, now it’s time to cut the excess away and cut the threads.

Hugs and Kisses Embroidered: Unhoop and clean up the design

Hugs and Kisses Embroidered: Unhoop and clean up the design

Now that is done, the tea towel is ready for use!

Let’s take another look:

Hugs and Kisses Embroidered: Finished Product

Just in case you don’t know what tea towels are used for, here’s a list:

  1. Give them as a gift
  2. Wrap baked goods or gifts
  3. Line your serving tray
  4. Decorate the table
  5. Use as a hot pad or as a potholder
  6. Store your clean, wet dishes
  7. Drying dishes
  8. Replace paper towels
  9. Repurpose them (next blog post)

So what do you think? Will you create your own embroidery tea towels? I would love to know and please share your finished products.

Supplies used:

There are some compensated affiliate links used at no cost to you. 

Be Mine Ricoma Embroidery Machine EM 1010

Thanks for stopping by!