Technique Tuesday meets My Sweet Petunia Blog Hop + Giveaway

Hello everyone and welcome to Technique Tuesday and My Sweet Petunia Blog Hop!! Today we are showcasing some of Technique Tuesday’s stamp sets and My Sweet Petunia MISTI. If you arrived here from the talented Kia Gibson-Clapper blog, then you are on the right track. If you arrived here on your own, then you will want to start at the beginning, Teri Anderson’s amazing blog so that you don’t miss a thing!

Take a look at my card:

What a Guy stamp set

The MISTI makes repeat stamping so easy and fun to do. It has changed the stamping world tremendously. Paired with Technique Tuesday stamps, creating cards are so easy.

Here’s how I created this card:

Cut the card base to 4.25 by 11, scored at 5.50.

Place the card base into the MISTI bottom right hand corner.

Place Technique Tuesday What a Guy nail stamp where you want to start stamping.

Ink up the stamp with Versamark ink and close the door.

What a guy

Repeat stamping along the left side of the card, turning the nail stamp around.

Set the base card aside.

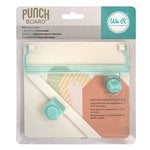
Create a gift tag using We R Memory Keepers Tag Punch Board.

Tag Punch Board

Decide on the sentiment and place the tag into the MISTI.

Figure out the place of the sentiment by placing the stamps on the tag.

Close the door and the stamps are set.

Ink up the stamps with Altenew Crisp Permanent Black Ink and stamp.

Repeat the stamping if the stamp isn’t as crisp as you like.

What a guy stamp set

Stamp the nail stamp 2 more times on the same color cardstock as the card base and die cut it with Altenew Mini Blossom die cutting machine.

Mini Blossom Die Cutting Machine

Attach the die cut nails to the tag.

Add a brad to the tag and attach the tag to the card base bottom right hand corner using 3M double-sided foam tape.

Done!

Let’s take another look:

What a guy stamp set

Amazing!!

What is a blog hop without an amazing gift? Yayyy!!

Prizes

  • We are giving away a $50 shopping spree from Technique Tuesday and a $50 shopping spree from My Sweet Petunia to TWO lucky winners! Please leave a comment on all of the blogs included in the blog hop by Monday, May 28th, at 11:59pm CDT for a chance to win. The winners will be announced on Technique Tuesday and My Sweet Petunia blog on Tuesday, May 29th, 2018.

    Next Stop on this Blog Hop is the:

    Ceal Pritchett

You do not want to miss out on her amazing creations!!

Just in case you lose your place along the way, here is the complete list of participants so that you can find your way back:

Supplies used:

(Thank you so much for stopping by. Compensated affiliate links used at no cost to you.  The Technique Tuesday products were given to me since I’m on the design team.  The other products were personally purchased. This post was not paid or sponsored.)

what a guy  MISTI Stamping Tool - The Most Incredible Stamp Tool Invented We R Memory Keepers - Tag Punch BoardMini Blossom Die Cut Machine black ink  

Thanks for stopping by!!

Christmas – Where Creativity Meets C9

Hello everyone!!  I’m here today with the Where Creativity Meets C9 Blog Challenge Design Team!! Our challenge this month is Christmas!!

Take a look at my tag:

For this tag, I used Concord & 9th Ornamental Dies. I die cut three red pieces and one white piece.  I used the additional die pieces to emboss the front of one of the red pieces.

Once all of the pieces are cut, put the ornamental tag together using Tombow Xtreme Adhesive.

To finish the tag off, add some glitter to the front of the tag and add sweater ribbon.

Lets take a look inside.

I love how this tag turned out!!  Nice and simple!!

What do you think?  Please let know below.

I can’t wait to see how you interpret our challenge theme this month.

c9-banner

Did you know that we have a giveaway going on? Yes, we do!! Our sponsor Concord and 9th is giving away a $25 gift certificate to their shop!!  Yes!!!  Isn’t that big.  Plus the winner gets to be a guest designer for a future challenge.

Here’s how: Create a project using Concord and 9th and upload it on the Where Creativity Meets C9 blog by the 29th of every month of for a chance to win.  A random winner will be chosen and it could be you!!

Are you ready?  So, go and create!!

Please don’t forget to follow Where Creativity Meets C9 on Facebook, Instagram and the Blog.

Supplies used:

(Thank you so much for stopping by. Compensated affiliate links used at no cost to you.  All products were personally purchased.  This post was not paid or sponsored. ) 
Ornamental dies

{Clean and Simple} – Cake

Hello everyone!!!  It’s CASology Tuesday!!  We are back with another Clean and Simple Cue Card just for you!!

This week’s cue card:

Take a look at my card:

Right at Home Sweet Birthday Stamp set

For this card, I wanted a fun card shape since the cue card is cake.  So I used Pretty Pink Posh Scallop Circle Tag die to cut out two pieces of watercolor paper.

Scoring the second die at the top of the tag and adding adhesive will allow you to create a card.

Stamp the the cake image from Right At Home Sweet Birthday on the front and the sentiment inside the card using Colorbox Jet Black Ink.

Right At Home Sweet Birthday Stamp set

I used Jane Davenport Mermaid Markers to watercolor in the image.

Cards in all sizes are fun!!!

Nice, simple and easy.  What do you think?  Are you inspired to play along?  Please let me know below!

For more inspiration, check out my fellow Design Team members blog for more awesome work.

Deidre Payne

Hannelie Bester

Hazel Hodgkins

Jacquie Southas

Janet Ribet

Jen Wills

Joyce Mehrberg

Judy Marino

Kymona Tracey

Melissa Chipperfield

Rachel Bergfeld

Sherrie Mannion

Guest Designer

Claire

Supplies used:

(Thank you so much for stopping by. Compensated affiliate links used at no cost to you.  All products were personally purchased.  This post was not paid or sponsored.)

Right At Home SWEET BIRTHDAY Clear Stamp SBJULY16*

Thank you so much for stopping by!!

How to Create a Sprinkle Turnabout Gift Bag

Second Post for the today
If your looking for the Altenew Baby Mini Album, click here

Hello everyone!!  I’m here again showcasing the Sprinkles Turnabout Stamp set  and the Sprinkles Tag Set from Concord & 9th as apart of their 2nd Birthday Celebration!!

Lets take a look:

Concord & 9th Sprinkled with Love

Yes, I created a gift bag using the Sprinkles Turnabout stamp set and the Sprinkles Tag Set!

I love how this cute little bag turned out.

Concord & 9th Sprinkled with Love die


Here’s how I created it:

The tag:

  • Using the Sprinkles Turnabout stamp create the sprinkle pattern on a piece of white cardstock, with 4 different ink colors. Note: Follow the direction on the back of the package to line up the stamp perfectly to get the even pattern.
  • Stamp the sentiment in the center of the pattern with black ink.
  • Ink up the stamp again this time using Versamark ink and sprinkle black embossing power over the sentiment.
  • Heat set the powder for a raised intense sentiment.
  • Use the Sprinkles Tag die to cut out the tag.
  • Use We R Memory Keepers Power Punch to punch a hole at the top of the tag.

The bag:

  • Create the bag with We R Memory Keepers Box Punch Board.
  • Before folding the bag, use the small sprinkle stamp and Versamark Ink to create sprinkles all over the bag.
  • Sprinkle clear embossing powder on top and heat set.  This gives the image a translucent look.
  • Use ribbon to close the bag and attach the tag.  Once the bow is tied, run a piece of string under the bow and attach a couple charms.

Pretty amazing to see how a stamp set can transform a piece of cardstock.

So, what do you think?  Will you use the Sprinkles Turnabout stamp set and die to create a couple of gift bags?  Let me know.  I would love to hear from you.

Supplies used:

(Thank you so much for stopping by. Compensated affiliate links used at no cost to you.  All products were personally purchased.  This post was not paid or sponsored.)

Sprinkles Turnabout Stamp Set Sprinkles Tag dies We R Memory Keepers - Gift Box Punch BoardRed sunset ink Hero Arts - Embossing Powder - Detail Black We R Memory Keepers - Crop-A-Dile - Power Punch - 1/4 Inch Hero Arts - Embossing Powder - Clear

Thank you so much for stopping by!!

Rubber Dance Stamp July 2017 Theme Challenge

Hello everyone!!  I’m here today with the Rubber Dance Stamp for the last time as a design team member!!  I had so much fun being on this team.  I’ve learned so much from the talented ladies on this team.  Their creativity is endless and beautiful and for that I’m grateful for the opportunity to work along side of them.

So Bibi, Susanne and the entire team – Thank You from the bottom of my heart!  I have a love for mixed media and can’t wait to play along with your challenges as a participant.

Now onto today, July 2017 Theme Challenge!

rubber dance stamps

Take a look at my tag:

Rubber Dance Stamps Beautiful Bugs

I had so much creating this tag.  I recently took an online class that taught me about the color wheel and how to use colors.  I created a postcard size switch using three colors next to each other.  I used blue, green and yellow green.

When I saw the theme for this challenge I knew I wanted to use this postcard.

Using Neat and Tangled Scalloped Die set cut out the tag.

Using the Mini Misti, stamp the Dragonfly and the sentiment from Rubber Dance Stamps Beautiful Bugs and Something Wonderful stamp set using black ink.

Rubber Dance Stamps Something Wonderful

Then use We R Memory Keepers Crop-A-Dile Power Punch to punch a hole in the tag.

Now it time to get the ribbon colored.  Using Tim Holtz Crinkle Ribbon, cut three pieces.

Spray them with Altenew Ink Spray Ocean Wave, Frayed Leaf, and Warm Sunshine. Crinkle in your hand and then dry it with a heat tool.

Add them to the tag and your done.

Crinkled Ribbon

I love how this turned out and I love that is is my last project as a member of this team.

What do you think?  Please let me know below.  I would love to hear from you.

Guess what!!!  If you like this stamp set or any other stamp set from Rubber Dance Stamp, use coupon code: KTFreeShip for free shipping!!  YES, Free Shipping.

Now onto the challenge prizes!

The winner will win five fabulous stamps fromRubber Dance Stamp!! Wait, if the winner used stamps from Rubber Dance Stamp, they will winner another five stamps! That’s a total of 10 stamps!! Wow!!!

You have until July 31, 2017, midnight Central European Time.  Which is 6:00 PM, July 31, 2017!! Please pay attention to this time. Here in NY, we are 6 hours behind Norway! 

Supplies used:

(Thank you so much for stopping by. Compensated affiliate links used at no cost to you.  All products were personally purchased.  This post was not paid or sponsored. ) 

rubber dance stampsrubber dance stamps something wonderful We R Memory Keepers - Crop-A-Dile - Power Punch - 1/4 InchMini MISTI - Most Incredible Stamp Tool InventedNeat and Tangled SCALLOPED Die Set Tim Holtz Idea-ology CRINKLE RIBBON TH93020 ink spray

Thank you so much for stopping by!


Rubber Dance Stamp February 2017 Theme Challenge

Hello everyone!! I’m here today with the Rubber Dance Stamp Theme Challenge!!

The theme is “Lots of Layers”!  All you have to do is create a piece of work that has a lot of layers.

Check out what I created to inspire you:

love-rds

I tried to keep my tag pretty simple since that is more my style, but I also wanted to play around with some mixed media.

Are you asking yourself, where are the layers?  I was hoping that you would ask.

Here you go:

  1. I add gesso on the top of the tag and let it dry.
  2. Then I blended Distressed Ink Mustard Seed, Spiced Marmalade, Fired Brick and Seedless Preserve.
  3. After that, I used Rubber Dance Stamps Round in Circles stamped paired with StazOn Jet Black Ink to stamp the circles.
  4. Then I used the Rubber Dance Stamps Think Again stamp set to stamp the sentiment with the StazOn Ink.
  5.  To finish the tag off, I colored the Crinkle Ribbon with Mustard Seed reinker and added it to the tag.

Thats four layers!!! Yayyy!

What do you think? Please let me know below. I would love to hear from you.

The winner will win five fabulous stamps fromRubber Dance Stamp!! Wait, if the winner used stamps from Rubber Dance Stamp, they will winner another five stamps! That’s a total of 10 stamps!! Wow!!!

You have until February 28, 2017, midnight Central European Time.  Which is 6:00 PM, February 27, 2017!! Please pay attention to this time. Here in the US is a day behind Norway! 

Supplies used:

round-in-circles  think-again

Thank you so much for stopping by!

~Kymona

Hero Arts Shaker Tag – a2z Scrapbooking December 2016 Challenge

Hello everyone!!  I’m here today with a a2z Scrapbooking Challenge. The theme this month is Anything but a Card!!

anthing-but-a-card-banner

Take a look at my tag:

img_8128

Here is how I created this tag:

I gather all of my supplies needed to create a tag:  Hero Arts Joyful Tiding Tag Set, Hero Arts Raspberry Ink, Hero Arts Black Ink, Lucy Abrams Ivory Sequin, We R Memory Keepers Fuse Tool, We R Memory Keepers Photo Sleeves,  and Tombow Mono Adhesive Plus, We R Memory Keepers Crop-a-dile and a ColorBox Art Dauber.

I die cut three tags so that I could stack them on top of each other.  Then I used the sponge dauber to add some color using the Hero Arts Raspberry Jam Ink.

happy-holiday-tag-supplies-a2z

Once the top tag was inked to my liking, I adhered the two additional tags with Tombow Mono Adhesive Plus.

happy-holiday-tag-stacking-a2z

happy-holiday-tag-3

Once all of the pieces were in place, I used the Mini MISTI to stamp the sentiment on the tag.


happy-holiday-tag-stamping-a2z

Now the tag is ready to become a shaker.

happy-holiday-tag-together-a2z

I gathered all of the supplies need to create the shaker portion of the tag.

You need a We R Memory Keepers Fuse Tool, We R Memory Keepers Fuseable Photo Sheets.

happy-holiday-tag-fuse-a2z


Place the finished tag inside the plastic and line the die up over it.  Use Washi tape to hold it down.  Then you want to glide the fuse tool around the die, sealing it.

happy-holiday-tag-fusing-2-a2z

Once you add the sequin is added inside, seal the top of the tag the same way you did the body of the tag.

Punch a hole using a We R Memory Keepers Crop-a-dile and string a piece of string.

Nice and easy! Super cool to create!

img_8128

What do you think? I would love to hear what you think below.

I hope you love what you see and that it inspires you to join us this month. You have the entire month to create a new project and enter it into our challenge. By entering you will have a chance to win a $25 Gift Certificate to the a2z Scrapbooking Store. Winner will be announced on the 7th of September.  Good Luck!

If you would like to purchase any Hero Arts products please head on over to the store and use the coupon code KYMONA15 to get 15% off your purchase.

Supplies used:

ha-joyful-tidingha-raspberry-inkTombow Permanent Adhesive Plusivory-sequin

Thanks for stopping by!

~Kymona

Stencil Tag – a2z Scrapbooking September 2016 Challenge

Hello everyone!!  I’m here today with a new a2z Scrapbooking Challenge. The theme this month is Make It A Tag!! 

Take a look at the card I created:

Hello Tag (a2z)

I used Hero Arts Asian Flower Pattern Stencil and Distress Inks (Scattered Straw, Fossilized Amber, Spiced Marmalade and Barn Door) to create the background on the white tag that I cut out by hand.

Then I used Hero Arts Hello Stamp and Cuts set to cut out the word hello and adhered it to the front of the tag with Tombow Mono Multi Liquid Glue. After that I stamped the rest of the sentiment underneath the die cut.

I added a white ribbon to the top of the tag to finish it off.

Super, super easy to create.

What do you think?

I hope you love what you see and that it inspires you to join us this month. You have the entire month to create a new project and enter it into our challenge. By entering you will have a chance to win a $25 Gift Certificate to the a2z Scrapbooking Store. Winner will be announced on the 7th of September.  Good Luck!

If you would like to purchase any Hero Arts products please head on over to the store and use the coupon code KYMONA15 to get 15% off your purchase.

Supplies used:

HA Asian Flower Pattern StencilHA Hello Stamp and Cutheavyweight cardstockTombow Multi-Purpose AdhesiveDistress Ink Scattered Straw

Thank you so much for stopping by!

~Kymona

CS Take It Make It: Using Different Inks

Hello everyone!! I’m here with CS Take It Make It: Take a Technique Challenge for June.

Our theme is Take a Technique: Lets Get Inky!!

For this month’s challenge the technique we would like you to use more then one type of ink on your project (ink pads, ink sprays, stains, acrylic inks, etc.)  Or more then one color of ink on your project…and don’t forget to include stamping somewhere too!!

This should be super fun to see what you come up with.

Take a look at my tag:

Hello Tag (TIMI)

I have to admit I’m super excited about this tag.  I don’t usually create tags, much less one with all of this ink on it, but I have to say I really had fun creating this tag.

Let’s check out how I created this:

I gather my supplies that I needed.

tag supplies (CSTIMI)

I used the ink blending tool to apply the ink to tag, overlapping the colors for seamless blending.

ink blending (CSTIMI)

Then I sprayed water in my hand, then sprinkled the water onto the tag.  The inks reacts to water so it creates water spot on the tag. Let the tag dry.

water splatter (CSTIMI)

Once the tag is dry, spray some wild honey distress spray stain to the tag. Let that dry.

ink sprayed (CSTIMI)

After that ink up the stamp with waterproof ink and stamp the image.

stamped image (CMTIMI)

Once the image is on the tag, ink the edges with wild honey distress ink.

Inked edges (CMTIMI)

Now that the tag is done, I inked up the ribbon with the wild honey spray and heat set the ribbon.

inked ribbon (CMTIMI)

You add the ribbon to the tag. I felt like this card needed a sentiment.  So I die cut 3 hello’s from Mama Elephant’s Venice Envelope die set.

Take another look:

Hello Tag (TIMI)

So what do you think? I love how this tag turned out.

We have two prizes to offer this month, the first is our sponsor prize. This winner will be chosen randomly from all of the entries in the challenge! The sponsor for June: PaperArtsy!

paperartsy

bottles

Prize: 5 bottles of Infusions

Infusions are water soluble particles with 2 components: dye color pigment suitable for paper/ fabric, mixed with Walnut Stain. The color powder particles dissolve faster than the walnut crystals, so you can control the color-to-brown stain ratio!

infusion

Color Chart Reference

Our second winner is our Design Winner. This winner is chosen by our DT, who all vote for their favorite design from all of the entries. This winner will have their winning project published in Craft Stamper Magazine, they will have a GDT slot for an upcoming challenge, and will also feature in their very own Winners Profile blog post!

Now if that isn’t a reason to play along I’m not sure what is!!

I can’t wait to see what you come up with.

Supplies used:

VENICE-ENVELOPE-CC_large

Thanks for stopping by!

~Kymona