Altenew August 2017 Release Blog Hop Winner

Hello everyone!!  I’m here to announce the winner for the August 2017 New Release Blog Hop!

Thanks to everyone who participated and left all of the wonderful comments on my blog. I wish everyone could win but I can only choose one winner.

Are you ready to see who won?  Here you go:

Yayyy,  Melissa you are the lucky winner of the $30 gift certificate from Altenew!!  Please contact Altenew at winner@altenew.com with the subject line “Altenew August 2017 Blog Hop Winner from Kreative Kymona’s Blog”.

Once again, thanks to all of you for stopping by and leaving some love on my blog.

Creating Your Own Background Paper

Hello everyone!!  I’m up on Altenew’s Scrapbook Blog today showing you how to create your own background paper using Altenew’s Building Blocks stamp set.

Here’s a sneak peek:

Building Blocks

To see how I created this page with a complete tutorial and hear the story behind these photos head on over to Altenew’s Scrapbook Blog.  I can’t wait to see what you think!

Supplies used:

(Thank you so much for stopping by. Compensated affiliate links used at no cost to you.  All products were personally purchased.  This post was not paid or sponsored. )

scrapbook collection kit  Building Blocks

Thank you so much for stopping by!

Here’s the Scoop Gift Card

Concord and 9th

Hello everyone!!  I’m here today showcasing the yet another stamp set from Concord & 9th August Release.

Today it’s all about ice cream with the Here’s The Scoop stamp and die set!!

Let’s take a look:

Here's the Scoop

Isn’t this gift card just the cutest?  I love that the ice cream scoops was big enough to create a mini card.

Here’s how I created this gift card:

  • Stamp the ice cream scoop onto white card stock in black ink.
  • Using Prima Coloring Pencils, color the image the colors of your choice.  I used PC 920 (light green), PC924 (crimson red) and PC 1082 (Chocolate).
  • Use the Here’s the Scoop Die to cut that image out.
  • Cut a second one to create the gift card.
  • Score the second ice cream scoop on the left side and apply adhesive.
  • Adhere the two pieces together pieces together.

Here's the Scoop

  • Slide your card and gift card inside the envelope to send off to the recipient.

Nice, clean and simple.  This mini card was so much fun to make and the possibilities are endless.

What do you think?  I would love to hear what you think?  Please let me know below.

Supplies used:

(Thank you so much for stopping by. Compensated affiliate links used at no cost to you.  All products were personally purchased.  This post was not paid or sponsored.)

Here's the Scoop BUNDLE Here's the Scoop Stamp Set Here's the Scoop diesRed sunset ink  Jet Black Ink We R Memory Keepers - Envelope Punch Board

Thank you so much for stopping by!

How Do You Store Your We R Memory Keepers Planner Punch Board

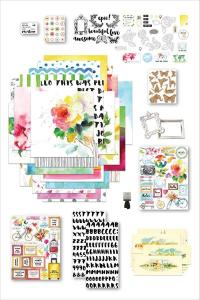
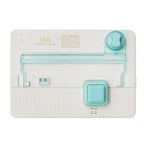
Hello everyone!!  I’m here today with a question for all of you?  How do you store your We R Memory Keepers Planner Punch Board?  When I purchased up mine, I wasn’t sure how I was going to store it, especially since it came with so many moving pieces.

I called Denise, better know as Mama from Simply Charming Everyday!!  She creates the cutes bags and accessories using her sewing machine.  She is famous for her Bunkie Bags, MISTI bags, Big Totes and Pouches.

Bunkie Bags

I asked Mama if she could make me a special pouch for my new We R Memory Keepers Planner Punch Board and accessories.  She said YES, right away no hesitation.  I love this lady!!

She asked me to pick my fabric and I let her know she can go with the black and white polka-dot with a pink zipper to match my other bags.  I also told her it has to have her signature button on it.   She laugh and said no problem.

Lets take a look at my pouch:

Everything Pouch

I totally love how this pouch turned out.  It is the cutest thing in the world.  It holds my We R Memory Keepers Planner Punch and its accessories.

Lets take a closer look:

Everything Pouch

When you fist look at the pouch it looks very small.  You will wonder to yourself, how will all of these things fit in this petite bag.  Well hold on to your sit, because it will.

Everything Pouch

Take a look at the bag when you open it completely!!  Its huge inside.  I love how the zipper opens up so wide.  I can fit everything in without stretching the fabric.

Everything Pouch

Check it out!!!  Everything fits and there is room for more stuff!!  I love it.  Mama did an awesome job.

Lets take another look:

I love Mama’s signature button.  I ask for it every time she creates something for me.

Check out the pouch she created for my daughter:

Everything Pouch

So what do you think?  Isn’t this the cutest pouch you’ve seen.  I love that is totally hand sewn.  She makes all of these bags by hand.  She also creates custom items as well.

I’ve asked for:

  • a cover for my ScanNCut
  • a cover for my Typewriter
  • a cover for my daughter’s sewing machine.

Mama is totally accommodating and flexible.  I highly recommend her bags and expertise!!

You can find her on different social media outlets!

Blog ⋅ Facebook ⋅ Instagram


Thank you so much for stop by!!


Altenew August 2017 Release Blog Hop + Giveaway

Hello everyone and welcome to Altenew’s August 2017 Release Blog Hop!! Today we are showcasing the all of the new Stamps, Dies and Inks.  If you’ve arrived here from the talented Svitlana Shayevich blog, then you are on the right track. If you arrived here on your own, then you will want to start at the beginning, the Altenew Card Blog so that you don’t miss a thing!

Take a look at my layout:

24/7 stamp set

I absolutely love how this layout turned out.  I stepped out of my comfort zone for this page.  I wanted to really incorporate a couple of the new stamp sets from this release.

Speech Bubbles

I used Speech Bubbles, 24/7, and More Then Words with the Reflection Scrapbook Collection. They make the page fun yet elegant.

Here’s how to create this page:

  • Using the Memory MISTI, stamp all of sentiments from all three stamp sets.  24/7


24/7 stamp set

Reflection Scrapbook Kit

  • Then cut different pieces of pattern paper from the Reflection Collection Kit.
  • Distress the edges for an added effect.
  • Adhere all of those pieces down using Tombow liquid glue and 3M Foam tape.
  • Add thread on top of the layered panel, in no particular order.  Just make sure the thread can be seen off of the side of the photo.
  • Adhere the photo on top of the layer panel using foam tape.
  • Fussy cut the Speech Bubbles that was stamped earlier and adhere them to the top of the photo using 3M Foam tape.

Speech Bubbles

enamal dots

Let’s take another look:

more then words

So what do you think?  I would love to hear from you below.

What is a blog hop without an amazing gift? Yayyy!!

Prizes

  • Altenew is giving away a $50 gift certificate to THREE lucky winners! Please leave a comment on the Altenew Scrapbook Blog or Altenew Card Blog by Thursday, August 31st at 11:59pm EDT for a chance to win. The winners will be announced on the Altenew Card/Scrapbook Blog on Saturday, September 2nd.
  • In addition I have a $30 gift certificate to giveaway from comments left on this post by Friday, September 1st at 11:59pm EDT for a chance to win.

    Next Stop on this Blog Hop is the talented:

Yoonsun Hur

You do not want to miss out on her amazing creations!!

Just in case you lose your place along the way, here is the complete list of participants so that you can find your way back:

Altenew Card Blog

Jennifer McGuire

Vicky Papaioannou

Laura Bassen

Lilith Eeckles

Nina-Marie Trapani

May Sukyong Park

Therese Calvird

Terhi Koskinen

Virginia Lu

Mindy Baxter

Svitlana Shayevich

Kymona Tracey ← you are here

Yoonsun Hur

Galina Filippenko

Isha Gupta

Flora Monika Farkas

Supplies used:

(Thank you so much for stopping by. Compensated affiliate links used at no cost to you.  All products were personally purchased.  This post was not paid or sponsored.)

     scrapbook collection kit

Memory MISTI 12 x 12 - Most Incredible Stamp Tool Invented Tombow Mono Liquid Glue      

Thank you so much for stopping by!!

{Clean and Simple} – Bud

Hello everyone!!!  It’s CASology Tuesday!!  We are back with another Clean and Simple Cue Card just for you!!

This week’s cue card:

Take a look at my card:

I’m so happy with this card!!  I love this Kitty Bee Design Flower For You Bunny.  This digital image is so stinking cute!!

I printed the image and used the ScanNCut to cut the image out. I used copic markers to color the flower in then added glossy accents in the center of the flower.

Before placing the image on the card front, add a couple of score lines to the bottom and the side of the card using a scoring tool.

The brightness in the photo hides the score lines on the side but they are there.

To add a sentiment, simple die cut Simon Says Stamp Big Hugs out of red card stock twice.  Adhere it to the card base using Tombow Mono Liquid Glue.

Adhere the bunny to the card base using 3M Foam Tape.

Nice, simple and easy.  What do you think?  Are you inspired to play along?  Please let me know below!

For more inspiration, check out my fellow Design Team members blog for more awesome work.

Deidre Payne

Hannelie Bester

Hazel Hodgkins

Jacquie Southas

Janet Ribet

Jen Wills

Joyce Mehrberg

Judy Marino

Kymona Tracey

Melissa Chipperfield

Rachel Bergfeld

Sherrie Mannion

Guest Designer

Sunday Stamper

This week’s sponsor is Kitty Bee Design!

Supplies used:

(Thank you so much for stopping by. Compensated affiliate links used at no cost to you.  All products were personally purchased.  This post was not paid or sponsored.)

          Tombow Mono Liquid Glue Simon Says Stamp SCRIPTY BIG HUGS Wafer Dies sssd111491

Thank you so much for stopping by!!

Happy Day with Concord & 9th

Concord and 9th

Hello everyone!!  I’m here today showcasing the yet another stamp set from Concord & 9th August Release.

Today it’s all about balloons with the Happy Balloon stamp set!!

Let’s take a look:

concord & 9th happy balloon

I love how the balloons can be used as hot air balloons too.  This stamp set is so versatile and can be used all year round.

Here’s how I created this card:

Simple stamp the solid balloon using Altenew Deep Iris Ink.

Using the decorative balloon stamp and the basket stamp, stamp the image using Altenew Black Ink.

To finish the card off, stamp the sentiment right under the balloon.

Nice, clean and simple.  This card is so doable and the possibilities of making a couple of these cards are great.

Supplies used:

(Thank you so much for stopping by. Compensated affiliate links used at no cost to you.  All products were personally purchased.  This post was not paid or sponsored.)

Happy Balloons Stamp Set

Deep Iris Ink  Jet Black InkMini MISTI - Most Incredible Stamp Tool Invented

Thank you so much for stopping by!!

Clearly Planned August 2017 Release Sneak Peek Day 2

Hello everyone!!  I’m here today to share the new Taylored Expressions Clearly Planned August 2017 Release Sneak Peek Day 2 with you!!

Check out what I created for you:

taylored expressions school days

This stamp set is perfect for this back to school.  It includes all of the element to celebrate back to school but also all year round.

Come on back tomorrow for more of this fabulous release! You will fall in love with what we have in store for you!

Thanks for stopping by!

{Clean and Simple} – Prickly

Hello everyone!!!  It’s CASology Tuesday!!  We are back with another Clean and Simple Cue Card just for you!!

This week’s cue card:

Take a look at my card:

Altenew Sewing Labels

For this card I use the rose from Altenew Sewing Labels to represent the cue card.  I colored the image in using Copic Markers. To finish the card off I used We R Memory Keepers Tab Punch Board to round the corners.

Nice, simple and easy.  What do you think?

Are you inspired to play along?  Please let me know below!

For more inspiration, check out my fellow Design Team members blog for more awesome work.

Deidre Payne

Hannelie Bester

Hazel Hodgkins

Jacquie Southas

Janet Ribet

Jen Wills

Joyce Mehrberg

Judy Marino

Kymona Tracey

Melissa Chipperfield

Rachel Bergfeld

Sherrie Mannion

Guest Designer

Amy R.

This week’s sponsor is STAMPlorations!

Supplies used:

(Thank you so much for stopping by. Compensated affiliate links used at no cost to you.  All products were personally purchased.  This post was not paid or sponsored.)

sewing labelsWe R Memory Keepers - Tab Punch Boardheavyweight cardstock

Thank you so much for stopping by!