Hello everyone!! Have you heard? We R Memory Keepers has a new punch board!! Yes, they do! It is the best one yet in my opinion.
Let me introduce you to the:
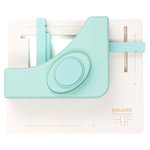
We R Memory Keepers Word Punch Board
Yes, a word punch!! Now we can punch out words, phrases and sentences (I love pushing limits)!
Let’s check this new tool out:
Does this tool remind you of another tool We R Memory Keepers release back in 2017? If you said yes, and guessed the Planner Punch Board, then you are correct!!

If you missed that review, you can check it out here.
The difference between the two are the actual inserts. The Planner Inserts has different types of holes for the different planner systems and the Word Inserts has letters- one for each letter in the alphabet!!
What’s in the Box:
- One Alignment Guide Base
- 26 Letter Inserts A-Z
- Instructions
Let’s take a closer look at the Word Punch Board:
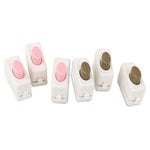
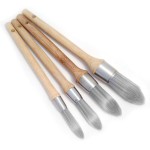
The Word Punch Board comes with Adjustable Inserts.

Each insert has a letter from the alphabet imprinted on the top of the inserts.
Allowing you to personalize notebooks and gifts!

This punch board can punch 10 letters at one time.

Punching repeated letters is easy to do.

Here’s how I do it:
- Simple spell out the word you would like to punch placing another punch in the repeated letter space.
- Once all of the letters inserts are in place, pick up the letter insert that does not belong.
- Slide the paper right in the corner groove of the punch board, so that your second punch will line up.
- Punch the word.

- Move the repeated letter into the open space and punch again.

Nice and easy. Instructions are located included in the box just in case you need it.
Pushing the Punch: Punching a Sentence

I love seeing how far a tool can go and this one did not disappoint! I punch a sentence!! Yes, a full sentence minus the punctuation. (Maybe, the company will create some punctuation marks after this review. Crossing my fingers.)
Here’s how I did it:
- Place the letters in the punch board, leaving space between each word.
- If the sentence is short, less than 10 letters, all of the inserts will fit.
- If the sentence is long, more than 10 letters, punch the first set of words.
- Remove the inserts and add the rest of the inserts, eyeballing the space between each letter and words, punch.
- Repeat step 4 if you need to.
Amazing right! It’s perfect for scrapbook pages. Creating your own title.
Aligning the Inserts

The Word Punch Board has an alignment guide base.
Catching the Waste

The Word Punch Board comes with a hole catcher that opens at the bottom.
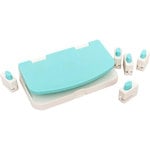
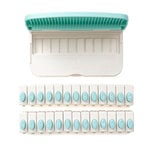
Storing the Punch

You can store the inserts flat within the base by linking them together.

Labeling with the Word Punch Board:
- Notebooks
- Cards
- Scrapbook layouts, Pocket Pages
- Photos
- Storage containers
- Gifts
- Tags
- Journals
- Planners

So there you have it!! The Word Punch Board!
Let’s take another look:

What do I think?
I love it!! I recommend it for those of you who are in love with adding words to your project, personalizing gifts, or simply punching letters into paper!
- This tool is easy to store.
- It fits right in your bag.
- It’s inexpensive.
- You can create sentences, phrases and words.
- It cuts though thick paper with ease.
So what do you think? Will you add this word punch board to your supply collection? I would love to hear from you. Leave a comment below.
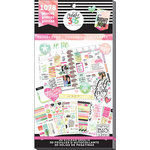
Supplies used:
(Thank you so much for stopping by. Compensated affiliate links used at no cost to you. All products were personally purchased. This post was not a paid or sponsored post.)
Thank you so much for stopping by!!