Altenew | Refresh Your Watercolor Brush Markers Blog Hop + Giveaway

Hello and welcome to Altenew’s July 2019 Stencil Release Blog Hop!! Today we are showcasing brand new Watercolor Brush Marker Refills. If you arrived here from the talented blog, Janette Kausen, then you are on the right track. If this is your first stop, then you will want to start at the beginning, the Altenew Card Blog.

Take a look at my watercolor embroidery canvas:

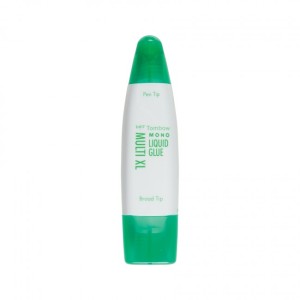
I love it when experiments go the right way, LOL! When the Tropical Fiesta Watercolor Brush Marker Refills showed up at my door, I wasn’t sure what to do with them. I tossed many ideas around and thought they weren’t out of the box enough. That’s when a light bulb went off, and I thought would they look good on fabric.

So, I tried, and I was excited when it went right!

Here’s how I created this colorful watercolor embroidery canvas:

Place a piece of linen-cotton canvas fabric on a glass mat.

Use a glass mat just in case the water or the ink didn’t absorb in the fabric. It would be easy to clean up.

Once the water on the fabric, start adding ink to the material.

Add as much color or different color as you desire. I used four different colors: Frest Lemon, Sunkissed, Turquoise, and Crimson.

Let the color take their time and move before you pick up the fabric.

Once you have the desired look, pick up the piece of fabric carefully; remember the mat is glass, so the liquid is sitting right on top of that glass.

Clean off the residue and place the piece of fabric back on the glass mat. Hoop it so it can dry. I used a heat tool because I was impatient.

Once the fabric dries, cut away the excess material, and now you’re ready to add a sentiment.

Before that could happen, I realized that I loved the backside of the fabric because it was a bit more subdued. So I changed it.

Now its time to add the sentiment.

Die-cut the word blessed from the Mega Blessed Die Set and adhere it to the front of the fabric.

Beautiful, easy, and fun to create. It’s a fantastic wall hanging home decor piece.

Let’s take another look:

What is a blog hop without an amazing gift? Yayyy!!!

Prizes:

To celebrate this release, Altenew is giving away a $30 gift certificate to 6 lucky winners! Please leave a comment on the Altenew Card Blog and/or Altenew Scrapbook Blog by 9/25/2019 for a chance to win.

We’ll also draw a winner to receive a $15 gift certificate from the comments left on each designer’s blog on the blog hop list below. All winners will be announced on the Altenew blogs on 9/27/2019.

Promotion:

Enjoy $50 OFF the Watercolor Marker Ultimate Bundle from 9/20/2019 at 12:01 AM EDT until 9/21/2019 at 11:59 PM EDT. No code needed to enjoy this deal! Not valid on previous purchases. While supplies last. Shop HERE!

Next Stop on this Blog Hop is the:

Jaycee Gaspar

You do not want to miss out on her amazing creations!!

Just in case you lose your place along the way, here is the complete list of participants so that you can find your way back:

Altenew Card Blog

Norine Borys

Emily Midgett

Therese Calvird

The Hedgehog Hollow

Nathalie DeSousa

Lydia Fiedler

Virginia Lu

Yoonsun Hur

Altenew Scrapbook Blog

LauraJane

Maryam Perez

Svitlana Shayevich

Laurie Willison

LilitEeckels

Sveta Fotinia

Jen Schow

Agnieszka Malyszek

Janette Kausen

Kymona Tracey, ← you are here
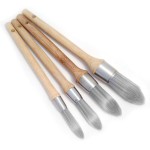
Jaycee Gaspar

Supplies used:

(Thank you so much for stopping by. Compensated affiliate links are used at no cost to you. The Altenew products were given to me since I’m on the design team. The other products were personally purchased. This post was not paid or sponsored.)

We R Memory Keepers - Precision Glass Cutting Mat Tombow Mono Liquid Glue

I hope you enjoyed what you saw today and would give it a try yourself.

Thank you so much for stopping by!

National Sticker Day 2018

photo source


Hello everyone!!  It’s National Sticker Day 2018!! Yes, they have a national sticker day, LOL!!

How many of you use stickers and what for?  I use stickers in my planner/journal.  Stickers make the pages come alive. I love the bold colors and the big bold sentiments you find in stickers books.

Today, I’m going to show you some stickers I printed and cut using my Cricut Maker!

Let’s Take a Look:

Stickers

For these stickers I used printable vinyl to create these super cute stickers.

I choose this design in design space and followed the directions.  Designs space prompts you to print with your pinter first then you bring it back to the machine and it cut the stickers out for you.

Take another look:

I love how easy this was to do and I created these whenever I want to.

What are you doing for National Sticker Day?  Do you create your own stickers or buy them from a store.  Please let me know.

Supplies used:

(Thank you so much for stopping by. Compensated affiliate links used at no cost to you.  All products were personally purchased.  This post was not paid or sponsored.)

Cricut MakerCricut® Printable Vinyl

Thank you so much for stopping by!!

Create a Stencil using a PenBlade

Hello everyone!!  I’m here today to show you how to create a stencil using a PenBlade.

Take a look:

Stencil and PenBlade

All I did was use the PenBlade to cut a thick piece of plastic that you see in the photo above. Then I used the stencil to create that card.

Super simple and easy.  I created a video but it didn’t turn out good. I will try to create another since I have more plastic to play with.

I have a coupon code for you to pick up a set of PenBlades for yourself on the PenBlade site: Kreative

What do you think?  Please let me know below.


PenBlade Clarity Brushes

Thanks for stopping by!

~Kymona

My Overhead Table Top Tripod

Hello everyone!!  I’m here today with a tutorial on how I created my overhead table top tripod for my iPhone!!

I posted this picture:

Overhead Tripod

on Instagram the other day and everyone was totally amazed by it.  So I decided to create a little tutorial on how I made it.

Now I have to say, I was not the creator of this idea.  Sarah Shotts did a Periscope showing us how to put this overhead table top camera mount together.  She got the idea from Katie.

So props to these young ladies for sharing this idea with all of us!!!

Now let get to work!!

First you will need to go to either Home Depot, Lowes or any hardwood store that sells PVC pipes.

I went to Home Depot with my dad to buy all of the materials.

My dad and I take one

We picked up:

1 10 foot piece of 1/2 inch PVC pipe

2 1/2 inch PVC Caps

3 1/2 inch PVC 90 degree Elbows (slips, on threading)

2 1/2 inch PVC Tees (slips, no threading)

1 1/4 20 x 12 bolts

Drill

15/64 Drill Bit

Now I had to cut that 10 foot pvc pipe. Home Depot lets you cut the pipe yourself.

Cutting with a saw

Here are the sizes that I cut my pipes. They are based on the size of my desk:

2 11 inch pieces

2 10 inch pieces

1 13 inch piece

1 3 inch piece

PVC pipes pieces

After those cuts I was left with long piece, so I cut other pieces. I cut some longer pieces:

1 18inch piece

1 23 inch piece

I will use these interchangeable, depending on how high or low I want my camera to sit.

Ok, now lets put the tripod together:

Overhead Tripod 1

Putting this together is super doper easy. The pieces just slid right into the elbows and the tees with ease.  You can take it apart and travel with it as well.

Now on to assembling the actual camera mount:

I took a sharpie marker and placed a dot on the inside of the second tee.

Dot in the pipe

Then I took the drill and drilled a hole where you see that red dot.

PVC pipe with screw

Then I screwed the screw into that drilled hole.

Small camera mount

I bought this mini tripod from Amazon for my iphone last year but it to small so I just unscrewed the part that holes the camera.

Mounted on the PVC

I screwed that camera mount on to the screw and here you have it!!

Super doper easy and portable!!  That is the best part!!

Overhead Tripod

What do you think? Will you build one?  I would love to hear from you.

Thanks for stopping by!

~Kymona