Altenew November 2018 Stencil/Ink Spray Release Blog Hop + Giveaway

Hello everyone and welcome to Altenew’s November 2018 Release Blog Hop!! Today we are showcasing all of the new stencil and ink sprays.  If you arrived here from the talented Laurie Willison blog, then you are on the right track. If you arrived here on your own, then you will want to start at the beginning, the Altenew Card Blog so that you don’t miss a thing!

Take a look at my scrapbook page:

Flowing Hearts Stencil

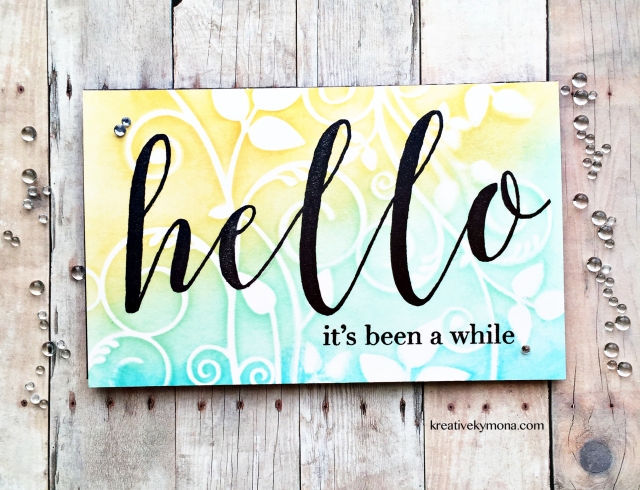
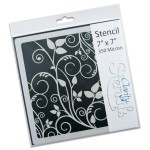
To create this page I used the new Flowing Hearts Stencil, the new Orange Cream Metallic Shimmer Ink Spray and the Cosmic Berry Metallic Shimmer Ink Spray.  They are a perfect fit with this photo.

Here’s how I created this scrapbook page:

Spray the two ink colors onto the large watercolor palette. Spray water and place the white cardstock on top of the palette.

Let dry.

Once the paper dries, use black ink and stencil the hearts in place.

Flowing Hearts Stencil

Cut away at a portion of the heart so that the photo can fit right up underneath it.

To add texture, add black thread under the photo and adhere it in place.

Flowing Hearts Stencil

Die cut the title using the Fine Alphabet Die Set and adhere the letters down.

Use Photoshop to type the journaling in colors that match the pages background.

Flowing Hearts Stencil

Add the wood veneer pieces to add another type of texture to the page.

Nice and easy.

Let’s take another look:

Flowing Hearts Stencil

What is a blog hop without an amazing gift? Yayyy!!

Prizes

  • Altenew is giving away a $50 gift certificate to SIX lucky winners! Please leave a comment on the Altenew Card Blog and/or Altenew Scrapbook Blog by Monday, December 3, 2018 at 11:59pm EDT for a chance to win. The winners will be announced on the Altenew Card Blog and Altenew Scrapbook Blog on Friday, December 7th, 2018.
  • In addition I have a $30 gift certificate to giveaway from comments left on this post by Sunday December 2nd at 11:59pm EDT for a chance to win. The winner will be announced on Monday December 3rd, 2018.

Next Stop on this Blog Hop is the:

Norine Borys

You do not want to miss out on her amazing creations!!

Just in case you lose your place along the way, here is the complete list of participants so that you can find your way back:

Altenew Card Blog

Altenew Scrapbook Blog

Kristina Pokazanieva

Therese Calvird

Nathalie DeSousa

Svitlana Shayevich

Alex Syberia

Lilith Eeckels

Kathleen Graumüller

Virginia Lu

Vicki Boutin

Zinia Redo

Vicky Papaioannou

Enza Gudor

Laurie Willison

Kymona Tracey ←you are here
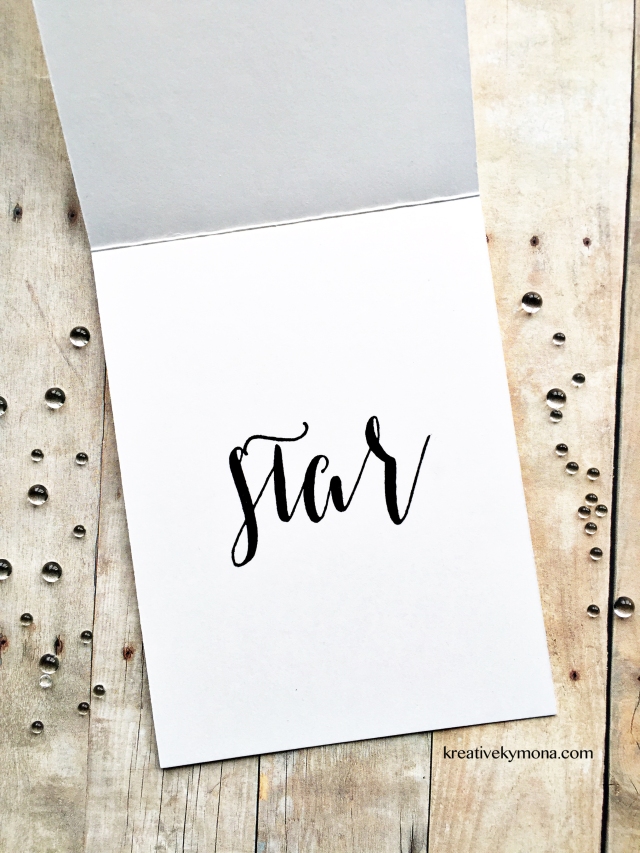
Norine Borys

Olga Moss

Agnieszka Malyszek

Zsoka Marko

TaeEun Yoo

Erum Tasneem

Rowena M

Supplies used:

(Thank you so much for stopping by. Compensated affiliate links used at no cost to you.  The Altenew  products were given to me since I’m on the design team.  The other products were personally purchased. This post was not paid or sponsored.)

Flowing Hearts Stencil Orange Cream Metallic Shimmer Ink SprayCosmic Berry Metallic Shimmer Ink SprayAltenew Fine Alphabet Die Watercolor Palette

Thank you so much!

Art Journaling Page + Giveaway

Hello everyone!!  I’m here today with another Art Journaling Page plus a Giveaway to share with all of you!!

My good friend Josefine and I decided to get together and do a mini Instagram hop using Gel Press Petite Plates.

Both of us love using Gel Press Plates on our art journaling pages.  So when we saw the petite plates we had to give them a try and share what we love with all of you!!

This petite set comes with 3 gel press plates:

  • 3″ Hexagon
  • 3″ Oval
  • 3″ Rectangle

We wanted to show how we used it to get everyone excited about them.

Take a look at my page:

gel press petite plates

I wanted to show how you could create different impressions using all three of the plates. My design is very random and I love it that way.  Not much thought goes into my pages. I used StencilGirl Stencils for each of my impressions.

So for each impression I use the same process:

  • This what the plates looks like once you take them out of the packaging.

Gel Press Plate

  • Once I decided on the plate that I wanted to use, I placed the stencil right on top of the plate.

Gel Press Plate

  • Then I added some paint on top of the stencil and used a brayer to even the paint onto the plate.

Gel Press Plate

  • This is what the plate looks like after the paint is evened out.

Gel Press Plate

  • Take the stencil off of the plate to see the pattern transferred onto the plate.

Gel Press Plate

  • Press the plate onto the paper to create the design your looking for.

gel press petite plates

Totally fun and no two impressions will ever look the same.

So what do you think?  Aren’t these petite plates fun to use.

Giveaway time:

You have three chances to win:

  1. Leave a comment here.
  2. Leave a comment on my Instagram page
  3. Leave a comment on Josefine’s Instagram page.

Here’s what you have to do, leave a comment on this blog post, letting me know what you will create with this press plates.  Leave your comment by Wednesday, July 26th, 2017 by 11:59pm est to win.

A random winner will be chosen and announced Thursday, July 27th.

Supplies used:

(Thank you so much for stopping by. Compensated affiliate links used at no cost to you.  All products were personally purchased.  This post was not paid or sponsored. )

 ATC stencil loopy ladders 

Thank you so much for stopping by!

Art Journaling Series – Imagine

Hello everyone!!  I’m starting a new series on my blog called the Art Journaling Series!!  I’m having so much fun with paints and stencils that I want to do more and share more!! I will try and post at least once a month for now but we will see how this goes!!

I posted a page yesterday, if you didn’t see it, you can check it out here.

Let take a look at my new page:

art journaling

Here’s how I created this page:

  1. I applied different size washi tape to my 8 x 10 Gel Press Plate.
  2. Then I randomly added Vicki Boutin Acrylic Paint in yellow and orange on top of the washi tape plate.
  3. I used a brayer to even out the paint.
  4. Once the plate was covered, I remove the washi tape, leaving the pattern you see above.
  5. After the paint dried, I used some stencils from The Crafter’s Workshop (Mini Ledger, Mini Time for Love, and Mini Specimens) and Liquitex Black Gesso to add the different marking on the page.
  6.  To finish the page off, I stamped Visible Image Face It! and Imagine Dream Inspire stamps using Ranger Archival Jet Black Ink.

I totally love how this page turned out.  I thought about writing on this page but it didn’t need it at all.

I’m linking my page up to Craft Stampers Take It Make It Challenge this month.


Supplies used:

(Thank you so much for stopping by. Compensated affiliate links used at no cost to you.  All products were personally purchased.  This post was not paid or sponsored. )

Gel Press 8 x 10 REUSABLE GEL PRINTING PLATE 10802 Speedball Art Products - Pop-In Soft Rubber Brayer - 4 inchesThe Crafter's Workshop - 6 x 6 Doodling Templates - Mini Ledger    The Crafters Workshop - 6 x 6 Doodling Templates - Mini Time for Love  The Crafter's Workshop - 6 x 6 Doodling Template - Specimens American Crafts - Mixed Media Collection - Acrylic Paint - Set 1face stamp set sentiment stamp set

Thank you so much for stopping by!!

Altenew Stencil Release Blog Hop + Giveaway

Hello everyone!!  I’m so excited to be here today.  This is my first Altenew Blog Hop as a design team member!!  Today we are showcasing all of the new stencils that are being released.  If you’ve arrived here from fabulous Lydia Evans, then you are on the right track. If you arrived here on your own, then you will want to start at the beginning, the Altenew Card Blog so that you don’t miss a thing!

Take a look at my layout:

altenew layered kaleidoscope stencil b

For my layout I used Altenew Layered Kaleidoscope B Stencil  paired with some of the supplies from the Reflection Scrapbook Collection Kit and some Ink Sprays to add interest to my page.

Altenew scrapbook layout

I used the Layered Kaleidoscope B stencil to add texture behind my photo using embossing paste. I took my time to only get the embossing past in the center design of the stencil only.

Note: for those of you who are new to this technique, I would suggest you mask of the areas that you do not want the past to go as to not make a mistake.

applying embossing paste

I did this twice so that the design would peak out from behind the photo.

Note: you could color the embossing paste using Altenew’s inks and/or sprays to really enhance the texture.  Like this:

coloring embossing paste with Altenew ink spray

I choose not to use it the color paste because it was to much yellow on the page but know that this is an option as well.

Let’s take a closer look:

layered scrapbook page using Altenew Reflection Scrapbook kit

For this page, I matted the photo on top of a piece of pattern paper from the Reflection Scrapbook Kit. Then I used the stickers and other embellishments from the kit to add the title and cute saying to the layout.  To finish the layout off, I used Altenew Ink Spray and a paintbrush to add ink splatters throughout the page.

So what do you think?  Will you use stencils on your layouts now?  I would love to hear what you think below!

What is a blog hop without an amazing gift? Yayyy!!

Prizes

To celebrate this release, Altenew is giving away a $50 gift certificate to FIVE lucky winners! Please leave a comment on the Altenew Card Blog or/and Scrapbook Blog by Tuesday, June 20th at 11:59pm EDT for a chance to win. The winners will be announced on the Altenew Card/Scrapbook blogs on Thursday, June 22nd.

Next Stop on this Blog Hop is the talented:

Debby Hughes

You do not want to miss out on her beautiful creations!!  It is sure to please, trust me!!

Just in case you lose your place along the way, here is the complete list of participants so that you can find your way back:

Altenew Card Blog

Jennifer McGuire

Altenew Scrapbook Blog

Sveta Fotinia

Sandra Dietrich

Yoonsun Hur

Erum Tasneem

Laura Bassen

Enza Gudor

Agnieszka Malyszek

Lydia Evans

Kymona Tracey ← You are here!

Debby Hughes

May Sukyong Park

Terhi Koskinen

Svitlana Shayevich

Virginia Lu

Therese Calvird

Lilith Eeckles


Supplies used:


Thank you so much for stopping by and enjoy hopping along!!

Rubber Dance Stamp May 2017 Color Challenge

Hello everyone!! I’m here today with Rubber Dance Stamp March 2017 Color Challenge!

Take a look at the colors for this challenge:

Now, these colors are amazing.  They remind me of spring and summer time, which are both my seasons.

Check out my card:

To create this card:

Super easy and fun.

Guess what!!!  If you like this stamp set or any other stamp set from Rubber Dance Stamp, use coupon code: KTFreeShip for free shipping!!  YES, Free Shipping.

Now onto the challenge prizes!

The winner will win five fabulous stamps fromRubber Dance Stamp!! Wait, if the winner used stamps from Rubber Dance Stamp, they will winner another five stamps! That’s a total of 10 stamps!! Wow!!!

You have until May 14, 2017, midnight Central European Time.  Which is 6:00 PM, May 14, 2017!! Please pay attention to this time. Here in NY, we are 6 hours behind Norway! 

Supplies used:


Paper Artsy Fresco Finish BUBBLE GUM Chalk Acrylic Paint 1.69oz FF116Paper Artsy Fresco Finish TANGO Chalk Acrylic Paint 1.69oz FF72Paper Artsy Fresco Finish CHERRY RED Chalk Acrylic Paint 1.69oz FF86 Tsukineko Stazon JET BLACK INK PAD SZ-31

Thank you so much for stopping by!!

{Clean and Simple} CASology 219 – Spooky

Hello everyone!!  It’s CASology Tuesday!!  We are back with another Clean and Simple Cue Card just for you!!

This week’s cue card:

week-219-spooky

Take a look at my card:

spook-tacular1

To create this card, I used the TCW Mini Spiderweb stencil to create a spiderweb on the front of my cardstock using Distress Ink Black Soot.  Then I used your Next Stamp Happy Haunting Die Set to die cut the spider out of an piece of watercolor scrap paper and web out of black cardstock. After that I used Your Next Stamp SpookTacular Halloween to stamp the sentiment in the center of the web using Your Next Stamp Black Olive Ink.  I adhered the spider with a foam tape and the web with Tombow Mono Liquid Glue.

Once again I couldn’t make one card, I had to make two, LOL!

spook-tackular-3

Are you inspired to play along?  Please let me know below!

For more inspiration, check out my fellow Design Team members blog for more awesome work.

DT Badge

Our sponsor this week is Serendipity Stamps

Supplies used:

Ronda Palazzari Spiderwebyns-happy-haunting-die spooktacular-halloweenyns-black-olive-ink
Thank you for stopping by!

~Kymona

Create a Stencil using a PenBlade

Hello everyone!!  I’m here today to show you how to create a stencil using a PenBlade.

Take a look:

Stencil and PenBlade

All I did was use the PenBlade to cut a thick piece of plastic that you see in the photo above. Then I used the stencil to create that card.

Super simple and easy.  I created a video but it didn’t turn out good. I will try to create another since I have more plastic to play with.

I have a coupon code for you to pick up a set of PenBlades for yourself on the PenBlade site: Kreative

What do you think?  Please let me know below.


PenBlade Clarity Brushes

Thanks for stopping by!

~Kymona

The Ton Spring 2016 Blog Hop

Second Post for today
If your looking for CS Take It Make It Inspiration Post, click here

Hello everyone!!  I’m super excited today.  I was asked to participate in The Ton’s Spring 2016 Release Blog Hop!!!  Yayyyyyy!!

Screen Shot 2016-04-05 at 7.04.16 AM

I was totally siked when Effie reached out to me and asked if I would like to hop along with her team.  I jumped at the opportunity to work with her fabulous team.

Enough about my excitement, lets get started on this hop!! If you arrived here from the talented Eunji blog then you are on the right track.  If you arrived here on your own, you will want to start at the beginning, The Ton blog, as to not miss any of the amazing projects!

I’ve created two cards for this awesome hop.

Card Number One:

Happy Birthday (ton outside)

When I first saw this Bokeh Burs Star stamp set, I fell in love.  Such a pretty stamp set with so many things that you can do with it.

I knew it would look super pretty embossed with some distress inks blended on top.

Here is how this card was created:

  1. Stamp the image using Versamark ink in the center of the Recollection White Heavyweight cardstock.
  2. Apply Hero Arts White Embossing Powder on top of the stamp image and heat set. This will resist the ink that will be added on top.
  3. Lay your card flat on your table and start applying your first distress ink Mustard Seed.  Tap off before you apply your first coating of ink.
  4. Then blend the next color, Spiced Marmalade, to create a pretty blend between the two colors.
  5. Next blend the last color, Festive Berries, to create a contrast between the other colors.  Together all three of them are amazing.
  6. Make sure you cover all of the white embossing powder with the distress ink so that everything pops.
  7. Now you can stamp the sentiment in the center of the star using Versafine Ink for a clear, crisp impression.
  8. To finish the front of the card off, add several Pretty Pink Posh Sparkling Clear Sequin randomly.

I hardly ever stamp the inside of my cards.  I decided that this card would totally rock, with a sentiment on the inside.

Happy Birthday (ton inside)

Use Versafine ink again to stamp the sentiment for a crisp, clear impression.

What do you think?  Isn’t this set fabulous!! I think so!!

Card Number Two:

hello (ton)

Isn’t this just fabulous!!  This stamp set is called Brushed Hello.  I love everything about this card.  From the background to the “HELLO” sentiment. Everything about this card screams BOLD!!!  I love it.

Here is how to create this card:

  1. Tape down the Clarity Stencil to the cardstock so that it lays flush over the paper.
  2. Select two-three colors to blend.  The colors used above Fossilized Amber, Cracked Pistachio, Mermaid Lagoon.
  3. Use the Clarity Stencil Brushes to blend the colors over the stencil.
  4. Check out the video below on how I achieved that look. Its a 5 minute video from start to finish in real time.

  1. Trim the blended cardstock down to the desired size.
  2. Stamp the Hello sentiment from the Brushed Hello stamp set using Versafine Black Ink. Then stamp another sentiment if you like.
  3. Add rhinestones to finish the card front off.
  4. Adhere the card front to your cardbase using Tombow Stamp Runner Adhesive. 

Finished!!  What do you think?  I love both cards using both of these stamp sets.  Such a great way to bring in Spring!!

Let me know what you think below!!  I would love to hear from you.

Your next stop on this hop is the super talented Mayline!!  You will want to see what she has come up with.

Giveaway!!

What is a blog hop without giveaway!!! In order to qualify for one of the three $25 gift codes to The Ton’s online store, you must leave a comment on each stop on the blog hop.  The comment period will close on Wednesday, April 13th at 11:59pm EST.  Winners will be chosen randomly from the comments left on all of the blogs.

Just in case you get lost along the way, here is the lineup:

The Ton
Ruby Naz
Lisa Harrolle
Jessica Frost-Ballas
Virginia Lu
Keeway Tsao
Amy Tsuruta
Emily Midgett
Laura Sterckx
Vera Yates
Laurel Beard
Enuji Jung
Kymona Tracey ← you are here
Mayline Jung

You will not be disappointed!!  Have fun hopping!!

Supplies:


  Bokeh Bur Star Hero Arts Clear Embossing PowderRecollections White Heavyweight Pretty Pink Posh 6mm Sequins IMG_6249 Stamp Runner Dot AdhesiveRecollections Black HeavyweightClarity BrushesClarity Stencil Leafy Swirl

Thanks for stopping by!

~Kymona

How to use a Stencil to Watercolor – a2z Scrapbooking Challenge

Third post for today
If your looking for Your Next Stamp Sketch and Color Challenge, click here
If your looking for CS Take It Make It Challenge, click here

Hello everyone!!  I’m here today with a new a2z Scrapbooking Challenge. Its all about watercoloring and I have a super fun technique for you: using a stencil to watercolor!

Yup, you can use stencils to watercolor.  Go figure!!

Take a look at the card I created:

IMG_0113

Creating this card was simple, although it looks complicated.

  1. Take Hero Arts Bold Daisy Stencil and turn it up side down.
  2. Tap Distress Mini Ink Mustard Seed and Spiced Marmalade ink pad onto the stencil.
  3. Spray the stencil with water moving the ink.
  4. Turn the stencil over and place it onto your watercolor paperr.
  5. Press down and use a napkin to wipe away the excessive ink and water.
  6. Let the watercolor paper dry.
  7. Stamp the sentiment using Hero Arts Handwritten Thank You using Versafine Ink.
  8. Add Hero Arts Sunshine Mixed Accents to finish the card off.

What do you think?

I hope you love what you see and that it inspires you to join us this month. You have the entire month to create a new project and enter it into our challenge. By entering you will have a chance to win a $25 Gift Certificate to the a2z Scrapbooking Store. Winner will be announced on the 7th of April.  Good Luck!

If you would like to purchase any Hero Arts products please head on over to the store and use the coupon code KYMONA15 to get 15% off your purchase.

Supplies used:

Bold Daisy StencilHA Handwritten Thank you Distress Inks Kit 1Onyx Versafine Ink Ranger Watercolor PaperSunshine Mixed Accents

Thank you for stopping by!!

Kymona

CS Take It Make It: Take a Technique Inspiration

Hello everyone!! I’m here with CS Take It Make It: Take a Technique Challenge Inspiration for February.

Our theme is Take a Technique: Text Me!!

For this month’s challenge the technique we would like you to use text or script background stamps, or text paper in your projects. Any language, any style. Old book pages, bits torn from magazines, scrapbooking papers.. whatever you can find! … The ‘text’ part does NOT include sentiments, phrase or single word stamps…. think backgrounds!!

This should be super fun to see what you come up with.

Take a look at my card:

Thanks on text (TIMI)

I love how this card turned out!! I used Clarity Stencils-Chinese Lantern and Clarity Stencil Brushes to create the pattern on the texted pattern paper.  These two products are my favorite supplies this year thus far.

This is how I created this card:

I placed the stencil over the pattern paper and used two different brushes to apply the Distress Ink Salty Ocean, Peacock Feathers and Mowed Lawn.

stencil and brushes

Here is where the magic happened, I moved the stencil over slightly to the right and applied BoBunny Sugar Glitter Paste, Yummy!!

I let the glitter paste dry and cut the unknown text pattern paper down to 4 by 5.25.

I adhered the pattern paper to the black cardstock with Tombow Extreme Adhesive because I needed the pattern paper to stick securely to the card base because of its weight.

Then I die cut Lawn Fawn Scripty Thanks three times and adhered them together and onto the pattern paper using Tombow Mono Liquid Glue.

I placed a heavy book on top of the finish card to assure the die cut sticks to the pattern paper.

Take a closer look:

Thanks on text 3 (TIMI)

Thanks on text 2(TIMI)


There you go!  That’s how I created this card.

So what do you think? I’m in love, are you?

We have two prizes to offer this month, the first is our sponsor prize. This winner will be chosen randomly from all of the entries in the challenge! The sponsor for February: A Sprinkle Of Imagination

The prize is a £25 voucher to spend in the online store.

Our second winner is our Design Winner. This winner is chosen by our DT, who all vote for their favorite design from all of the entries. This winner will have their winning project published in Craft Stamper Magazine, they will have a GDT slot for an upcoming challenge, and will also feature in their very own Winners Profile blog post!

Now if that isn’t a reason to play along I’m not sure what is!!

Wait!!  Wait!!  I have more: ASOI are also offering an extra 10% off for my blog readers! The code is CSBlog10% and will work from 5-25th of February, with a minimum £5 spend excluding P&P. 

Tell me that isn’t good!!

I can’t wait to see what you come up with.

Supplies used:

Clarity BrushesChinese Lantern Distress Ink Salty OceanDistress Ink Peacock FeathersMowed LawnTombow XtremeTombow Multi-Purpose AdhesiveLF Scripty Thanks

Thanks for stopping by!

~Kymona