Where Creativity Meets C9 Sketch Challenge

Hello everyone!! I’m here today with the Where Creativity Meets C9 Blog Challenge Design Team!! Our challenge this month is Sketch!!

I love sketches.  They give you a starting point on how your card should look. This sketch could be interpreted in many different ways.

Take a look at my card:


Fabulous phrases dies

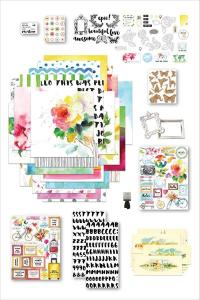
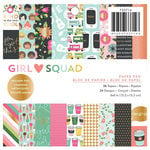
For my card, I used Pebbles Girl Squad pattern paper to create the center piece and capped it off with Concord & 9th Fabulous Phrases Dies. This die set comes with 5 pieces and the one that I used consist of two words but I cut the bottom word off for a simple hey.

Super quick and simple!

What do you think? Please let me know below.

I can’t wait to see how you interpret our challenge theme this month.

c9-banner

Did you know that we have a giveaway going on? Yes, we do!! Our sponsor Concord and 9th is giving away a $25 gift certificate to their shop!! Yes!!! Isn’t that big. Plus the winner gets to be a guest designer for a future challenge.

Here’s how: Create a project using Concord and 9th and upload it on the Where Creativity Meets C9 blog by the 29th of every month of for a chance to win. A random winner will be chosen and it could be you!!

Are you ready?  So, go and create!!

Please don’t forget to follow Where Creativity Meets C9 on Facebook, Instagram and the Blog.

Supplies used:

(Thank you so much for stopping by. Compensated affiliate links used at no cost to you.  All products were personally purchased.  This post was not paid or sponsored. ) 

Fabulous Phrases dies Pebbles - Girl Squad Collection - 6 x 6 Paper Pad with Foil Accents

Thank you so much for stopping by!

Technique Tuesday March 2018 Release

Yayyyyy!!! The day has finally arrived!  It’s release day for Technique Tuesday.  They are releasing 4 clear stamps and 4 crafting die!

Gertie & Garth Goat Clear Stamp
Gertie & Garth Goat Crafting Die
Sassy Love Your Guts Clear Stamps
Sassy Love Your Guts Crafting Die
Cherry Blossoms Clear Stamps
Cherry Blossoms Crafting Die
Love You to Pieces Clear Stamps
Pieces of my Heart Crafting Die
Love Puzzle Crafting Die

Let’s look at today’s card:

Love Puzzle Craft Die Amazing right!! Look at that die cut! It’s just perfect. This crafting die is called Love Puzzle Crafting Die. The puzzle pieces are attached at the center point but could be easily snap to separate them. You can make two card with one pass of the die cutting machine.

Here’s how these card was created:

Cut a card base to 4 x 8, scored at 4. Score the card front with different scoring lines to add interest.

Cut a piece of pattern paper to the size of the die.

Using a die cutting machine, cut the puzzle piece out.

Adhere the puzzle piece to the card front using Mini Stampin’ Dimensionals.  Remember to adhere the center piece for the letter o.

Round all of the corners withWe R Memory Keepers Envelope Punch Board.

Love Puzzle Craft Die

Now its time to create a card for the letter that were die cut from the puzzle pieces.

Cut the cardstock to 3 x 6, scored at 3.

Score the card front for added interest.

Align the letters on the top score line for perfect placement. Adhere them with liquid mono adhesive.

Round the top left corner withWe R Memory Keepers Envelope Punch Board.

Love Puzzle Craft Die

Two quick and easy cards in less then 5 minutes!!  You can’t beat that!!

So what do you think?  Are you in love with this puzzle die?  What do you think of the entire release.

Want more inspiration?

Stop on by Technique Tuesday Blog for more inspiration and to see what my fellow team members created just for you!

Supples used:

Technique Tuesday We R Memory Keepers - Envelope Punch Board

Thank you for stopping by!!

Creating Your Own Background Paper

Hello everyone!!  I’m up on Altenew’s Scrapbook Blog today showing you how to create your own background paper using Altenew’s Building Blocks stamp set.

Here’s a sneak peek:

Building Blocks

To see how I created this page with a complete tutorial and hear the story behind these photos head on over to Altenew’s Scrapbook Blog.  I can’t wait to see what you think!

Supplies used:

(Thank you so much for stopping by. Compensated affiliate links used at no cost to you.  All products were personally purchased.  This post was not paid or sponsored. )

scrapbook collection kit  Building Blocks

Thank you so much for stopping by!

Baby Mini Album using Altenew’s Reflection Scrapbook Collection

Hello everyone!!  I’m up on Altenew’s Scrapbook Blog today showing you how I created a 3D Scrapbook Page using the Reflection Scrapbook Collections Kit.

Take a look:

Altenew Reflection Scrapbook Collection

To see how I created this baby mini album with a complete tutorial head on over to Altenew’s Scrapbook Blog.  I can’t wait to see what you think!

Supplies used:

(Thank you so much for stopping by. Compensated affiliate links used at no cost to you.  All products were personally purchased.  This post was not paid or sponsored. )

scrapbook collection kit  heartfelt sentimentsAltenew Baby Balloon Stamp SetAltenew Artist Markers  Altenew Glue Tape Altenew Bold Alphabet Die

Thanks for stopping by!!

Altenew Scrapbook Collection Blog Hop + Giveaway

Hello everyone and welcome to Altenew’s Scrapbook Collection Blog Hop!! Today we are showcasing the amazing Reflection Scrapbook Collection.  If you’ve arrived here from awesome Elsie Robinson’s blog, then you are on the right track. If you arrived here on your own, then you will want to start at the beginning, the Altenew Scrapbook Blog so that you don’t miss a thing!

Take a look at my layout:

reflection scrapbook collection

For this layout, I used the pattern paper from the Reflection Scrapbook Collection to create the circle patten behind my photo.

I used a 2in circle punch to punch out 4 circles out of the different pattern papers that has matching colors in the photo.

Then I trimmed the photo down to fit over the circles without totally covering them.

To add dimension behind the photo, I cut two black and white pieces of the pattern paper and adhered it to the back of the photo.

Once the circles and the photo were adhered down, the page looked to white so I used Altenew Frayed Leaf Ink Spray to add splatters around the focal point of the page.

After the ink dried, I placed the title down using the letter stickers that come in the kit.

To finish the page off, I placed some the the chipboard in the kit on top of the photo and under the title of the page.  Adding the date to the bottom of the page using the rotary stamp which is also included in the Reflection Scrapbook Collection.

Let’s take a closer look:

So what do you think?  Would you use pattern paper to create different shapes to use on your layouts?  I would love to hear what you think below!

What is a blog hop without an amazing gift? Yayyy!!

Prizes

  • Altenew is giving away a $50 gift certificate to THREE lucky winners! Please leave a comment on the Altenew Scrapbook Blog by Wednesday, July 19th at 11:59pm EDT for a chance to win. The winners will be announced on the Altenew Scrapbook Blog on Saturday, July 22nd.
  • In addition I have a $30 gift certificate to giveaway from comments left on this post by Wednesday, July 19th at 11:59pm EDT for a chance to win.

Next Stop on this Blog Hop is the talented:

Irit Landgraf

You do not want to miss out on her beautiful creations!!  It is sure to please, trust me!!

Just in case you lose your place along the way, here is the complete list of participants so that you can find your way back:

Altenew

Enza Gudor

Paige Evans

Missy Whidden

Sandra Dietrich

Meghann Andrew

Stefanie Ried

Flora Monika Farkas

Claudia van Rooijen

Elsie Robinson

Kymona Tracey ← you are here

Irit Landgraf

Elena Morgun

AhSang Jung

Eunyoung Lee

Anna Komenda

Lilith Eeckels

Terhi Koskinen

Before you go, check out Altenew’s new promotions:

Supplies used:

(Thank you so much for stopping by. Compensated affiliate links used at no cost to you.  All products were personally purchased.  This post was not paid or sponsored. )

scrapbook collection kit ink spray

Thank you so much for stopping by and enjoy hopping along!!!

Using Pattern Paper to Create a CAS Card

Hello everyone!! I’m here today using pattern paper to create a CAS card. Gossamer Blue is a monthly crafts club dedicated to inspiring and motivation memory keepers and crafters alike.

Each month they come out with 3 different types of kits:

  1. Scrapbook Kit
  2. Life Pages Kit
  3. Planner Kit

Each kit is full of amazing goodies!

Here are some peeks at some of the kits:

Planner Kit Goodies

Life Pages Kit Goodies

 I used the Planner Pages Kit paper to create my card, take a look:

Here’s how I created this card:

  1. Cut the card base to 4.25 by 11, scored at 5.50.
  2. Cut the pattern paper to 4.25 by 5.50.
  3. Adhered the pattern paper to the card front using Tombow Mono Adhesive + Permanent.
  4. Using Lawn Fawn Stitched Heart Envelope Die cut the small note card out of Bristol cardstock.
  5. Use the Mini MISTI to stamp the sentiment from The Stamp Market You Are My Fave stamp set on the die cut notecard using Versafine Onyx Ink.
  6. Add 3M foam adhesive to the note card and adhere it to the center of the card front.

Nice, easy and a great way to use up pattern paper.

What do you think? Please let me know below. I would love to hear from you.

Supplies used:

Lawn Fawn - Lawn Cuts - Dies - Stitched Heart EnvelopeMini MISTI - Most Incredible Stamp Tool Invented 

Thank you so much for stopping by!


Did You Hear the News Shaker Card

Hello everyone!!  Did you hear the news?  I’m guest designing for Gerda Steiner Design this month!!  I’m super excited!!

I’m up on their blog showing you how I used the What’s New stamp set to make this cute shaker card:

did-you-hear

Stop on by Gerda Steiner Design blog to see the full card and tutorial.

Please let me know what you think.  I would love to hear from you.

Thanks for stopping by!

name-tag