The Ton 3rd Anniversary Release Blog Hop

Hello everyone!!!  The Ton 3rd Anniversary Release Blog Hop is underway and it’s amazing. I made it back from Creativation just in time to participate in the hop so I’m excited.

If you arrived here from The Ton blog then you are on the right track.  If you arrived here on your own, you will want to start at the beginning, The Ton blog, as to not miss any of the amazing projects!

The Ton released 22 new stamps for their 3rd Anniversary which includes up to two free gifts with purchase (Daisy Duet and Peony Notes Bundle A+B+C). For more information on The Ton’s incentive gifts, head over to the The Ton’s blog.  All new release products are available now!!

Lets jump in:

Card One:

City Building

The inspiration for this card came from an artist I met at Creativation on Monday.  His use of colors and water was amazing on a large background stamp.

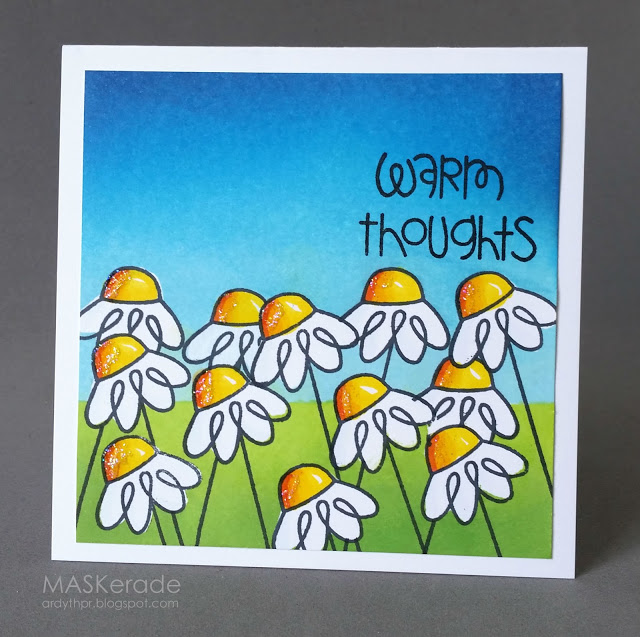
So, for my first card I used the City Buildings Cling Background stamp to create a subtle multicolor background topped with a sentiment from the Seriously Amazing stamp set.

City Building

For the sentiment to pop off of the card, black embossing powder was added on top and heat set. Add a couple of gumdrops to finish the card off.

Card two:

XOXO

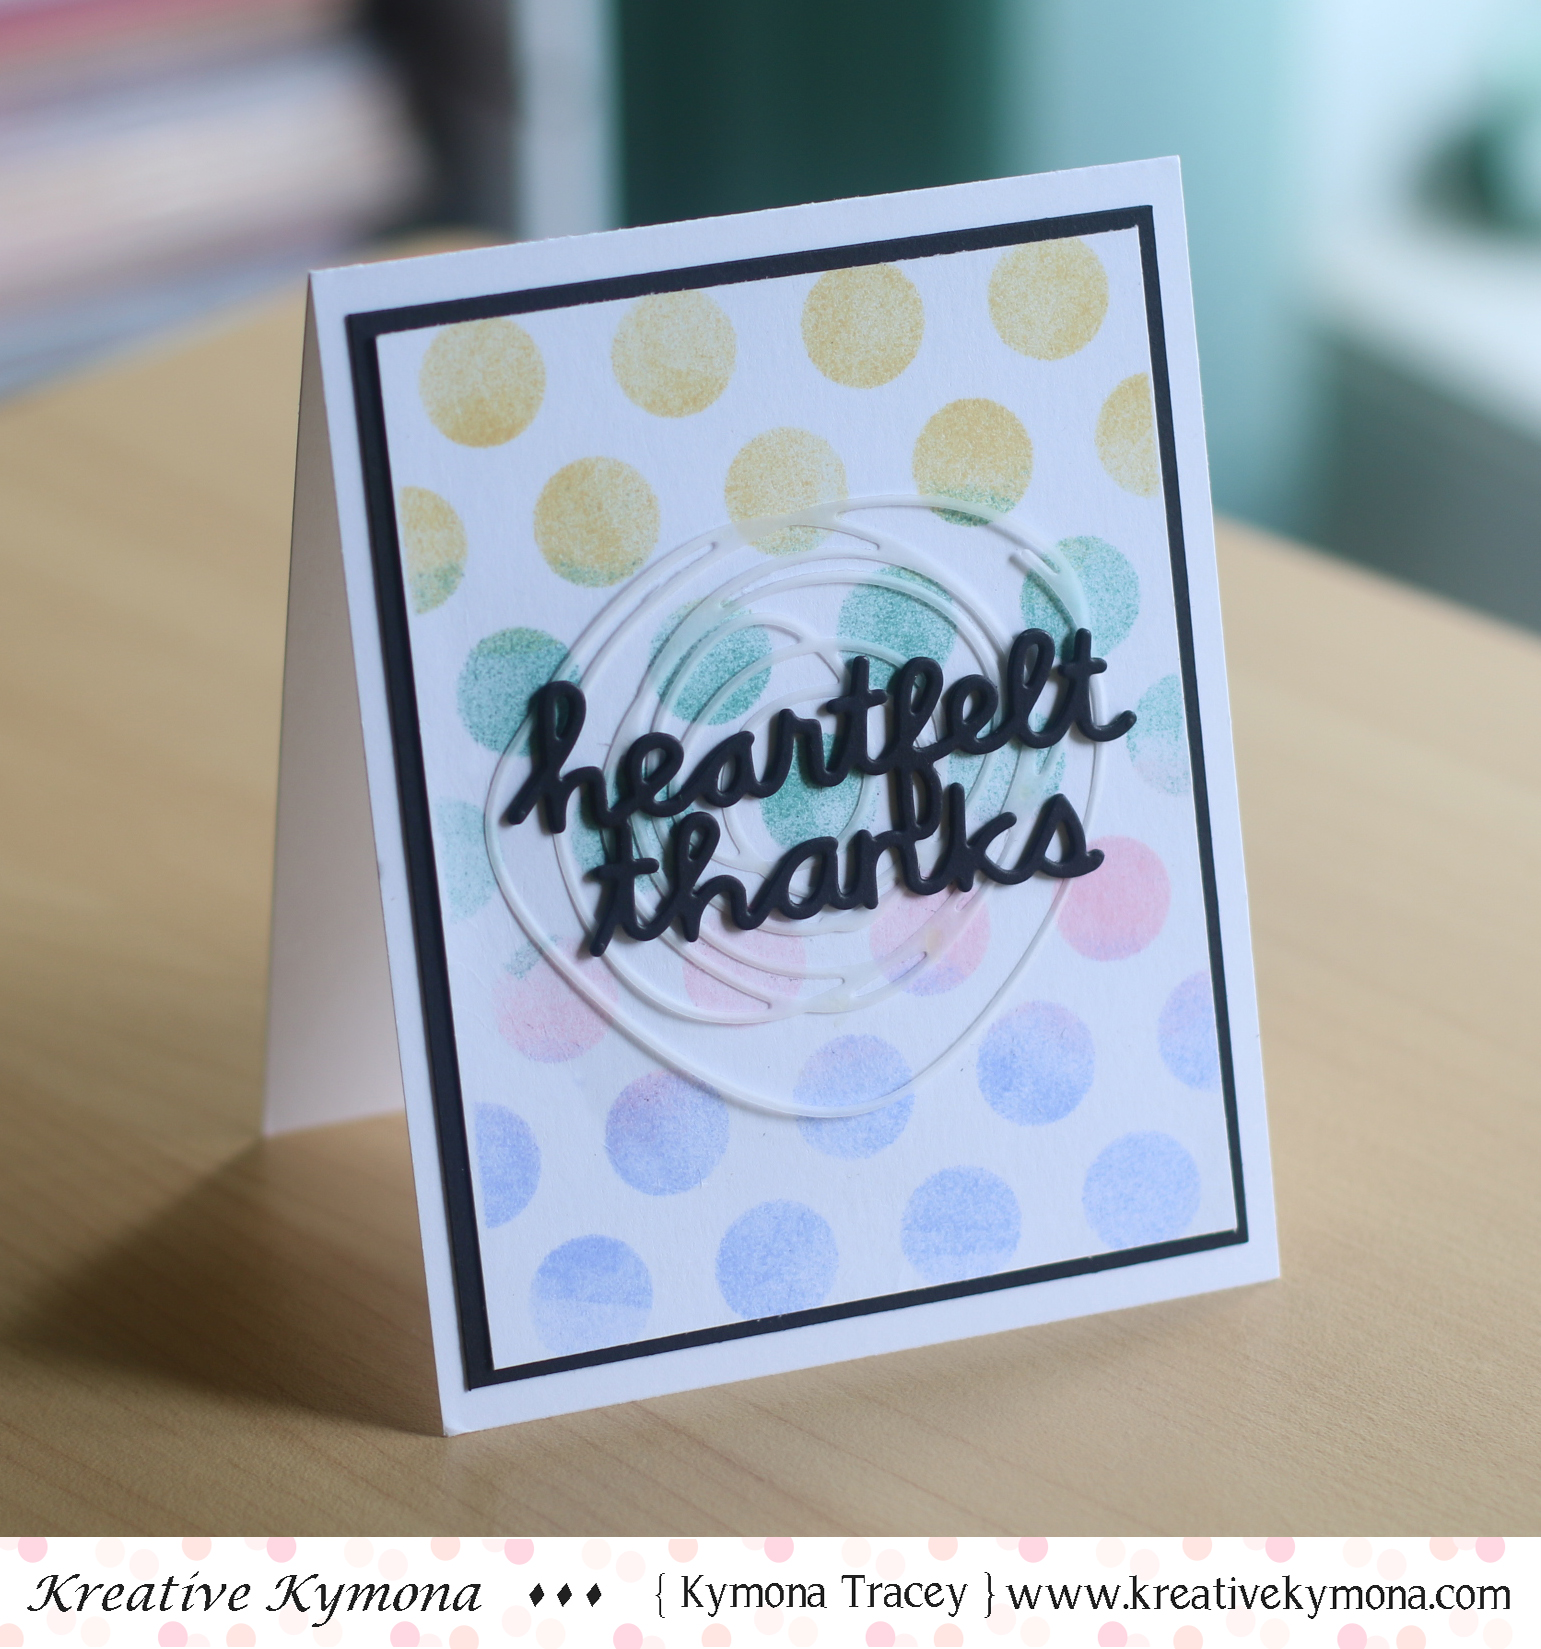
For my second card, I used the XOXO Mini stamp set to create a clean and simple Valentine’s Day card.

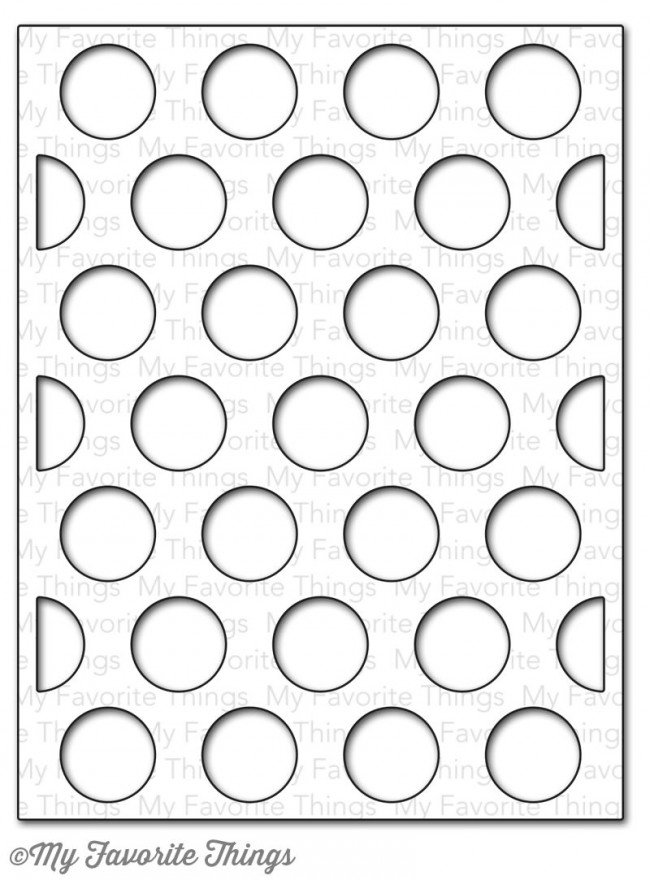
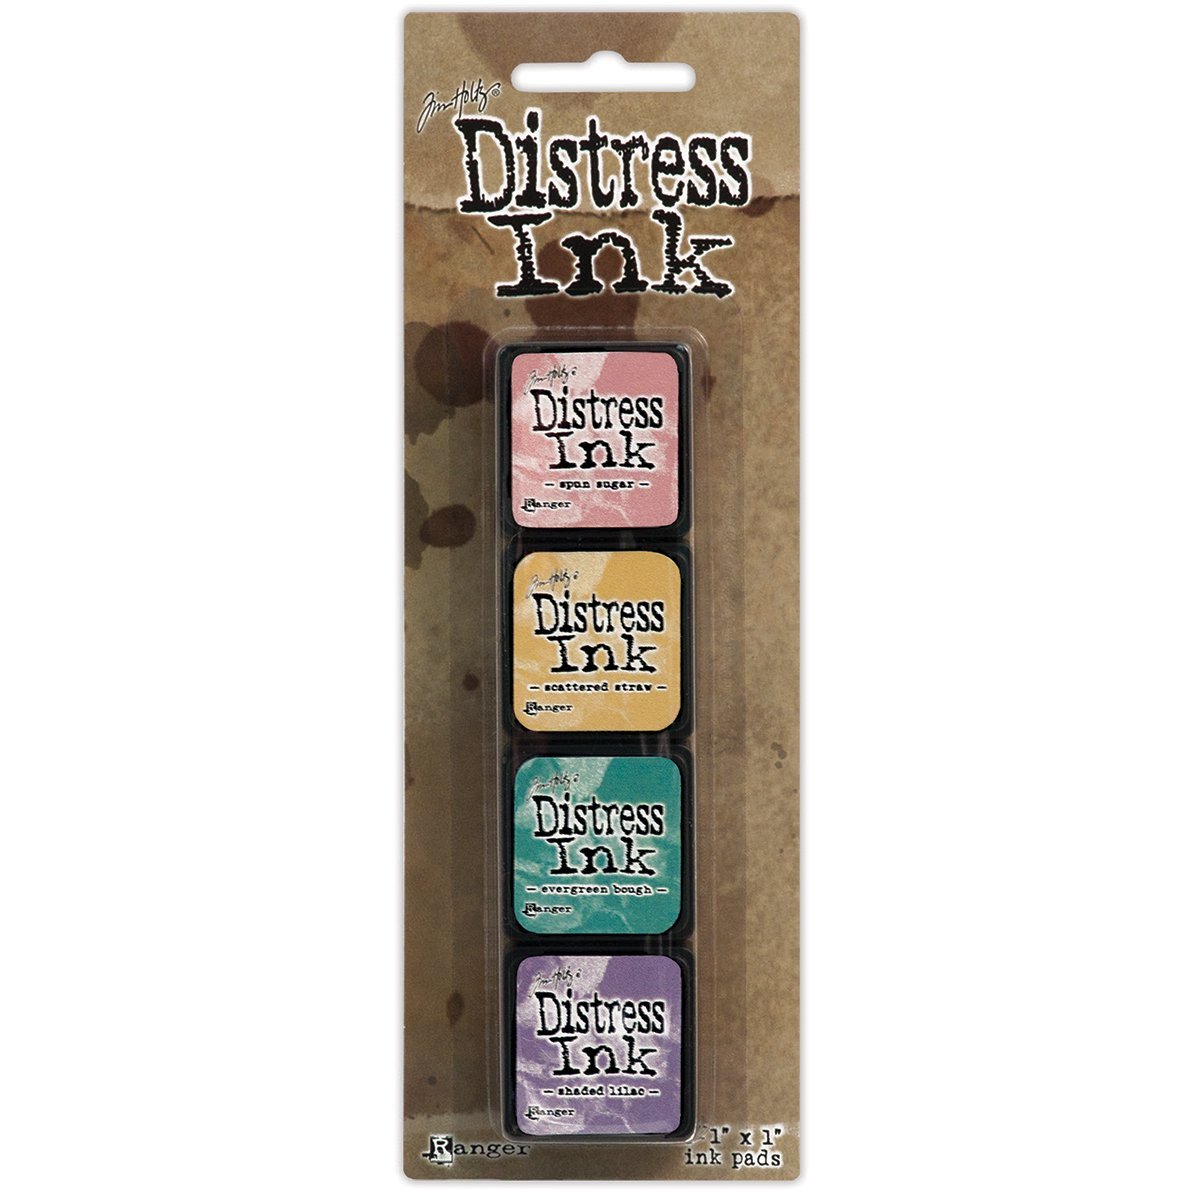
Use 4 different distress ink colors to create the pink ombre look.  Once thats done, stamp both sentiments using the MISTI and black ink.  Make sure the sentiment is dry, then stamp the sentiment again using Versamark ink.  Add black embossing powder and heat set the sentiment.

City Building

Add a couple of gumdrops to finish the card off.

So what do you think?  Are you loving The Ton’s new release?  I would love to hear what you think.

Now what’s a blog hop without a giveaway!!

Giveaway Time:

For each day of The Ton’s blog hop festivities (1/19 to 1/26), Effie is giving away a stamp set of choice to a lucky commenter. To qualify, you must leave a comment on each blog stop for the respective giveaway day for which you are entering.  The comment period for all giveaways closes on January 28, 5pm EST.

Just in case you get lost along the way, here is the lineup:

The Ton

Kymona Tracey ← you are here

Laura Jane

Dana Gong

Here is the entire schedule and blog hop order:

January 19
The Ton
Kay Miller
Vera Yates
Chris Dayton

January 20
The Ton
Brenda Noelke
Amy Kolling
Jenny Lee Yamasaki

January 21
The Ton
Janette Kausen
Lisa Harrolle
Justine Hovey

January 22
The Ton
Amy Tsuruta
Mayline Jung
Maria Peters

January 23
The Ton
Laurel Beard
Anna Kutsenko
Svetlana Pavola

January 24
The Ton
Kymona Tracey
Laura Jane
Dana Gong

January 25
The Ton
Tae Eun
Simon Hurley
Olga Matyushevskaya

January 26
The Ton
Taheerah Atchia
Eunji Jung
Isha Gupta
Sveta Fotinia

You will not be disappointed!!  Have fun hopping along!!

Supplies used:

(Thank you so much for stopping by. Compensated affiliate links used at no cost to you.  The Ton  products were given to me since I’m guest designing.  The other products were personally purchased. This post was not paid or sponsored.)


Thank you so much for stopping by!!

Your Next Stamp DT Dare – Fall Colors

Hello everyone!!  I’m here today with Your Next Stamp and our DT Dare!!!

What is a DT Dare you ask? It’s a fun monthly challenge for the YNS design team to show case more fabulous projects using the new release products!!

YNS-DARE-Badge

Fun right!!

Wait there is more!!  If you leave a comment on the YNS blog post you could Win a YNS Stamp Set of your choice!!! 

Exciting right!!  It sure is for me!!

The DT Dare Challenge this month is Fall Colors!!  The design team was asked to create a project using one of the new stamp sets from the September release.  I went with the new Autumn Leaves Splatter and the Mini Autumn Leaves Splatter stamp set for my project.

Take a look at my project:

fall-hello-yns

YNS Supplies:Autumn Leaves Splatter, Mini Autumn Leaves Splatter, Whatnot Sentiments Set Five

Other Supplies: Bristol Smooth Paper, Bristol Vellum, Colorbox Black Embossing Powder, Staples

What do you think?  Let me know below.

Super simple and easy.

So tell me what you think of this challenge? I would love to know, let me know below!

Don’t forget we have Blog Candy for you!!  If you leave a comment on the YNS blog today you have a chance of winning the blog candy.

DTDare2candy-547x232

Thank you so much!

~Kymona

YNS Sketch and Color Challenge #41

I’m here today with Your Next Stamp (YNS) and the Sketch and Color Challenge #41!!

Each challenge has a sketch and a color combo to choose from.

Take a look at the color combo:

YNScolor-41

Take a look at the sketch:

YNSSketch41

Take a look at my card:

Happy we're friends (YNS)

YNS Supplies: Happy Everything Stamp Set

Other Supplies: Recollection Heavyweight Cardstock, Distress Ink Cracked Pistachio, Seedless Preserves, Picked Raspberry, Peacock Feathers, My Favorite Things Stencils Circle Burst, Mini Ink Blending Tool, Versafine Black Ink

What do you think?  Did I follow the color photo? Let me know below.

So are you ready for the new challenge?

You have until June 23rd, 2016 at midnight EST to play along and submit your project on the YNS Blog post.  One random participant will win a $15 gift certificate to the Your Next Stamp Store.  If YNS stamps or dies are the focal point then the winner receives and additional $5 gift certificate f0r a total of $20.  The winner will be announced on the YNS Blog the Sunday after the challenge closes.

I hope to see your projects!!

Supplies listed above!

Thank you so much for stopping by!

~Kymona

How to use a Stencil to Watercolor – a2z Scrapbooking Challenge

Third post for today
If your looking for Your Next Stamp Sketch and Color Challenge, click here
If your looking for CS Take It Make It Challenge, click here

Hello everyone!!  I’m here today with a new a2z Scrapbooking Challenge. Its all about watercoloring and I have a super fun technique for you: using a stencil to watercolor!

Yup, you can use stencils to watercolor.  Go figure!!

Take a look at the card I created:

IMG_0113

Creating this card was simple, although it looks complicated.

  1. Take Hero Arts Bold Daisy Stencil and turn it up side down.
  2. Tap Distress Mini Ink Mustard Seed and Spiced Marmalade ink pad onto the stencil.
  3. Spray the stencil with water moving the ink.
  4. Turn the stencil over and place it onto your watercolor paperr.
  5. Press down and use a napkin to wipe away the excessive ink and water.
  6. Let the watercolor paper dry.
  7. Stamp the sentiment using Hero Arts Handwritten Thank You using Versafine Ink.
  8. Add Hero Arts Sunshine Mixed Accents to finish the card off.

What do you think?

I hope you love what you see and that it inspires you to join us this month. You have the entire month to create a new project and enter it into our challenge. By entering you will have a chance to win a $25 Gift Certificate to the a2z Scrapbooking Store. Winner will be announced on the 7th of April.  Good Luck!

If you would like to purchase any Hero Arts products please head on over to the store and use the coupon code KYMONA15 to get 15% off your purchase.

Supplies used:

Bold Daisy StencilHA Handwritten Thank you Distress Inks Kit 1Onyx Versafine Ink Ranger Watercolor PaperSunshine Mixed Accents

Thank you for stopping by!!

Kymona

YNS Sketch and Color Challenge #25

Hello everyone!!!  I’m here today with Your Next Stamp (YNS) and the Sketch and Color Challenge #25!!

Each challenge has a sketch and a color combo to choose from.

Take a look at the sketch:

YNSSketch25


Take a look at the color combo:

YNScolor-25

Yes, I did it again!  I went with the color combo!!  These colors are so fall that I couldn’t resist, plus the new release is so fitting for this color combo, why not!!

Take a look at my card:

You are Amazing (YNS)

YNS Supplies: Gingerbread Man Die Set, Whatnot Sentiments Set Six

Other Supplies: Distress Ink Fossilized Amber, Ground Expresso, Fired Brick and Dried Marigold, Winsor &Newton Cotman Water Color Paper

So are you ready for the new challenge?

You have until October 29th at midnight EST to play along and submit your project on the YNS Blog post.  One random participant will win a $15 gift certificate to the Your Next Stamp Store.  If YNS stamps or dies are the focal point then the winner receives and additional $5 gift certificate fro a total of $20.  The winner will be announced on the YNS Blog the Sunday after the challenge closes.

I hope to see your projects!!

Supplies used:

Gingerbread Die WhatnotSixDistress Ink Mini 14Distress Ink Mini 13Distress Inks Mini 9Distress ink mini 2Winsor & Newton Cotman Water Color Paper

Thank you so much for stopping by!!

~Kymona


YNS Sketch and Color Challenge #24

Hello everyone!!!  I’m here today with Your Next Stamp (YNS) and the Sketch and Color Challenge #24!!

Each challenge has a sketch and a color combo to choose from.

Take a look at the sketch:


YNSSketch24

Take a look at the color combo:

YNScolor-24

Yayyy, I finally went the color combo!!  These colors are amazing and I found it easy to use them.

Take a look at my card:

Happy Halloween (YNS)

YNS Supplies: Halloween Pumpkins, Dripping Goo Die, Circles Die Set

Other Supplies: Distress Ink Seedless Preserve, Distress Ink Salty Ocean, My Favorite Things Hybrid Ink, Michaels Recollections Cardstock Black and White

For this card:

I cut my cardstock base and ink blended it with distress ink.  After that I die cut the dripping goo and adhered it to the top of my card base.  Then I die cut the circle moon and adhered that to the card base.  After that I stamped the sentiment using the hybrid ink.  Then I stamped and masked all of the pumpkins and faces.

Super simple and easy!!

So what do you think?

So are you ready for the new challenge?

You have until October 15th at midnight EST to play along and submit your project on the YNS Blog post.  One random participant will win a $15 gift certificate to the Your Next Stamp Store.  If YNS stamps or dies are the focal point then the winner receives and additional $5 gift certificate fro a total of $20.  The winner will be announced on the YNS Blog the Sunday after the challenge closes.

I hope to see your projects!!

Supplies used:

Seedless PreservesDistress Ink Salty OceanMFT Hybrid Black InkYNS circle diesDripping GooHalloween Pumpkins Recollections Black HeavyweightRecollections White Heavyweight

Thank you so much for stopping by!!

~Kymona

So Suzy Stamps October 2015 Challenge – Halloween

Third post for today
If your looking for the a2z Scrapbooking October 2015 Challenge, click here
If your looking for the So Suzy Stamps October New Release, click here

Hello everyone,  I’m here today with So Suzy Stamps October 2015 Blog Challenge.

11082498_10153720285210558_7666493263852333524_n

Check out my card:

Halloween (SSS)

I just love how that background turned out!!  I’m not use to making background but I wanted to give this a try and I’m so glad I did!!

Here’s how I created this card:

  1. I cut out a circle mask and adhered it to the card front so that I could blended Distress Ink Salty Ocean and Seedless Preserves together to create the night sky.IMG_5380
  2. Then I used Heidi Swap Star Stencil and Hero Arts Unicorn Ink and added some stars in the sky.
  3. Then I used WPlus9 Shimmer Spray Mist to add shimmer dimension in the sky.
  4. After that I stamped So Suzy Stamps Safest Day Stamp Set using My Favorite Things Hybrid Ink.
  5. Then I stamped the So Suzy Stamp Halloween Cat using the same Hybrid Ink .
  6. Then I used the Hybrid Ink to add color to my Unique Laser Deisgns Halloween Mini Chipboard and adhered it within my moon.

It might look hard, but it was the easiest card I could have created!!

So what do you think?  Please let me know below!!

Check out my fellow design team members!!  You will not want to miss it..

I hope you join in our challenge this month.

Supplies used:

WPlus9 Shimmer Spray MistSafest DayMFT Hybrid Black InkHalloween CatHero Arts Unicorn Pigment InkMini Halloween Chipboard0421.1443553989.451.416

Thank you so much for stopping by!!

~Kymona

Heartfelt Thanks – Muse

Hello everyone!!  I’m popping in really quickly to share my card for the Muse Challenge this week!!

Yes, its been a while since I played and the opportunity presented itself so I jumped on it.

This week’s Muse is Anita Bowden. Take a look at her card:

20150919_134014

Now take a look at my card:

Heartfelt Thanks 1

To create this card, I used My Favorite Things Jumbo Dot Cover-Up and created a stencil.  I used Distress Ink Scattered Straw, Spun Sugar, Evergreen Bough, and Shade Lilac to create my circles.

Stencil and Inks

I simple pounced the ink onto the paper.  Once that was done, I removed the stencil and trimmed the card panel down and added to the black panel and then add that to the card base.

I used Papertrey Ink’s Circle Scribbles Die to cut a piece of vellum.  Then I die cut Paper Smooches Heartfelt Thanks sentiment out of black card stock.  I attached both to the card front using Tombow Multipurpose Glue.

Super simple and fun to create.

So what do you think?  Does my card fit the Muse?

Supplies used:

mft jumbo dot coverupDistess Mini Ink Kit 4PTI Circle Scribbles Die Paper Smooches Heartfelt Thanks Tombow Multi-Purpose Adhesive

Thank you so much for stopping by!

~Kymona

Muse Challenge #124

Second Post for today
If your looking for The Alley Way Stamps post, click here


Hello everyone!!  I’m so happy to be here today.  I’m playing with the Muse Challenge today.  I haven’t played in a long time. I just haven’t had the time.

So it feels good to be able to play now.

The Muse this week is Ardyth and here is her card:

Ardyth

Take a look at my card:

Our Friendship Grows (MUSE)

I totally love this stamp set from Lawn Fawn.  Its called Our Friendship Grows.

To create this card, all I did was distress the background with Distress Ink Broken China and Mowed Lawn.

Then I stamped and die cut three of the flowers.  I used Copic Marker E33, E35, E37 to the center of the flower.

I attached the flower with foam adhesive and used my ruler and Copic Multiliner to draw in the stem.

I added Clear Wink of Stella to the center of the flower.

I stamped the sentiment using My Favorite Things Hybrid Ink.

I trimmed my card panel down and adhered it to the card base.

Super easy and Fun!!

You will see more of theses flowers this week.  Such a pretty set of flowers.

Supplies used:

LF Our Friendship Grows Distress Ink Broken China Mowed LawnCopic Markers3M Double Coated Foam TapeWink of Stella clearCopic MultilinerMFT Hybrid Black Ink

Thank you for stopping by!

~ Kymona

Top Dog Dies – Butterfly

Hello everyone!!! It’s Top Dog Die Wednesday!!  I’m here today showcasing Top Dog Dies Butterfly Die Set!!

TDD Butterfly


When I first saw this butterfly die set I knew I had to have it.  Its super intricate.  I love the detail!

A couple of days ago I was on Instagram, my favorite social media site, and came across Bianca better known as@thecoloursofmagic.  She posted a finish piece of different distress inks blended together.  I fell in love. I knew I had to give this a try.


Take a look at her color combo:

FullSizeRender (1)


Totally awesome right!! Thanks Bianca for sharing!! Check her out, she has some great coloring photos in her feed.

Now take a look at my card:

Butterfly 4 (TDD)

I love how you can see the multicolors behind the butterfly.  I added some Clear Wink of Stella for some shimmer.

Butterfly 3 (TDD)

Such a great card to give to a friend.  I stamped Mama Elephant Sunday Sentiments on the inside of the card.

Butterflyinside (TDD)


Look at how beautiful those colors look behind that butterfly!  Love it.

Butterfly (TDD)

Butterfly 2 (TDD)

This card was easy to create:

1. I partial die cut my butterfly out of the card panel.

2. I used an ink blending tool to blend Distress Ink Mustard Seed, Spiced Marmalade, Fired Brick and Seedless Preserve on my card base.

3. I added some Clear Wink of Stella to the blended colors.

Tip: be careful when using the wink of stella on distress ink.  Since the distress ink activates with water, the liquid will move the colors around.  So good across the colors not up and down.

4. I added the card panel to the card base using Tombow Xtreme Adhesive.

5. I stamped my sentiment from Mama Elephants Sunday Sentiments on the inside of my card using My Favorite Things Hybrid Ink.

6. I used my We R Memory Keepers Corner Chomper to round the bottom corners.

7. I added Pretty Pink Posh 4mm and 6mm Sparkling Clear Sequins.

So what do you think?  I hope you like this card as much as I enjoy making it!

Supplies used:

TDD Butterfly SUNDAY SENTIMENTS Wink of Stella clear Tombow XtremeWe R Memory Keepers Corner ChomperMFT Hybrid Black Ink Mustard SeedSpiced Marmalade Fired BrickSeedless PreservesPretty Pink Posh Sequins 4mmPretty Pink Posh 6mm Sequins


Thanks for stopping by!!

~Kymona