How to Create an Envelope Wrap in 5 Minutes & Giveaway

Imagine getting a beautiful card in a beautiful envelope.  Yes, a beautiful envelope.

How many times do we send out cards or even receive cards in plain white or colored envelopes.  No, one really thinks about creating an envelope to match the card inside.  I’m guilty of that myself.  I spend a lot of time on creating my cards, I don’t even thing about the envelopes that they are going in.

That’s why I’m so excited that Papertrey Ink has a great Make It Monday #163 challenge going on this week called Envelope Wraps!  This challenge has challenged me to really think about the envelopes I’m using to send my cards out in.

Making my envelope wrap was entertaining.  I changed my mind seven times on how I wanted my envelope to look.  I finally decided on the style I liked.

Happy Mail For
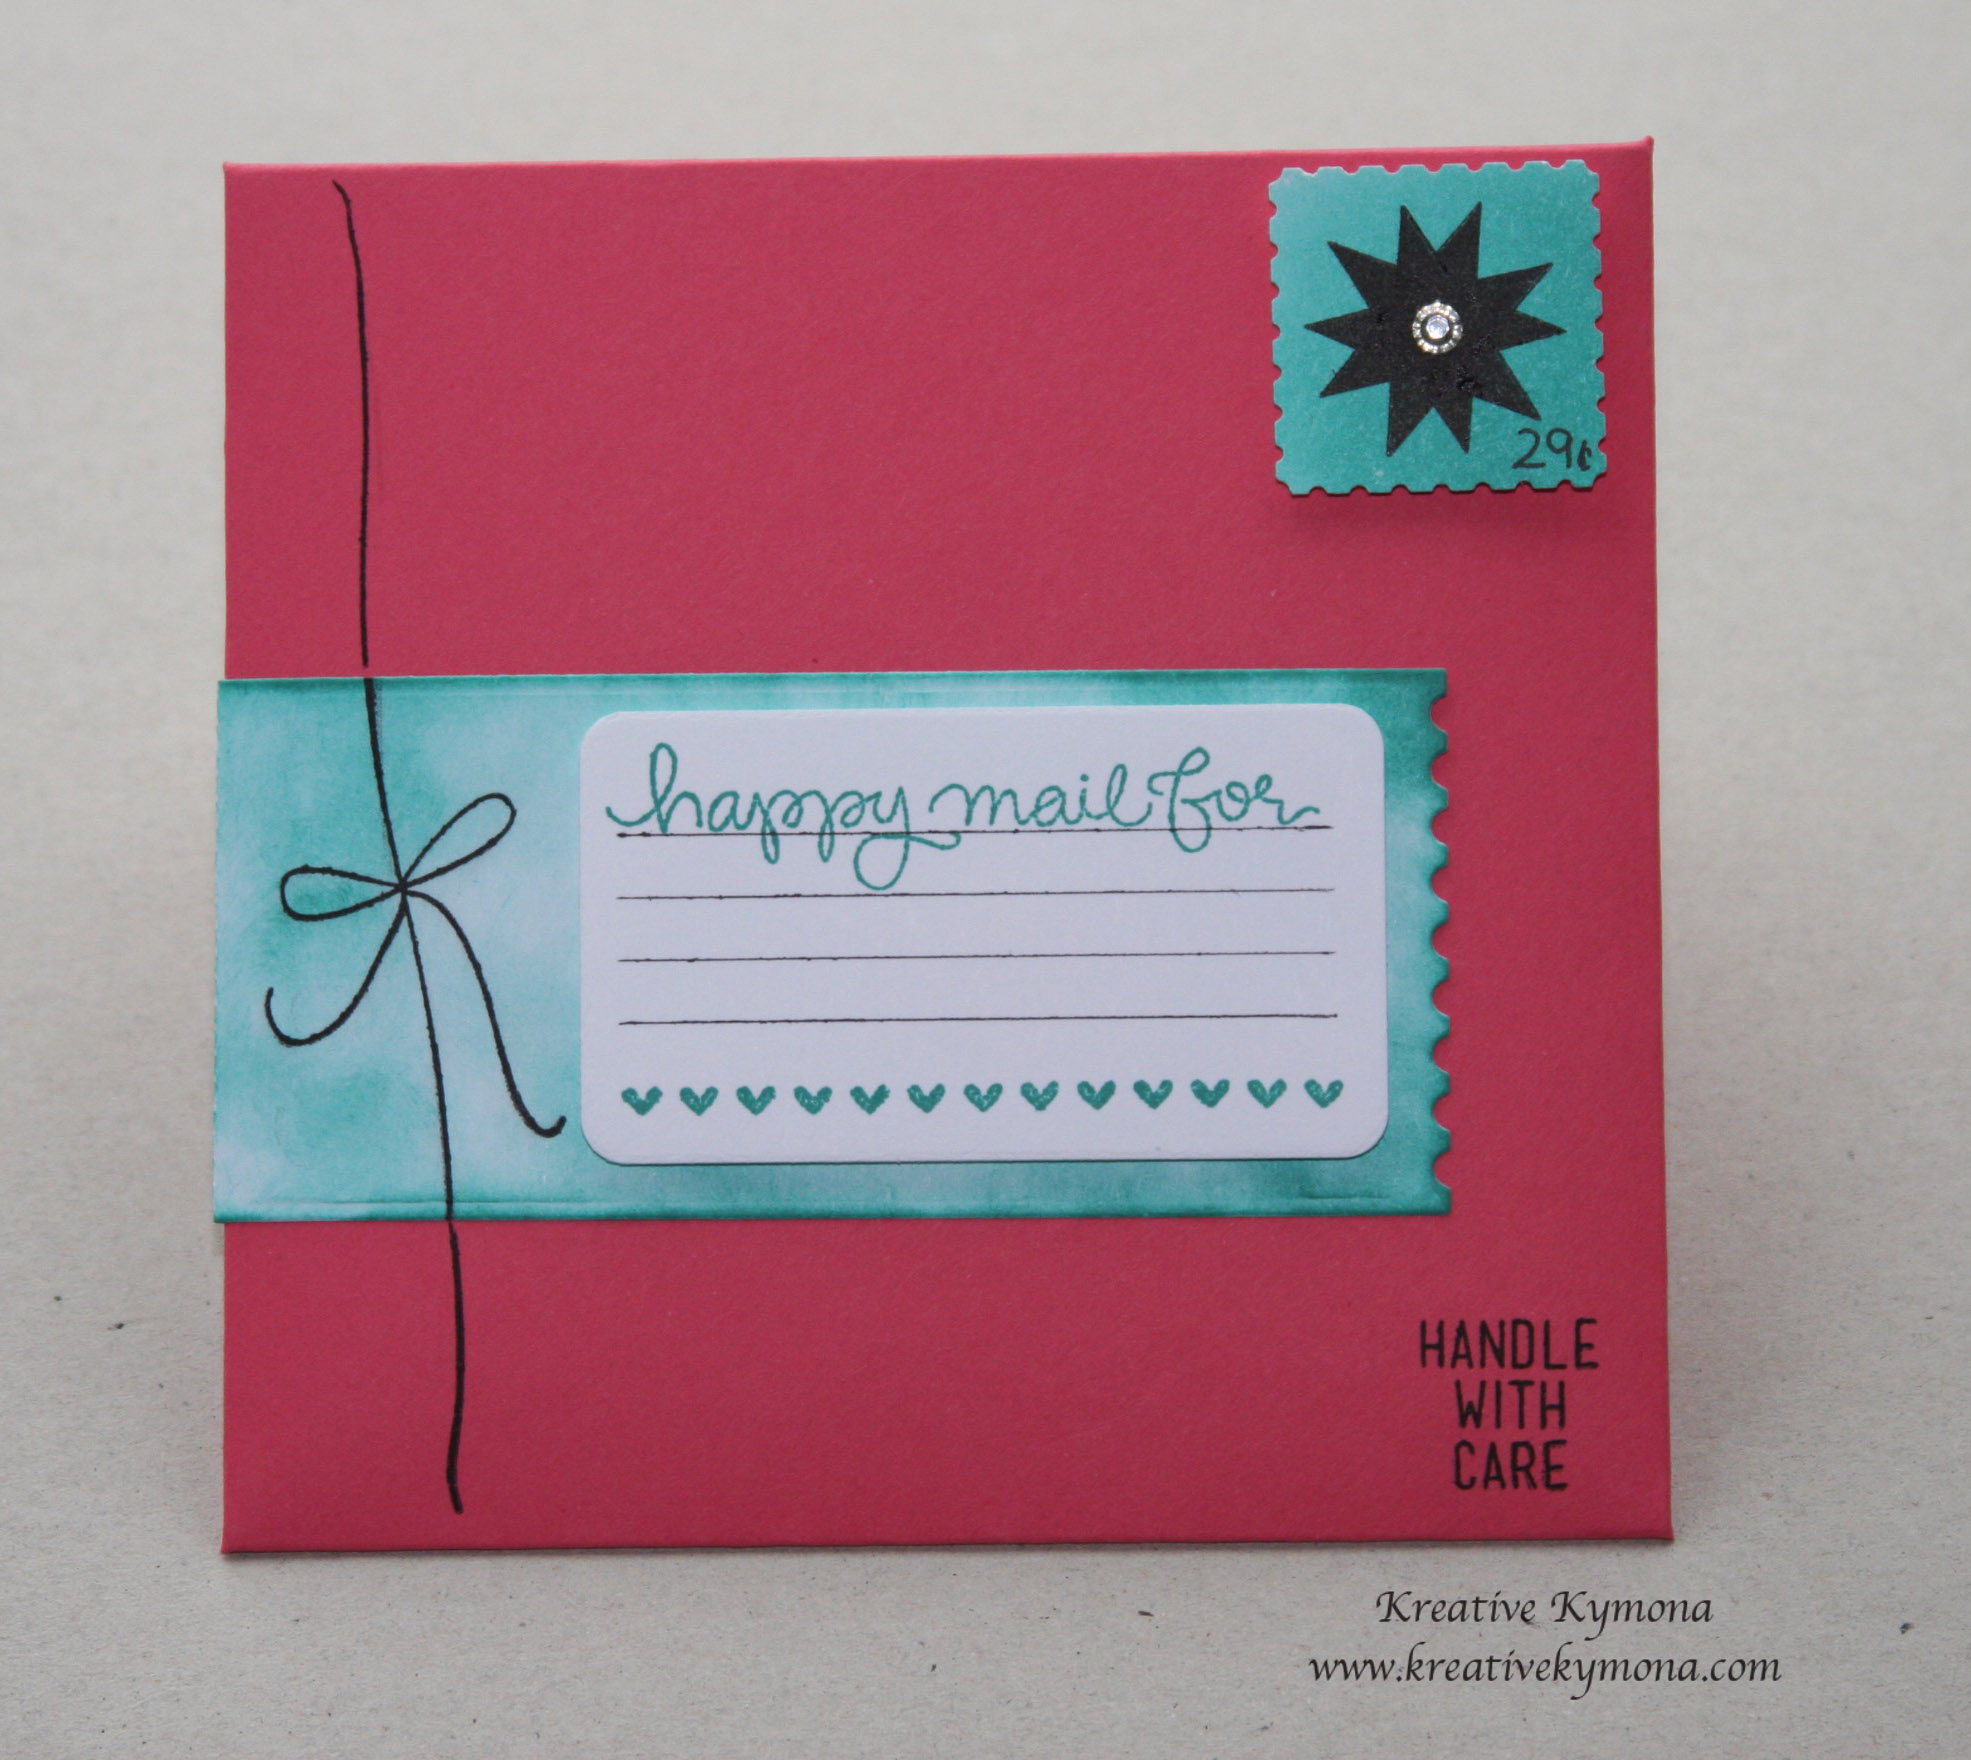
Front of the envelope

Full Envelope Back

Back of the envelope

Envelope wrap back

Close up of the other end of the envelope wrap

Wouldn’t you want to receive an envelope that looked like this?  I would. I probably wouldn’t open it for fear of missing it up.

How about creating this envelope wrap for your next envelope. I created a PDF for you view on how to re-create or create your own envelope wrap.

Click here for the PDF instruction on how to make your own envelope wrap.  Please let me know if this was helpful.

Giveaway time!!!!  I have an extra Wrapped Mailing Label Die from Simon Says Stamp that I am giving away.  Just leave a comment below by 11:59pm on May 11, 2014.  The winner will be randomly chosen and sent an email.

Supplies used:

envelope punch boardEnvelope SentimentsSimple Stars Stamp SetPTI Tropical TealStampin' TrimmerSnail AdhesiveBig Shot Die-Cut MachineSSS Wrapped Mailing Label Craft DiesStrawberry SlushStampin' DimensionalsSponage DaubersCopic MultilinerBasic Rhinestones Jewel AccentsPostage Stamp Punch

 ~Kymona


Watercolor Splats

Did I tell you that I’m soooo excited about Water-coloring!!!  Well, just in case you missed it, I’m soooo excited about Water-coloring!!!!!

My water-coloring class starts next week and I can’t wait.  So in the meantime, I’m practicing using my watercolors.  I’m also waiting from my order to come in with some different types of watercolors for this class.  What class you ask, its my Online Card Class called Watercolor for card makers.  I want to learn everything there is to know about how to use water-coloring on my cards.  I also want my 7-year-old daughter to learn all about water-coloring as well. She’s taking the class with me, lol.

Today’s card is for Papertrey Ink’s Make it Monday #161: Watercolor Splats challenge.  What a great way to practice water-coloring!!! I Love It.

So, watercolor splats are a fun twist that lets you use droplets of water to do all of the work for you.  I used Papertrey dye ink’s to pull of this effect.  My order of ink’s came in today which was perfect for this card.  The colors are amazing and they do dry fast.

Take a look:

You are My...Watercolor Splats

To create these watercolor splats, I used my sponge daubers to apply the ink to my paper.  I love the textured look the sponge daubers created on my paper.

After applying each color of ink, I used my Artist’s Loft #4 paint brush soaked with water and touched my paper with the tip of the brush.  I didn’t press hard at all.

Once the water landed on the paper, the ink started to move all by itself.  To create bigger circles, I just added more water to the center of the circle.  It was fun to watch.

I can’t wait for my 8 year daughter to create her card with these splats.  She is going to be amazed.  I’ll post her card when she is done.

Supplies used:

classiccrestsolarwhtiePTI Summer Sunrise InkPTI Berry Sorbet InkPTI Tropical Teal Sponage DaubersPTI Phrase Play #1 DiePTI Phrase Play #1 Mini Stamp SetWe R Memory Keepers Corner ChomperStamp Runner Dot Adhesive

Please leave a comment below, letting me know what you think!!  I would love to hear from you.

-Kymona