Distress Techniques Day 4

Hello everyone!!  I’m back again with another days work from the Creative Chemistry 103 class.

I skipped Day 2 and 3, but I will come back to it.  Today I will show you what Day 4 is all about.

Day 4 was all about Distress Crayons.

I bought two sets when they came out but I wasn’t a fan of them.  I couldn’t get them to do what I wanted.  Another design team member showed me how I could use them and I was ok with that.  Then this class really set the record straight.

Take a look:

Distress Tags 4

The different techniques are:

  1. Distress Crayon Smudge
  2. Distress Crayon Textured Resist
  3. Distress Crayon Watercolor Resist
  4. Distress Crayon Blended Background
  5. Distress Crayon Layered Coloring

Totally awesome right!!  I love these different techniques!!

Supplies used:

Thank you so much for stopping by!

~Kymona

Distress Techniques Day 1

Hello everyone!!  I’m here today with some distress tags from the Creative Chemistry 103 class.

I have to thank my design team member for encouraging me to take this 3rd class by Tim Holtz.  I’ve taken the first two back when they came in 2012 and 2013, and wasn’t sure what I would learn in this class that would be different.

I have to admit, I’ve learned quit a bit.  So I’m thankful for the push.

Day one we learned a couple of different techniques!!

Here are a couple of them:

  1. Distress DIY Ombre – my butterfly tags
  2. Distress Highlight Stamping – the face card and the leaf tag
  3. Distress Off-Set Stamping – the flower card

Distress Tags 1

I love how these tags turned out.  I can’t wait to see what the other days will bring.

Supplies used:
Mini Ink Blending Tool

Thank you so much for stopping by!!

~Kymona

OCC: Background Check Homework Day 2

Hello everyone!!  I’m here today just popping in to share my homework for my new Online Card Class called Background Check!!

Its all about creating different backgrounds for our card designs.  Day 2 was all about creating backgrounds using stamping techniques. The possibilities are endless with this type of designs.

So I started with Kristina’s technique which is Dye and Pigment Ink Stamping.

Take a look at my card panel that I created:

Dye and Pigment Stamping Finish (OCC)

I used Lawn Fawn Argyle Backdrops to create this pattern.  I used Papertrey Ink Summer Sunrise, Hawaiian Shores, and Berry Sorbet Dye Ink.  I also used Hero Arts Unicorn Pigment Ink.

Dye and Pigment Stamping (OCC)

I love how this turned out.  I have to try this with other pattern stamps that I have in my stash.

Now I have to go to finish up Day 2 and start on Day 1.  I’m working backwards but I’m ok with that.

What do you think?  Let me know below.

Supplies used:

PTI Berry Sorbet InkPTI Summer Sunrise InkHawaiian ShoresHero Arts Unicorn Pigment InkLF Argyle Backdrops

Thank you for stopping by!!

~Kymona

Online Card Class Homework – Day 2

Hello everyone!!  I’m here today with another card I created for my Stretch Your Dies homework!!

Kristina Werner taught us how to die cut within larger dies.  I thought this was totally awesome.

Take a look at my card:

Leafy ThanksM

For this technique:

1. I die cut our leaves out of watercolor paper.

2. Then I arranged the leaves the way I wanted them to appear on my card.

3. I covered the arrangement with masking paper so that the leaves stay in place.

4. I ran the masked leaves through my big shot to cut out a circle.

5. Before moving the mask, I added foam tape to the back of each leaf.

6. I placed my masked piece down and then took my time and lifted the mask.

7. I die cut my thank you, added Wink of Stella to all of my piece and my card was done.

Leafy ThanksM2

Super easy and fun.

Supplies used:

Stitched Leaves LF Scripty Thanks Wink of Stella clearCanson Watercolor Paper Distress Ink 4Distress Ink 2


Thanks for stopping by!

~Kymona

Top Dog Dies – Just for you

Hello everyone!!  Its Top Dog Die Wednesday!!  I’m here with a die technique that I learned in my new Online Card Class called Stretch Your Dies!!

Carissa Wiley taught us how to create a window card using a die-cut opening!!  I was super excited when I saw that technique.

I went with Top Dog Dies Decorated Eggs Die Set to create my card today!

TC095-DTake a look at my card:

Just for you (TDD)

How cute is that!!  I used the solid egg die to create that window.

Take a closer look:

Just for you 4 (TDD)

I partial die cut on that egg so that the egg would be a door to my sentiment inside the card.

Here is how I created this card:

1. I cute a strip of Lawn Fawn Let’s Polka, Mon Amie patten paper and adhered it to the front of my card front.

2. I placed the die to the right side of the card front.

That’s when I remembered I wasn’t going to be able to partial die cut the egg because my cutting plate was too big and my card could fold or the die cut would go through the whole card.

So I cute my card in half.  Once I’m done cutting my die I will adhere the card panel to the front of a new card front to stay with a one layer card.

3. Before attaching the card panel to my card front, I die cut the egg on my card front so that the card panel matches the card base.

4. I used Papertry Ink  Swoosh Stamp set to stamp my sentiment inside the egg and Technique Tuesday Smile Borders to stamp my sentiment on the strip of pattern paper using Memento Tuexdo Black Ink.

5. I added Pretty Pink Posh Sparkling Clear 4mm sequins  and 6mm sequins to added interest.

Just for you 2 (TDD)

Just for you 3 (TDD)

So what do you think?  Are you fascinated as much as I was.  Never thought to use my dies in this manner.  This is why I love learning!!

Supplies used:

LetsPolkaMonAmiePetitePaperPack Swoosh Smile Borders Pretty Pink Posh Sequins 4mm Pretty Pink Posh 6mm Sequins Memento Black Ink

Thank you for stopping by!!

~Kymona

Clean and Simple 4 – Day 1

Hello everyone!!  I’m here today with my first homework project from the new Online Card Class – Clean and Simple 4!!

Before I show you what I created, let me just say I LOVE these classes.  I learn so much from all of the instructors.  Its unbelievable.

Day 1 we learned about:

1. Heat Embossing and Masking

2. 3D Embossing

3. Faux Ceramic Titles

Did your jaw drop?  Yes, it should.  Amazing, Amazing stuff. I can’t wait to share all of it with you.


My card today showcases Heat Embossing and Masking!  The talented Jennifer McGuire taught us how to combine simple masking and stamping with powders to create unique backgrounds that will really add pop to a clean and simple design.

Take a look at my card:

OCC Embossed Love

Amazing right!! Just some pop of color turned this simple card to Wow!! simple card.

Here is a closer look:

OCC Embossed Love 2

Here you can see the white emboss pattern that follows evenly across the card.  Amazing what masking can really do!!

I will be back with more cards from Day 1 class!!

FYI –  a2z Scrapbooking Store has all of your Hero Arts needs.  The best part is, I have a coupon for you to use.  Use KYMONA15 to get 15% off your totally purchase.

Jennifer used a Hero Arts Basic Grey Bold Flower Pattern Background Cling Stamp on her card, that I love but didn’t have. So I ordered it from a2z Scrapbooking and you can too.

Hero Arts Bold Flower Pattern

Supplies used:

Hero Arts Highline Ironwork LF Scripty Love Hero Arts White Embossing PowderHero Arts Snow Layering Paper Hero Arts Black Layering Paper

Thanks for stopping by!

~Kymona


Holiday Card Workshop Day 4

Hello everyone!!  I’m here with my homework from Day 4 from my Online Card Class Holiday Card Workshop.  I’m so happy I’m able to complete some of my homework.  There are times when I don’t get to finish all my assignments, so to be able to get them done this time around is great for me.

Day 4 lessons focused on One-Layer Cards.

Our instructors today were:

1. Jennifer McGuire with a Window Card

2. Laura Bassen with Create a Scene

3. Julie Ebersole with Simple Masking

Now on to my cards.  Lets start with:

1. Jennifer taught us a double partial die cutting trick.  I really love this technique and will be using it on more of my cards.

Here is my card:

Snowman

Yes, this card has two separate die cuts.  Can you believe that?  I know, neat isn’t it.

Lets look at the inside of the card:

Snowman InsideI heat embossed my sentiment, cut a circle stencil and inked my circle with distress inks.  I add clear wink of stella to the circle.  I colored a piece of white cardstock with the same Copic marker I used on the snowman’s buttons.  I punch a heart and adhered it to the circle.

I loved the card so much I made another.  Take a look at my second card:

Santa Die cut

Isn’t this Santa just the cutest you’ve seen.  I really like my coloring of this Santa.  I’m not to fond of the background but it will do.

In fact the snowman should have this background and the Santa should have the other background.

Take a look at the inside of the card:

Santa Inside

I think I put to much glitter on this circle.  What do you think?

Now on to the next card:

2. Julie taught us how to mask off an area and stamp in that area to create a silhouette.

I’m not sold on my card but I tried, take a look:

Joy

Julie used die cut of a deer with antlers, her cards look so much better.  I have to give this technique another try.

Julie created another card that I will try to do tomorrow.  I also have to work on the card Laura taught us.

I will be back tomorrow with those cards.  Stay tuned!!

Supplies used:

Snowman and Santa Card:

Winter FriendsCopic MarkersSalty Ocean Distress InkTumble Glass Distress InkCircles Framelits DieItty Bitty Accents Punch PackWink of Stella clearclassiccrestsolarwhtie


Joy Card:

Scripty Joy Mistletoe Lawn Trimmings Hero Arts Unicorn Pigment InkSSS Khaki cardstockconfetti

So what do you think?

Thanks for stopping by!

~Kymona


Holiday Card Workshop Day 5

Hello everyone!!  I’m here today to post my homework from my new Online Card Class!!  The new class is Holiday Card Workshop!!  I’m so excited about this class.

So, I’m starting with day 5 because I haven’t had a chance to start any of my cards until yesterday which happen to be DAY 5!!

Day 5 just happen to be Gift Tags!!  Gift tags are so much fun and nothing gives a wrapped gift a finishing touch like a gift tag.

Today we learned how to make three different tags:

1. Gift Card Tag by Kristina Werner

2. 2-in-1 Tag and Card by Laura Sterckx

3. Window Tags by Yana Smakula (my favorite)

All of the lessons taught today were simple amazing.  I truly learned a lot and will share my creations with you.

1. Let’s begin with my take on Kristina’s gift card tag:

Gift Card TagIsn’t this gift card holder tag the cutest!!  I didn’t punch a hole in the tag yet because I’m not sure how I want to use it.

Gift card tag close upTake a look at that closure!  Kristina taught us how to create that.  I thought that was the amazing part of this gift card tag.

I didn’t add a gift card inside yet, because I’m not sure who I’m going to give this tag too.

Now on to the next tag!

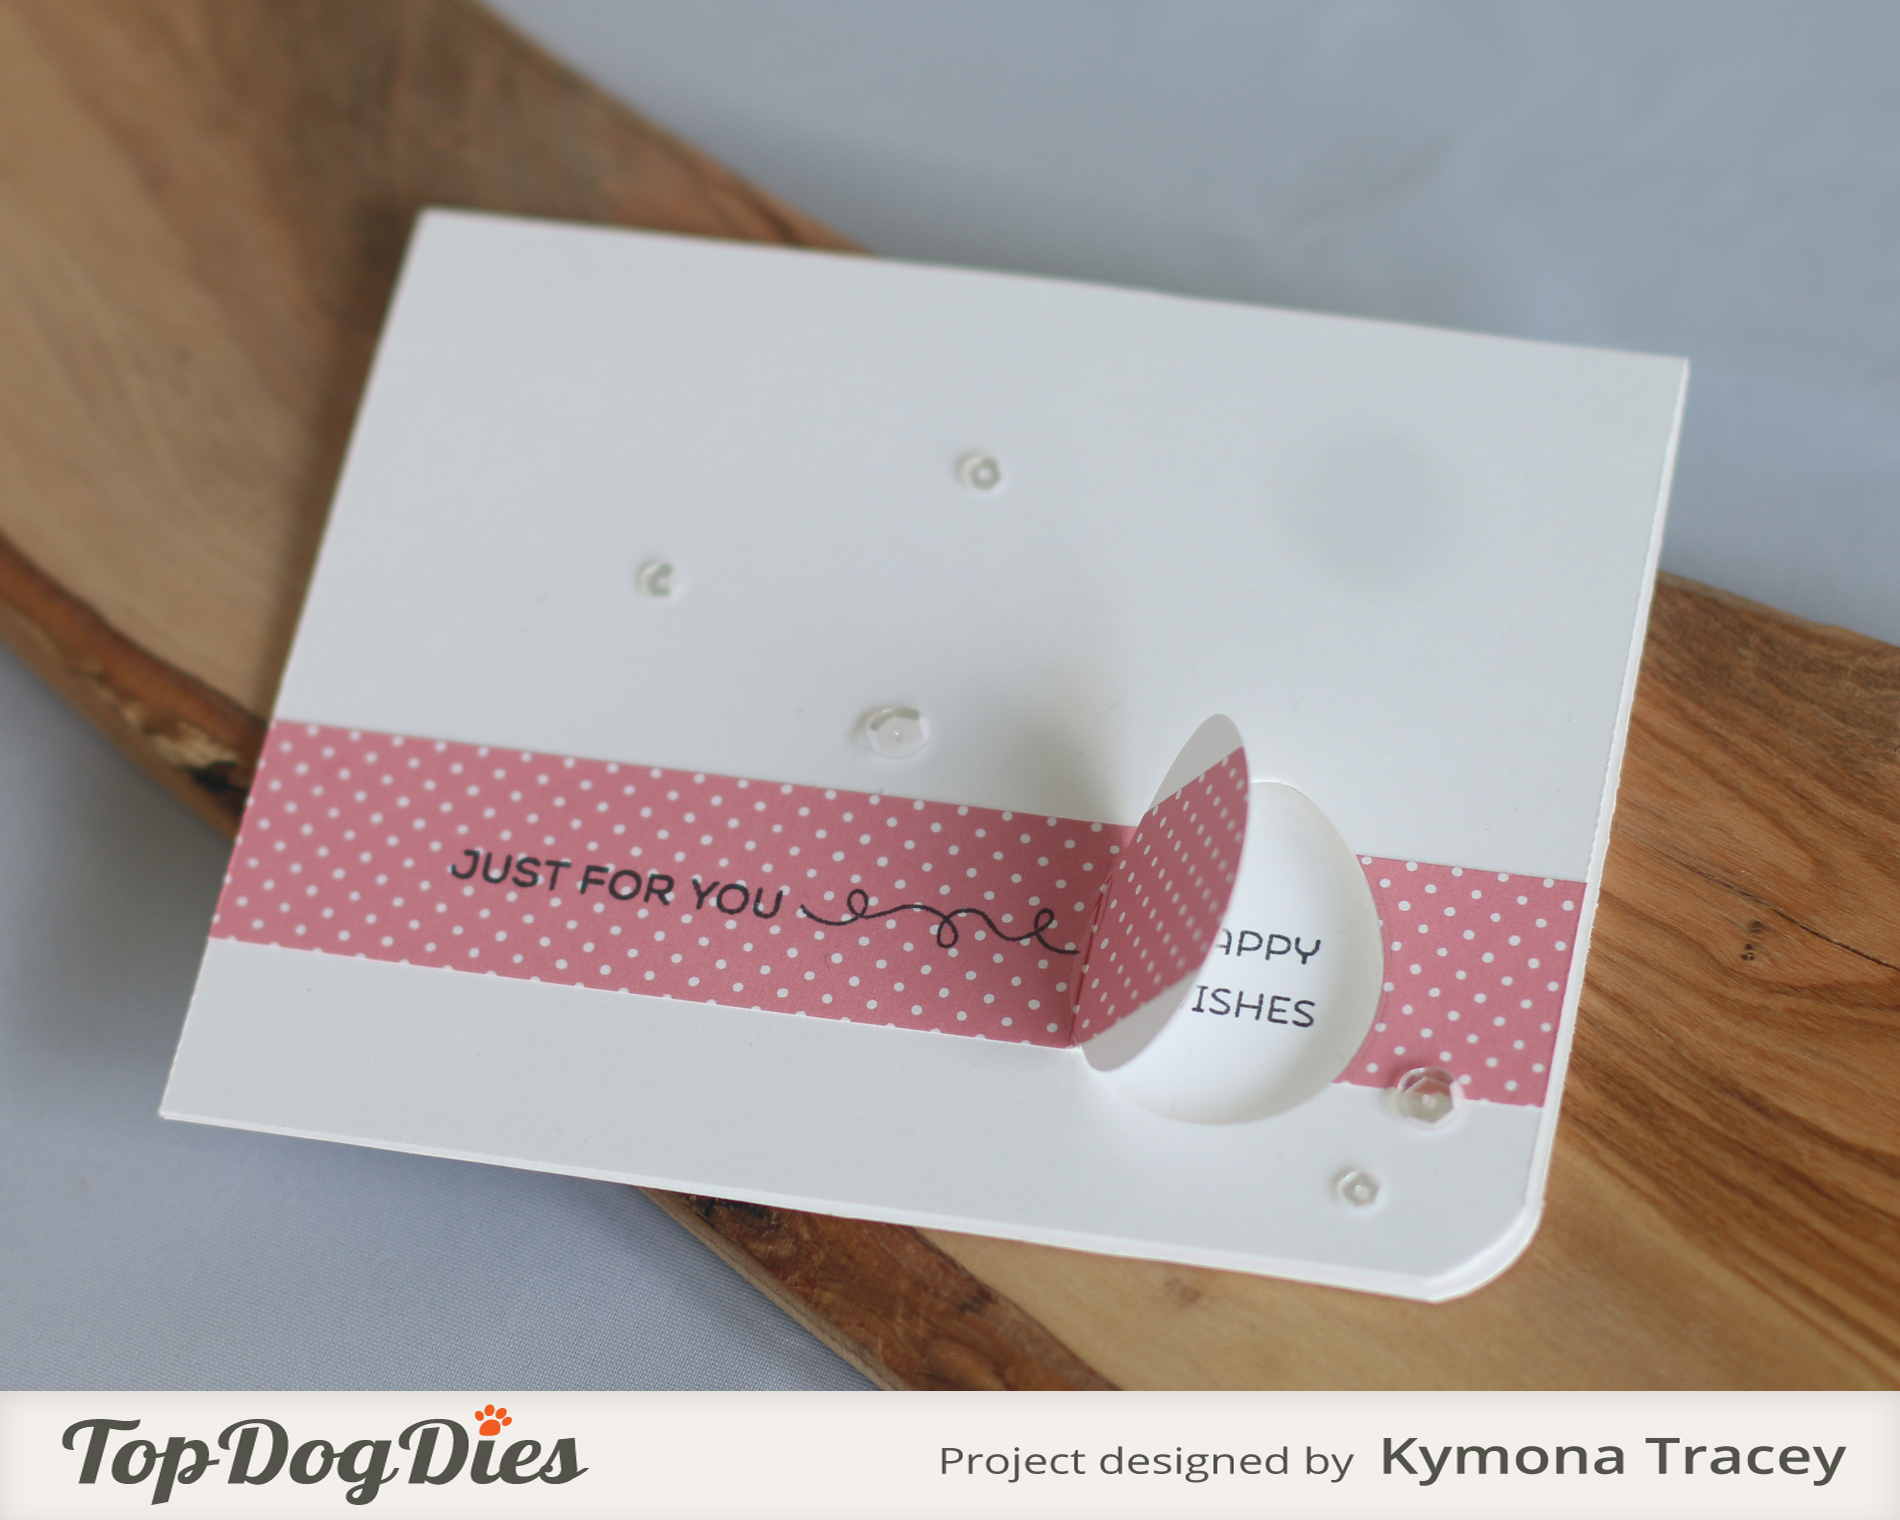
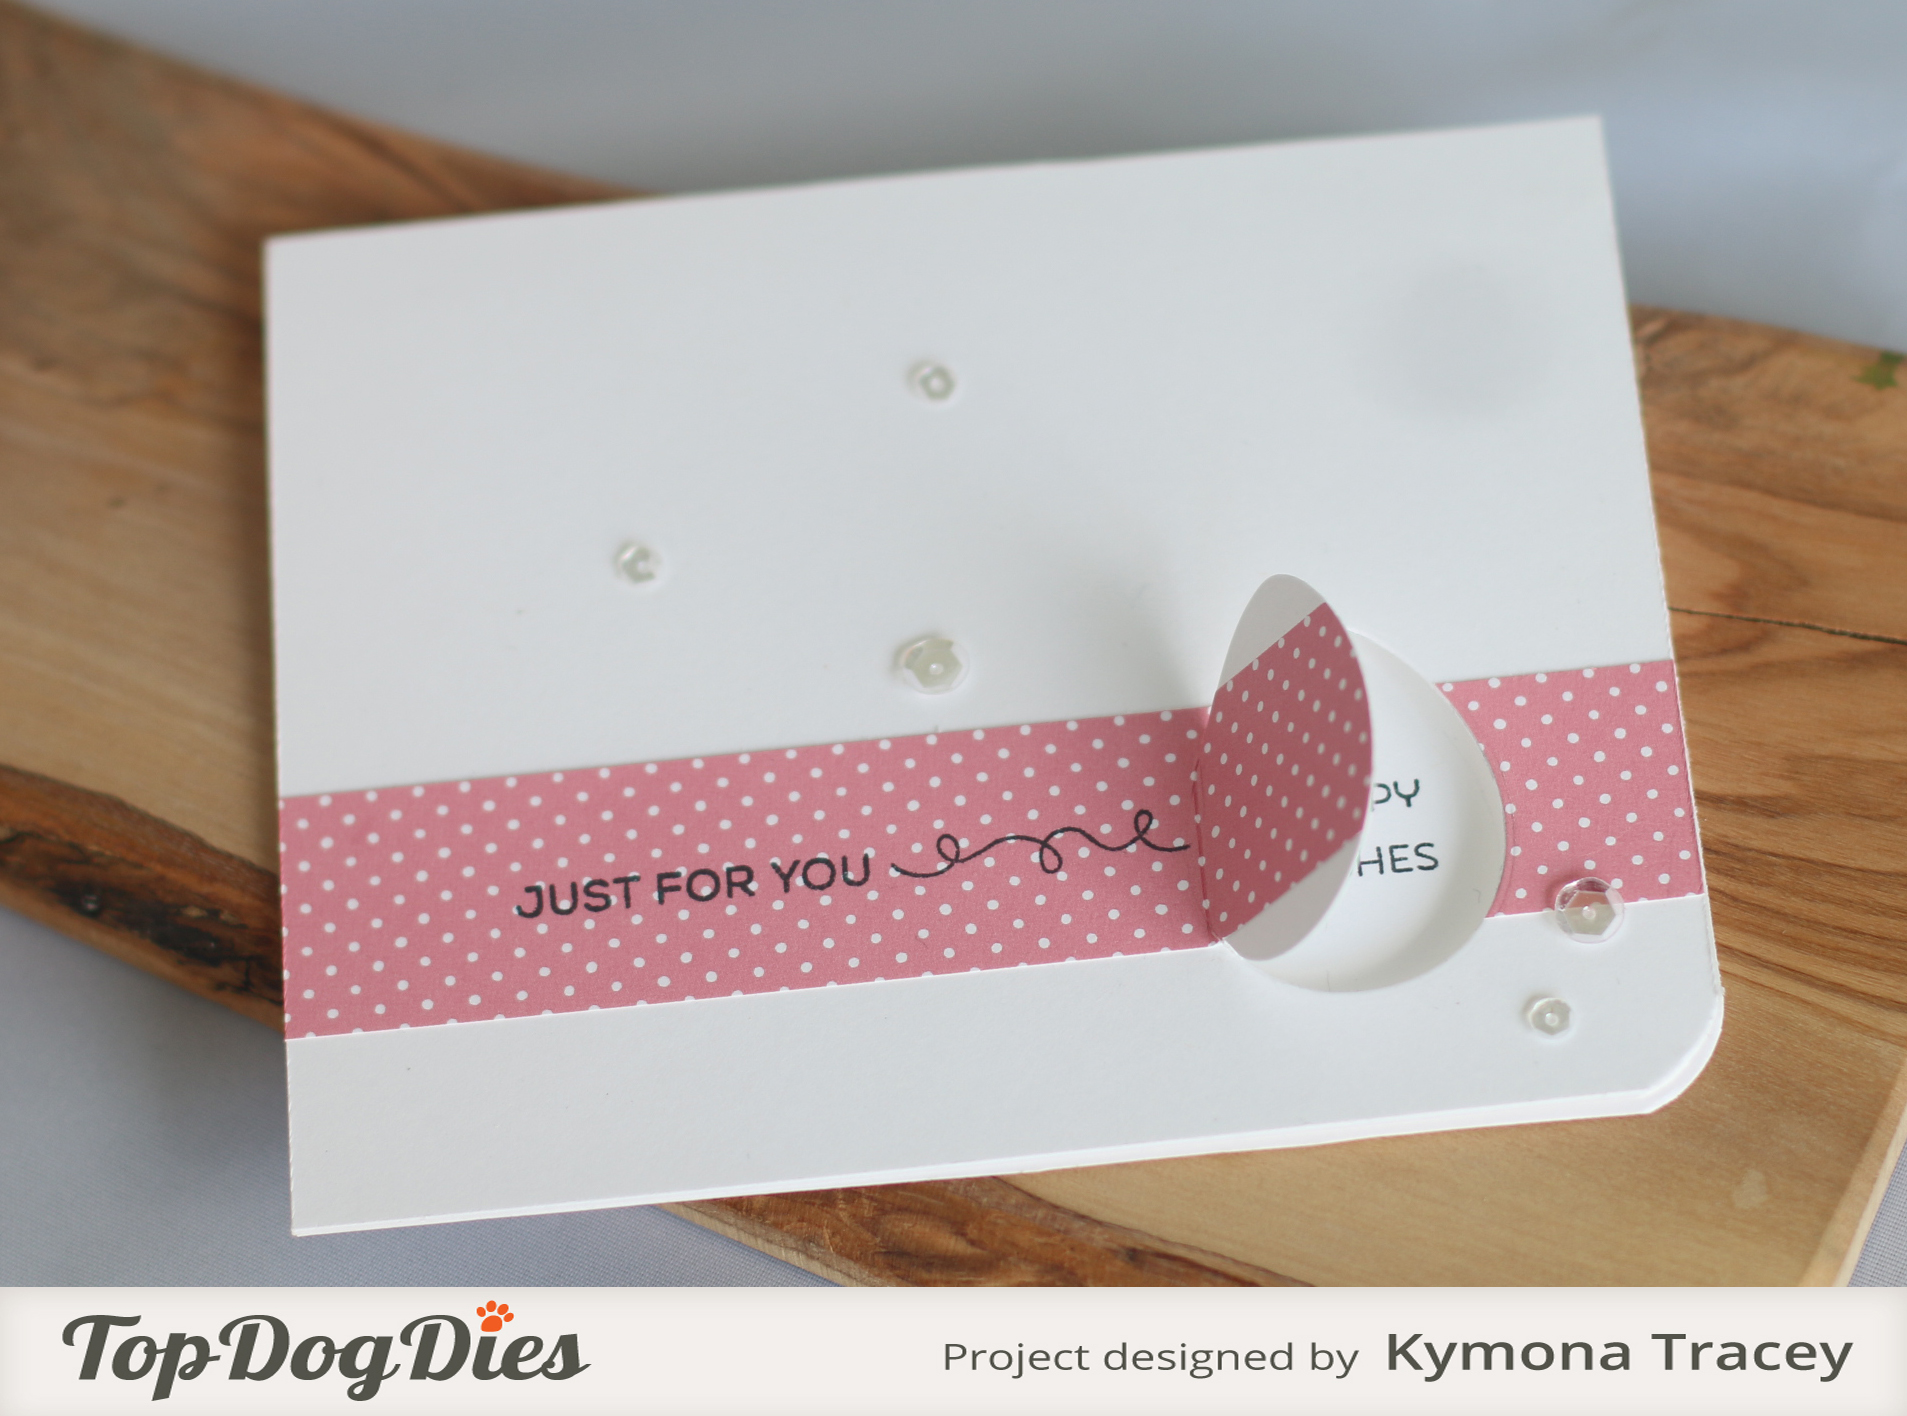
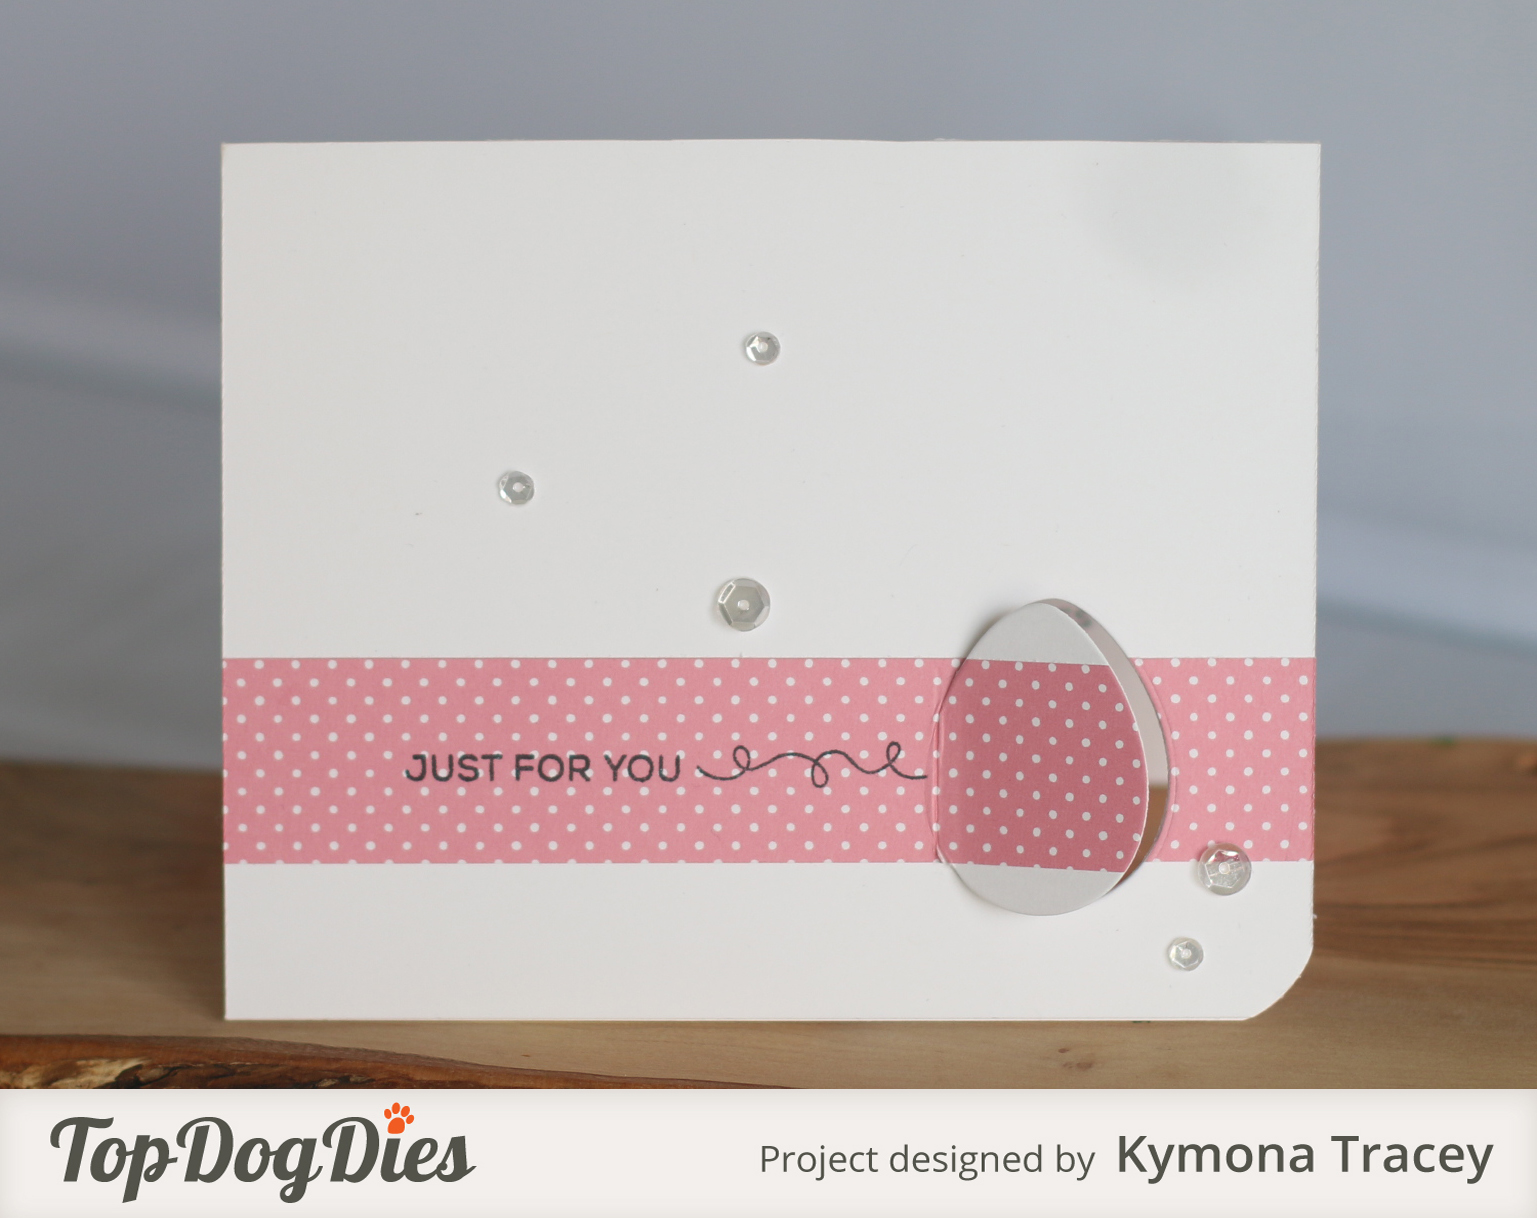
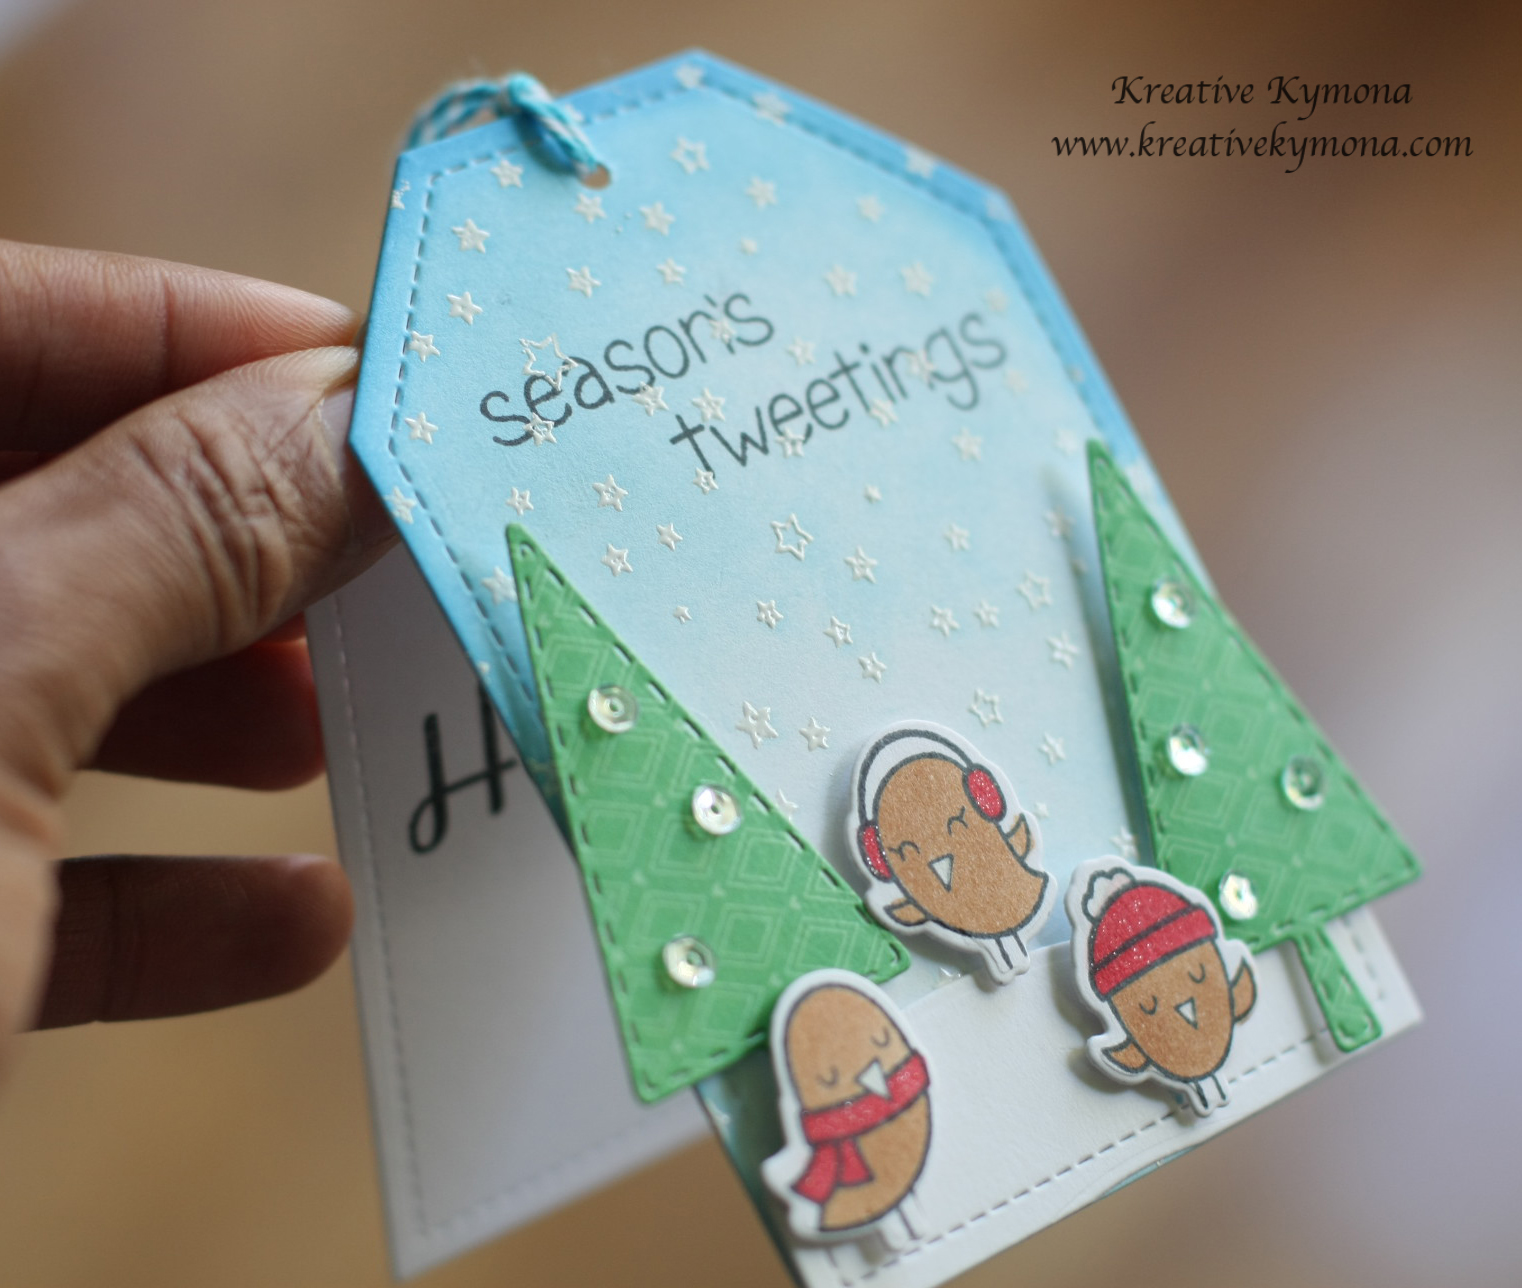
2. Here is my take on Laura’s 2-n-1 gift tag and card:

2-n-1 gift card tag

I’m so proud of my tag!  This is the first time I built a sense using my stamps and dies.  I’ve always been afraid to try for fear of messing up, but I really enjoyed creating this.

2-n-1 gift card tag insideHere is the inside of my tag, that now can be a card!!  Love it!!

2-n-1g gift card tag openThis is what the tag looks like on the side!

Now on to my favorite of the three!!

Yana taught us how to create three different window cards from: easy, medium, hard!

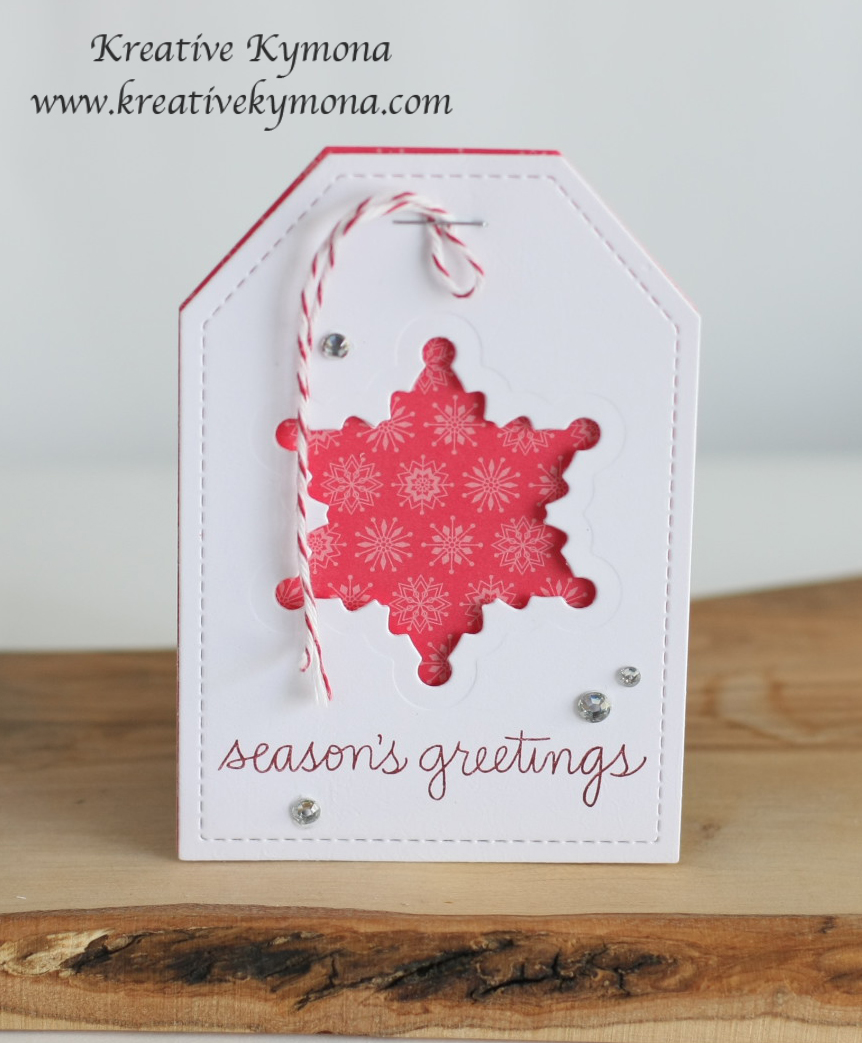
1. This is my take on Yana’s Window tags:

Easy Tag first:

Window TagThis was an easy window tag to reproduce.  I love how pretty it looks just as it is.

2. Medium tag:

Window Tag MediumThis tag is a step up from the first tag.  All I did was add foam tape and some pattern paper.
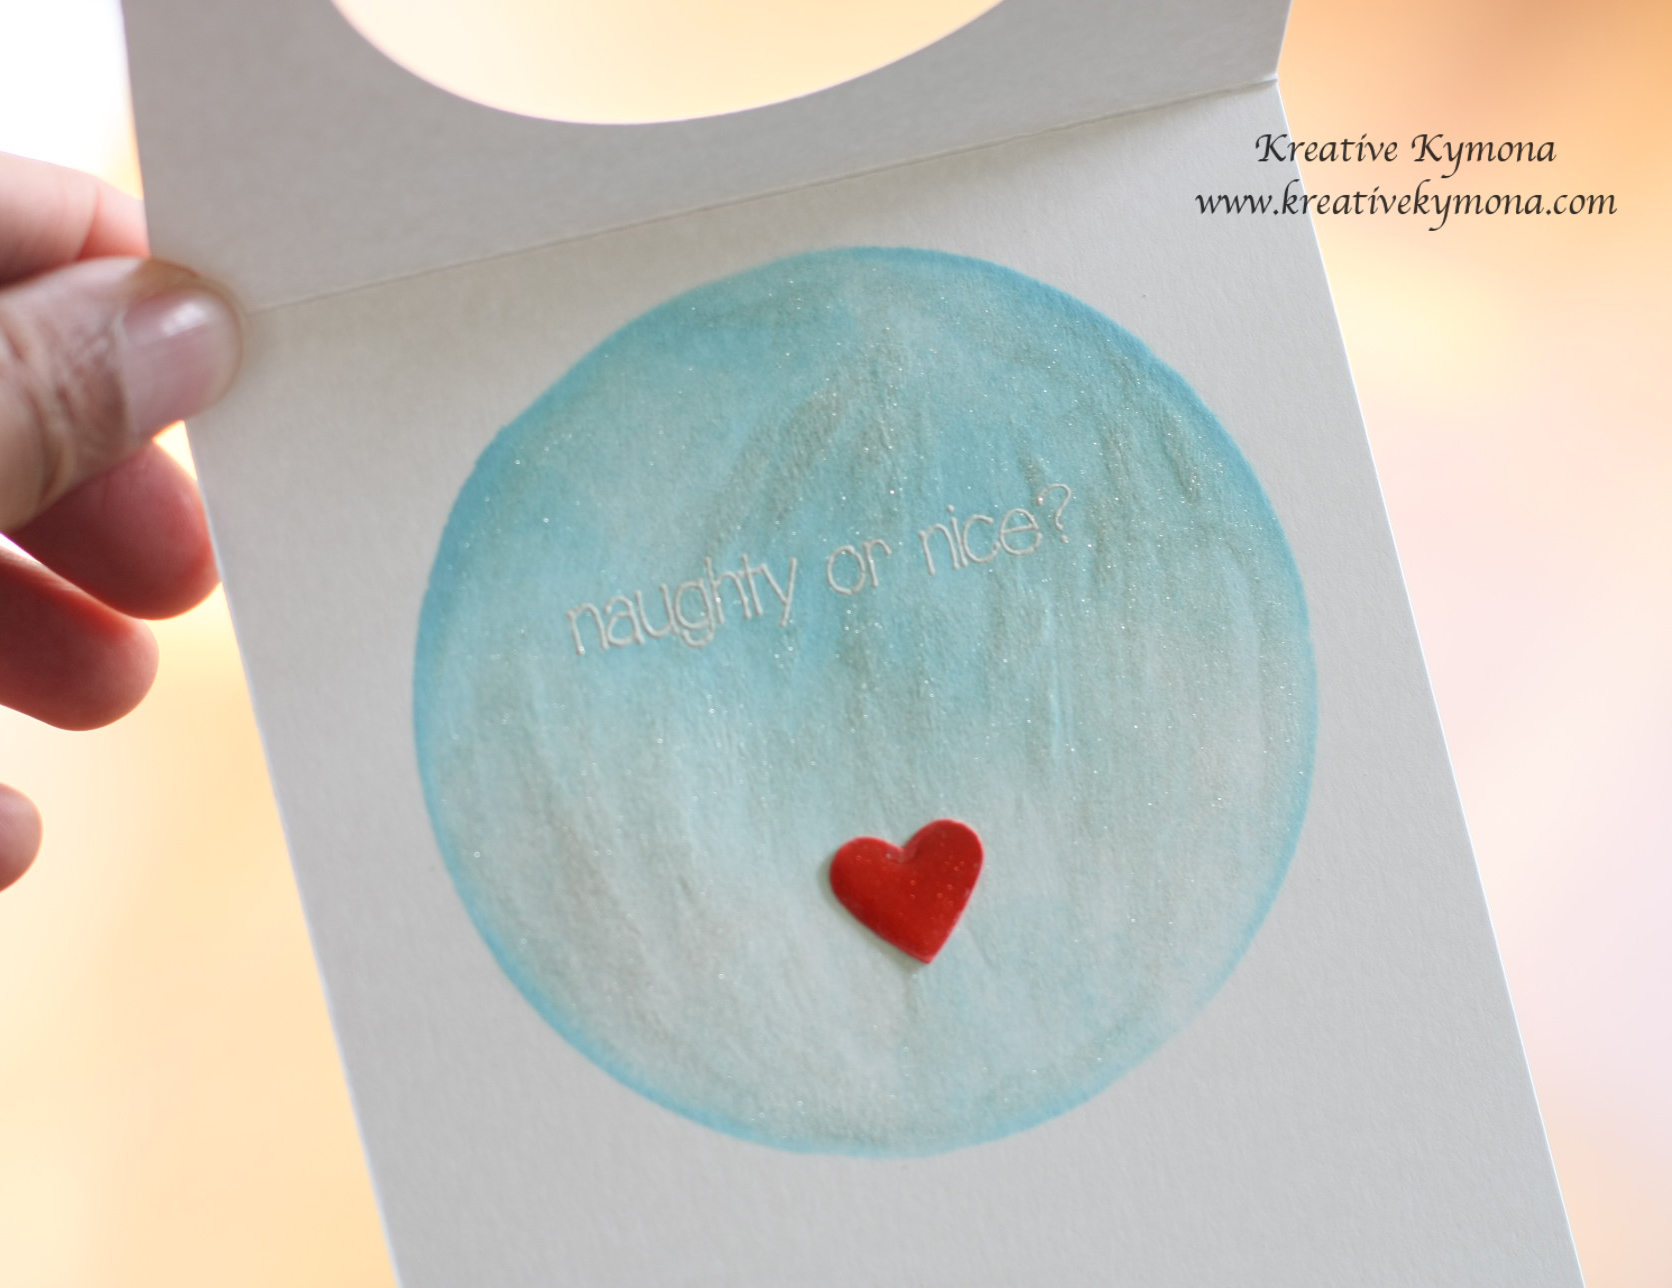
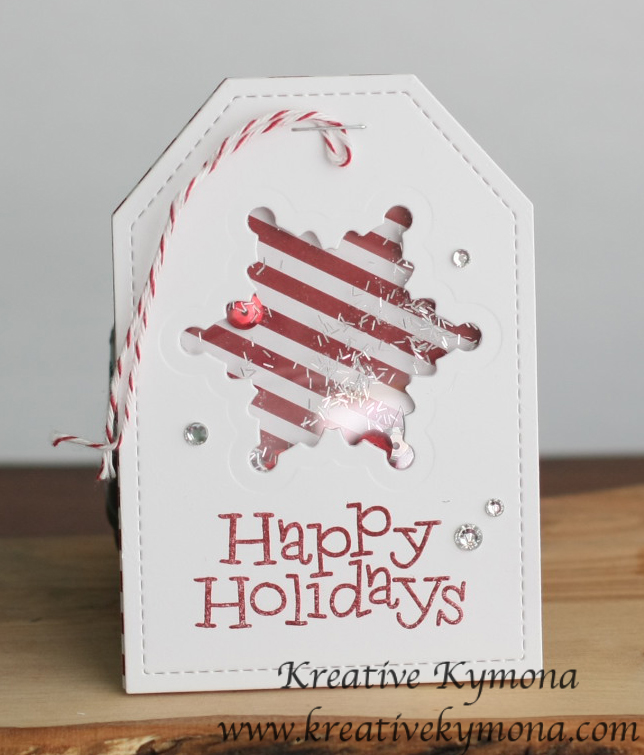
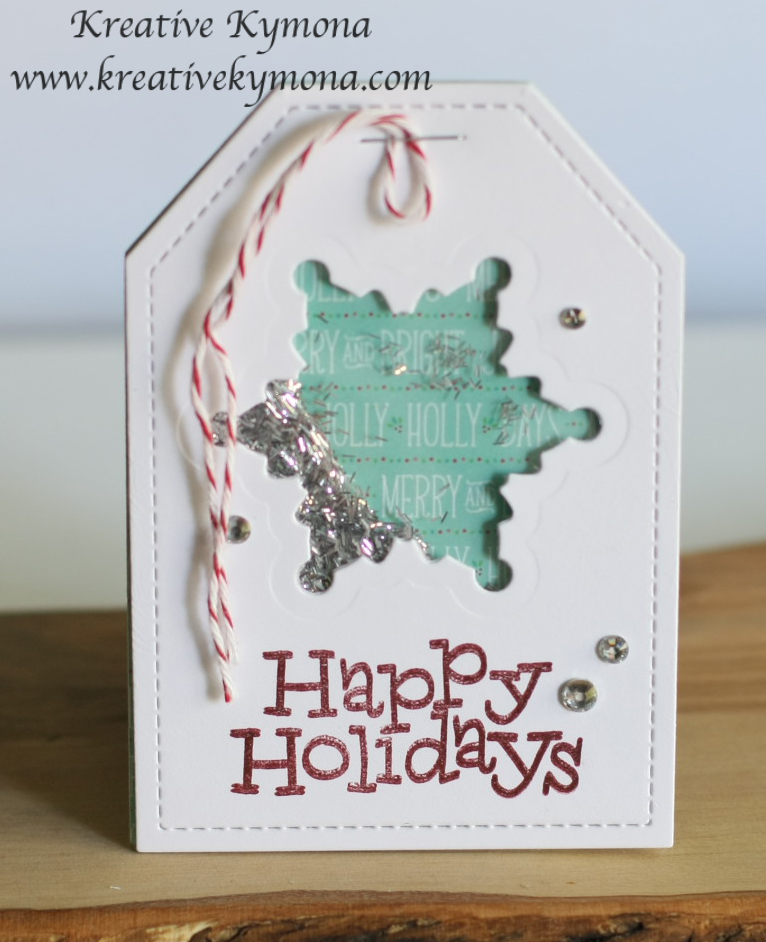
3. Hard tag:

Window Tag hard

This tag is now a shaker tag!!  Yayyy!  (Don’t mind my small camera lens behind the tag.)

Here is an extra:

Extra Tag

How cute are these tags!!

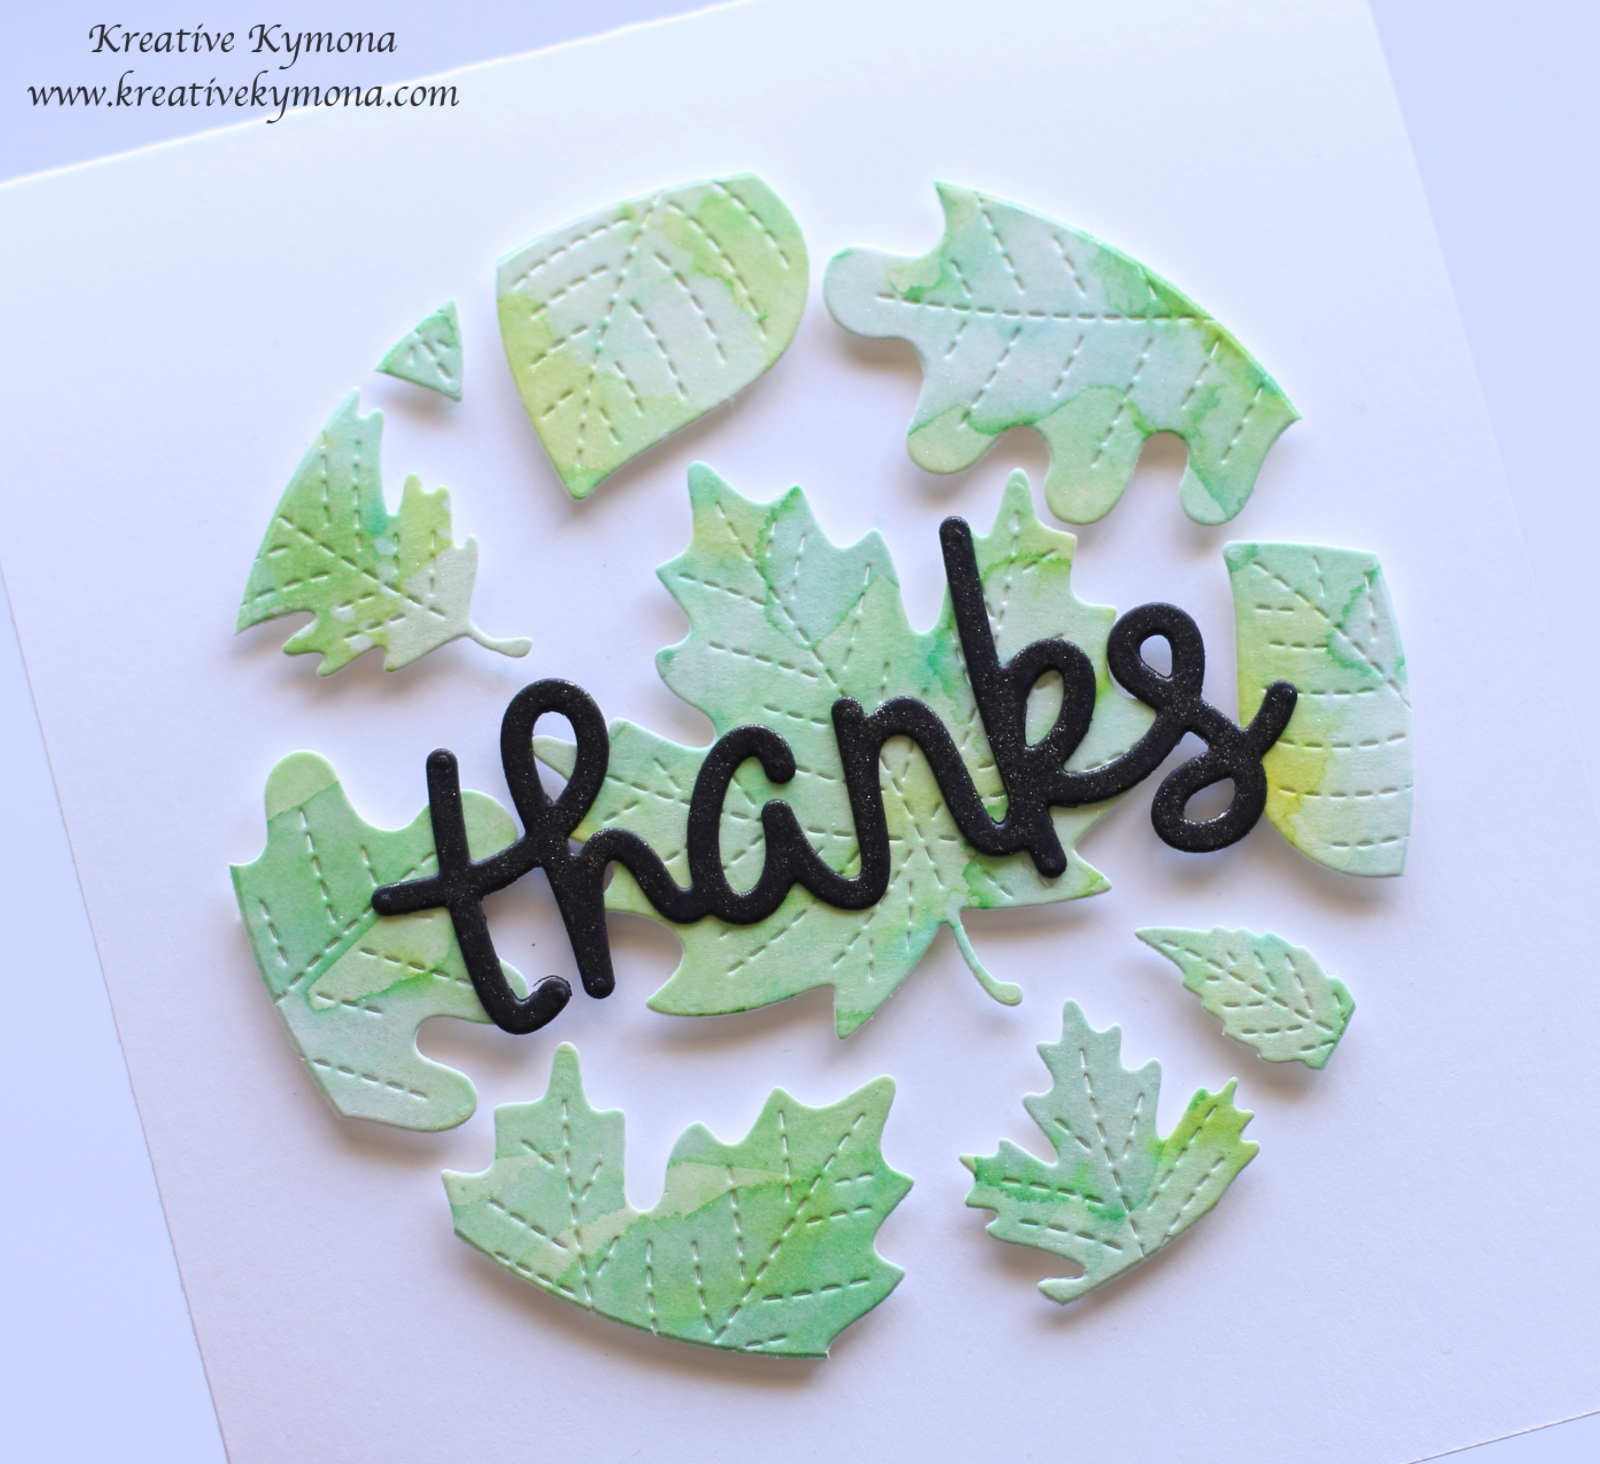
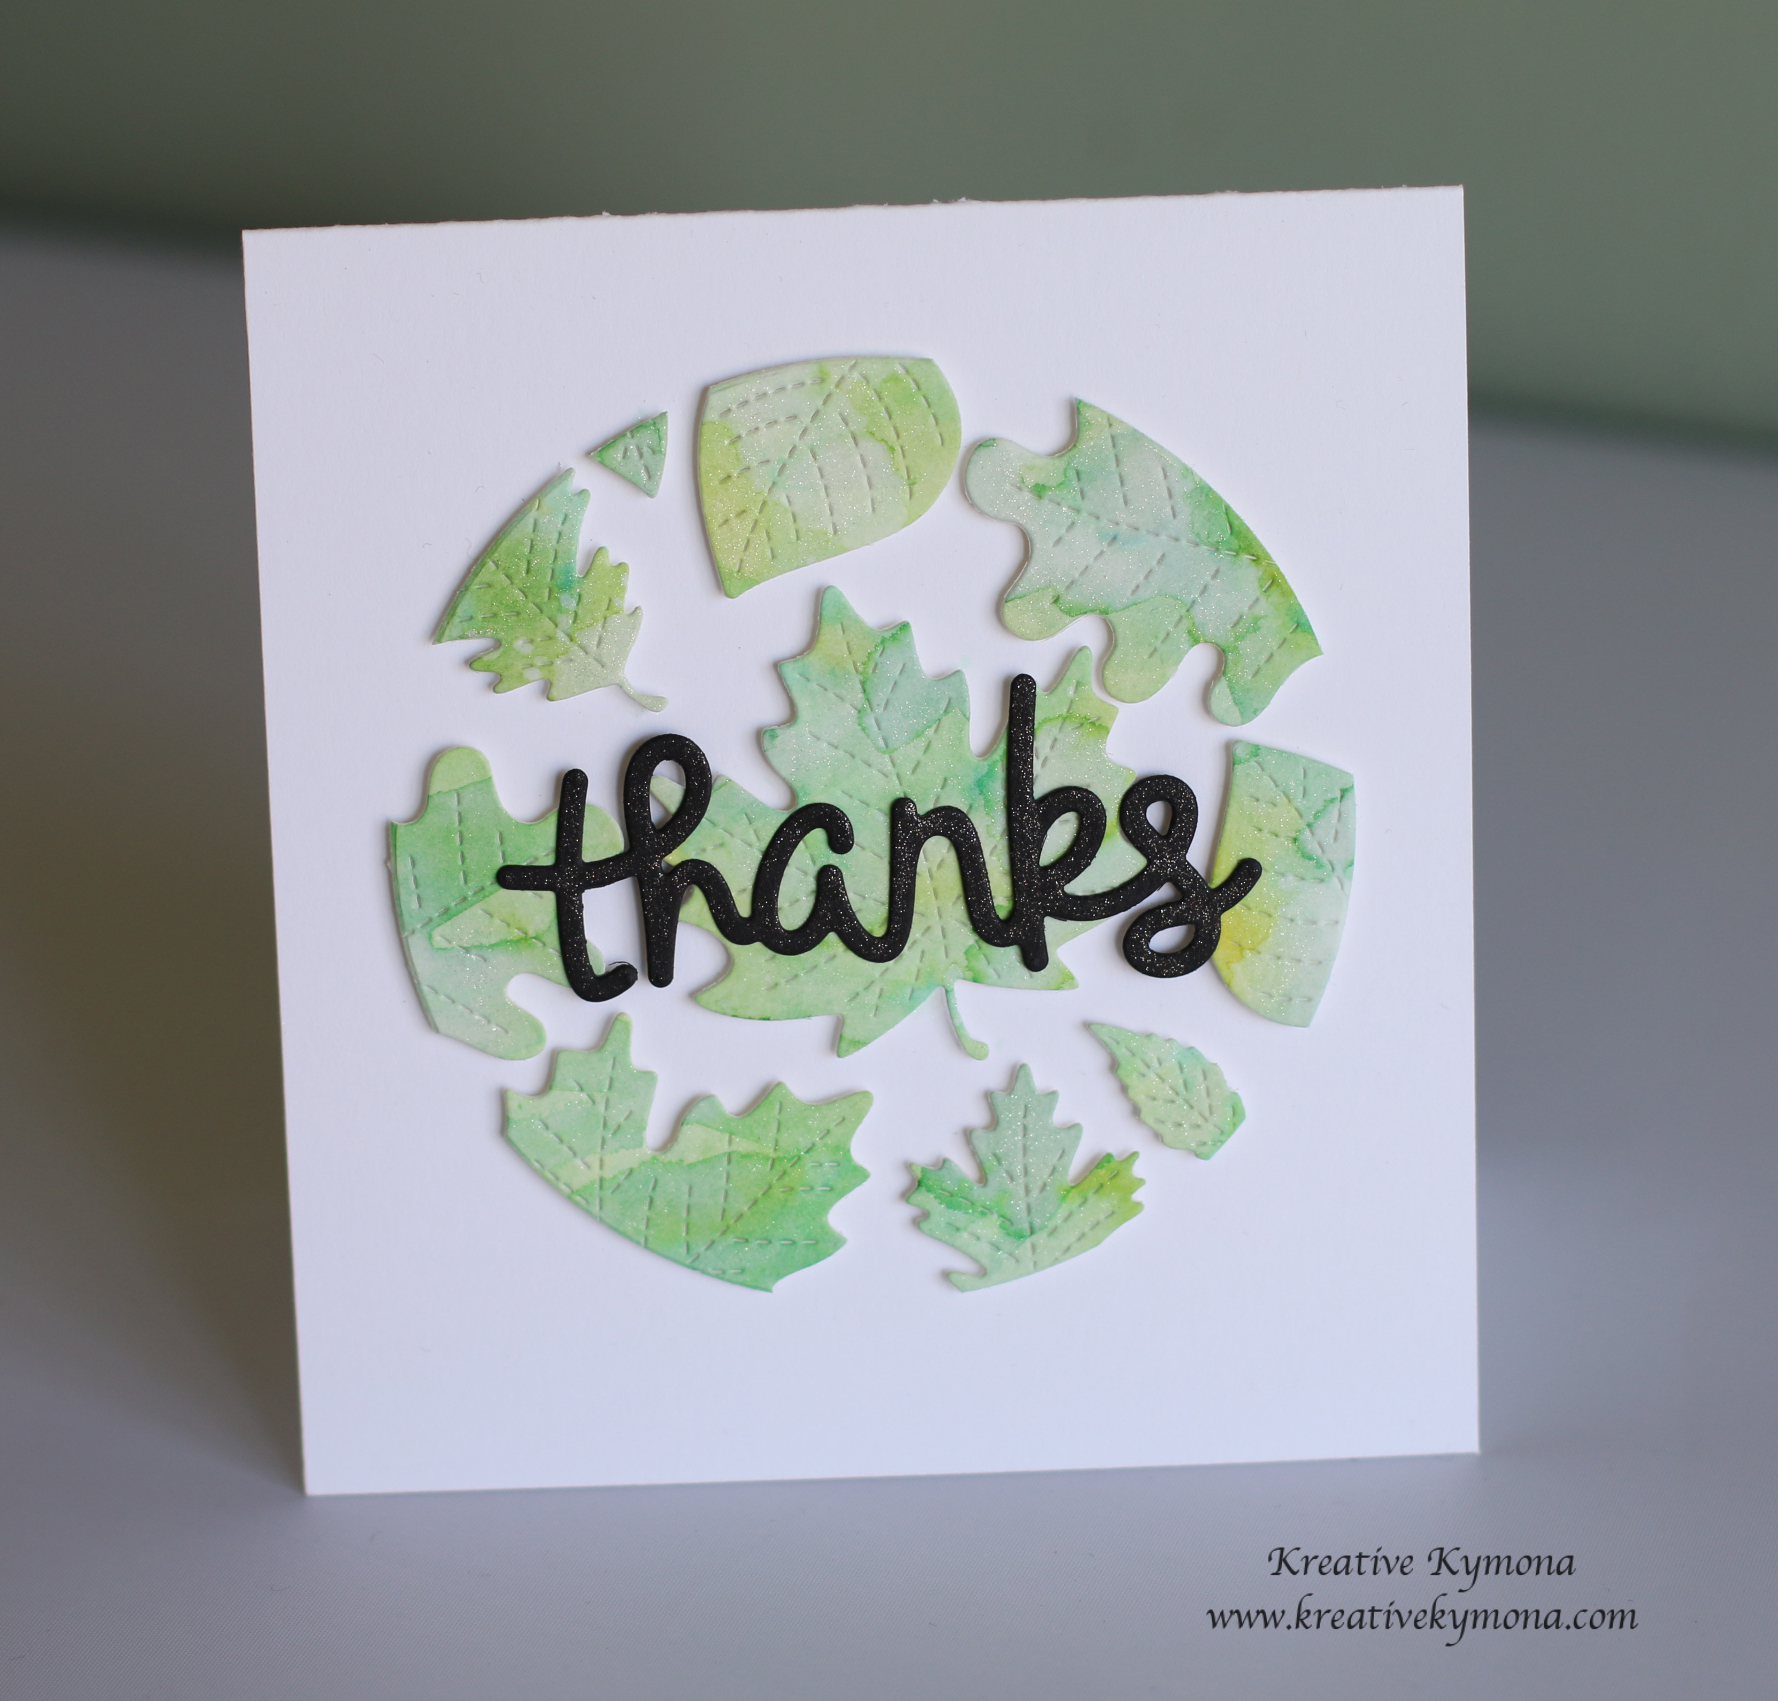
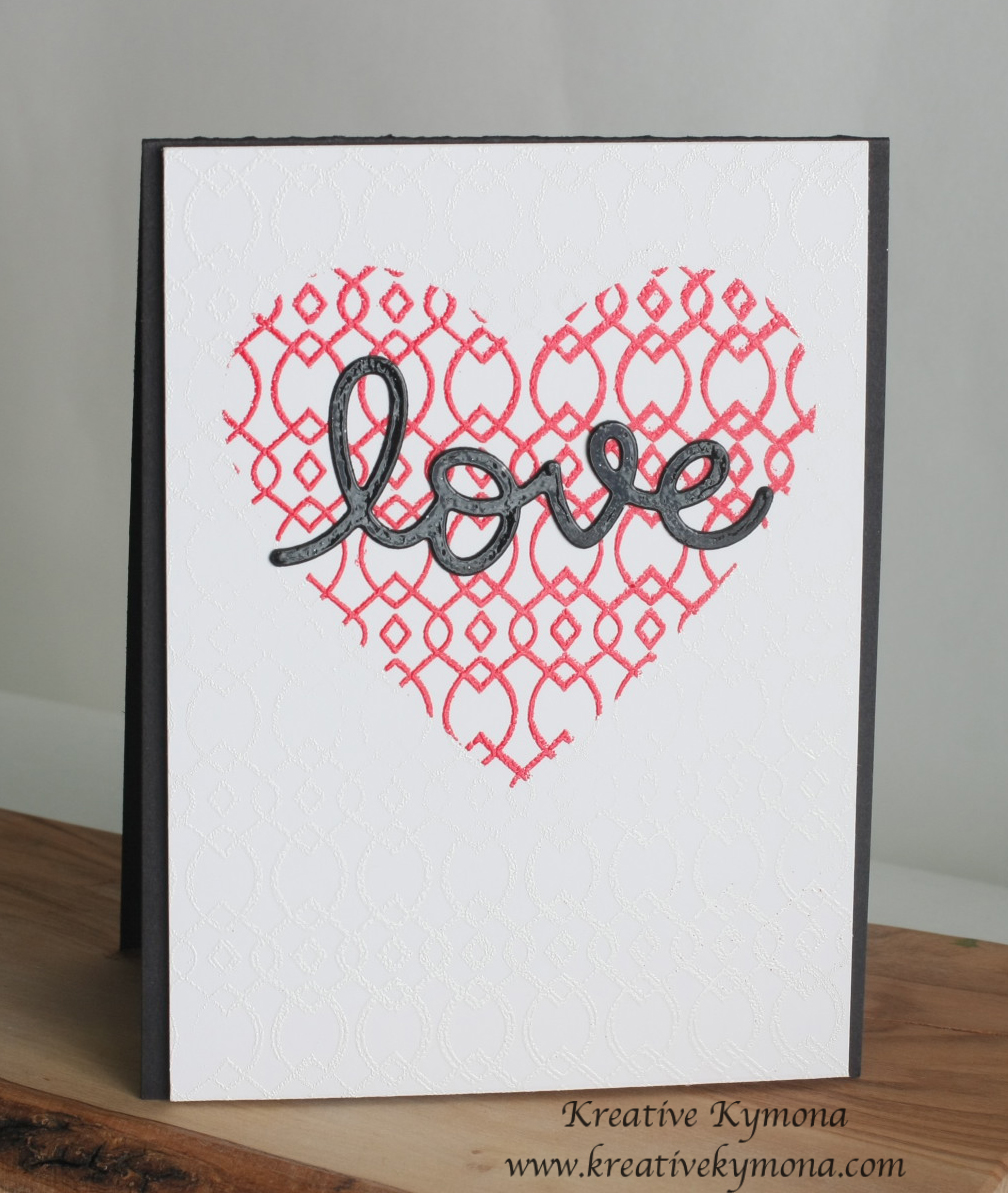
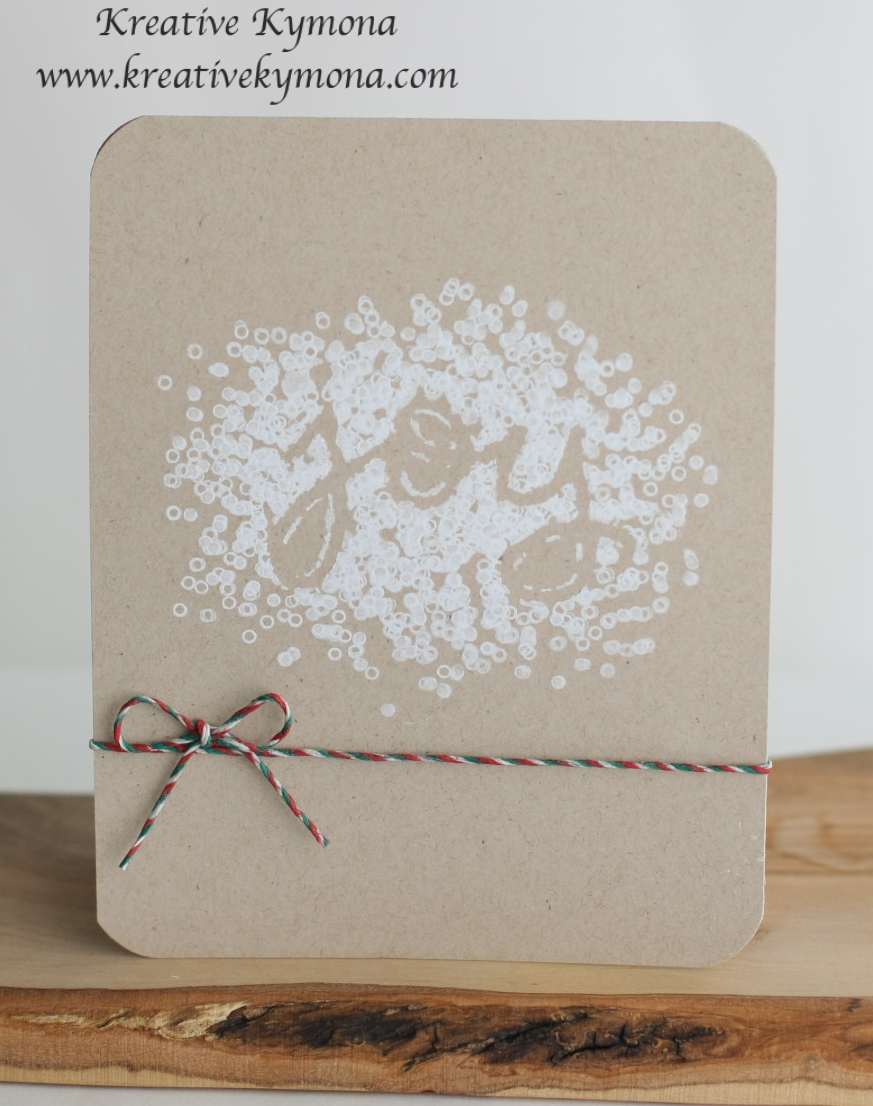
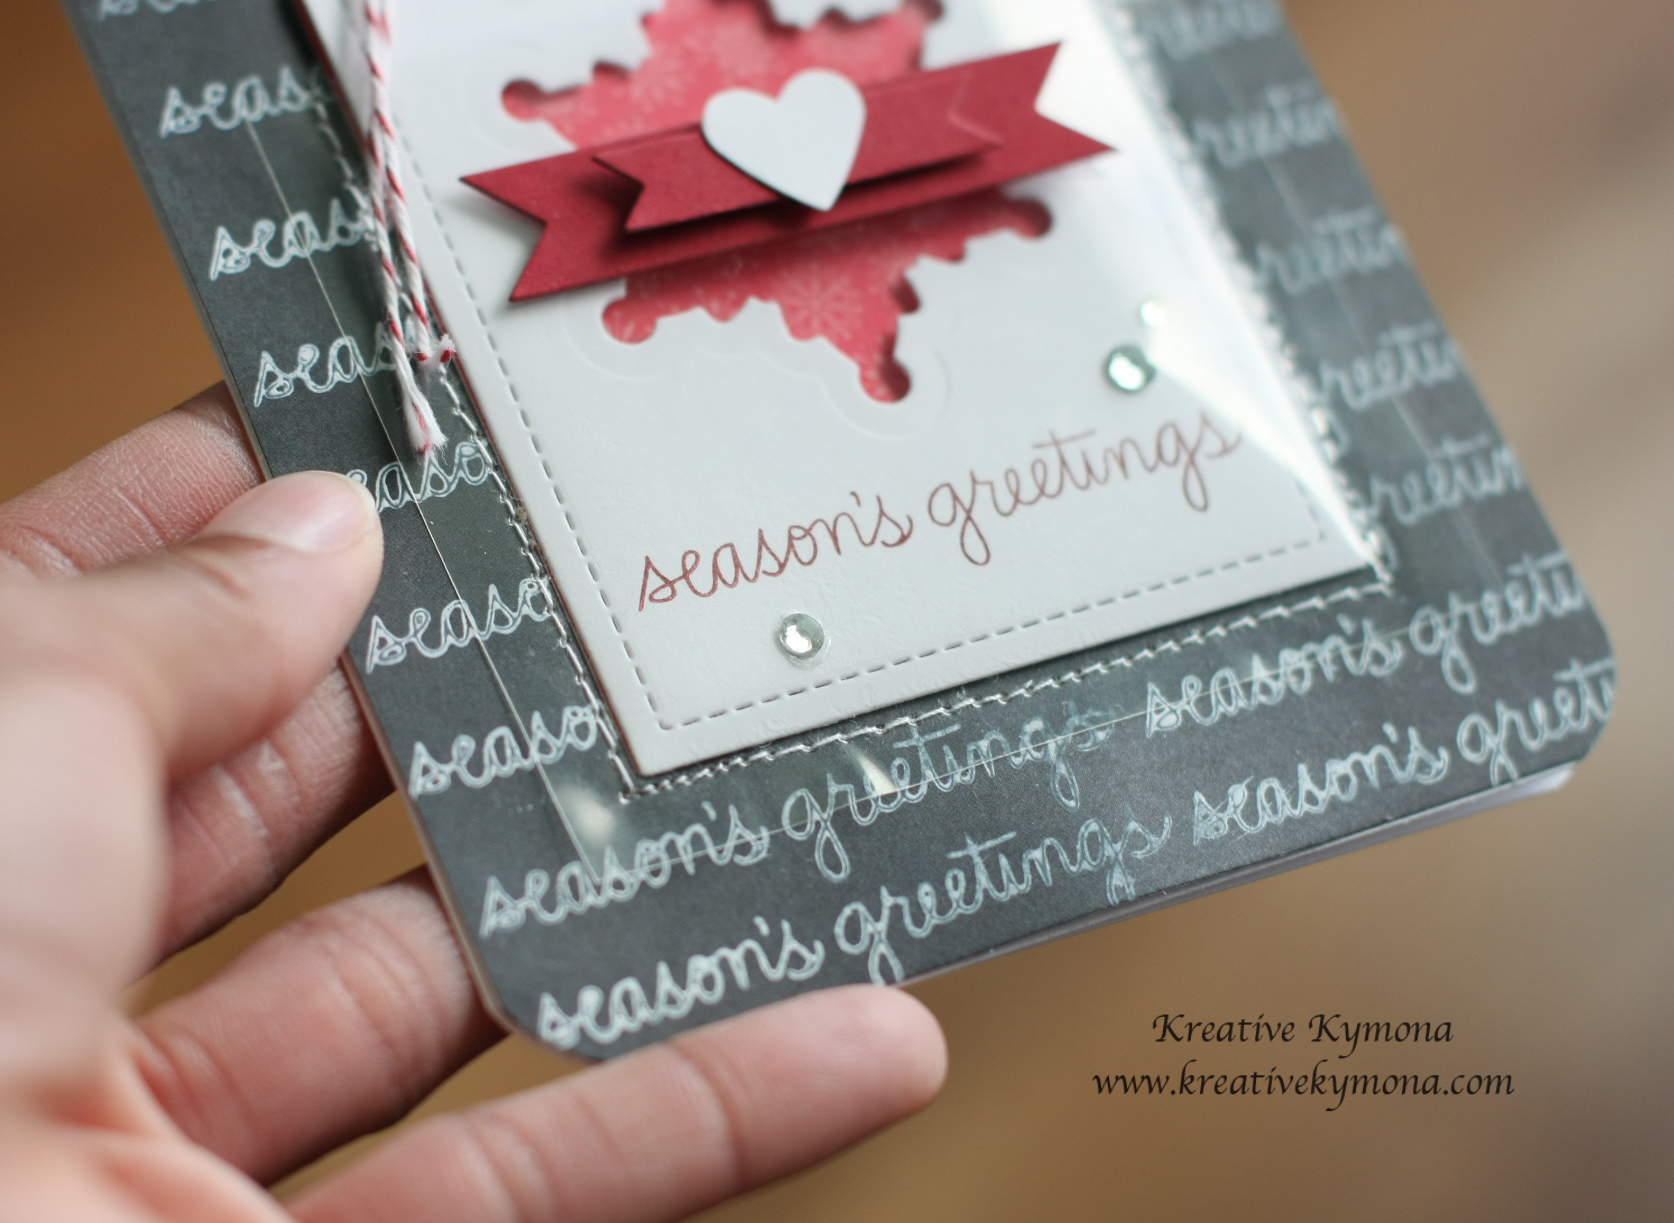
Now take a look at my card with the Medium tag:

Window Tag Card

I love the chalkboard look!! Do you?

How cute is this!!!!!!! I love this lesson.  My mind is 100 miles per hour on what I can create next, using these ideas.

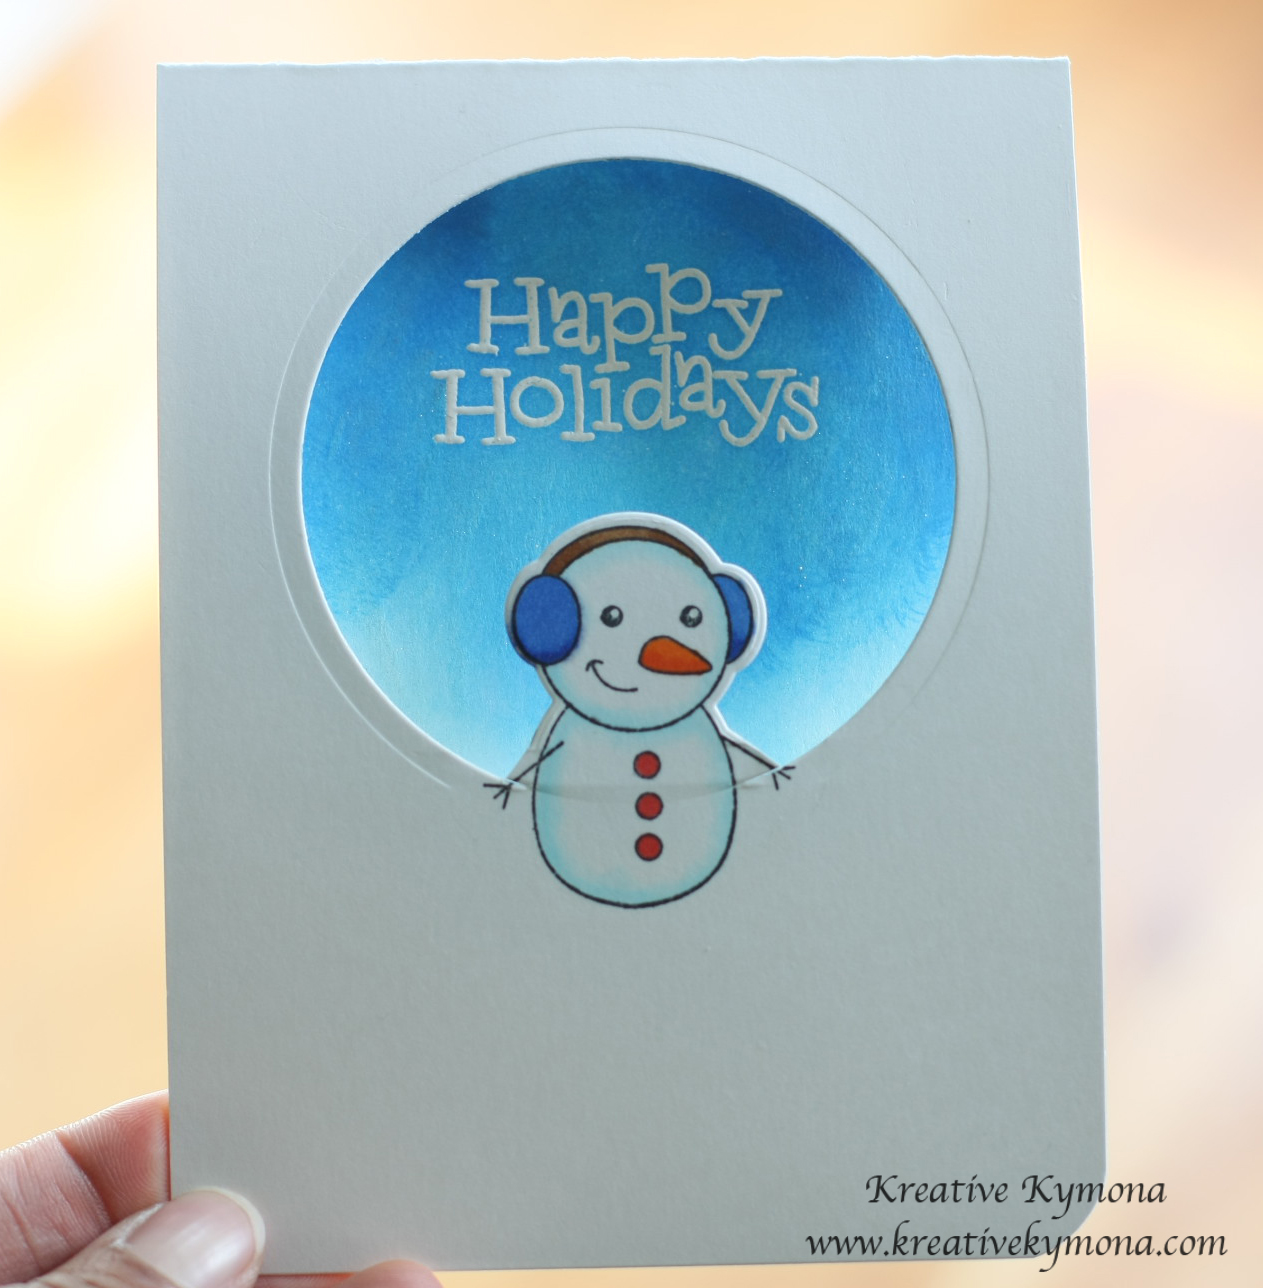
Take a closer look at my card front:

Window Tag Card closeup stitch

Yes, that is thread on my card.  Can you believe you that?  Yes, I used my little sewing machine with the help of my daughter and stitched that window sheet on my card.

Now look at my complete package:

Window Tag Set

Yayyyy!!!  I love this set!  I can’t wait to make more.  I might use this set as a giveaway!!  I love it and want to share it!

I can’t wait to share the rest of the days with you.

Supplies used:

Gift Card Tag

Be JoyfulChristmas TagableHero Arts Unicorn Pigment InkLawn Fawn Snow Day PaperCherry CobblerCherry Cobler Bakers TwineHero Arts White Embossing Powder


2-n-1 Tag and Card

Winter Sparrows Winter Sparrows Lawn Cuts Stitched Duo 1 Dies Starry BackdropsVersaMarkLine Shaped DiesCopic MarkersStitched Slopes and HillsTumble Glass Distress InkSalty Ocean Distress InkPretty Pink Posh clear 3M Mounting TapeBig Holiday Wishes


Window Tag and Card:

Stitched Duo 1 Dies Lawn Fawn Snow Day PaperFestive Flurry dies SSS Be JoyfulCherry Cobbler InkBasic Rhinestones Jewel AccentsCherry Cobbler Baker's TwineCherry CobblerBitty Banner FramelitMy Minds Eye Chalk StudioItty Bitty Accents Punch PackSewing MachineWindow Sheets3M Mounting Tape

Thank you so much for stopping by!

~Kymona

Stretch your Stamps 2: Day 3 Homework

Hello everyone!!  For our third lesson we worked with alphabet and sentiment stamps.  We were taught how to really stretch our stamps in such amazing ways.

Julie Ebersole taught us how to create a word search using our alphabet stamps set.  This was so much fun.

Take a look at my card:

Wordsearch

I used Lawn Fawn’s Clark’s ABCs stamp set to create word search.

I placed my main sentiment on my acrylic block and stamped my card panel with Versafine Black Ink.

I covered the stamped image with clear embossing powder and heat set it.

Then I placed random letters on my acrylic block to finish the word search.  I stamped those letters in Hero Arts Soft Granite ink.

After all of my letters were stamped, I used my Koi watercolors to add a small amount of watercolor to the top of my cardstock.

I added some star wood veneers topped with white paint and Stampin’ Up! rhinestones to my project.

On my card base I drew a line around the card to create a boarder.

I added foam adhesive to my word search panel and placed in the center of my card.

So I have to confess, it was hard to line up my letters correctly but I kind of like it this way.  I have to try again. Julie made it look so effortlessly.

So what do you think?  Let me know!!

Supplies used:

LF ClarksABCsHero Arts Soft graniteKio WaterColorsBasic Rhinestones Jewel Accents3M Mounting TapeBazzill Marshmallow CSStampin' Trimmer

Thank you for stopping by!

~Kymona

Stretch your Stamps 2: Day 1Homework

This is my second post for the day.

If your looking for the Create a Smile Guest Designer Search post click here.


Hello everyone!  My favorite online card classes are back in session and I’m super excited!  I love these classes.  I learn so much and met so many wonder crafters from all over the world.

SYS2

Stretch your Stamps 2 helps us look at our stamps in a whole new way!! The class started yesterday and I’ve learned a lot thus far.

For our first lesson, Kristina Werner taught us how to multilayer emboss resist with a regular background stamp.

For this lesson we used Hero Arts Highline Ironwork Background Stamp because it has a lot of detail that can be painted and repainted.

First we did a simple wash of watercolor, dried the complete background and then add another layer of watercolor to spot highlight the design.  This stamp works because the design is open and has lots of open spaces to paint.

Take a look at my watercolor piece when I was finished with it:

watercolor pieces

From this piece I created these cards:

Big Hug and Background

Big Hugs close up

Big You and Background Stamp

Big You whole card

I was able to make three cards with this one watercolor piece.  I really loved this technique.  I would have never thought to use this back ground stamp in this manner.

I’ve used this stamp before, take a look at this card.  You can clearly see the difference in the way the stamp was used.

I have two other techniques to try for this first lesson.  I’m going to try and post the assignments as I do them.  Please don’t hold me to that totally, things do come up.

Supplies used:

Hero Arts Highline IronworkKio WaterColorsSSS HelloYouOnyx Versafine Inkglossy accentsWink of Stella clearBazzill Marshmallow CSStampin' TrimmerTombow Multi-Purpose AdhesiveStrathmore Watercolor paper

Thank you for stopping by!

~Kymona