Hello everyone!! It’s CASology Tuesday!! We are back with another Clean and Simple Cue Card just for you!!
This week’s cue card:

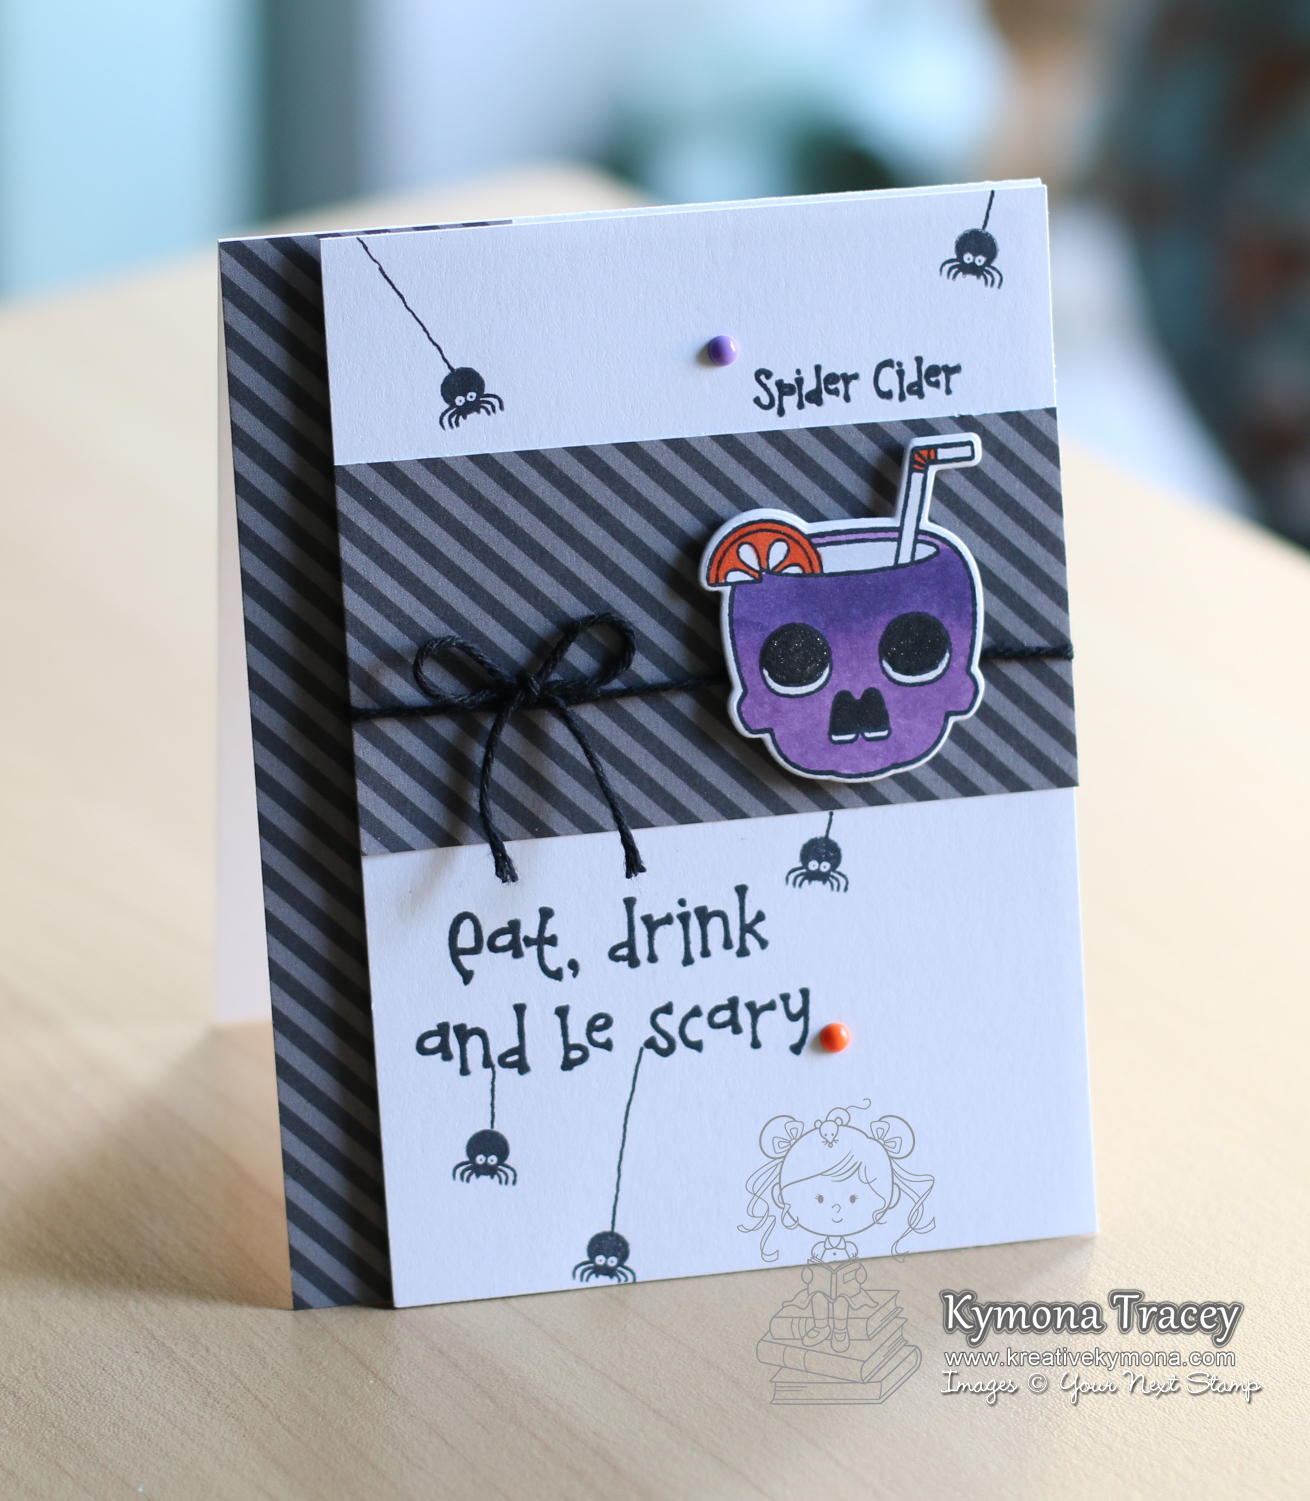
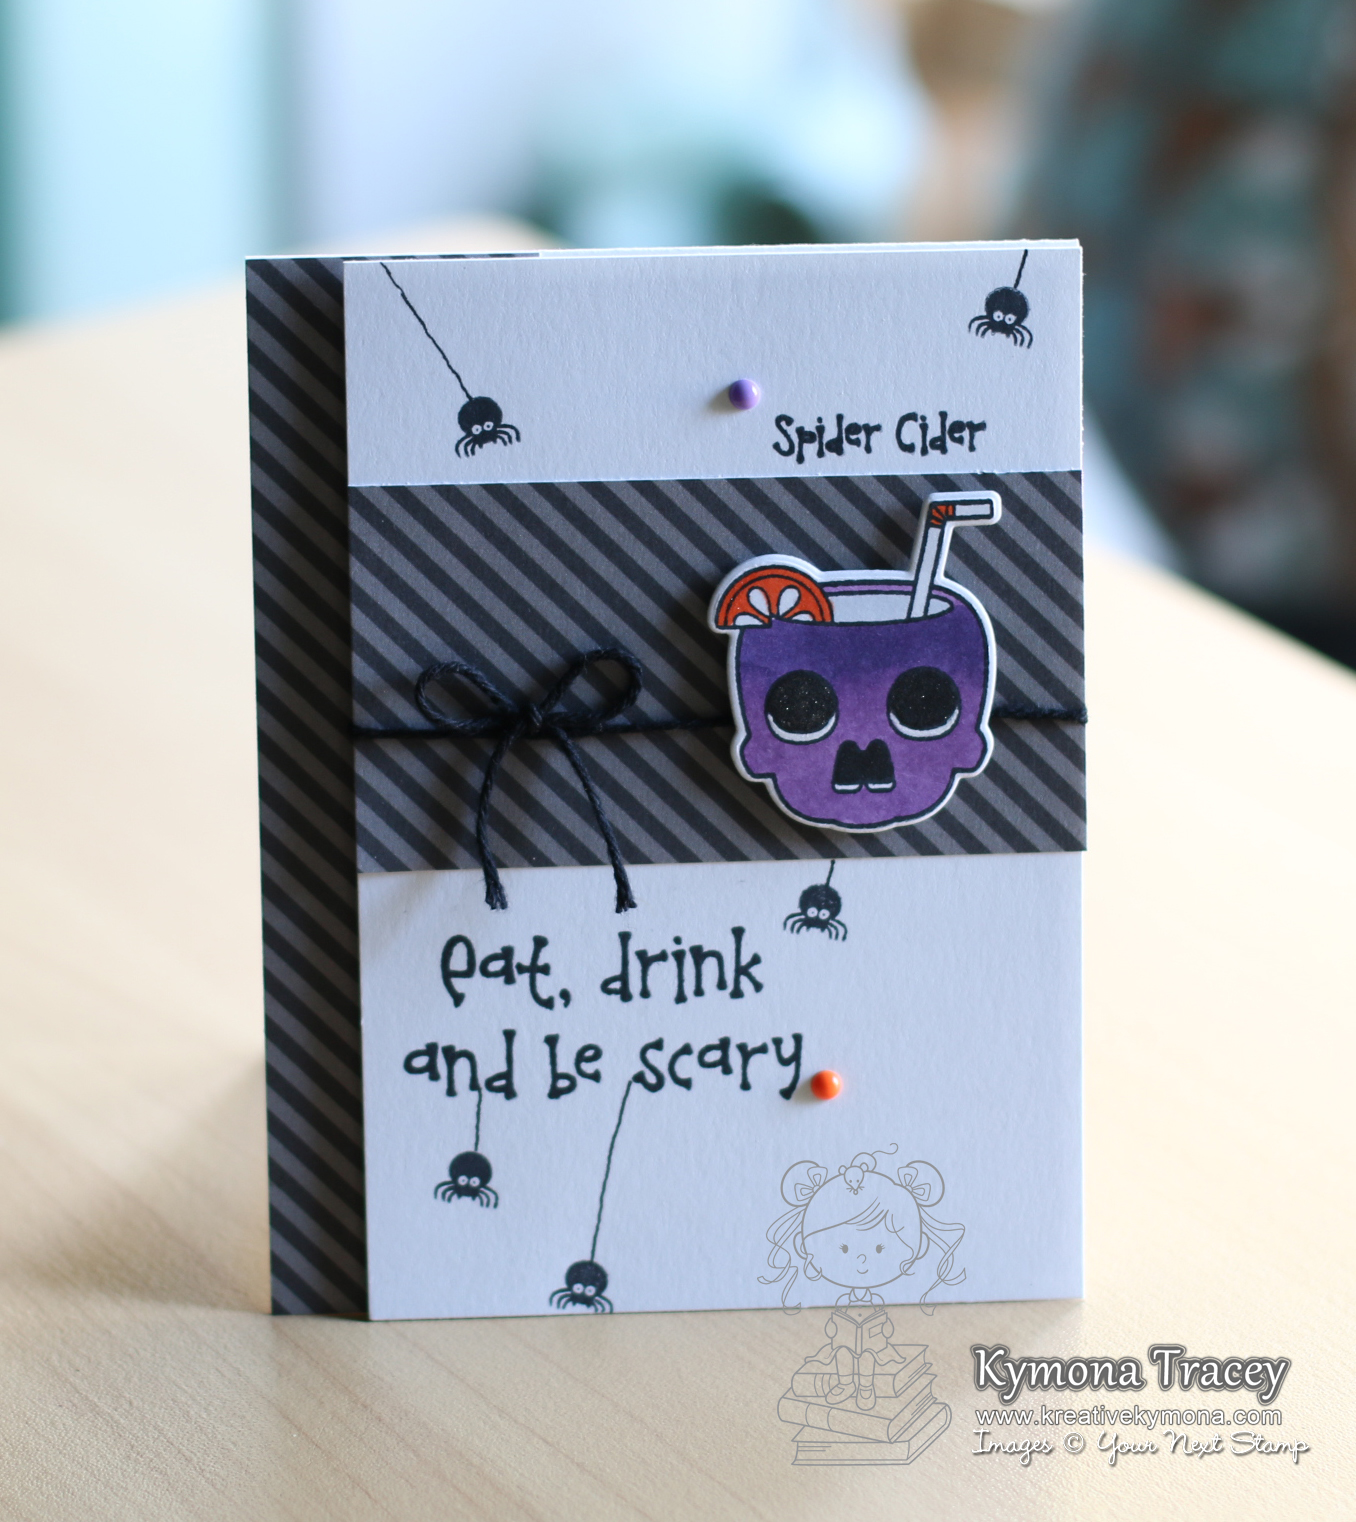
Take a look at my card:

For this week’s cue card, I used a couple different stamps from different companies!! I love spreading the love!
I used Concord and 9th Love You.Mean It stamp set for the circles that created the wreath. Then I used Mama Elephant Jingle Greetings for the sentiment. I stamped both of those with Clearsnap Colorbox Wicked Black Ink.
Here comes the interesting part.
I used a paper piercer to make a small hole at the top of the wreath. Then I strung two small jingle bells to a piece of twine and pushed the other end through the hole. I tied a small knot. I used a piece of washi tape to hold it down. I added a piece of cardstock (4 x 5.25) to cover up the washi tape.
After that I die cut three of the cute bow from Reverse Confetti Tagged Tote Confetti Cuts out of red cardstock. I adhered them together and placed it right over the pierced hole. Now the jingle bells look like they are attached to the bow.
Clever right? Believe it or not it was really simple and easy.
Are you inspired to play along? Please let me know below!
For more inspiration, check out my fellow Design Team members blog for more awesome work.
![]()
Guest Designer
Our sponsor this week is Birch Press Design!
Supplies used:


Thank you so much for stopping by!
~Kymona