Creating Shaker Cards with Queen & Co.

Hello everyone!! I’m happy to be here today to share some super cute shaker cards from Queen & Co. with you.

Queen & Co.

It’s been a long time since I created shaker cards, so this was so much fun to do. Once I started I couldn’t stop. I love that type of crafting. The ideas just flow because the company made it that easy for me.

Let’s take a look at the cards I created:

Fruit Basket Kit

I told you once I started I couldn’t just make one card. I had to make three. I used the Fruit Basket Kit for all of the cards created.

The kit contains:

(9) Fruit Theme Dies

(1) 6×6 Paper Pad with 24 sheets

(3) Yards of Twine

(15) Coordinating Foam Fruit Shapes with Acetate

Droplet Stickers (Watermelon Seeds)

Exclusive Fruit Toppings

Exclusive Sentiment Stamp Set

Epoxy Dot Stickers


With all of these goodies, you can make 15 of cards from one kit. Very cost effective.

Let’s take an individual look at them:

Lemon Card

I have to admit, my favorite of the three, is the lemon card. It’s so cute and I was able to make a clutch bag to go with it.

Fruit Basket Kit

I love the look of the lemons. They are fun and bright. They just cheer up a dull room. Plus, I love the taste of them.

My plan is to send this bag and card to my dear friend Wanda! She is amazing and is so deserving of a thank you!

Let’s zoom in:

Fruit Basket Kit

Did you see the lemon shaker pieces? I love them!!

Creating this card and the others was easy because Queen & Co kit their products with everything you need to create this card.

Strawberry Card

Fruit Basket Kit

Delicious!! I love the mix and match of the colors and the patten paper. The pattern paper included in the kit is double sided so it easy to mix and match the different pattens by color.

Fruit Basket Kit

Take a look at the tiny strawberry shakers/toppings. Aren’t they cutes? They make me want to eat strawberries right now.
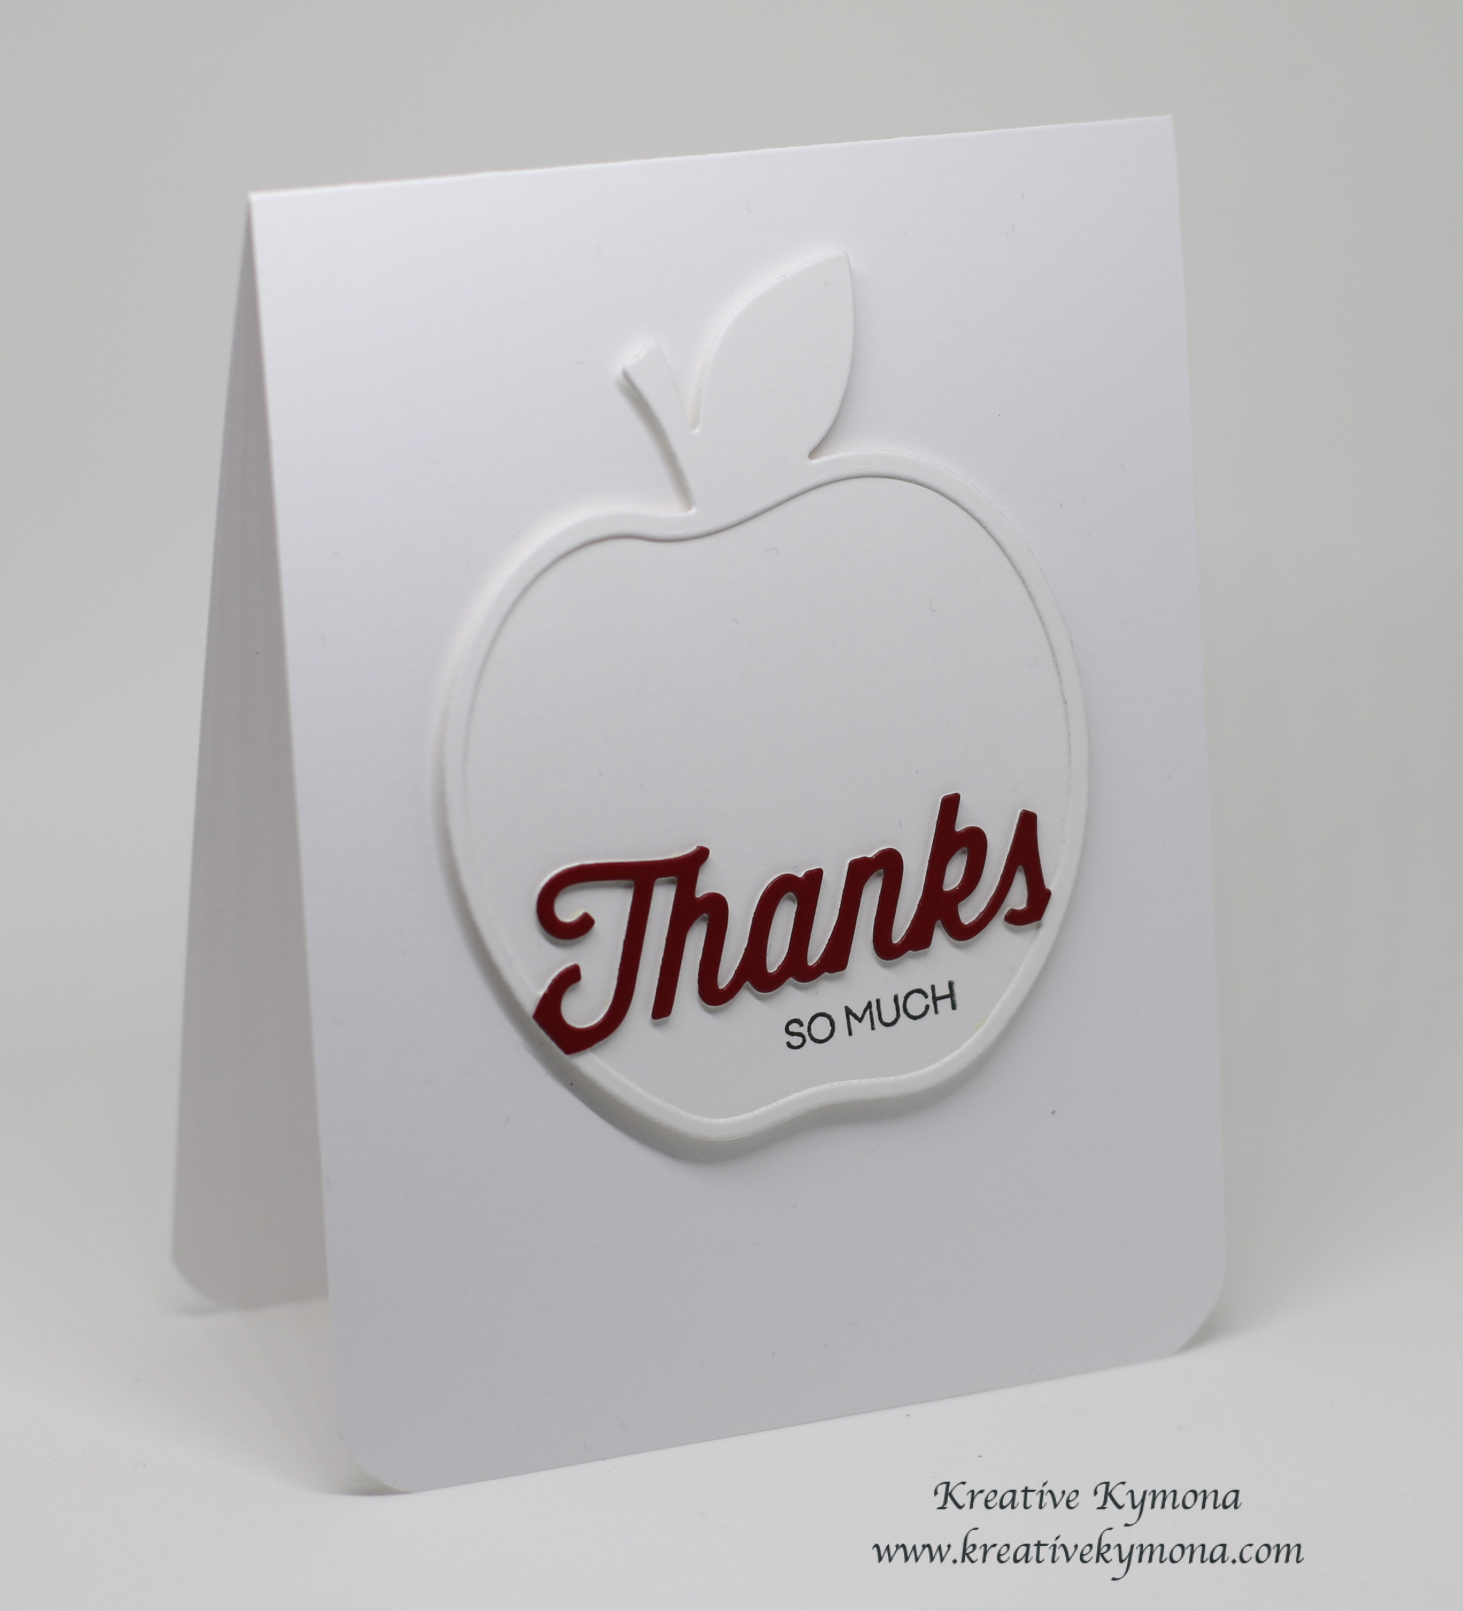
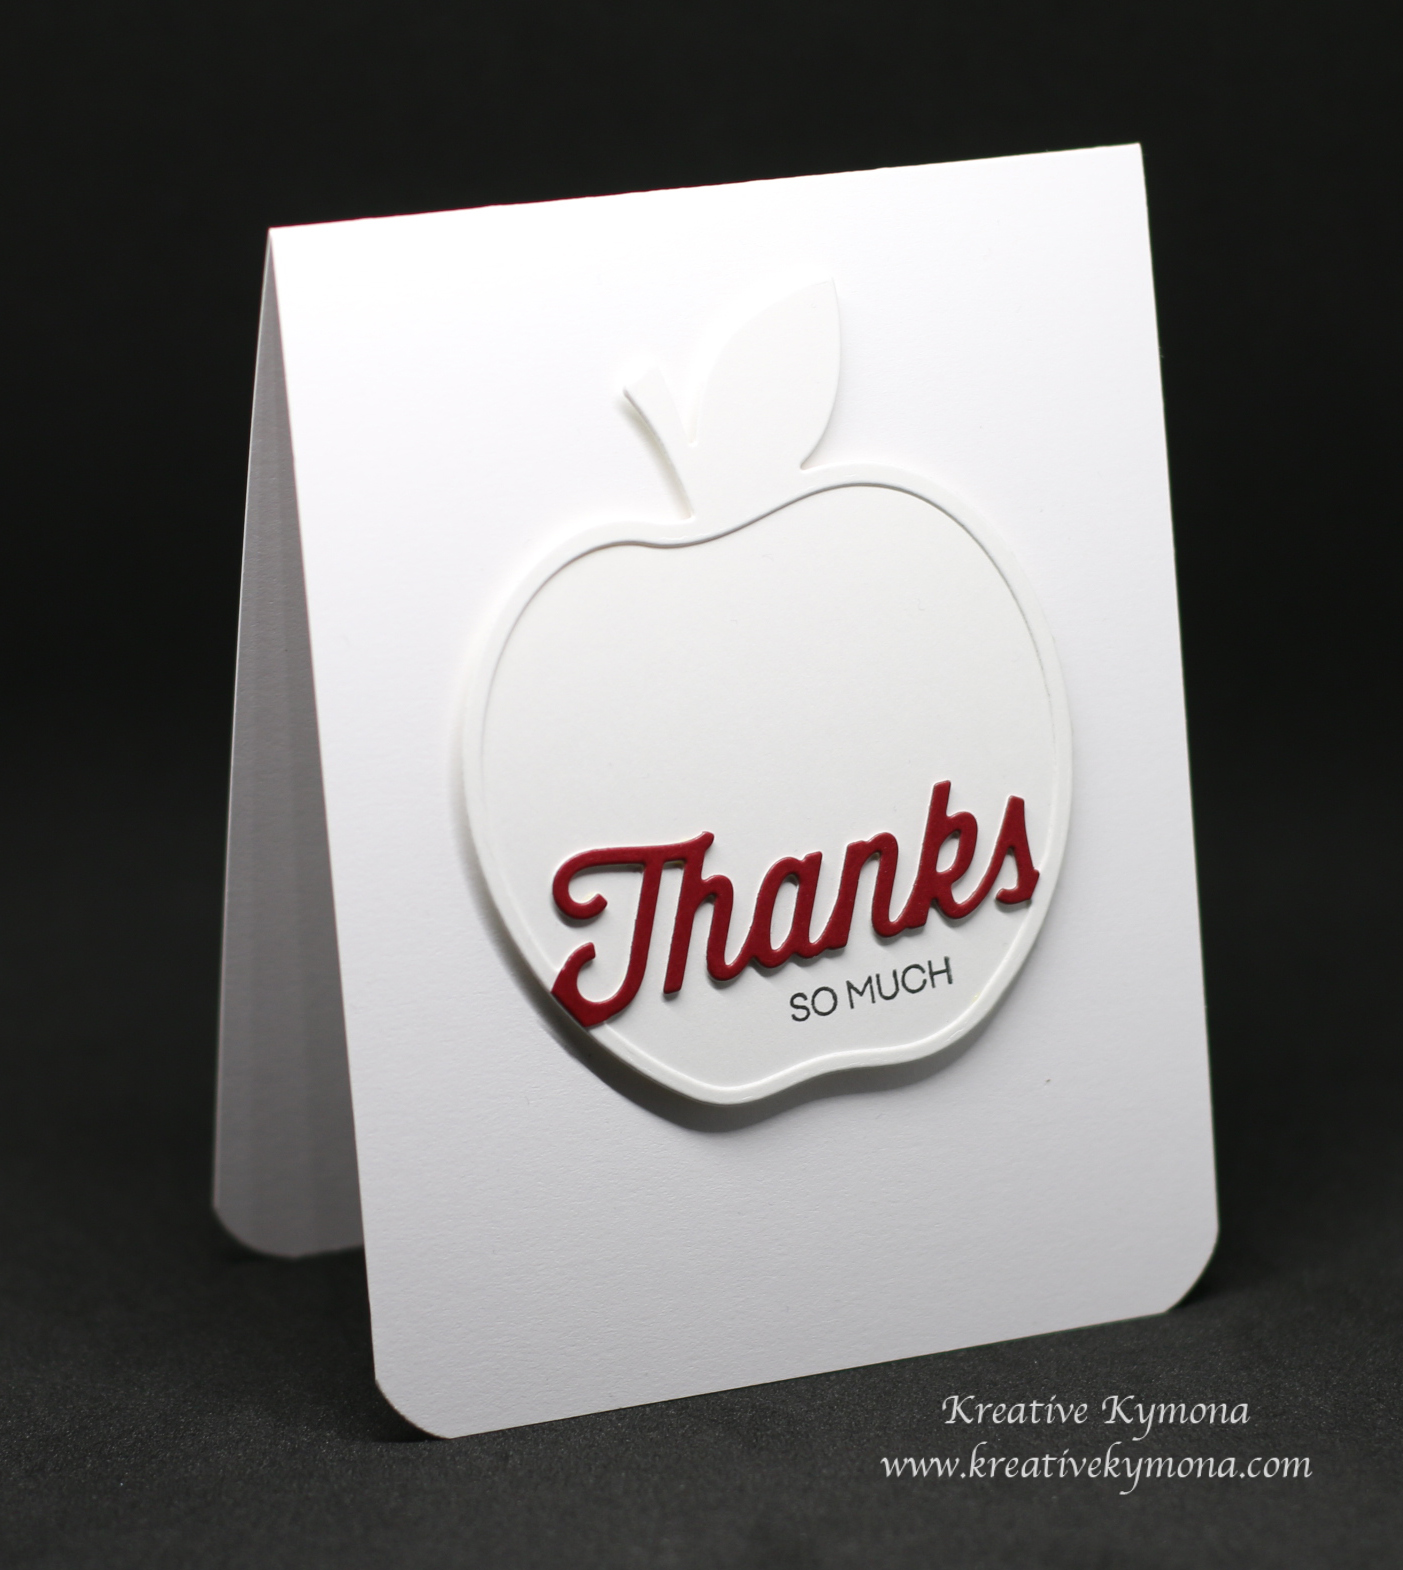
Apple card

This apple card is perfect for teachers. Teachers would love this fun interactive card.

Fruit Basket Kit

The sentiment stamp set in this kit is fabulous. All of the sentiments are fun-loving. They match perfectly with each fruit.

Again, the shaker pieces just adds to the beauty of the card.

So what do you think? Will you give Queen & Co. a try? How about creating some shaker cards for your next project. Let me know.

Supplies used:

(Thank you so much for stopping by. Compensated affiliate links used at no cost to you.  Queen and Co. products were given to me for this blog post.  The other products were personally purchased. This post was not paid or sponsored.)

Fruit Basket Kit

Thank you so much for stopping by!

Your Next Stamp July 2016 Release

July2016hopgraphic


Hello everyone!!  Yayyy, I love this blog hop featuring new products from Your Next Stamps makes squeal!! LOL!!

This release is super cute!!  Yesterday’s sneak peek was fun.

I’m the first stop on this amazing hop today!! How awesome is that!!  You are in the right place!! To continue on this fabulous hop all you have to do is click on the linky at the bottom of this post.

My favorite set from this release is the Fairytale Friends set! I shared my cards early this morning.

Are you ready for my big reveal?

Take a look at my cards:

Card 1 and 2:

Paint Swooshes and Splatters

YNS Supplies: School Notes, Paint Swooshes and Splatters, Circus Fun Matte Gumdrops

Other Supplies: Colorbox Doodlebug Pigment Ink, Recollections Heavyweight White Cardstock, Versafine Black Ink, We R Memories Corner Chomper

Thanks in color (YNS)

YNS Supplies: School Notes, Paint Swooshes and Splatters, Cupid Gumdrops

Other Supplies: Colorbox Bluebells Ink, Recollections Heavyweight White Cardstock, Versafine Black Ink, We R Memory Keepers Corner Chomper

Both of these cards sizes are 4 x 8 scored at 4.  To create the rainbow one, just start at the bottom with red and work your way up the rainbow.  Super easy.  For the ombre purple card, just start with the lightest color and work your way down.  Stamp your sentiment in the middle and add your gumdrops.  Bam!!  Your finished.

You can knock out a couple of these simple but pretty fun cards in no time.

Card 3:

Teachers card

YNS Supplies: School Notes, Scribble Fun Set Two, Apple Die

Other Supplies: Neenah Dessert Storm Cardstock, Stampin’ Up! Real Red Cardstock, Wild Wasabi Cardstock, Versamark Ink, 3M Foam Tape, Versafine Ink

Creating this card was simple too!

Its a standard size A2 card, 4.25 x 5.50. I simple stamped the small apple from the stamp set with versamark ink to give a tone on tone look.  Then I die cut the apple and the leaf out of their color cardstock twice.  I stamped the sentiment on the card front using versafine black ink. Adhered them together with 3M foam tape and mounted them on the card front.

So, what do you think?

I had so much fun creating these cards to inspire all of you and show you the versatility of the stamp sets! Which one of these items are favorite?  I would love to hear from you!

Be sure not to miss any blog along the way, because one lucky commenter will have a chance to win a $25 YNS gift certificate. Winner will be announced on the YNS blog on June 6th.  So don’t forget to leave a comment on each of the blogs participating in the blog hop.


Don’t forget to take advantage of the special promo code to get
20% off your entire purchase!!

SaleJuly2016

I’m also playing along with Virginia’s View Challenge #22: All About Colors

V V Challenge #22

Thanks for stopping by!

~Kymona

Thanks So Much!

Hello everyone!! I’m here today with Papertrey Ink Make It Monday Challenge.

This week Lexi showed us how to create a white on white die cut card with a pop of color.  Totally love this idea.

Take a look at my card:

Thanks so much

Isn’t this apple die cut the cutest!!  I love their new Apple Die with the Apple Mini Stamp Set.

I simple die cut the apples and then die cut the thanks with Simon Says Stamp Schoolhouse cardstock.

After die cutting the “thanks”, I carefully cut the sentiment away from the apple.  I adhered the thanks and the apple outline with Tombow Multipurpose Glue.

I stamped the sentiment with My Favorite Things Hybrid Black Licorice Ink.

I adhered my apple to the card base with foam tape.

Super easy and totally fun.  I love these stamp and die set.  I can’t wait to play again.

I took another photo with a different background, playing around with my new Foldio in the middle of the night.

Thanks so much 3

So what do you think?  Let me know below.

I’m also linking this card to Simon Says Stamp Wednesday Challenge: Clean and and Simple

wednesdayblog-logo

Supplies used:

PTI Apple Mini Stamp Set PTI Apple Die SSS schoolhouse redMFT Hybrid Black Ink Tombow Multi-Purpose Adhesive

Thanks for stopping by!

~Kymona

I Love Back To School, Do You?

Hello everyone!  I’m here today with the DoubleClick Skittles Back to School Challenge!!  This will be so much fun!

I love back to school.  I love new paper, pencils, pens, notebook, glue, OMG I love everything.

This is our second challenge and I wanted to say to everyone who participate in the first, Thank You so much.

This challenge runs for two weeks.  This is the second of the two.  So, you have one week before the challenge ends.

Now on to my card for this challenge:

Skittles Back to School

My daughter has her first male teacher this year so I wanted to make sure my projects were male centered.  This is challenging to me since I’m so use to making cute girly things, lol.

Want to know how to make this card, well here’s how you do it:

1. I cut my card stock so that is measures an A2 size card (4-1/4 x 5-1/2 scored at 5-1/2).

2. I used my Big Shot and Stampin’ Up! Alphabet Press Textured Impressions Embossing Folder to create the the texture on the front of my card.

3. I used my Project Life Lined Journaling Cards for the first time ever, LOL.  I love these little cards.  (I have no idea what my resistance was but its over.) I divert!

4. I stamped my crayon, glue, paintbrush and ink from the Sweet Stamp Shop Artsy Fartsy Stamp Set with Memento Tuxedo Black Ink.

5. I used my Copic Marker #G07, YR16, V17, B14, R27, G28, Y19, Y13, B12 to color in all of my images.  (I’m so happy about that.  I’m trying to practice my coloring.)

6.  I stamped my sentiment from Simon Says Stamp Hey Teacher Stamp Set using Memento Tuxedo Black Ink.

7. I added color to my apple using my Copic markers.

8. I adhered my journal card to my card base using foam adhesive.

9. I  added Wink of Stella to some of the embossed letters and numbers on my card base.

10. To really make my card pop, I added my Pumpkin Skittles to the four corners.

Here’s a close-up:

Skittles Back to School close up

So what do you think? Now its your turn to play along with our challenge.  The challenge ends on August 19th.  The winner will be announced on August 23rd.

The winner will receive The New Summer 2014 Skittle Release!

New Summer 2014 Skittle Release


Supplies used:

Big Shot Die-Cut MachineAlphabet Embossing FolderProject Life 3x4 Lined CardsArtsy FartsySSS Hey TeacherMemento Black InkCopic Markers3M Mounting TapePumpkin Pie

Thank you so much for stopping by.

~Kymona