Hello everyone!! Can you believe its October already. The time really is flying. September totally went by and I didn’t even get to celebrate my one year blogging anniversary!! I will do something this month so stay tune in for that.
Today I’m here with the DoubleClick Skittles Challenge! In Honor of Breast Cancer Awareness Month, our challenge is any project with pink!!
I am an Instagram junkie as my son would say. I have to admit I had my reservation about it in the beginning. I’m not big on share pictures of my kids and things like that for fear that someone stranger would have access to them. It was my wonderful cousin Nicky who reassured me that I could use Instagram for just my paper-crafting business. Well I started and now I can’t stop!!
I say all of that to say that, I’ve meet someone wonderful ladies on Instragam. I feel like I’ve known them forever. Its amazing what cardmaking can do. This one young lady named Kendra Hernandez from Inkin’ It Up with Kendra introduced me to a new stamp company called Pretty Cute Stamps.
Their stamp sets are so stinking cute! Their September release really had some great stamp sets. You must check them out.
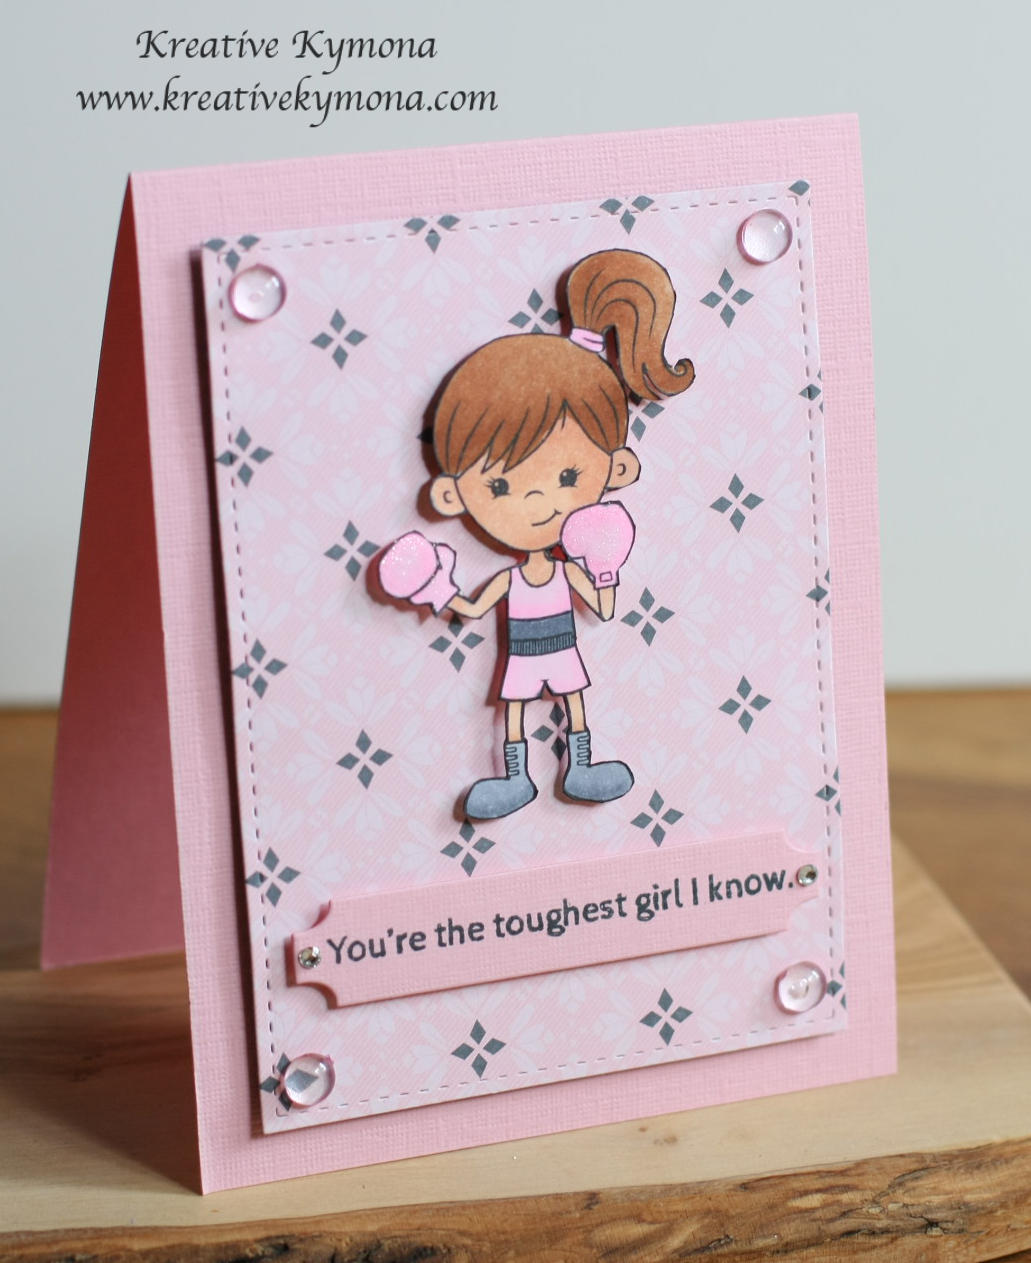
For my card today, I chose to use Fight Like a Girl!! The images and the sentiments are to die for. When I saw this set I knew I had to have it for the month of October.
Here is my card:

I know a couple of people who are breast cancer survivors and I’m so happy that they are fighting this fight. They are the toughest women I know. I Salute them!!
I also lost one of my most favorite patient to breast cancer two years ago now. She was the happiest person that I ever met in the hospital where I worked. She wouldn’t let anything stop her from living her life for her children, 3 of them at that, and no dad. She relied heavy on the oldest. She past about a week and have after her birthday. I have to say I was really heart broken by it. She had so much life, so much she wanted to do, so much she wanted to share with her children. She wasn’t a patient to me, she had become my friend. Her children had become mine children too. What a beautiful soul!!
This card is dedicated to her! I wish I could give her the biggest shout out but because of the nature of my work I can’t but she knows up there in heaven that I’m talking about her.
Her children are doing well. The oldest boy finished college, the middle girl is about to finish college and the youngest girl is in high school. I keep in touch with them. I promised her.
People are placed in your life for a reason, sometimes you don’t know why until they are gone. I miss her but I know she isn’t far.
To create this card:
I used some retired Stampin UP! pretty in pink cardstock and Lap of Luxury Designer Series Paper.
I stamped the image, colored it using Copic markers and fuss it cut it out. I have the SVG file but my Silhouette Cameo doesn’t recognized those files. I have to find out why.
I stamped the sentiment and used Avery Elle Custom Panels Die set to cut it out.
Then I added some Clear Wink of Stella to the boxing gloves so that they could shine. You can see that a little bit in the photo.
Then I added may Pink Sherbert Skittles in all four corners. They give the DSP a nice frame.
OOO, before I forget, if you purchase the stamp set Lisa the owner of Pretty Cute Stamps is donating $2.00 to the Susan G. Komen Foundation. Such a great cause!!
So what do you think of my card? I think the Copic Online Card Classess is helping me out a lot. Let me know what you think.
Supplies used:


Thanks for stopping by!
~Kymona


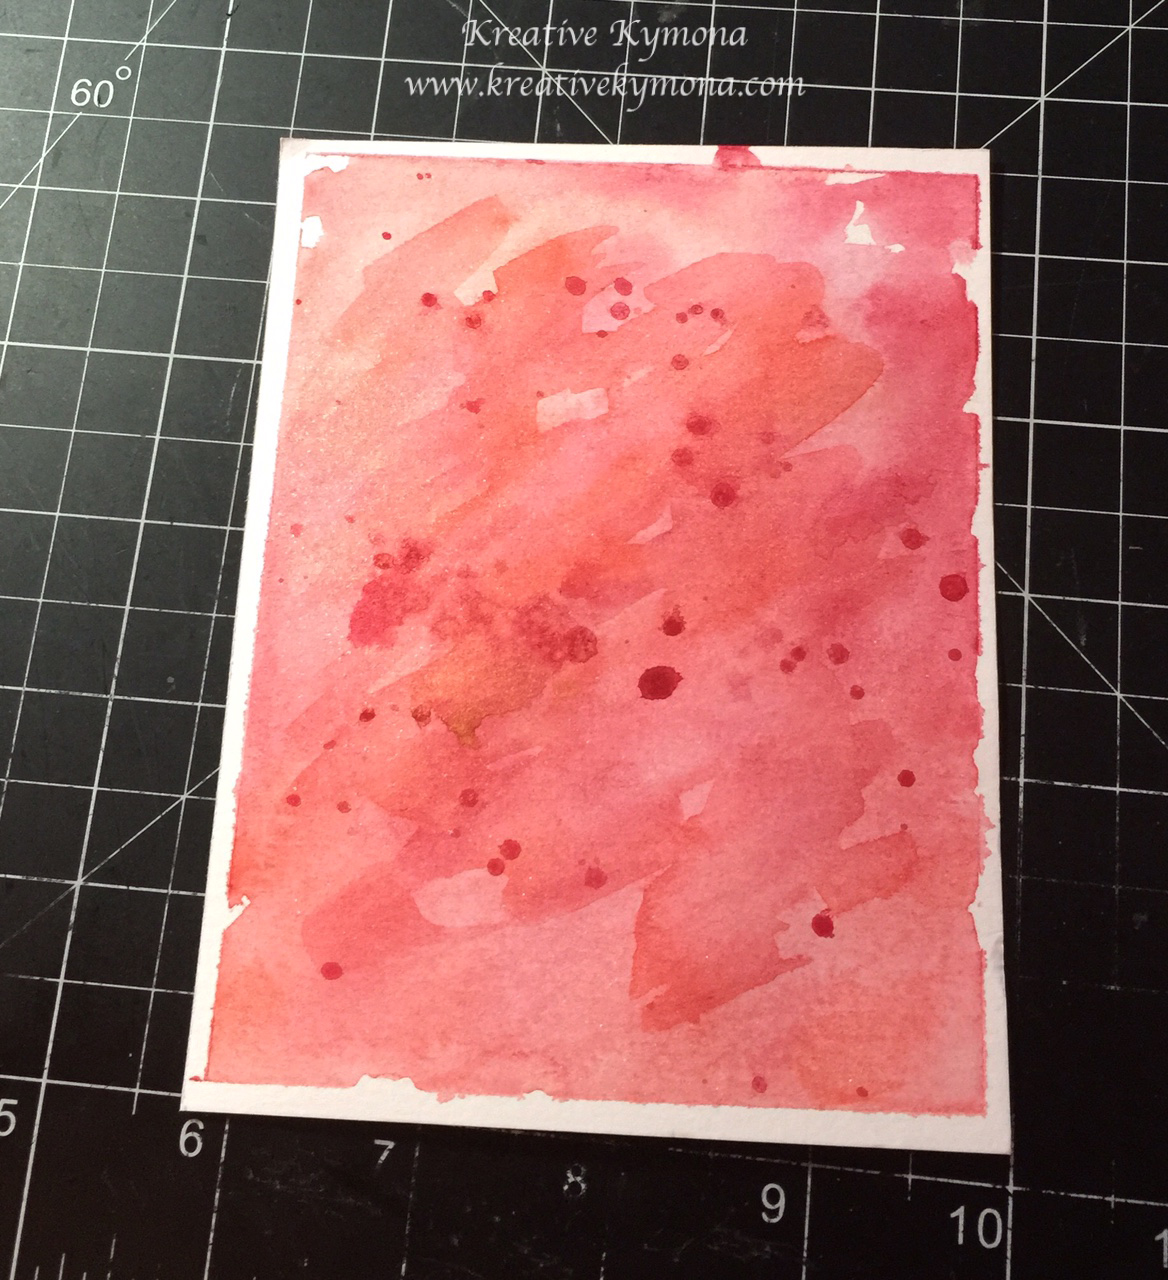
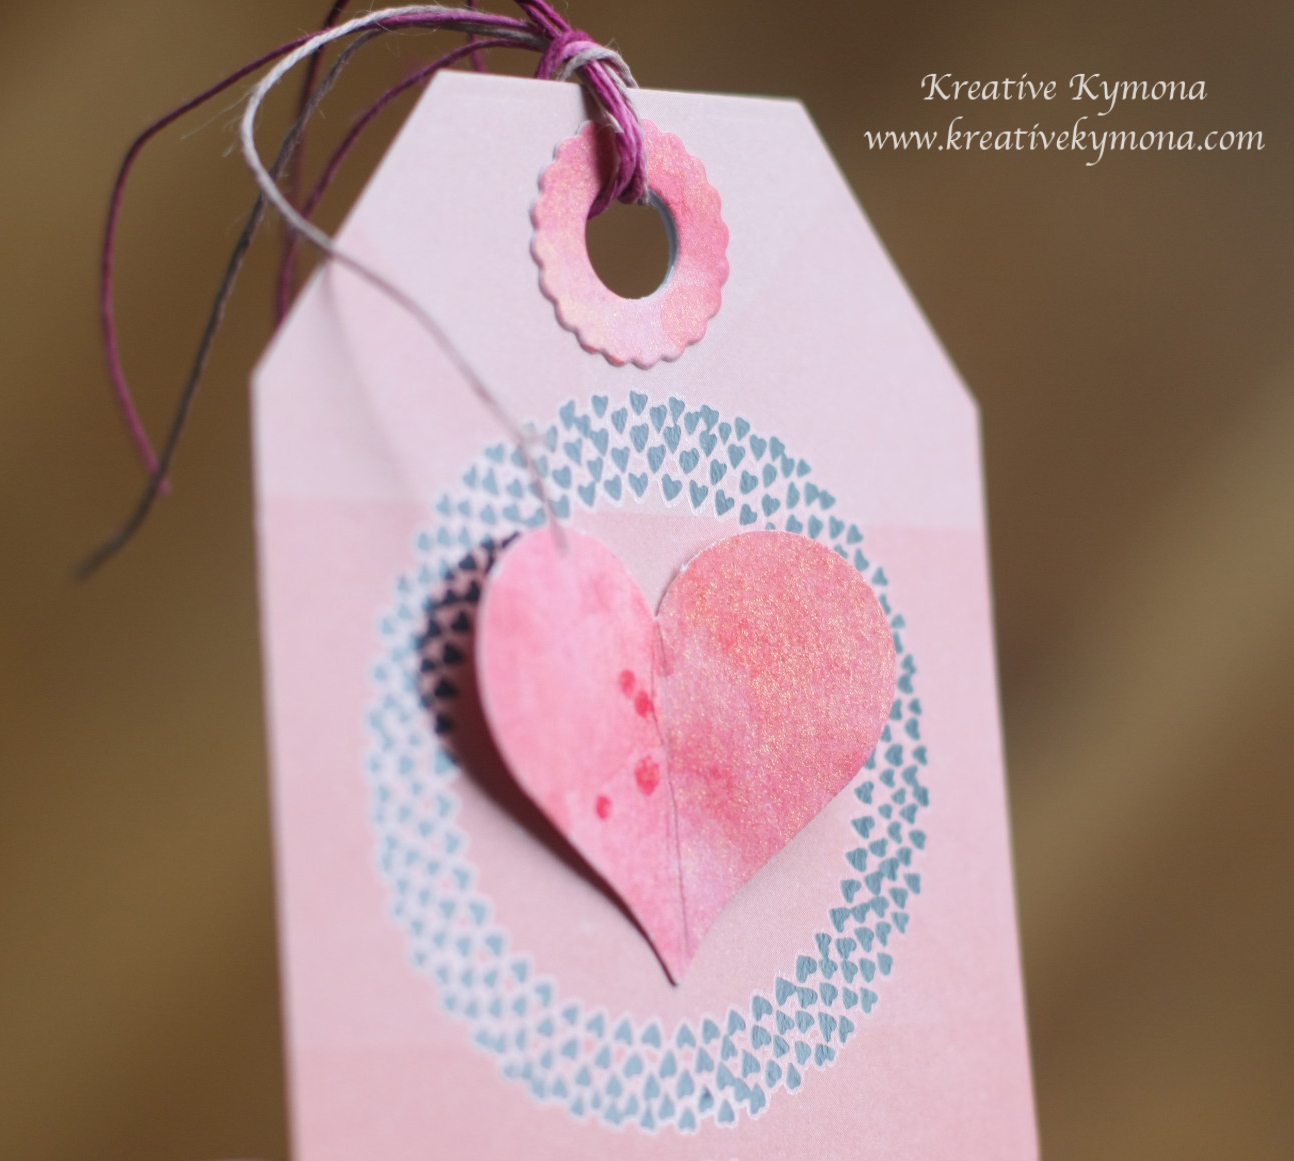
 Don’t you just love that heart!! I love how that watercolor piece turned out. I punch a bunch of hearts from that watercolor piece.