How to Blend Colors for the Sparkle and Shine Challenge

Fourth post for today
If your looking for Your Next Stamp Sketch and Color Challenge, click here
If your looking for CS Take It Make It Challenge, click here
If your looking for a2z Scrapbooking Challenge, click here

Hello everyone!!  I’m here today with the Sparkle and Shine Challenge!!!  How exciting is this!!! 

Since its the first of the month, its time for our new challenge!!!

Here is the inspiration photo that guided us this time around:

April 1_2016

Now take a look at my card:

Enjoy (S&S)

I love how this card turned out.  These colors are awesome together.

Here is how I blended these colors to created this card:

I gathered all of my supplies. I used the Distress Ink Kits 13 and Kit 14, My Favorite Things Stencil Circle Burst, Ink Blending Tool, Recollection White Heavyweight Cardstock, Simon Says Stamp Painted Enjoy, Clear Wink of Stella, Stampin’ Up! Rhinestones and Tombow Mono Liquid Glue.

ink blending 6

Then I started inking in the middle with the Distress Ink Abandon Coral.

ink blending 2

Next in line was Distress Ink Fossilized Amber. I took my time and tried to blend the colors with ease.

ink blending 3

After that, was Distress Ink Cracked Pistachio. Always moving in a circular motion.

ink blending 4

Moving right along, up next is Distress Ink Mermaid Lagoon.

Ink blending 7

Now its time for the big reveal.

ink blending 6

Super cool effect!

Then I used Simon Says Stamp Painted Enjoy Die and cut out 4 enjoy’s.  I glued them together and adhered it to the front of the card.

I added Clear Wink of Stella to the sentiment and finished the card off with a couple of Stampin’ Up! rhinestones.

enoy close up (S&S)

Nice and easy!! Perfect blending of colors.

Wait before I go, I was asked to show this same effect using the Clarity Brushes.

clarity bursh blending

I posted my comparison on Instagram a couple of weeks ago when I created this card.  You can find it here on Instagram.

What do you think?

Now its your turn to give this challenge a try!! I can’t wait to see what you come up with!!

Our sponsor for this challenge is Create a Smile Stamps!!

Create A Smile Badge

The winner of this challenge will receive a $25 gift card to their online store and will be asked to be our Guest Designer for the next month.

Supplies used:

Mini Ink Blending ToolRecollections White Heavyweightcircle burst stencil painted enjoyWink of Stella clear Basic Rhinestones Jewel AccentsTombow Multi-Purpose AdhesiveDistress Ink Mini 13  Distress Ink Mini 14Clarity Brushes

Thank you for stopping by!

~Kymona

{Clean and Simple} CASology 191 – Washi

Hello everyone!!  It’s CASology Tuesday!!  We are back with another Clean and Simple Cue Card just for you!!

This week’s cue card is:

Week 191 - Washi

Take a look at my card:

Washi (CAS)

I’m so tickled by my card.  I love how the numbers look like they come with the newsprint on them.  Its Washi Tape!! I used Tim Holtz’s Symphony Tissue Tape and Penny Black By The Number Die.

To create this card:

  1. Add 5 strips of washi tape to white cardstock.
  2. Use the die cut to cut the washi cover cardstock.
  3. Adhere the die cut to the cardbase using Tombow Mono Multi Liquid Glue.

Nice and simple!

I was having so much fun, that I had to create another card.

Enjoy Washi (CAS)

This time I used some new watercolor washi tape that I picked up from Michaels. I love this tape.  So super pretty. I have to say that I’m super luck to have this set of washi tape.  I hear everyone saying they can’t find these.  I might have to search them out and pick up another for a giveaway, maybe!!

washi

To create this card:

  1. Add two strips of tape on the bottom of my card base.
  2. Use Simon Says Stamp Painted Enjoy Die to cut one word out.
  3. Adhere it right above the washi tape with Tombow Mono Multi Liquid Glue.

Nice and easy clean and simple card!!

What do you think?  I can’t wait to see what you come up with!

For more inspiration, check out my fellow Design Team members blog for more awesome work.

DT Badge

Supplies used: 

Tissue Tape by the numberRecollections Black HeavyweightRecollections White HeavyweightTombow Multi-Purpose Adhesivepainted enjoy

Thank you so much for stopping by!

~Kymona

Waffle Flower Crafts – Photo Inspiration

Hello everyone!!  I’m here today with our new Waffle Flower Crafts Photo Inspiration Challenge!!  This is our fifth challenge for 2015! Time is flying.

10991320_10206178011269627_2513321303919933970_n

Now, I really love these colors together, navy blue, pink, gold and white!!  How pretty!

Now take a look at my card:

Enjoy (WFF)

Such pretty subtle colors!  I knew the Waffle Flower Flower Circles Die Set would look amazing in these colors.

To create this card:

It was simple.  I started with a card base cut to an A2 size card.

I used Simon Says Stamps Cotton Candy cardstock and Lawn Fawn Sweater Weather pattern paper to cut out my Flower Circle Die.

I adhered the flower on the card, then stamped my sentiment from the Holiday Labels- Give Thanks Set in the center of my flower using Versafine Onyx Black Ink.

I adhered some Pretty Pink Posh 4mm and Simon Says Stamps Gold Sequin to the front of my card.

I sprayed the card front with Heidi Swapp Gold Spray.

That’s it!!  Super simple and easy!

So what do you think? Please let me know.  Now its your turn!! I can’t wait to see what you come up with!!

Supplies used:

Waffle Flower Flower Circles Die Holiday Labels Give Thanks Stamp Set Onyx Versafine InkPretty Pink Posh Gold Sequins SSS Sparkle and Shine sequin Color Shine Gold

Thank you for stopping by!

~Kymona
Because I’m Happy…

still smilingstill smiling       still smiling

My smiles and happiness continues!!  I found out yesterday afternoon that I was one of the winners of the Muse Challenge#69.  I became a Featured Member yesterday. Yayyyy!!!! I worked really hard and it paid off.

Thank you to everyone who voted this week.  Congrats to the other wonderful women who won and played along this week!!

I’m back again to play along for this weeks challenge.  The Muze Challenge #70 was created by Vicki Dutcher.  Vicki’s card is full of details.  Take a look:

Vicki Dutcher

When I saw Vicki’s card, I knew I had a striped background stamp from Simon Says Stamp that I wanted to use.  Plus I love the color she used and decided to use the same color from Hero Arts.

Here is my take on Vicki’s card.


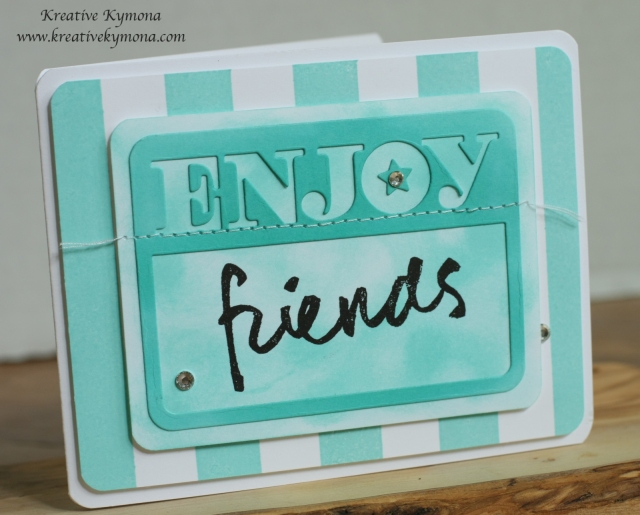
Enjoy Friends 2

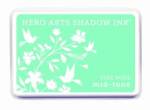
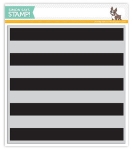
The color made me feel happy and since I’ve been in a great mood, I decided to use the same color.  For my background I used Simon Says  Stamp Wide Stripes Background Stamp with Hero Arts Tide Pool Ink.

The striped mat was adhered to the card base with foam dimensionals.

For the mat under my sentiment die, I sponged the white card stock with same Hero Arts Tide Pool Ink very lightly in a whimsical motion, leaving some of the white card stock to show through. I was going to watercolor that mat but changed my mind.

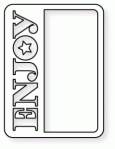
For my sentiment piece, I rubbed my Hero Arts Tide Pool ink across my white card stock to create the same color.  I used Papertrey Inks Phase Plate #4 Die to cut the ENJOY sentiment and frame.

The mat and the sentiment plate was then sewn together to represent the flagged banner across the front of Vicki’s card.

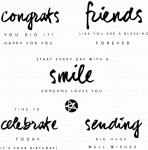
The sentiment “friends” from Papertrey Ink’s Wet Paint 3 stamp set was stamped in the window with versamark onyx ink.

I added rhinestone for an added dimension.

Was my interpretation of Vicki’s card accurate?  Please let me know what you think.

~Kymona
Supplies used:

Phrase Play #4Wet Paint 3Wide Stripe Background StampclassiccrestsolarwhtieHero Arts Tide PoolSewing MachineStampin' TrimmerBasic Rhinestones Jewel AccentsStampin' DimensionalsOnyx Versafine Ink

Shadow Stamping

This week’s challenge technique is a one layer Shadow Stamping card for Less is More.

Shadow Stamping is stamping the an image twice without re-inking the stamp.  You will see the stamp lighter the second time, which creates a shadow.

I used Stampin’ Up!’s Peachy Keen stamp set to create this effect.

Take a look:

Double Heart Enjoy

I stamped the first heart with Crisp Cantaloupe ink,  then without re-inking the stamp I stamped the heart again, giving the heart a shadow.  I repeated those steps using the Bermuda Bay ink.  I stamped the sentiment from the Simply Celebrate stamp set in Memento Tuxedo Black ink.  I added a rhinestone to finish the card off.

I am pleased with how my shadow stamping turned out.

Please leave a comment below letting me know what you think.

Supplies used:

classiccrestsolarwhtieBermuda Bay InkCrisp CantaloupePeachy KeenSimply CelebrateBasic Rhinestones Jewel Accents