Your Next Stamp DT Dare – Stripes

Hello everyone!!  I’m here today with Your Next Stamp and our DT Dare!!!

What is a DT Dare you ask? It’s a fun monthly challenge for the YNS design team to show case more fabulous projects using the new release products!!

YNS-DARE-Badge

Fun right!!

Wait there is more!!  If you leave a comment on the YNS blog post you could Win a YNS Stamp Set of your choice!!! 

Exciting right!!  It sure is for me!!

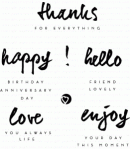
The DT Dare Challenge this month is Stripes!!  The design team was asked to create a project using one of the new stamp sets from the March release.  I went with the new From the Heart Stamp set and some Recollection ColorSplash washi tape for my project.

Take a look at my project:

Love Happiness Life (YNS)

To create this card, I added the washi tape to the card front first to create the strips, then stamped the sentiment. Nothing to it.

Such a great way to use the washi tape you have on hand.  This was just perfect because this stamp set has the word happiness in it so I just replaced it with the washi tape.

What do you think?  Please let me know below.

Super simple and easy.

So tell me what you think of this challenge? I would love to know, let me know below!

Don’t forget to head on over to the Your Next Stamp Store to take advantage of the online discount code below and save an extra 20% on everything in the store!!

Don’t forget we have Blog Candy for you!!  If you leave a comment on the YNS blog today you have a chance of winning the blog candy.

DTDare2candy-547x232

Supplies used:

 From the Heart Color Splash Watercolor and Word Washi TapeRecollections White Heavyweight

Thank you so much for stopping by!

~Kymona

Jamaican Butterfly…..

Hello everyone!!  I’m here with Muse Challenge #84.  This week Muse was Therese Calvird and I have to say her card is ABSOLUTELY Beautiful!

Take a look at Therese’s card:

Butterfly Triangles

When I say it I was taken back.  Her butterfly was so pretty and I love how she broke it up.

I still can’t figure how she did it.  It looks like embossing paste but how did she stamp on that.  Then I thought she stamped the image and then use her die cut to cut the panel.  That made more sense but still I was intrigued.

So I decided to to give this card a try.

On August 8th, 2014 I posted a picture of a Jamaican butterfly that I fell in love with on Instragram, wishing all Jamaican’s Happy Independence Day.  I also mentioned that that butterfly would be my next butterfly card inspiration.

Here is the picture of the butterfly:

201-314-PRODUCT-200Photo credit

Here is my card:

Jamaican Butterfly

Here is the card flat:

Jamaican Butterfly closeup

So how did I create this card?  Here you go:

1. I stamped Papertrey Ink Life is Beautiful large butterfly in Memento Tuxedo Black Ink on my Neenah Solar White card panel.

2. I colored the butterfly with Copic markers G28 and Y13.

3.  I used Papertrey Ink Stripes Horizontal Cover Plate and cut the card panel.

4. I used Papertrey Ink Wet Paint to stamp my sentiment on one of the horizontal die cuts.

5. I carefully placed the strip back in place but lifting some of them with foam adhesive.

6. I had a couple of Lawn Fawn Scripty Hello die cut already so I adhered two together for thickness.  I use glue and added it to the front of my card.

7. I added Clear Wink of Stella to the butterfly and the hello.

8. I added Pretty Pink Posh Clear Sequins and Stampin’ Up! Rhinestones to the card to spice it up.

So what do you think?  Did my card pass this Muse test?

Please let me know!

Supplies used:

Life is Beautiful Stamp Set Memento Black InkclassiccrestsolarwhtieCopic MarkersStripes Horizontal Cover Plate3M Mounting TapeScripty Hello Wet Paint Wink of Stella clearPretty Pink Posh clear Basic Rhinestones Jewel Accents


You Did It!!!!

Hello everyone!! Can you believe we are already in June!!  It was just January the other day!! Time is flying so fast.

If you were asked what you accomplished in the last 6 months what would your answer be?  Wow, for me it would be a lot.

Here is a short list from January to June:

  1. I traveled to Houston, Texas for Stampin’ Up! Leadership Conference.
  2. I traveled to Rosemont, Illinois to become Copic certified.
  3. I entered a lot of blog challenges and have met a lot of wonderful people.
  4. I’ve taken a couple of Creative Live classes and LOVED them.
  5. I participated on my very first blog hop with some of my classmates from April Bowles Blogging Class.
  6. I won and received honorable mention from a couple of the card challenges I participated in.
  7. I traveled to Hanover, Maryland to take a Copic workshop class.
  8. Let’s not forget all of the mothering I’ve done in the last 6 months.

Those are big accomplishments for me so Congrats to me.  Speaking of Congrats, June is the month for graduations!  I love graduations.  My hat goes off to everyone graduating this year.  So making a card for this occasion was most fitting.

I’m playing along with Freshly Made Sketches today.  Here is a copy of their sketch:

FMS140

This sketch was created by Linda C.

I love the stripes at the bottom of the sketch. I decided to use Stampin’ Up!’s new in colors for this card.

Take a look:

Woo-Hoo

So my soon to be sister-in-law, just graduated from law school and the WOO-HOO is for her!  I remember when she was applying to law school.  I can’t believe the time has passed so fast.  She is studying for the bar now so she is unreachable but I wanted to give her a shout out on my blog for a JOB WELL DONE!!

IMG_6307CONGRATULATIONS ALICIA!!

Supplies used:

2014-2016 InColorsItty Bitty Accents Punch PackWhisper WhiteBasic Black InkStampin' DimensionalsStampin' TrimmerFuse Fast Adhesive

So let me know what you think? I love comments.

~Kymona

What’s Popping, “YOU” Are!!!

Hello everyone!!  It’s a new week, which means new Muse Challenge.  I’m excited again because I was given honorable mention from the ladies over at the Muse Challenge for last weeks card!!  I get all giggly when I see my name and card showcased.   The winners and the other honorable mentions are talented women and I’m so happy for all of them.

So this week I’m back again with another card for this week Muse Challenge #71.  Our Muse for this week is Therese Calvird.  Stacking die cuts are what we are challenged to do.

Take a look at Therese’s card:

Hello

I love how she was able to match the lines in her background with the lines on her hello’s.  Everything follows so nicely and it looks so pretty.  I tried this same technique with my card.

Take a look at my card:

You are a true friend

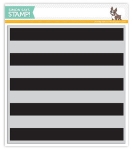
I created this card using all of the Stampin’ Up! in colors.  I used Simon Says Stamps wide stripes stamp to created the background.  I die cut 5 of the you’s and stacked them with a stamp you.  I added the “you” to the background and aligned the colors on the you with the background for a seamless finished.

You are a true friend closeup

Here is a close up of the stacked” you”.  I stamped the sentiment right under the you so that it looks natural.  This technique was fun to do so I might try it again on another card.

Let me know what you think of my card.

Supplies used:

Tangelo Twist InkMossy Meadow InkLost Lagoon InkHello Honey InkBlackberry Bliss InkSSS Big You DieSSS HelloYouOnyx Versafine InkWide Stripe Background StampBasic Rhinestones Jewel Accents

Please leave a comment below letting me know what you think!

~Kymona


Because I’m Happy…

still smilingstill smiling       still smiling

My smiles and happiness continues!!  I found out yesterday afternoon that I was one of the winners of the Muse Challenge#69.  I became a Featured Member yesterday. Yayyyy!!!! I worked really hard and it paid off.

Thank you to everyone who voted this week.  Congrats to the other wonderful women who won and played along this week!!

I’m back again to play along for this weeks challenge.  The Muze Challenge #70 was created by Vicki Dutcher.  Vicki’s card is full of details.  Take a look:

Vicki Dutcher

When I saw Vicki’s card, I knew I had a striped background stamp from Simon Says Stamp that I wanted to use.  Plus I love the color she used and decided to use the same color from Hero Arts.

Here is my take on Vicki’s card.


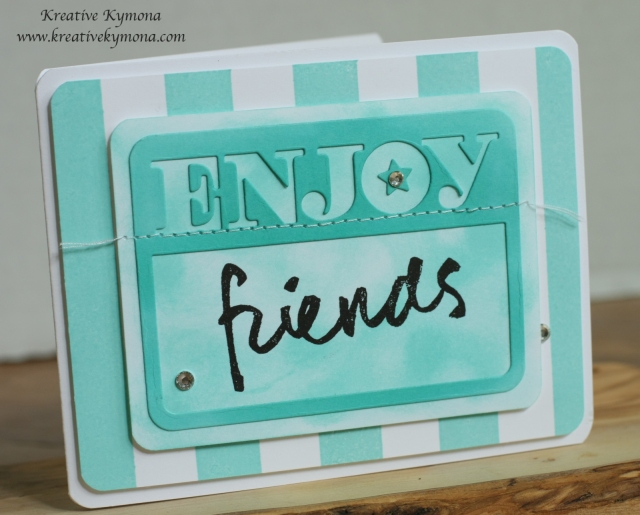
Enjoy Friends 2

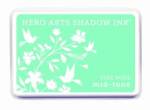
The color made me feel happy and since I’ve been in a great mood, I decided to use the same color.  For my background I used Simon Says  Stamp Wide Stripes Background Stamp with Hero Arts Tide Pool Ink.

The striped mat was adhered to the card base with foam dimensionals.

For the mat under my sentiment die, I sponged the white card stock with same Hero Arts Tide Pool Ink very lightly in a whimsical motion, leaving some of the white card stock to show through. I was going to watercolor that mat but changed my mind.

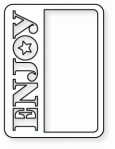
For my sentiment piece, I rubbed my Hero Arts Tide Pool ink across my white card stock to create the same color.  I used Papertrey Inks Phase Plate #4 Die to cut the ENJOY sentiment and frame.

The mat and the sentiment plate was then sewn together to represent the flagged banner across the front of Vicki’s card.

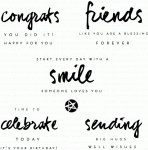
The sentiment “friends” from Papertrey Ink’s Wet Paint 3 stamp set was stamped in the window with versamark onyx ink.

I added rhinestone for an added dimension.

Was my interpretation of Vicki’s card accurate?  Please let me know what you think.

~Kymona

Supplies used:

Phrase Play #4Wet Paint 3Wide Stripe Background StampclassiccrestsolarwhtieHero Arts Tide PoolSewing MachineStampin' TrimmerBasic Rhinestones Jewel AccentsStampin' DimensionalsOnyx Versafine Ink

5 Days of Birthday Cards – Day 1

I was looking through my stash of cards and I realized that I was really low on birthday cards so I’m going to have a series of birthday card to showcase.  I will make 5 different birthday for this series.

Today’s card is a male’s birthday card.  I love the colors and the shapes that are on this card.  I’m using a lot of different products on my card that are new in my craft corner.

Take a look:

Male Birthday Card Front

The horizontal stripes were made with a new die cut from Papertrey Ink called Stripes Horizontal.   When I was finished with the front of the card I was wondering what will I add to the inside.  And here is what I decided.

Inside mistake

Take a look at that.  Can you believe I made such a big mistake!!!!  I could not believe it.  I wasn’t paying attention and stamp the image upside down.  How could I???  What was I going to do? At first I decided to just not show the inside but I really want to use this card so what can I do to fix this mistake.  Take a look at how I made a come back.

Inside Corrected

I decided to use what I learned in the Insiders class and brought the front of my card to the inside of the card.  All I did was turn the square image 90 degrees for a different look.  I just love it!!!  The card came out so nice.

My mistake caused me to really pull from my creative hat and it made the card pop.

I hope you enjoy this card as much as I do.  Just click on the images below if you want to purchase them.

Supplies Used:

Remember Your Birthday 131347

Remember Your Birthday
131347

Coastal Cabana 131297

Coastal Cabana
131297

Baked Brown Sugar 131296

Baked Brown Sugar
131296


Whisper White CS 100730

Whisper White CS
100730

Fresh Prints DSP 132996

Fresh Prints DSP
132996

Stripes Horizontal Cover Plate PTD-0536

Stripes Horizontal Cover Plate PTD-0536


Snail Adhesive 104332

Snail Adhesive
104332

Stampin' Dimensionals 104430

Stampin’ Dimensionals
104430

Stampin' Trimmer 126889

Stampin’ Trimmer
126889


3/16 Inch Corner Punch 119871

3/16 Inch Corner Punch
119871


Signature