CS Take It Make It: Take a Technique Challenge

Second Post for Today
If your looking for Your Next Stamp Sketch and Color Challenge, click here

Hello everyone!! I’m here with CS Take It Make It: Take a Technique Challenge Inspiration for April.

Our theme is Take a Technique: Spring Flower!!

For this month’s challenge the technique we would like you to stamp a flower anywhere on your project, or even real ones!!  Cover your art with flower embellishments, or make a flower shaped creation.  Go crazy (or minimal if that’s your thing!) with the florals…and don’t forget to include stamping somewhere too!!

This should be super fun to see what you come up with.

Take a look at my card:

Hello (CSTIMI)

This was super easy technique this month.  I love Spring Flowers because I’m a Spring baby!!

Here is how I created this card:

  1. Cut the black card base to an A2 size, 4.25 by 5.50 scored at 5.50.
  2. Cut the white card base using Mama Elephant Femme Frames.
  3. Use Hero Arts You’re So Lovely Stamp set to stamp your flowers using Hero Arts Tide Pool and Bubble Gum ink.
  4. Then stamp the sentiment two times using Versafine Ink.
  5. Add small Stampin’ Up! Rhinestones to center of the flowers.
  6. Finally adhere the white card panel to the black card base with Tombow Extreme Adhesive.

So what do you think? I love how this card turned out.

We have two prizes to offer this month, the first is our sponsor prize. This winner will be chosen randomly from all of the entries in the challenge! The sponsor for April: Traplet!

TraplietPrize:  All Six Kate Crane Art Journaling DVD’s

Our second winner is our Design Winner. This winner is chosen by our DT, who all vote for their favorite design from all of the entries. This winner will have their winning project published in Craft Stamper Magazine, they will have a GDT slot for an upcoming challenge, and will also feature in their very own Winners Profile blog post!

Now if that isn’t a reason to play along I’m not sure what is!!

I can’t wait to see what you come up with.

Supplies used:

FEMME_FRAMES-CC_large Recollections White HeavyweightRecollections Black HeavyweightHero Arts Tide PoolBubble GumOnyx Versafine Ink Basic Rhinestones Jewel AccentsTombow Xtreme

Thank you for stopping by!!

~Kymona

Top Dog Die – DIY Notebook

Hello everyone!!!  It’s Top Dog Dies Wednesday!!

Today I’m working with the Top Dog Dies Pretty Petals #3 Die Set!! I love this set!  You can use it on just about anything you create.  This die set is my go to set for dies!

Take a look at my project:Notebook 3 (TDD)

I created this notebook for my daughters teacher!!  My daughter and I are having a rough time this year because of the common core.  The way they teach math is unbelievable hard.  It makes no sense to me and teaching my daughter the way I learned it may not going to help her on test day.  So its been a struggle for both of us.

I talk to her teacher almost everyday so that I can stay on top of what she is learning and I wonder if she is tired of me, LOL!

I decided to create this notebook to show her that I truly appreciate her time, patience and her helpfulness as it pertains to my daughter.  I’ve said it before teachers really need all of our support because they have a tough job.

Creating this notebook was super easy!  I used my We R Memory Keepers Cinch and We R Memory Keepers Journal Kit!!

Notebook 5 (TDD)

Notebook 6 (TDD)

I decided that I loved how the chipboard looked just as it was.  I simply stamped my sentiment from Stampin’ Up! For Being You Stamp set (it was a sale-a-bration item) with My Favorite Things Hybrid Ink.

Then I used my Faber-Castell Polychromous Colored Pencils #140 and #125 to color my image in. The coloring is so beautiful to me.

Then I die cut my petals attached them to the front of the book, drew in a stem that attached to the sentiment.

Notebook 2 (TDD)

I added wink of stella to the letter and rhinestones to the petals.  I added the tabs to the pages to finish it off.

I love how this notebook turned out.

Notebook 4 (TDD)

What do you think?  Will my daughter’s teacher love this book?

I’m also entering this project into Jennifer McGuire Share Handmade Kindness Challenge.  We are on Week 2: Community

SHK-Week-2

Supplies used:

TDD Pretty Petals 3 DieCinchJournaling KitFor Being You Faber-Castell Polychromos Pencils MFT Hybrid Black Ink

Thanks for stopping by!!

~Kymona


Top Dog Dies – No Stamping Card

Hello everyone!!!  It’s Top Dog Die Wednesday!!  I’m here to showcasing Top Dog Dies Pretty Petals Die Set #2!!

TDD Pretty Petals 2 Die


This die set is such a versatile set.  You can use it to create some many different crafty things.

For my card today, I decided to use only my dies and no stamping on my card.

Take a look:

Hello Flowers (TDD)


I love how my flowers turned out and this card didn’t require any stamping.

For the card panel, I used retired Stampin’ Up! Polka Dot Embossing Folder to create the dots.

I die cut each flower out of Lawn Fawn Hello Sunshine pattern paper and attached them with foam tape.  I used my Copic Multiliner to draw the stem.  I added some Stampin” Up! Rhinestones to the center of each flower.

To add a sentiment, I die cut the Top Dog Dies Hello from the same pattern paper and used Tombow Liquid Glue to adhere it to the card panel.

I added my card panel to my card base and WaLa!!!!

Super simple and complete!!

What do you think? Let me know below!!

Supplies used:

TDD Pretty Petal #2   Hello Sunshine Petite Paper Pack Polka Dot Folder Basic Rhinestones Jewel AccentsLarge Rhinestone Basic JewelsCopic MultilinerTombow Multi-Purpose AdhesiveTDD Hello Die Set

Thanks for stopping by!!

~Kymona

Hello….

Hello everyone!!  I’m here with CAS(E) this sketch #84. I only have 8 hours to post this card.

CTS_Sketch84

I created a one layer card. I wanted to keep it very simple.

Take a look at my card:

Hello(Sorry about the photo, no natural lighting it is 1:26 in the am)

Edited to include this better photo at 6:30am

Hello2

My card is pretty clean and simple.  I used there Stampin’ Up! colors to create my card, crisp cantaloupe, pistachio pudding and basic black.

The sentiment is from Stampin’ Up! Hi There stamp set.

The scallops are from Papertrey Ink’s Ombre Builders stamp set.

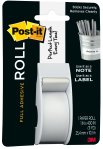
1. I masked 1inch of space at the top of the card using the post-it tape.

2. I stamped my image 1/8 from the top and bottom of the post-it tape.

3. I removed the tape and added my sentiment.

4. I added rhinestones and WALA my card is done!!

What do you think? Please lave a message.

Crisp CantaloupePistachio PuddingBasic Black InkHi ThereOmbre BuildersPost-It Full Adhesive RollBasic Rhinestones Jewel AccentsStampin' Trimmer

Thank you for stopping by.

~Kymona


Can’t Get Enough Of Butterflies..

Hello everyone!  I’m so excited to be back again with another entry for Papertrey Ink’s Make it Monday #168: Baby Wipe Stamping.

Yesterday, I created an extra butterfly so I’m using that butterfly on my card today!  I paired my butterfly up with my new stamp set from Stampin’ Up! Work of Art and the new in colors.  Beautiful!!
You are a fabulous work of art

After viewing what others have done with their cards, I’m going to try some of my other stamps.  I thought you needed to have a coordinating die for this technique but my fellow card makers show me otherwise.

Supplies used:

Blackberry Bliss InkHello Honey InkLost Lagoon InkMossy Meadow InkTangelo Twist InkLife is Beautiful Stamp SetLife is Beautiful DieWork of artUltra Thick White CS 120Basic Rhinestones Jewel Accents

Tell me what you think?

~Kymona