Hello everyone!! I’m here with CAS(E) this Sketch #145 Challenge today. I don’t get to participate in challenges much so when I do, I get all excited.
Lets jump right in:
Here is the sketch:

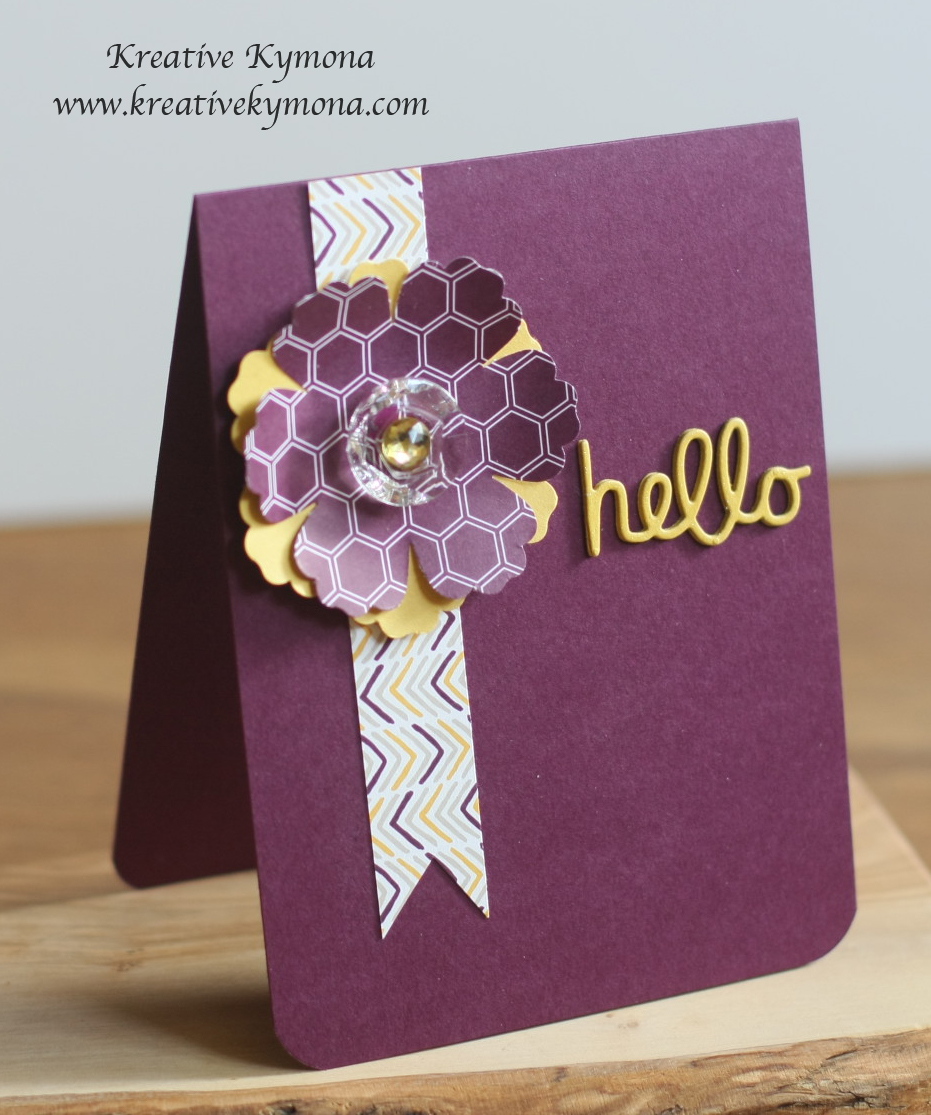
Take a look at my card:
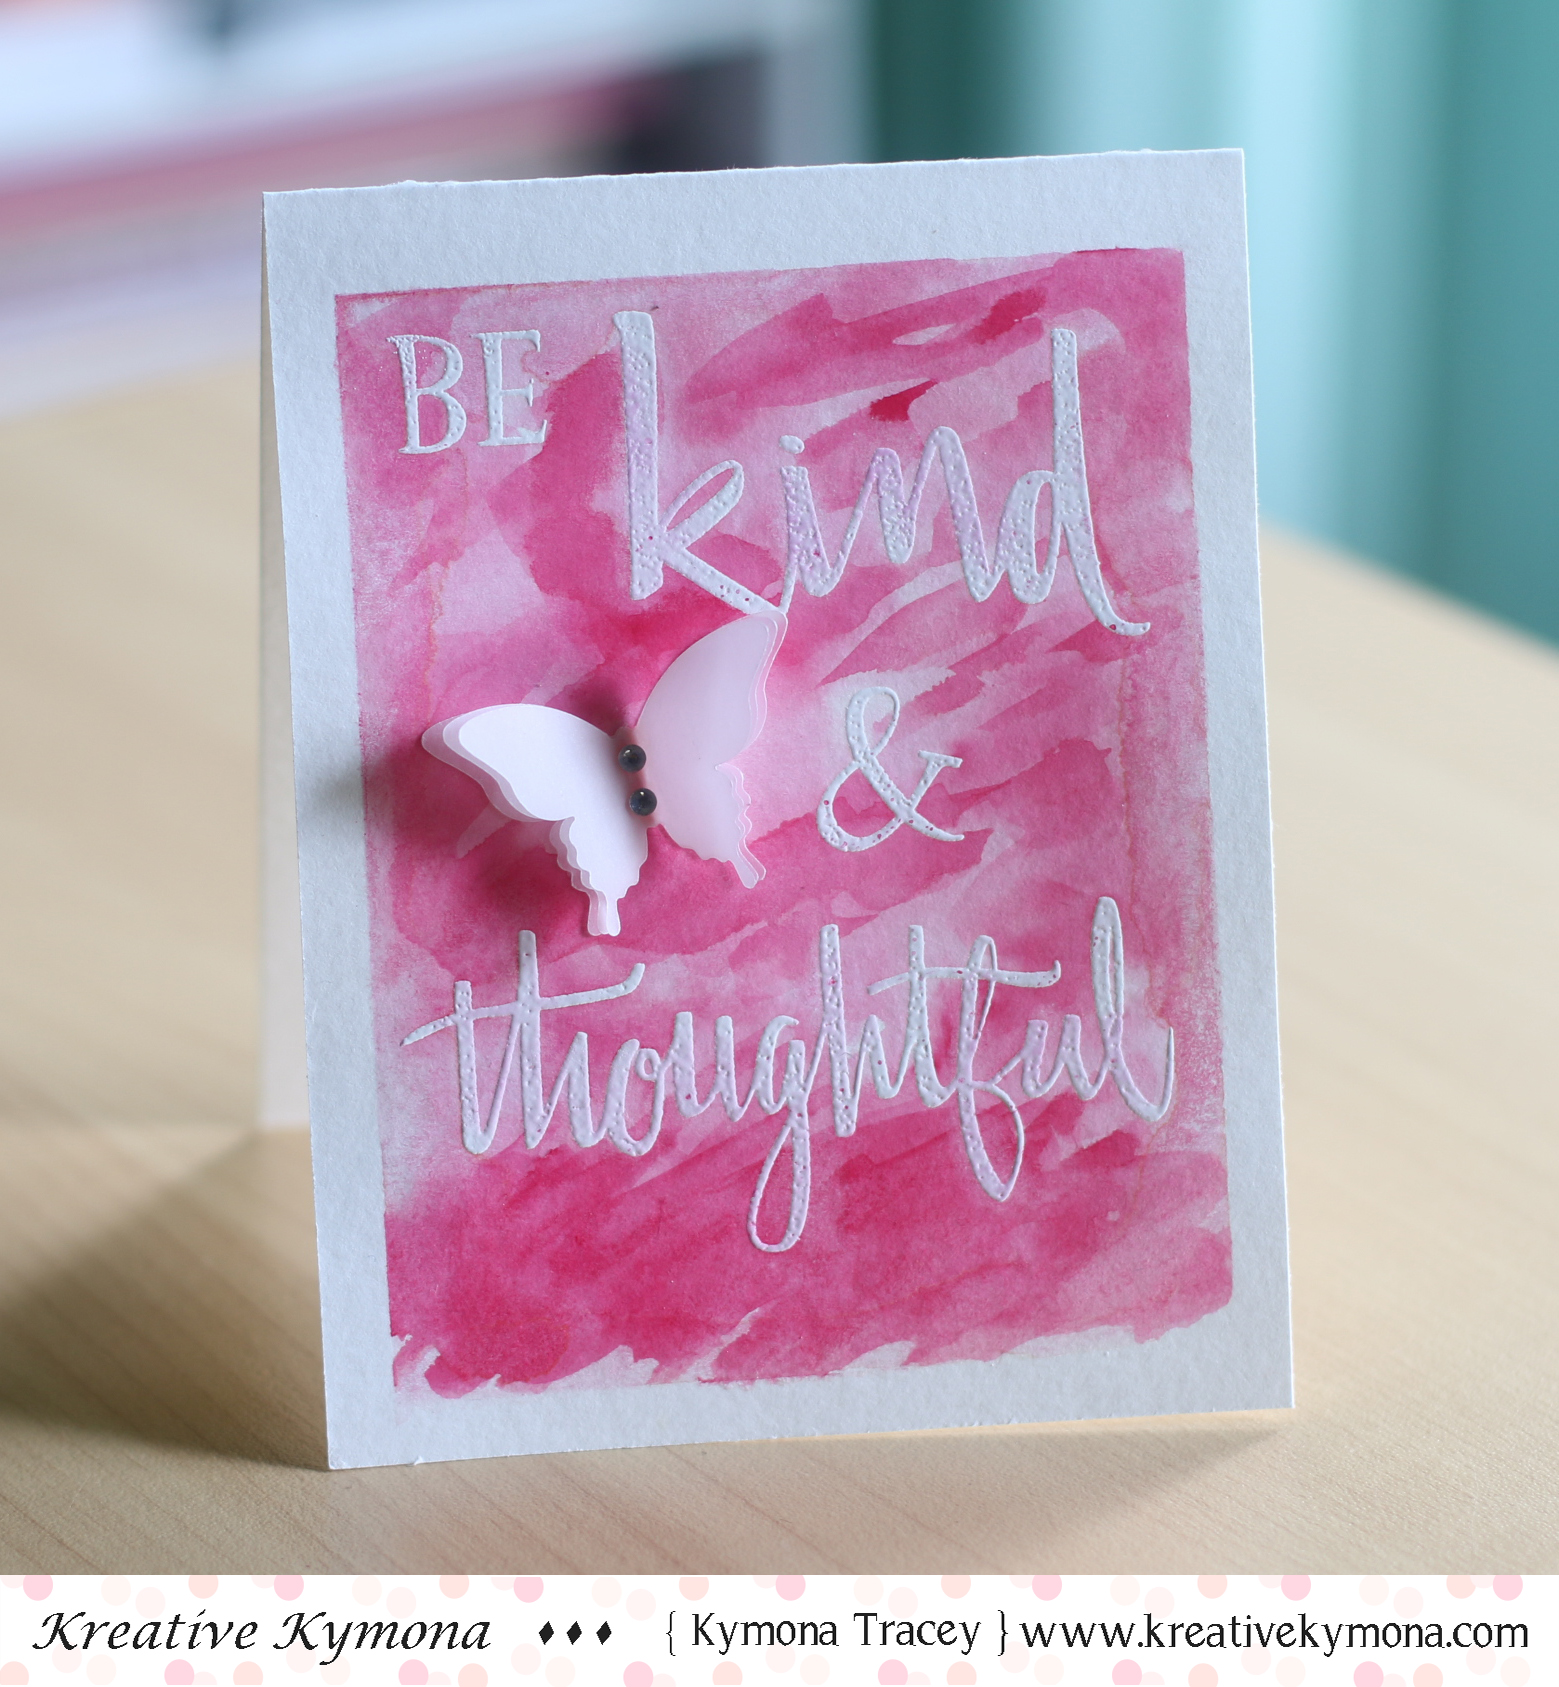
Creating this card was simple:
I used my powder bag and prepped my watercolor paper so that the embossing powder would stick to areas that I don’t want.
I used Concord & 9th Being Classy Stamp Set and stamped my sentiment using Versamark Ink.
I sprinkled Hero Arts White Embossing Powder on top of the stamped sentiment. Then I heat set it.
After all of the powder melted, I taped down my Canson watercolor paper so that I can watercolor the front of the card.
I used Koi Watercolor to add the color to my Canson watercolor paper.
Since I heat set the sentiment, it resists the color and rolls of the white sentiment. The color only lands on the paper where the sentiment isn’t.
Some of the paint settled on the sentiment, I just used a damp cloth to wipe the ink off. Super easy.
I used Stampin’ Up! Elegant Butterfly Punch to cut out three butterflies out of vellum paper.
I attached each of the butterflies together and add two rhinestones in the center.
Super easy and pretty!!
I hope I fit the sketch!
Supplies used:


Thanks for stopping by!!
~Kymona