DIY Teachers Notecards and a Farewell

Hello everyone!!  Kymona here for the last time as a design team member.  I had so much fun working with Nicole and all of my fellow teammates.  All of these ladies are talented and I’ve learned so much.  Thank you Nicole!

For my last project, I create some DIY Notecards for my daughter’s teachers to use at her leisure.

Take a look:

RAH Notecards copy


To see the entire post, please head on over to the Right At Home blog for all of the details.

Thanks again for all the support while on the team. So long Nicole and my fellow teammates.  I will see all of you in crafty-land.

Thanks for stopping by!!

~Kymona


Celebrating Kindness Blog Hop with Julia Altermann!

bloghop-maingraphic-juliacelebrates10K

Hello everyone!!  Welcome to the Celebrate Kindness Blog Hop!! If you arrived here from the talented Keren’s blog you are on the right track.  If you arrived here on your own, you will want to start from the beginning at our guest of honor’s blog, the wonderful Julia.

I’m here today with a super special blog hop for Julia Altermann from Just One More Card to celebrate two things:

  1. Reaching 10K YouTube Subscribers, and
  2. to say Happy Birthday to her!!!!!!

Aren’t those two fantastic reasons to celebrate!! I think so and I feel so honored to be apart of this celebration.

Are you wondering how Julia and I met? Let me give you the story!!

I can’t remember where I saw this card by Julia two years ago but when I saw it, I was in love. I had to find out more.

GSD-2BChristmas-2BDigis-2B-2B1

I visited her blog and I feel in love with her style.  She had a video to show me how to create this card and I had to try it.

She introduced me to Gerda Steiner Design, because of her I purchase so many of Gerda’s stamps. Which started a friendship with Gerda and I.  Thanks Julia for that!

That’s not all, Julia has introduced me to so many other great people and crafty stuff!

Let me think:

  1. Prismacolor Pencils
  2. Purple Onion Design
  3. Stabilo Pens
  4. Kit and Clowder Online Coloring Classes
  5. Bloobel Digi
  6. Polychromous Color Pencil
  7. Uni-Ball Signo Broad Point Gel Pen

The most important of them is her Friendship!!  Although Julia is Germany and I am in the US, we have great conversations, when time permits and I am grateful for that.

So now you know some of our background let the fun begin.  I decided to case one of her cards for this hop.  It only makes sense she inspires me so much!

Here is Julia’s card that I cased:

Julia's card

Here is my card:

Happy Birthday Julia

Happy Birthday Julia!!

I wish you many, many, many more!!

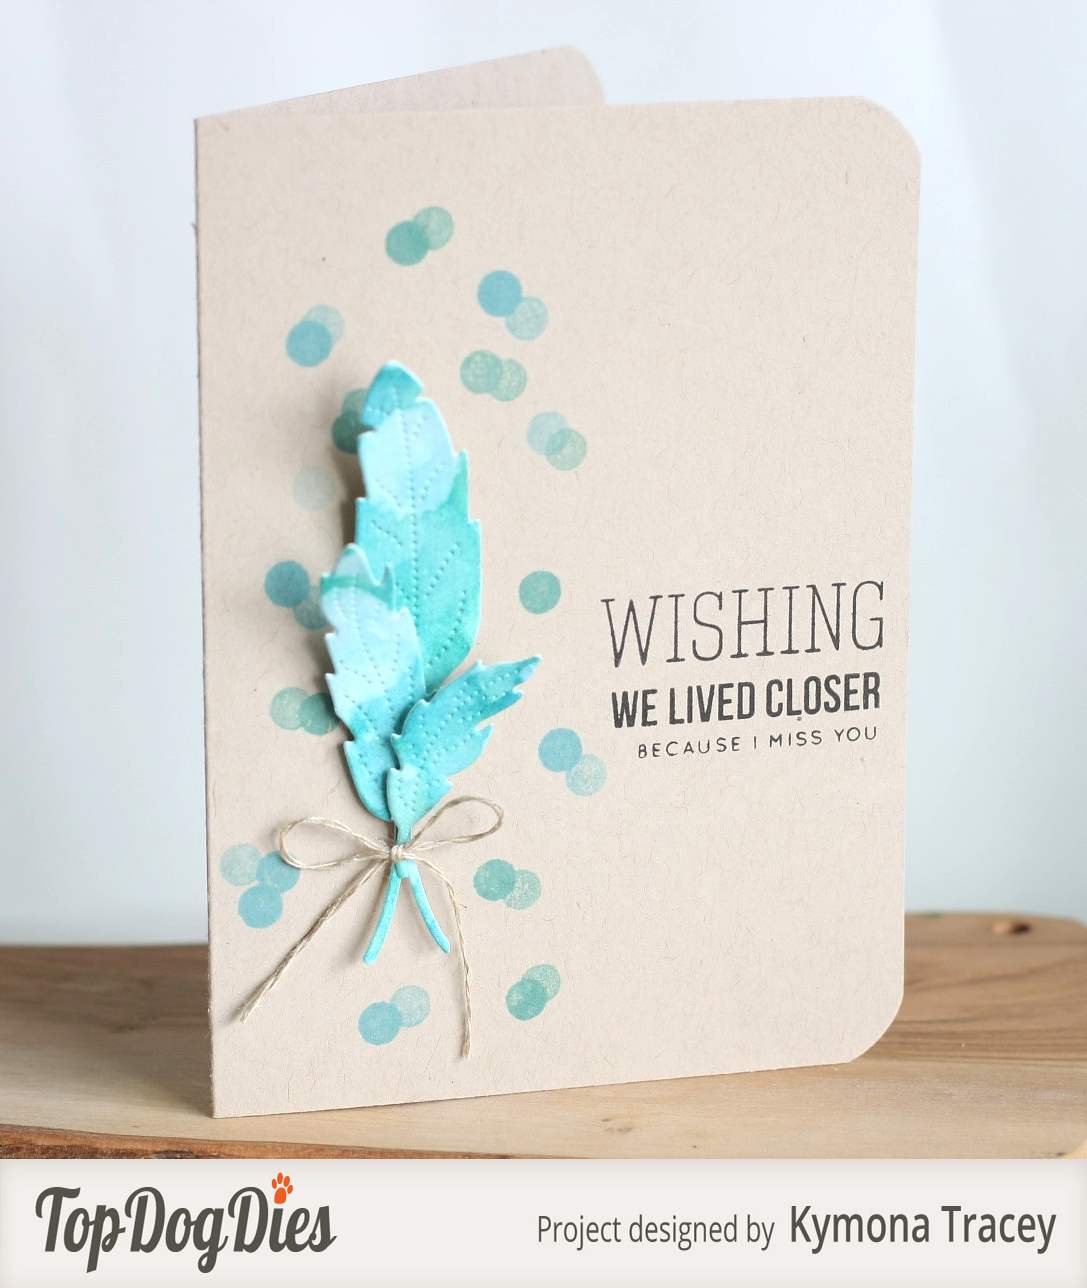
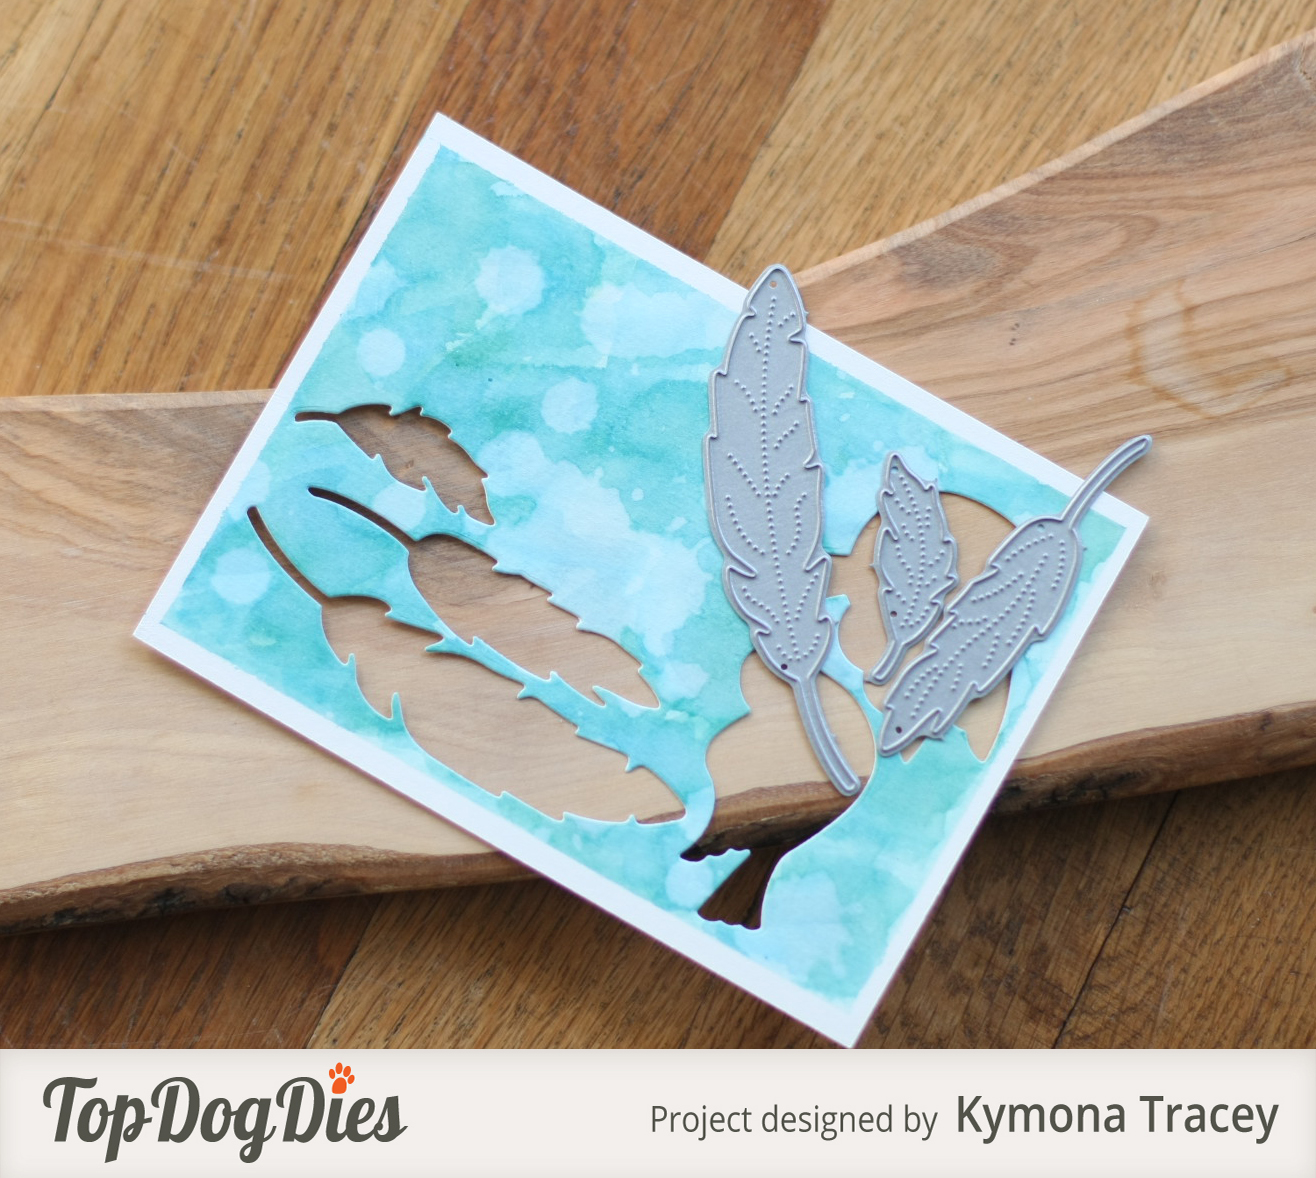
I created another card just because Julia is that wonderful!! Clean and simple is my style so that is what I wanted to create for Julia!

Take a look:

you are wonderful

Just for you Julia!!  You are wonderful and I’m so glad to have met you.

Congrats on your successful YouTube channel and Happy Birthday!!

Wait I have one more card for you:

Happy Birthday Embossed

This card was so easy to create!! All I did was emboss on kraft cardstock.  I think Julia will love this one.

Ok, ok, no more sappy stuff, LOL!!  Onto the blog hop prizes!!  Those are always fun. What is a blog hop without giveaways!!  Take a look at the list of prizes:

jomc-blog-hop-sponsors

A $15 gift card to Altenew
A $100 gift card to CAS-ual Fridays
A $25 gift card to Concord & 9th
A $20 gift card to Gerda Steiner Designs
A $30 gift card to Kit & Clowder
A $25 gift card to My Favorite Things
A $25 gift card to Purple Onion Designs
A $30 gift card to Pretty Pink Posh
A custom prize package from Seven Hills Crafts
A $40 gift card to Simon Says Stamp
Three custom prize packages from Stabilo

Amazing right!!  Anyone can be a winner!!  Everyone who leaves a comment by July 31st, 2016 by midnight will be entered into the drawing and the winners will be announced August 1 on Julia’s blog Just One More Card.  There will be a total of 13 prizes up for grabs.

So what are you waiting for!!!  The super talented Laura Bassen is up next!!

Go and check out everyone’s cards and leave them a super nice note!!  Just in case you’ve lost your way, I’ve added all of the participants blog below.

Just One More Card
Birka Reinitz
Debra James
Francine Vuillème
Jenn Shurkus
Jessa Feig
Keren Baker
Kymona Tracey ← you’re here
Laura Bassen
Laura Sterckx
Michelle Short
Marika Rahtu
Nichol Magouirk
Nina-Mari Trapani
Sonja Kerkhoffs
Simon Says Stamp
Stephanie Klauck
Tara Cardwell
Yoonson Hur

I hope you enjoyed what’ve seen here today.  I would love to hear from you!!  Please let me know what you think?
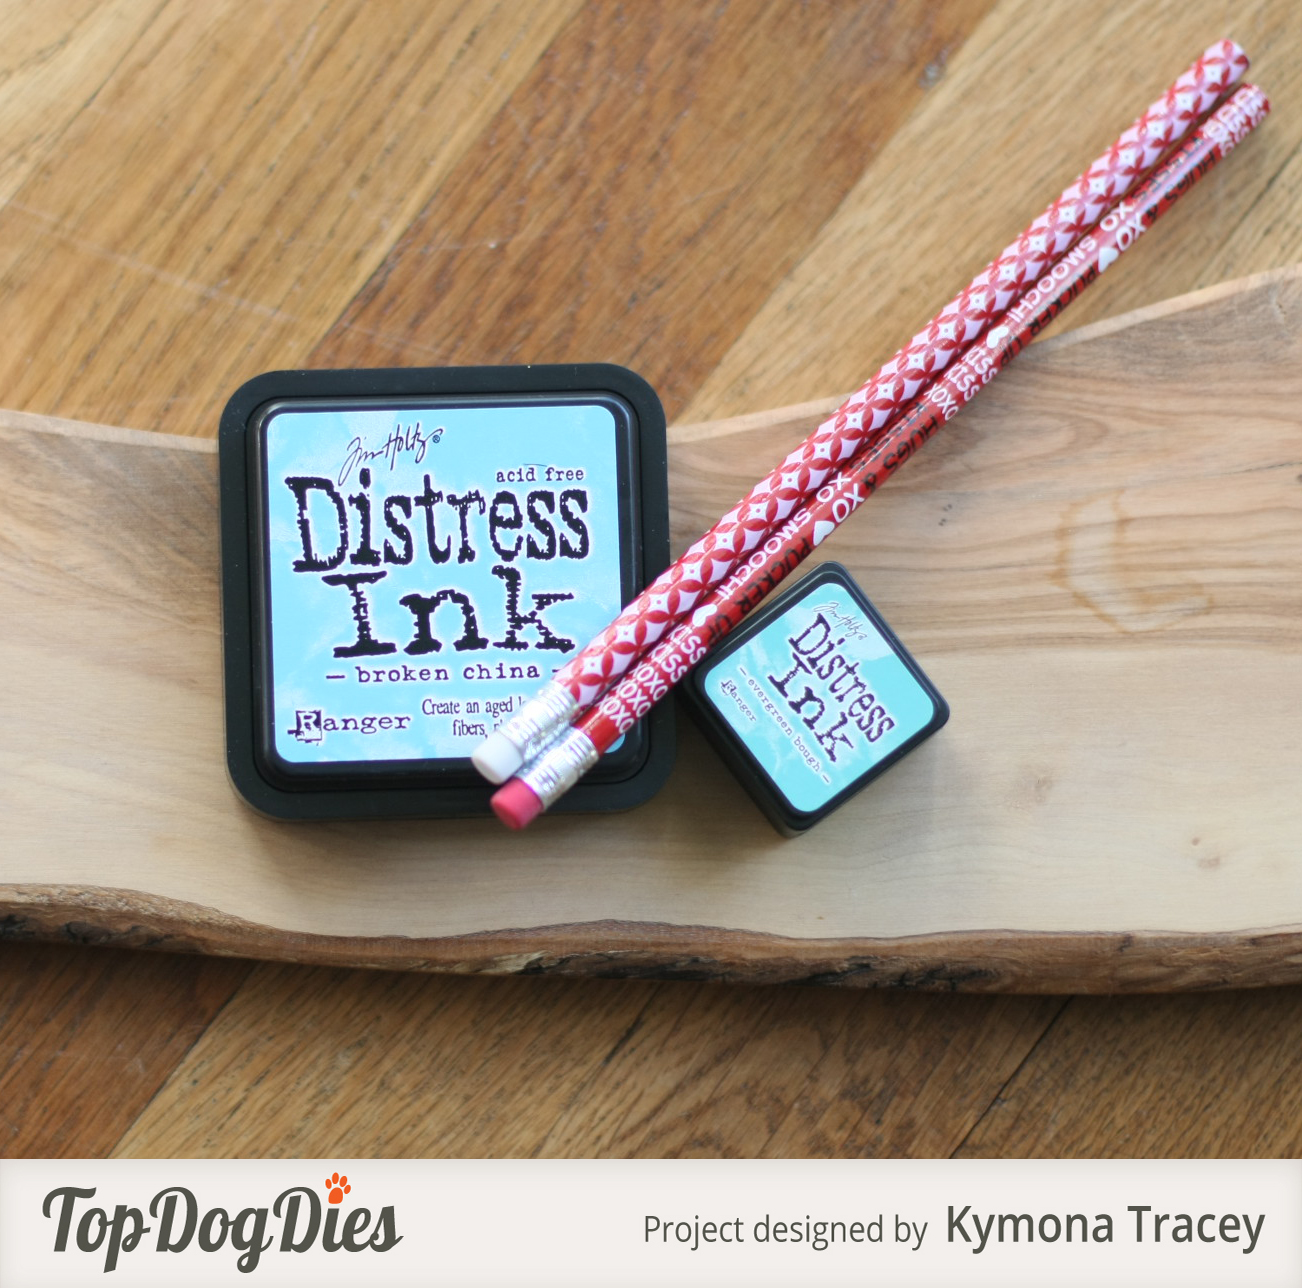
Supplies used:

MAKE A WISHWonky Stitched Rectangles Stax Rect peek a boo rectangle window dieTombow Irjiten Vivid Color PencilsElliot purple onionyou reason Penjuin and stamp set

Thank you so much for stopping by!!

Kymona

Top Dog Die – DIY Notebook

Hello everyone!!!  It’s Top Dog Dies Wednesday!!

Today I’m working with the Top Dog Dies Pretty Petals #3 Die Set!! I love this set!  You can use it on just about anything you create.  This die set is my go to set for dies!

Take a look at my project:Notebook 3 (TDD)

I created this notebook for my daughters teacher!!  My daughter and I are having a rough time this year because of the common core.  The way they teach math is unbelievable hard.  It makes no sense to me and teaching my daughter the way I learned it may not going to help her on test day.  So its been a struggle for both of us.

I talk to her teacher almost everyday so that I can stay on top of what she is learning and I wonder if she is tired of me, LOL!

I decided to create this notebook to show her that I truly appreciate her time, patience and her helpfulness as it pertains to my daughter.  I’ve said it before teachers really need all of our support because they have a tough job.

Creating this notebook was super easy!  I used my We R Memory Keepers Cinch and We R Memory Keepers Journal Kit!!

Notebook 5 (TDD)

Notebook 6 (TDD)

I decided that I loved how the chipboard looked just as it was.  I simply stamped my sentiment from Stampin’ Up! For Being You Stamp set (it was a sale-a-bration item) with My Favorite Things Hybrid Ink.

Then I used my Faber-Castell Polychromous Colored Pencils #140 and #125 to color my image in. The coloring is so beautiful to me.

Then I die cut my petals attached them to the front of the book, drew in a stem that attached to the sentiment.

Notebook 2 (TDD)

I added wink of stella to the letter and rhinestones to the petals.  I added the tabs to the pages to finish it off.

I love how this notebook turned out.

Notebook 4 (TDD)

What do you think?  Will my daughter’s teacher love this book?

I’m also entering this project into Jennifer McGuire Share Handmade Kindness Challenge.  We are on Week 2: Community

SHK-Week-2

Supplies used:

TDD Pretty Petals 3 DieCinchJournaling KitFor Being You Faber-Castell Polychromos Pencils MFT Hybrid Black Ink

Thanks for stopping by!!

~Kymona


Wishing you were here…

Hello everyone!!  Kymona here sharing my very first Top Dog Dies Design Team post with you today!!  I’m super excited to be here and I hope you love what I’m about to share with you!!

Today I’m working with one of the new dies that was released on Tuesday!!

tc084_1Top Dog Dies Feathers Die Set

Take a look at what I created for you:

Wishing you were closer

These feathers are super fun to work with.  I love the detail on each feather! So you want to know how I created this card?

Here you go:

1. I cut a piece of watercolor paper down to 4.25 x 5.50 and taped it down to my work station.

2. I added a good amount of water to my watercolor paper.

3. Then I dropped Distress Inks Broken China and Evergreen Bough to my paper and let the color spread all over my paper.  I heat set it.  Then I sprayed water in my hand and drop some drops of water onto my paper to create blotches of white spots.

TDD feather tutorial

4. Once my watercolor piece dried.  You can see in the next photo how watercolor dries lighter.

TDD feather Tutorial 1

5. I used my feather dies and cut out three feathers.

6. I adhered the flowers together with glue dots and tied a bow using linen thread.

7. I used the same color inks and a clean pencil erasers and added the dots surrounding my feathers.

TDD feather tutorial 3

8. I adhered the feathers over those dots using glue dots.

9. I used Simon Says Stamp Sending & Wishing stamp set to create my sentiment.  I stamped it to the right of the flowers.

TDD feather tutorial 2

10.  I used my corner chomper to round two of the cards corners.

That is all it took to create this card.  I love how it turned out and I hope you will give this technique a try.

Very elegant without any real hard work.

So what do you think? I would love to hear from you.

Supplies used:

Canson Watercolor Paper Distress Ink Broken ChinaDistress Ink Evergreen BoughLinen ThreadStampin Up glue dotsSending and WishingWe R Memory Keepers Corner Chomper

Thanks for stopping by!

~Kymona

Gifts for Workshop Members

Today is my fourth workshop with my coworkers.  We have so much fun.  For one hour we get to unwind and relax.  The type of work that we do at the hospital can be overwhelming at times.  This workshop allows us to regroup and go back to work ready for the rest of the day.

I have four faith members and one new member today.  So I decided to give them a small token of my appreciation. I love pencils and they just realized that.  So, I made them toppers for their mini pencils!!!  I love them!  Now, the idea isn’t totally mines.  I saw fellow demonstrator Angie Juda demonstrate this and I knew I had to make some for myself.  So, thank you Angie!  Enough suspense, take a look.

Pencils with Paper Toppers

I just love pencils and these toppers really gives them an edge.  You should try to make one for yourself.  It is very easy.

1. Cut a piece of DSP to 8-1/2 x 3 and fold in half long ways.

2. Use the Fringe scissors to cut the paper starting at the opening side of the paper. Leave about 1/4″ at the top of the paper uncut.  That should be at the fold.

3. Add sticky strip to the 1/4″ piece that isn’t cut.  That should be at the fold.

4. Take the backing of the stick strip off and align the top of the pencil, the silver top of the pencil to the edge of the paper, and roll the pencil on the sticky strip to form the topper.

5. Then you want to add Washi tape to cover up the edges. Push the excess Washi tape into the hole between the paper and the pencil to create a finished look.

6. To finish it off, use your hands to separate the fringes to create a nice full look.

See nice and easy!  If you need photos to help guide you please let me know.  I will provide that for you.

I hope you enjoy making them as much as I enjoyed making them.

Tune in later for pictures from my workshop later.

Supplies use:

1. Sweet Sorbet DSP which is in the Sale-A-Bration catalog.  If you spend, $50 in my online store you can get that set of paper for free.

2. Washi Tape from my local craft store.

3. Staples has the 28 pack of pencils that contain the black pencils as well.  I believe that’s an in store item only.

Fringe Scissors 133325

Fringe Scissors
133325

Sticky Strip 104294

Sticky Strip
104294

Staples Zebra #2 Mechanical Pencils

Staples Zebra #2 Mechanical Pencils


Enjoy!

Signature