How to Create Texture Using a Die Cut

Hello everyone!! I’m here today to show you how to create texture using a die cut from Technique Tuesday By the Numbers Crafting Die.

Let’s take a look:

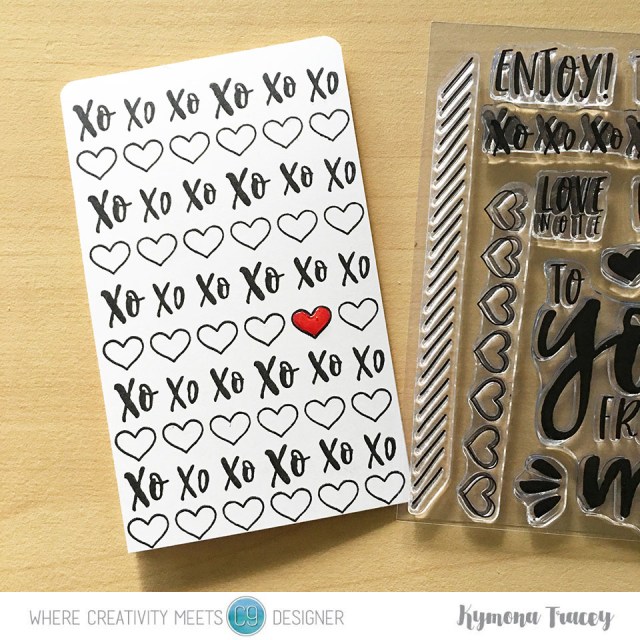
I love this By the Numbers die! It’s bold and full of space in between the numbers. Creating this card was simple.

Here’s how:

Simple die cut the numbers die 3 times out of white cardstock.

Then cut a 4th piece out of We R Memory Keepers Urban Chic patterned paper.  Adhere them all together using Tombow Mono Liquid Adhesive.

Cut the Neenah Solar White card base to 4.25 by 11 scored at 5.5.

Cut a second piece of the same Urban Chic patterned paper to 4.25 by 5.5 and adhere it to the top of the card base.

Line the die cut numbers strips with the stripes on the card base and adhere.

Beautiful texture!

To finish the card off, stamp the sentiment from Technique Tuesday Flowers For Mom stamp set inside using Versamark Ink.

Sprinkle Altenew Pure White Embossing Power on top and heat set it.

Flowers for mom stamp set

The font for this sentiment is my favorite.  It’s bouncy and playful.  It goes will with the front of the card.

Super quick and easy.

What do you think? Will you try adding some texture to your card front? I would love to see what you create!

Supplies used:

(Thank you so much for stopping by. Compensated affiliate links used at no cost to you.  Technique Tuesday products were given to me since I’m on the design team. All other products were personally purchased.  This post was not paid or sponsored.) 

Flowers for Mom By the Numbers Die Tombow Mono Liquid GlueMISTI Stamping Tool - The Most Incredible Stamp Tool InventedCards - Neenah, Solar White A2 - Scored - 25 Pack 

Altenew Stencil Release Blog Hop + Giveaway

Hello everyone!!  I’m so excited to be here today.  This is my first Altenew Blog Hop as a design team member!!  Today we are showcasing all of the new stencils that are being released.  If you’ve arrived here from fabulous Lydia Evans, then you are on the right track. If you arrived here on your own, then you will want to start at the beginning, the Altenew Card Blog so that you don’t miss a thing!

Take a look at my layout:

altenew layered kaleidoscope stencil b

For my layout I used Altenew Layered Kaleidoscope B Stencil  paired with some of the supplies from the Reflection Scrapbook Collection Kit and some Ink Sprays to add interest to my page.

Altenew scrapbook layout

I used the Layered Kaleidoscope B stencil to add texture behind my photo using embossing paste. I took my time to only get the embossing past in the center design of the stencil only.

Note: for those of you who are new to this technique, I would suggest you mask of the areas that you do not want the past to go as to not make a mistake.

applying embossing paste

I did this twice so that the design would peak out from behind the photo.

Note: you could color the embossing paste using Altenew’s inks and/or sprays to really enhance the texture.  Like this:

coloring embossing paste with Altenew ink spray

I choose not to use it the color paste because it was to much yellow on the page but know that this is an option as well.

Let’s take a closer look:

layered scrapbook page using Altenew Reflection Scrapbook kit

For this page, I matted the photo on top of a piece of pattern paper from the Reflection Scrapbook Kit. Then I used the stickers and other embellishments from the kit to add the title and cute saying to the layout.  To finish the layout off, I used Altenew Ink Spray and a paintbrush to add ink splatters throughout the page.

So what do you think?  Will you use stencils on your layouts now?  I would love to hear what you think below!

What is a blog hop without an amazing gift? Yayyy!!

Prizes

To celebrate this release, Altenew is giving away a $50 gift certificate to FIVE lucky winners! Please leave a comment on the Altenew Card Blog or/and Scrapbook Blog by Tuesday, June 20th at 11:59pm EDT for a chance to win. The winners will be announced on the Altenew Card/Scrapbook blogs on Thursday, June 22nd.

Next Stop on this Blog Hop is the talented:

Debby Hughes

You do not want to miss out on her beautiful creations!!  It is sure to please, trust me!!

Just in case you lose your place along the way, here is the complete list of participants so that you can find your way back:

Altenew Card Blog

Jennifer McGuire

Altenew Scrapbook Blog

Sveta Fotinia

Sandra Dietrich

Yoonsun Hur

Erum Tasneem

Laura Bassen

Enza Gudor

Agnieszka Malyszek

Lydia Evans

Kymona Tracey ← You are here!

Debby Hughes

May Sukyong Park

Terhi Koskinen

Svitlana Shayevich

Virginia Lu

Therese Calvird

Lilith Eeckles


Supplies used:


Thank you so much for stopping by and enjoy hopping along!!

Rubber Dance Stamp May 2017 Color Challenge

Hello everyone!! I’m here today with Rubber Dance Stamp March 2017 Color Challenge!

Take a look at the colors for this challenge:

Now, these colors are amazing.  They remind me of spring and summer time, which are both my seasons.

Check out my card:

To create this card:

Super easy and fun.

Guess what!!!  If you like this stamp set or any other stamp set from Rubber Dance Stamp, use coupon code: KTFreeShip for free shipping!!  YES, Free Shipping.

Now onto the challenge prizes!

The winner will win five fabulous stamps fromRubber Dance Stamp!! Wait, if the winner used stamps from Rubber Dance Stamp, they will winner another five stamps! That’s a total of 10 stamps!! Wow!!!

You have until May 14, 2017, midnight Central European Time.  Which is 6:00 PM, May 14, 2017!! Please pay attention to this time. Here in NY, we are 6 hours behind Norway! 

Supplies used:


Paper Artsy Fresco Finish BUBBLE GUM Chalk Acrylic Paint 1.69oz FF116Paper Artsy Fresco Finish TANGO Chalk Acrylic Paint 1.69oz FF72Paper Artsy Fresco Finish CHERRY RED Chalk Acrylic Paint 1.69oz FF86 Tsukineko Stazon JET BLACK INK PAD SZ-31

Thank you so much for stopping by!!

Rubber Dance Stamp March 2017 Theme Challenge

Hello everyone!! I’m here today with the Rubber Dance Stamp Theme Challenge!!

The theme is “Everything Spring”!  All you have to do is create a piece of work that has a lot of layers.

Check out what I created to inspire you:

I have to admit, I’m having fun playing with a little mixed media!!  You are free to create and not worry about mistakes.  Totally awesome.

Here is how I created these cards:

  1. Cut the Bristol cardstock to 3.25 by 10, scored at 5.50.
  2. Add some Koi watercolor to your Gel Press Plate
  3. Add more color if you need to. 
  4. Once you have all of the colors you want, place your cardstock on top of the gel press plate
  5. Take your time and lift the cardstock to reveal the fun watercolor patterns.
  6. When the watercolor dries, stamp Rubber Dance Stamps Textured Flowers randomly on the card front.
  7. To add more texture to the card front, stamp the smaller textured stamps randomly around the flowers.
  8. To finish the card off, round the bottom corners using the Tab Punch Board.

Super simple and easy!!

The winner will win five fabulous stamps fromRubber Dance Stamp!! Wait, if the winner used stamps from Rubber Dance Stamp, they will winner another five stamps! That’s a total of 10 stamps!! Wow!!!

You have until March 31, 2017, midnight Central European Time.  Which is 6:00 PM, March 31, 2017!! Please pay attention to this time. Here in NY, we are 6 hours behind Norway! 

Supplies used:

We R Memory Keepers - Tab Punch Board

Thank you so much for stopping by!

a2z Scrapbooking August 2015 Challenge

Second post for the day

If your looking for So Suzy Stamps New Release, click here

Hello everyone!!  I’m here with a2z Scrapbooking today with our August Challenge!!!

Our new challenge is sure to please you this month!!  Our challenge this month is Texture!!
Adding texture to your projects adds character.

Check out the card I created for this challenge:Hello (a2z)

Here is how I create this card:

I used Stampin’ Up! Brick Wall Embossing Folder and embossed my cover panel.

Then I stamped and die cut the apples from Hero Arts Stamp Your Own Fruit Stamp Set using My Favorite Things Hybrid Ink. 

I colored all of my apples with Copic Markers: R35, R37, R89.

I covered all of the apples with some Clear Wink of Stella and the center apple with Glossy Accents.

Glossy apple (a2z)

I adhered all of the apples with foam tape.

Then I die cut the hello from Hero Arts Hello Stamp and Cut Stamp Set and adhered it with Tombow Multipurpose Liquid Glue.

Super fun and texturized.  My card panel is raised and my apple is full of gloss!!

Now its your turn!!

Amazing isn’t it!! I hope you love what you see and that it inspires you to join us this month. You have the entire month to create a new project and enter it into our challenge. By entering you will have a chance to win a $25 Gift Certificate to the a2z Scrapbooking Store. Winner will be announced on the 7th of May.  Good Luck!

The stamp sets that I used can be found at the a2z Scrapbooking Store. If you would like to purchase any of those stamp sets I used please head on over to the store and use the coupon code KYMONA15 to get 15% off your purchase.

Supplies used:

HR Stamp Your Own Fruit HA Hello Stamp and Cut glossy accents Copic Markers Wink of Stella clearSU Brick Wall Embossing Folder,jpg

MFT Hybrid Black Ink3M Double Coated Foam Tape Tombow Multi-Purpose Adhesive

Thanks for stopping by!!

Kymona