Altenew April 2019 Washi Tape/Embossing Paste Release Blog Hop

Hello and welcome to Altenew’s April 2019 Washi Tape/Embossing Paste Release Blog Hop!! Today we are showcasing the new washi tape and embossing paste.  If you arrived here from the talented Alex Syberia blog, then you are on the right track. If you arrived here on your own, then you will want to start at the beginning, the Altenew Card Blog so that you don’t miss a thing!

Let’s take a look at my planner page:

Embossing Paste

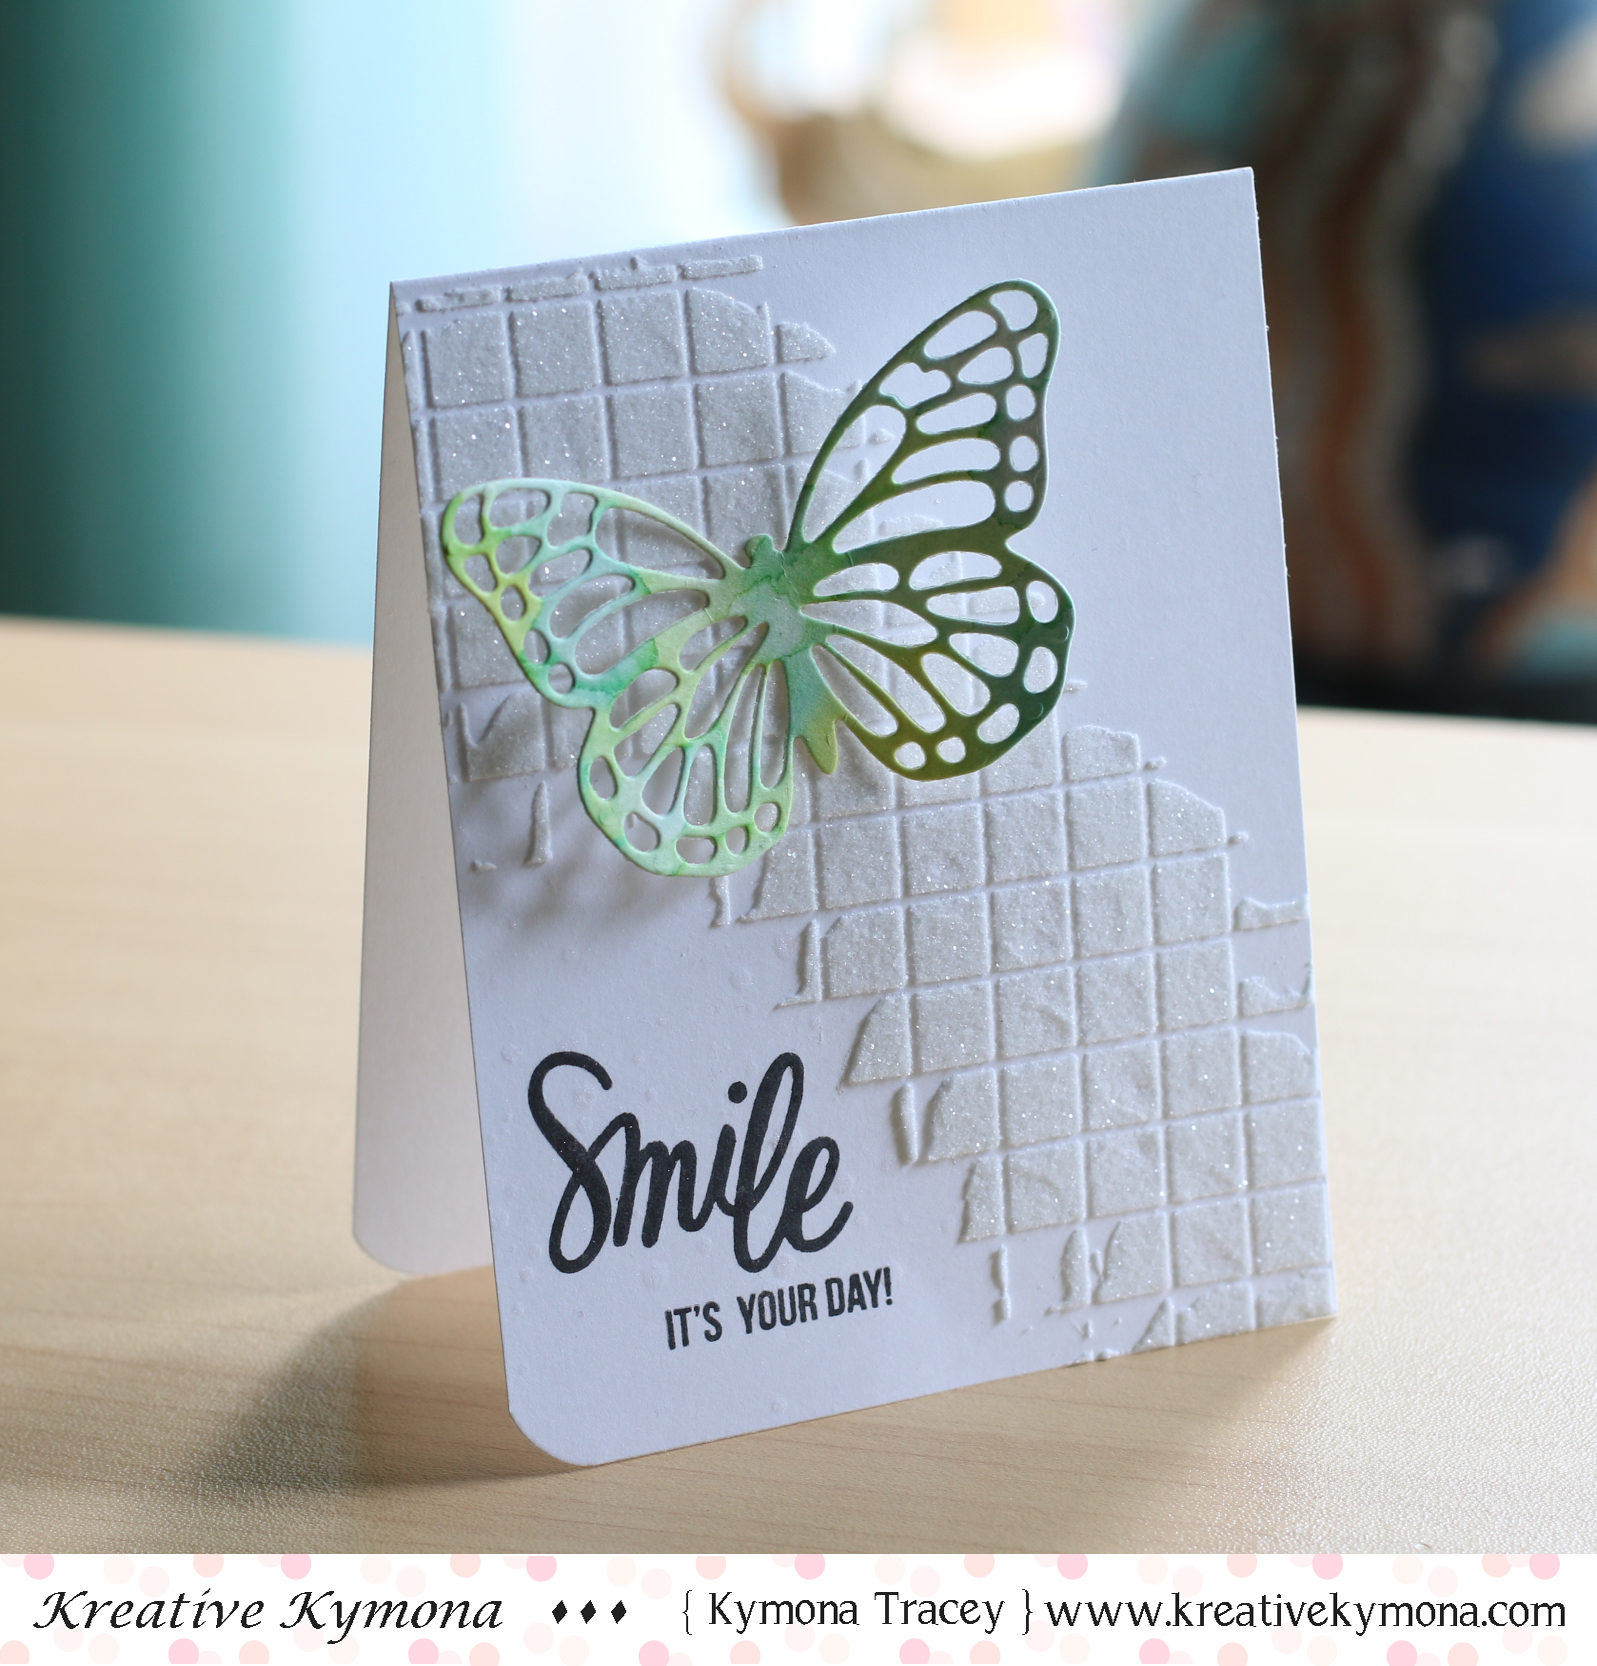
I love decorating my planner with card making supplies. Altenew’s new Embossing Paste looks amazing on these pages.

Here’s how I created the two-tone color butterfly:

Embossing Paste

Scoop out a small amount of the embossing paste on a piece of disposable plastic (I used a zip bag, it was on my desk).

Then I added a small amount of color from the Puffy Heart Ink Spray and Sunkissed Metallic Shimmer Ink spray to the embossing paste and mixed it in.

Place the Flowing Butterfly Stencil where you want the image and apply the color paste evenly.

Gently pick up the stencil to see the image.

Embossing Paste

Stamp the sentiment from the Reason to Smile stamp set above and/or below the image.

Embossing Paste

Let’s take another look:

Embossing Paste

I also created a bookmark for my planner as well, using the same method as before.

Embossing Paste

Here’s a close up. Look at that texture and depth.

Embossing Paste

What is a blog hop without an amazing gift? Yayyy!!

Prizes

  • Altenew is giving away a $30 gift certificate to SIX lucky winners! Please leave a comment on the Altenew Card Blog and/or Altenew Scrapbook Blog by Wedensday, May 1, 2019 at 11:59pm EDT for a chance to win. The winners will be announced on the Altenew Card Blog and Altenew Scrapbook Blog on Saturday, May 4th, 2019.
  • In addition Altenew will draw a winner to receive a $15 gift certificate to giveaway from comments left on each designer’s blog hop list. All winners will be announced on Altenew blogs by Saturday, May 4th, 2019.

Next Stop on this Blog Hop is the:

Zsoka Marko

You do not want to miss out on her amazing creations!!

Just in case you lose your place along the way, here is the complete list of participants so that you can find your way back:

Altenew Card Blog

Nicole Picadura

Therese Calvird

Laurie Willison

Galina Filippenko

Lilith Eeckels

Amanda Baldwin

Virginia Lu

Nathalie DeSousa

Lydia Evans

Maryam Perez

Vicky Papaioannou

Agnieszka Malyszek

Alex Syberia

Kymona Tracey

Zsoka Marko

Altenew Scrapbook Blog

Svitlana Shayevich

Olga Moss

Erum Tasneem

Hussena Calcuttawala

Sandra Dietrich

Anna Komenda

Sveta Fotinia

Kathleen Graumüller

Norine Borys

Mona Tóth

Jen Schow

Reiko Tsuchida

Kelly Janes

Marie Nicole

Ilda Dias

Supplies used:

(Thank you so much for stopping by. Compensated affiliate links used at no cost to you. The Altenew products were given to me since I’m on the design team. The other products were personally purchased. This post was not paid or sponsored.)

Embossing Paste Flowing Butterfly Stencil  Reasong to Smile Sunkissed Metallic Shimmer Ink SprayPuffy Heart Metallic Shimmer Ink Spray Hobonichi Planner

Thank you so much!

Rubber Dance Stamp May 2017 Color Challenge

Hello everyone!! I’m here today with Rubber Dance Stamp March 2017 Color Challenge!

Take a look at the colors for this challenge:

Now, these colors are amazing.  They remind me of spring and summer time, which are both my seasons.

Check out my card:

To create this card:

Super easy and fun.

Guess what!!!  If you like this stamp set or any other stamp set from Rubber Dance Stamp, use coupon code: KTFreeShip for free shipping!!  YES, Free Shipping.

Now onto the challenge prizes!

The winner will win five fabulous stamps fromRubber Dance Stamp!! Wait, if the winner used stamps from Rubber Dance Stamp, they will winner another five stamps! That’s a total of 10 stamps!! Wow!!!

You have until May 14, 2017, midnight Central European Time.  Which is 6:00 PM, May 14, 2017!! Please pay attention to this time. Here in NY, we are 6 hours behind Norway! 

Supplies used:


Paper Artsy Fresco Finish BUBBLE GUM Chalk Acrylic Paint 1.69oz FF116Paper Artsy Fresco Finish TANGO Chalk Acrylic Paint 1.69oz FF72Paper Artsy Fresco Finish CHERRY RED Chalk Acrylic Paint 1.69oz FF86 Tsukineko Stazon JET BLACK INK PAD SZ-31

Thank you so much for stopping by!!

CS Take It Make It: Take a Technique

Hello everyone!! I’m here with CS Take It Make It: Take a Technique Challenge Inspiration for December.

Our theme is Take a Technique: Sharing the Season!!

For this month’s challenge the technique we would like to see Seasonal creations: Winter/icy themed, or even Christmas projects if you’re not bored of these already! For those readers who live in different climates: Why not share your December seasons with us!

This should be super fun to see what the whether looks like in different parts of the world.

Take a look at my card:

Happy Holiday (TIMI)

Here in the USA, we are in the middle of fall and winter.  No, snow in my are yet, but they have some 4 hours away from me.  I hope we don’t get any.  I don’t care for the snow to much.  It makes it hard to drive.  Don’t get me wrong, its pretty but its troublesome.

I created this card using Purple Onion Designs Stacey Yacula Studio – Birch (Winter Bunny)!  Such a cute image and fun to color.  I used my Faber-Castel Polychromos Coloring Pencils.

I inked the background, added some embossing past for snow and a stitched hill.

I love how this card turned out!! Super pretty!

We have two prizes to offer this month, the first is our sponsor prize. This winner will be chosen randomly from all of the entries in the challenge! The sponsor for December: Polkadoodles

pd

The prize is a £25 voucher to spend in the online store.

Our second winner is our Design Winner. This winner is chosen by our DT, who all vote for their favorite design from all of the entries. This winner will have their winning project published in Craft Stamper Magazine, they will have a GDT slot for an upcoming challenge, and will also feature in their very own Winners Profile blog post!

Now if that isn’t a reason to play along I’m not sure what is!!

I can’t wait to see what you come up with.

Thanks for stopping by!

~Kymona

CS Take It Make It: Take a Technique Challenge

Hello everyone!! I’m here with CS Take It Make It: Take a Technique Challenge for our June.

Our theme is Take a Technique!

This months challenge is going to be super fun!!  Its all about texture!

This means using texture paste or embossing paste on your project or using a technique such as embossing, either embossing powder or embossing folders. Anything that gives your project a “touchy-feely” style!!

Wait, don’t forget the stamping, that with your texture should be fun!!

Take a look at my card:

Smile (CSTIMI)

Take a look at that textured background!!  I love it.

Here is how I created this card:

1. I taped my card base down to my work surface to keep it from moving.

2. I taped the Simon Says Stamp Grid Stencil on top of my card base.

3. I spread Wendy Vecchi White Embossing Paste on top of the Grid Stencil from the top left corner to the bottom right corner.

4.  While the paste was still wet, I sprinkled some Tim Holtz Distress Glitter Clear Rock Candy on top of the paste for a glittery look.

IMG_3845

5. I set the card base down to dry.

6. I die cut Stampin’ Up! Butterflies Thinlits Dies out of a watercolor piece that I created awhile back.

Watercolor scrap

I love keeping scraps, you never know when you will need them.

7. I attach the butterfly with Glossy Accents.

8. I stamped the sentiment using Simon Says Clear Stamps Happy and Smile to the bottom right side of his card.

Nice and easy!!

Now its your turn to play along with us.

We have a great prize pack for you.

We have two prizes to offer this month, the first is our sponsor prize. This winner will be chosen randomly from all of the entries in the challenge! The sponsor for June is:

Rubber Dance

Rubber Dance Store

Random Winners will win a voucher worth £20!

Winners amount

Our second winner is our Design Winner. This winner is chosen by our DT, who all vote for their favorite design from all of the entries. This winner will have their winning project published in Craft Stamper Magazine, they will have a GDT slot for an upcoming challenge, and will also feature in their very own Winners Profile blog post!

Now if that isn’t a reason to play along I’m not sure what is!!

I can’t wait to see what you come up with.

I would like to link this card up to Pretty Pink Posh Watercolor Blog Hop.

PPP Watercolor Blog Hop

Supplies used:

SSS Grid StencilEmbossing PasteDistress Stickles clear rock candyRubber Dance Store Butterflies Thinlits DieKuretake Gansai Tambi Watercolor

Thanks for stopping by!

~Kymona

Striped Thanks

Hello everyone!  I’m here with Papertrey Ink Make It Monday #176: Backgrounds with Embossing Paste.  It’s been a while since I’ve played along with them.  So, I’m glad I had a chance to play today.

Laura Bassen showed us how to use our dies to create stencils so that we could make pretty backgrounds using embossing paste.

I’ve done this before so it was nice to do this technique again.

Here is my card:

Thanks {watercolor}2

Here is how I create my card:

1. I used Papertrey Ink’s Stripes Horizontal Cover Plate to create my stencil.  I just ran the cover plate through my big shot twice for some thickness.

2. One at a time I mixed my distress reinkers with Wendy Vecchi Embossing Paste.  I mixed the paste and  Mustard Seed Distress Ink and spread my paste on the top of my stencil thick.  Then I mixed Peacock Feathers Distress Ink and spread it in the middle of the stencil, thick.  The last I mixed Picked Raspberry and spread it on the bottom of my stencil, thick.

3.  I lightly spread the paste upwards from the bottom to mix the colors going up.  Once I removed all of the excess paste, I removed my stencil to reveal the colorful stripes.

4. I set my card panel to the side and die cut my middle Papertrey Ink Circle Scribbles Die out of Stampin’ Up! Vellum.

5. Then I die cut Lawn Fawn Scripty Thanks out of Basic Black Cardstock.

6. I adhered the vellum scribble to my striped card panel with Glossy Accents.  I added my scripty thanks to the vellum scribble with Tombow Multipurpose Glue.

7. I rounded my corners with my We R Memory Keepers Corner Chomper (which by the way broke today, I’m so sad, I have to buy another one.).

8. The “thanks” looked to plain so I added Glossy Accents for a little shine.

That’s how I created this card!!  Oh by the way, my card size is 4-1/4 x 5-1/2 scored at 5-1/2.  My card panel measures 4 x 5-1/4.

So what do you think?  Let me know.


Supplies used:

Stripes Horizontal Cover Plate PTD-0536Distress Ink Mustard SeedDistress Ink Peacock FeathersDistress Inks Picked RaspberryEmbossing PasteLF Scripty ThanksBasic BlackWhite Vellumglossy accentsTombow Multi-Purpose AdhesiveWe R Memory Keepers Corner Chomperranger craft sheet

Thank you for stopping by!

~Kymona