Your Next Stamp March 2016 Sneak Peek

Hello everyone!!! I’m back again for this month’s Your Next Stamp Sneak Peek!!

We are getting ready for our March Release Blog Hop tomorrow with a sneak peek today. Are you excited? I am!!

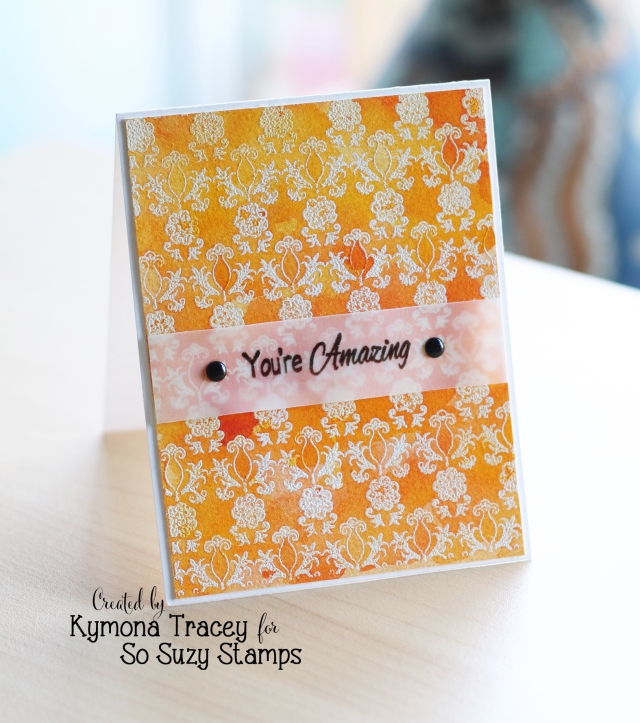
Take a look at my card that I’m giving you a sneak peek of:

image1 (4)

YNS Supplies: Cool Easter Chick, Double Stitched Hill Die, Give Thanks for Sparkle Gumdrops

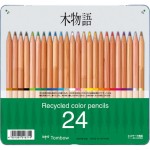
Other Supplies: Tim Holtz Watercolor Paper, Stampin Up Gumball Green CS, Brother Scan and Cut, Tombow Recycled Recycled Colored Pencils, Versafine Ink

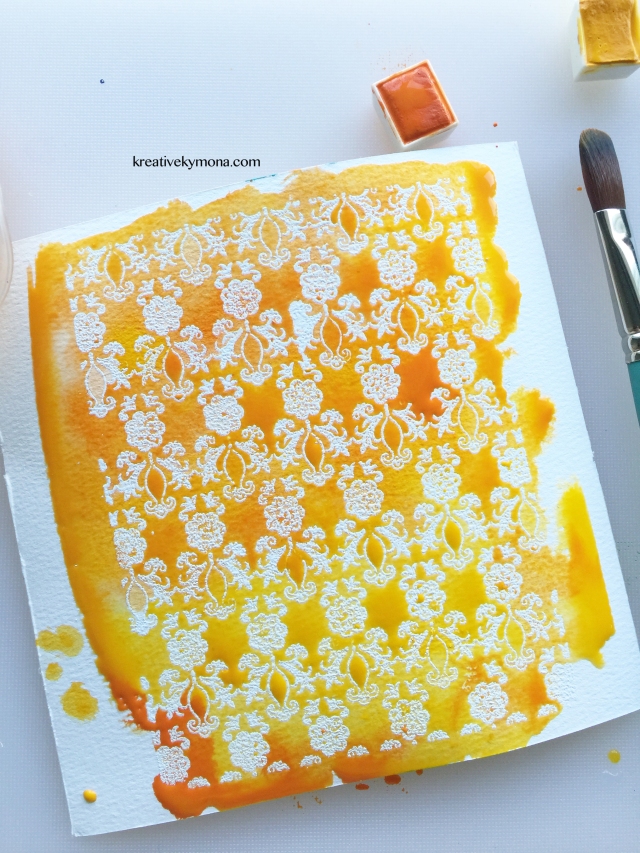
Creating this card was fun.  I just stamped the images and sentiment on the watercolor paper and colored the top birds with Tombow Recycled Colored Pencils.

Then I die cut the hill out of green cardstock using Your Next Stamp Double Stitched Hill Die.

I adhered it to the card base.

Then I colored 3 more chicks, cut them out with the Brother ScanNCut.

After that I adhered them to the bottom of the card.

I added three gumdrops for a finishing touch.

Nice and easy!

I hope I see all of you tomorrow for the March 2016 Release Hop!

Thank you so much for stopping by!!

~Kymona

CS Take It Make It: Take a Stamp Challenge

Second Post for Today
If your looking for Your Next Stamp Sketch and Color Challenge, click here

Hello everyone!!  I’m here today with CS Take It Make It Design Team for our CS Take It Make It: Take a Stamp Challenge for the month of March.

This month’s theme is Take a Stamp!!  That means take any stamp and create something, anything goes!! Now if that isn’t easy, I’m not sure what is!!

Take a look at my card:

image1 (5)

I love this So Suzy Stamp Flower Flourish and Tombow’s Recycled Color Pencils.  They are super vibrant with colors.

Creating this card was simple:

  1. I stamped the image with Versamark ink, added Hero Arts white embossing powder then heat set it.
  2. I colored the image with Tombow’s recycled color pencils.  I used light blue, purple, red, yellow green, green, orange, chrome yellow and magenta.
  3. Then I stamped So Suzy Stamp Elegance to stamp only a portion of the sentiment in the bottom left corner using Versafine Black Ink. 
  4. To finish the card off, I used my envelope punch board to round the corners of the card.

Nice, easy and quick!!

Prizes:

We have two prizes to offer this month, the first is our sponsor prize. This winner will be chosen randomly from all of the entries in the challenge! The sponsor for March is: Basement Studio!

12804629_10153926482717052_6119811474610869400_n

Our second winner is our Design Winner. This winner is chosen by our DT, who all vote for their favorite design from all of the entries. This winner will have their winning project published in Craft Stamper Magazine, they will have a GDT slot for an upcoming challenge, and will also feature in their very own Winners Profile blog post!

Now if that isn’t a reason to play along I’m not sure what is!!

I can’t wait to see what you come up with.

Supplies used:

Flower Flourish WM Recycled Color Pencils Neenah Desert Storm CS 67f65-white2bembossing2bpowder Onyx Versafine Ink 34acd-elegance envelope punch board


Thanks for stopping by!!

~Kymona

YNS Sketch and Color Challenge #34

I’m here today with Your Next Stamp (YNS) and the Sketch and Color Challenge #33!!

Each challenge has a sketch and a color combo to choose from.

Take a look at the color combo:

YNScolor-34

Take a look at the sketch:

YNSSketch34

Take a look at my card:

Total Sweetness (YNS)

YNS Supplies: Zero Calories Stamp Set, White Sugar and Sparkle Gumdrops

Other Supplies: Retired Stampin’ Up! DSP, Recollection Heavyweight Cardstock

What do you think?  Did I follow the sketch and the color photos? Let me know below.

So are you ready for the new challenge?

You have until March 17rd, 2016 at midnight EST to play along and submit your project on the YNS Blog post.  One random participant will win a $15 gift certificate to the Your Next Stamp Store.  If YNS stamps or dies are the focal point then the winner receives and additional $5 gift certificate f0r a total of $20.  The winner will be announced on the YNS Blog the Sunday after the challenge closes.

I hope to see your projects!!

Supplies listed above!

Thank you so much for stopping by!

~Kymona

Good Luck – Sparkle and Shine Challenge

Fourth Post for the day
If your looking for a2z Scrapbooking March Challenge, click here
If your looking for So Suzy Stamps March Challenge, click here
If your looking for the CASology Post, click here

Hello everyone!!  I’m here today with the Sparkle and Shine Challenge!!!  How exciting is this!!! 

Since its the first of the month, its time for our new challenge!!!

Here is the inspiration photo that guided us this time around:

March 1_2016

Now take a look at my card:

Good Luck (S&S)

My card is very CAS this go round.  My favorite types of cards.

Here is how I created this card:

  1. My card base is Neenah Desert Storm cardstock, cut to an A2 size card, 4.25 by 5.50 scored at 5.50.
  2. Then I used wishbone from the Lawn Fawn My Lucky Charm Die cut and die cut 4 wishbones out of Thermoweb Toner Sheets.
  3. After that I place a piece of Thermoweb Spring Green Foil on top of the die cuts and ran it through my mini mic.
  4. I took the backing off of the wishbone and placed them on the front and the inside of my card.
  5. Then I stamped the sentiment from the same stamp set.
  6. I used We R Memory Corner Chomper to round the corner of the bottom left.

Nice and easy!!

What do you think?

Now its your turn to give this challenge a try!! I can’t wait to see what you come up with!!

Our sponsor for this challenge is Create a Smile Stamps!!

Create A Smile BadgeThe winner of this challenge will receive a $25 gift card to their online store and will be asked to be our Guest Designer for the next month.

Supplies used:

Neenah Desert Storm CS My Lucky Charm Lawn Cuts toner sheets adhesiveDeco Foil Spring GreenOnyx Versafine Ink We R Memory Keepers Corner Chomper

Thank you for stopping by!

~Kymona


CASology 187 – Spin

Third Post for the day
If your looking for a2z Scrapbooking  March Challenge, click here
If your looking for So Suzy Stamps March Challenge, click here

 Hello everyone!!  It’s CASology Tuesday!!  We are back with another Cue Card just for you!!

This week’s cue card is:

Week 187 - Spin

I thought this cue card was fun to play with.  So many different takes on this cue card, how do you pick on.  I went thought all of my stamp sets and came across this retired Stampin’ Up! stamp set that I never used.  Never!!  That is crazy.

Take a look at my card:

Spinner (CAS)

Do you remember these spinners?  I loved them as a child. I love how this card turned out.

Creating this card was super easy.

  1. My card base was embossed with Papertrey Ink Sunshine Impression Plate.
  2. Then I cut the card panel slight smaller then the card base.
  3. After that I used retired Stampin’ Up! Take a Spin stamp set to stamp one of the images right in the middle of the panel with Stampin’ Up! Raspberry Ripple Ink.
  4. Then I used a needle to punch a small hole in the center of the stamped image.
  5.  I added the spinner and used foam take to prop up the card panel up.

That was it!!  Nothing too it.

What do you think?  I can’t wait to see what you come up with!

For more inspiration, check out my fellow Design Team members blog for more awesome work.

DT Badge

Our Guest Designer this week:

Michele

Our Sponsor this week is Cindy B Designs.

I’m entering this card into Darnell’s NBUS #6 Challenge.

button aqua use this the (1)

Supplies used:

Recollections White Heavyweightpti Sunshine impressions die

Thank you so much for stopping by!

~Kymona

a2z Scrapbooking March 2016 Challenge

Second Post for the day
If your looking for So Suzy Stamps March Challenge, click here

Hello everyone!!  I’m here with a2z Scrapbooking today with our March Challenge!!!

Our new challenge is all about Embossing!!!!!

Check out the card I created for this challenge:

Congrats (a2z)

Can you see the embossed triangle pattern?  I love how this turned out.

Here is how I created this card:

  1. I used Prima Watercolor Confections to create the watercolor background.
  2. Then I used Hero Arts Triangle Background and embossed the watercolor panel.
  3. After that, I trimmed the watercolor panel down, then I used Hero Arts Congrats Stamp and Cut and cut out the sentiment out of the panel.
  4. I die cut the sentiment out of some white card stock and glued them together.
  5. Then I adhered the watercolor panel to the card base.
  6. After that, I glued the sentiment together, then I inlayed them back into the panel.
  7. I added three black pearls for an added touch.

What do you think?

I hope you love what you see and that it inspires you to join us this month. You have the entire month to create a new project and enter it into our challenge. By entering you will have a chance to win a $25 Gift Certificate to the a2z Scrapbooking Store. Winner will be announced on the 7th of April.  Good Luck!

If you would like to purchase any Hero Arts products please head on over to the store and use the coupon code KYMONA15 to get 15% off your purchase.

Supplies used:

Prima Watercolor Confection HA Triangle Background Congrats stamp and cutNeutral mixed pearlsPrima Watercolor paper 6x6.jpg


Thank you for stopping by!!

Kymona

Embossed Tulip Background

Hello everyone!!  I’m here with So Suzy Stamps and boy can I tell you, this months release is amazing.  I love all of the new stamps that’s being released today.

My favorite is the Tulip Background Stamp!! I had the privilege to see this stamp back in January while at CHA.  I couldn’t wait to get this stamp in my hand.

Take a look at my card:

You're Amazing (SSS)

What do you think of this stamp now that you’ve seen it in action? It’s so delicate and dainty!!

Here is how I created this card:

I stamped my image using a Misti and Versamark ink for full coverage. 

Tulip Misit (SSS)

Then I added Hero Arts White embossing powder to the stamped image.

Embossed (SSS)

After that, I heat set the embossing powder. Making sure the embossing powered melted so that you don’t smudge the embossing powder on the card.

Tulips (SSS)

I created a watercolor panel using Prima Confection Watercolor.

Then I used my heat gun and heat set the watercolor panel.

After that I added the watercolor panel to the card  front using Stampin’ Up! Dimensionals.

I took a piece of vellum, stamped So Suzy Stamp Your Amazing Stamp Set and add it to the card front.

I used the two gumdrops to hid the glue.

What do you think?  Please let me know below. I had so much fun creating this card.

I’m entering this card into Darnell’s NBUS #6 Challenge.

button aqua use this the (1)

Supplies used:

Tulip Background  Youre Amazing Prima Watercolor Confection VersamarkMini Misti DimesionalHero Arts Clear Embossing Powder

Thank You so much for stopping by!

~Kymona