Happy Day with Concord & 9th

Concord and 9th

Hello everyone!!  I’m here today showcasing the yet another stamp set from Concord & 9th August Release.

Today it’s all about balloons with the Happy Balloon stamp set!!

Let’s take a look:

concord & 9th happy balloon

I love how the balloons can be used as hot air balloons too.  This stamp set is so versatile and can be used all year round.

Here’s how I created this card:

Simple stamp the solid balloon using Altenew Deep Iris Ink.

Using the decorative balloon stamp and the basket stamp, stamp the image using Altenew Black Ink.

To finish the card off, stamp the sentiment right under the balloon.

Nice, clean and simple.  This card is so doable and the possibilities of making a couple of these cards are great.

Supplies used:

(Thank you so much for stopping by. Compensated affiliate links used at no cost to you.  All products were personally purchased.  This post was not paid or sponsored.)

Happy Balloons Stamp Set

Deep Iris Ink  Jet Black InkMini MISTI - Most Incredible Stamp Tool Invented

Thank you so much for stopping by!!

CASology 5th Year Anniversary Blog Hop

Second Post for Today
If your looking for the Altenew Scrapbook Post, click here


Hello everyone!! Today is CASology 5th Year Anniversary Blog Hop!! We are so excited to be here today to share this special occasions with all of you!

Today’s blog hop is all about Balloons!  If you arrived here from Precious Remembrance Shop then you are on the right track.  If you arrived here on your own, then you will want to start at CASology blog as to not miss any of the blogs included in the special hop.

Take a look at my card:

Altenew Hug Me Stamp set

Yayyy, Happy Birthday CASology!!  I decided to go with Altenew’s Hug Me stamp set for this big celebration!! This stamp set is super cute and the image is clean and simple!

Here’s how I created this card:

Nice and easy.  What do you think?  I would love to hear from you.

Giveaway Details:

  • To be eligible for the sponsor prizes, you must comment on all stops included on the hop list by Monday, July 31st at 12noon CDT.  Winners will be selected randomly using random.org.
  • To be eligible for the CASology prize, you must comment on all stops included on the hop + link up a BALLOON themed card to the gallery.  Winner will be selected randomly using random.org.
  • Winners will be announced on Tuesday, August 1.

 Prize Details:

CASology – $50 gift certificate to the online craft store of winner’s choice

Altenew – $30 gift certificate to the online store

Sprinkle Berry – details coming…

Avery Elle – $20 gift certificate to the online store

Cindy B Designs – $25 gift certificate to online craft store of winner’s choice

Concord & 9th – $25 gift certificate to the online store

DeNami Designs – $20 gift certificate to the online store

Lawn Fawn – $35 gift certificate to the online store

Neat & Tangled – $25 gift certificate to the online store

Poppystamps – $20 gift certificate to the online store

Precious Remembrance Shop – stamp set of winner’s choice

7 Kids College Fund – $20 store credit

STAMPlorations – $15 gift certificate to the online store

Sunny Studio – Color Me Happy set + matching Color Word Die

The Ton – $20 gift certificate (for The Ton brand stamps, dies, inks & gilding products)

Uniko Studio – and in stock clear stamp set of winner’s choice

Waffle Flower – $25 gift certificate to the online store

Your Next Stamp – $20 gift certificate to the online store

Next Stop:

Next Stop on this Blog Hop is the talented and my awesome teammate:

Joyce Mehrberg!

You do not want to miss out on her amazing clean and simple design!

Just in case you lose your place along the way, here is the complete list of participants so that you can find your way back:

Kymona Tracey ← you are here
Joyce Mehrberg

Supplies used:

(Thank you so much for stopping by. Compensated affiliate links used at no cost to you.  All products were personally purchased.  This post was not paid or sponsored. )

Altenew hug me stamp setMini MISTI - Most Incredible Stamp Tool InventedPrima - Mixed Media - Watercolor Pencils - The BasicsPrima - Mixed Media - Watercolor Pencils - Scenic RouteStrathmore - 9 x 12 Watercolor Paper Pad - 15 Sheets

Thank you so much for stopping by!

Silhouette Stamping: CS Take It Make It Challenge

Second Post for today
If your looking for Your Next Stamp Challenge, click here

Hello everyone!!  I’m here today with CS Take It Make It Design Team for our CS Take It Make It: Take a Stamp Challenge for the month of September.

This month’s theme is Take a Stamp!!  That means take any stamp and create something, anything goes!! Now if that isn’t easy, I’m not sure what is!!

Take a look at my card:

Take Flight (TIMI)

I love the size of this card.  It measures 2.50 x 5.25.

To get the card started, I stenciled the background using one of Tim Holtz Mini stencil set 7 and distress ink: Squeezed Lemonade, Fossilized Amber, Spiced Marmalade and Ripe Persimmon.

Then I stamped So Suzy Stamps Girl With Balloons using Colorbox Archival Wicked Dye Ink. Then I stamped So Suzy Stamp Take Flight sentiment using Colorbox Archival Wicked Dye Ink.

Nice, easy but totally amazing.

Prizes:

We have two prizes to offer this month, the first is our sponsor prize. This winner will be chosen randomly from all of the entries in the challenge! The sponsor for September is: Visible Image.

Visible Image header

Visible Image

Prize: 3 Stamp Sets

Our second winner is our Design Winner. This winner is chosen by our DT, who all vote for their favorite design from all of the entries. This winner will have their winning project published in Craft Stamper Magazine, they will have a GDT slot for an upcoming challenge, and will also feature in their very own Winners Profile blog post!

Now if that isn’t a reason to play along I’m not sure what is!!

I can’t wait to see what you come up with.

Supplies used:

Girl with Balloons Take Flight

Thanks for stopping by!

~Kymona

Your Next Stamp DT Dare – Celebration

Hello everyone!!  I’m here today with Your Next Stamp and our DT Dare!!!

What is a DT Dare you ask? It’s a fun monthly challenge for the YNS design team to show case more fabulous projects using the new release products!!

YNS-DARE-Badge

Fun right!!

Wait there is more!!  If you leave a comment on the YNS blog post you could Win a YNS Stamp Set of your choice!!! 

Exciting right!!  It sure is for me!!

The DT Dare Challenge this month is Celebration!!  The design team was asked to create a project using one of the new stamp sets from the July release.  I went with the new Happy Birthday 2016 stamp set for my project.

Take a look at my project:

Happy Birthday 2016 (YNS)

YNS Supplies: Happy Birthday 2016

Other Supplies: Bristol Smooth Paper, Distress Ink Fired Brick, Wild Honey, Scattered Straw, Hero Arts White Embossing Powder

What do you think?  Let me know below.

Super simple and easy.

So tell me what you think of this challenge? I would love to know, let me know below!

Don’t forget to head on over to the Your Next Stamp Store to take advantage of the online discount code below and save up to 27% on everything in the store!!

Don’t forget we have Blog Candy for you!!  If you leave a comment on the YNS blog today you have a chance of winning the blog candy.

DTDare2candy-547x232

Thanks for stopping by!!

~Kymona

YNS August 2016 Release Sneak Peek

Hello everyone!!! I’m back again for this month’s Your Next Stamp Sneak Peek!!

We are getting ready for our August Release Blog Hop tomorrow with a sneak peek today. Are you excited? I am!!

Take a look at my card that I’m giving you a sneak peek of:

Happy Birthday 16 (YNS)

YNS Supplies: Happy Birthday 2016 stamp set and die, YNS Swirly Fun Paper Pack, Circle Panel Die

Other Supplies: Recollection White Heavyweight Cardstock, Clearsnap Colorbox Archival Wicked Black Ink, Plus Adhesive

Happy Birthday to YNS!!

Creating this card was a breeze!!  Here’s how:

  1. Using an A2 card size, cut the YNS Swirly Fun Paper Pack to fit the front of that A2 card, 4.5 by 5.5.
  2. Attach the pattern paper to the front of the card base using adhesive.
  3. Then use the Circle Panel Die and cut out a panel out of the white cardstock.
  4. Adhere that to the front of the patten paper.
  5. Stamp the sentiment on the circle panel using black ink.
  6. Die cut three balloon shapes out of scrap cardstock and adhere them to the front of the card, draw strings using a black pen.

Then your done. Nice and easy.

I hope I see all of you tomorrow for the August 2016 Blog Hop and Birthday Celebration.

Thanks for stopping by!

~Kymona


Sparkle and Shine Challenge

Third Post for the day
If your looking for a2z Scrapbooking  January Challenge, click here
If your looking for So Suzy Stamps January Challenge, click here

Happy New Year for the third time today!!

Hello everyone!!  I’m here today for the first time with the Sparkle and Shine Challenge as a Design Team member!!!  How exciting is this!!! Pretty exciting for me!!  The women on this team is amazing!!

Since its the first of the month, its time for our new challenge for the year!!!

Here is the inspiration photo that guided us this time around:

S&S Jan

Now take a look at my take on this photo:

Happy Birthday (S&S)

Take a closer look at that bling (wink of stella):

wink of stella

Here is how I created this card:

  1. I used Papertrey Ink Shaker Shapes Balloon Die to create a mask for my balloons.
  2. Then I used Distress Ink Seedless Preserves and Peacock Feathers to the masked area to create the balloons.
  3. Then I stamped the sentiment from WPlus9 Unforgettable stamp set in Ranger Archival Black Ink.
  4. I die cut the balloon ends out of silver paper (I don’t know who made the paper).  I used Stick It to adhered them to my card front.
  5. After that I added the finishing touches, the “bling”!! I added Clear Wink of Stella to the balloons and Rhinestones to the card front.

That easy!! It sure was.  After creating my card, I felt like I’ve seen it before.  Then I remembered Laura Basson’s card using the balloon die.  That card was the reason I bought that die back in June!!  This was the first time using it so it worked out perfectly!!

What do you think?

Now its your turn to give this challenge a try!! I can’t wait to see what you come up with!!

Our sponsor for this challenge is Create a Smile Stamps!!

Create A Smile Badge

The winner of this challenge will receive a $25 gift card to their online store and will be asked to be our Guest Designer for the next month.

Supplies used:

Balloon shaker die Seedless PreservesDistress Ink Peacock Featherswplus9 unforgettable Archival Jet Black Stick ItWink of Stella clear

Thank you so much for stopping by!!

~Kymona


YNS Sketch and Color Challenge #20

Hello everyone!!!  I’m here today with Your Next Stamp (YNS) and this week’s Sketch and Color Challenge #21!!

Each challenge has a sketch and a color combo to choose from.

Take a look at the sketch:

YNSSketch21

Take a look at the color combo:

YNScolor-21

You know me, I went with the sketch!!  I never seem to have the colors need for this.  I hope I can change for the next challenge, LOL!

Take a look at my card:

Let's Celebrate (YNS)

Yes, another shaker card.  I’m addicted to these cards.  Or is it the sequin that I love seeing move about in the card. LOL, LOL, LOL!!

YNS Supplies: Happy 6th Birthday Stamp Set, Balloon Buddies Die Set

Other Supplies: Retired Stampin’ Up! Watercolor Wonder DSP, My Favorite Things Hybrid Black Ink, Foam Tape, Lucy Abrams Peachy Sequin, We R Memory Keepers Fuse Tool, Recollections White Heavyweight Cardstock, Recollections Black Heavyweight Cardstock

Creating this card was a bit easy.

All I did was cut my DSP to make the sketch.  I adhered the yellow panel to the card base with a tape runner.

I die cut a circle in the front card panel.  That is where my shaker packet will go.

I created my shaker pocket using my Fuse Tool.  If you want to know who to do that you can check out my tutorial here.

I attached the shaker pocket to the card panel with the tape runner.  I added foam tape the back of that card panel and attached the entire piece to the card base.

I cut two strips of DSP to different sizes.  I stamped the sentiment on the bigger piece and attached both pieces with the tape runner.

I die cut the two balloons out of the same DSP and attached them to the front of the shaker window.  I die cut the balloon strings out of black card stock and attached them to the balloons.

I told you it was easy.  Now its your turn!!

So are you ready for the new challenge?

You have until September 3rd at midnight EST to play along and submit your project on the YNS Blog post.  One random participant will win a $15 gift certificate to the Your Next Stamp Store.  If YNS stamps or dies are the focal point then the winner receives and additional $5 gift certificate fro a total of $20.  The winner will be announced on the YNS Blog the Sunday after the challenge closes.

Supplies used:

YNSBDay2015  Balloon Buddies DieMFT Hybrid Black Ink 3M Double Coated Foam Tape Just peachy fuse bundleRecollections White HeavyweightRecollections Black Heavyweight

Thank you so much for stopping by!!

~Kymona

Top Dog Dies – August New Release and Giveaway

Hello everyone!!!  I’m here with Top Dog Dies!!  I’m here showcasing all of their new dies that are being released today!!

Lets jump right in!

Up first are the dies that I didn’t get a chance to play with yet!! They are totally awesome and I can’t wait to show you them on My Top Dog Dies Wednesday Series!

Top Dog Dies Borders #1 Die SetTop Dog Dies Happy Birthday Banner Die Set


Top Dog Dies Border #1 Die Set and Top Dog Dies Happy Birthday Banner Die Set

Top Dog Dies Love is Sweet Banner Die SetTop Dog Dies Make a Cake Die Set

Top Dog Dies Love is Sweet Banner Die Set and Top Dog Dies Make a Cake Die Set

Top Dog Dies Onesie Dress Die SetTop Dog Dies Rainbow Die Set

Top Dog Dies Onesie Dress Die Set and Top Dog Dies Rainbow Die Set

Awesome right!!!

My fellow DT members created samples using these dies so you should check them out!

Kymona Tracey ← You’re here!

Now onto the dies I did get to play with!!


Top Dog Dies Cupcake Die SetHappy Birthday (TDD)

This was the first die I played with as soon I received my happymail!!  Its the Top Dog Dies Cupcake Die Set. If you follow me, you’ve seen this card before.  I was given permission to showcase this card before the release.  That was exciting.

This die contains 7 dies, but one of the dies have 5 small cupcake toppers.  Super cute and versatile die set.  I love the different frosting topping.


Top Dog Dies Balloon Die SetGo and Celebrate (TDD) Lets Party Celebrate (TDD)

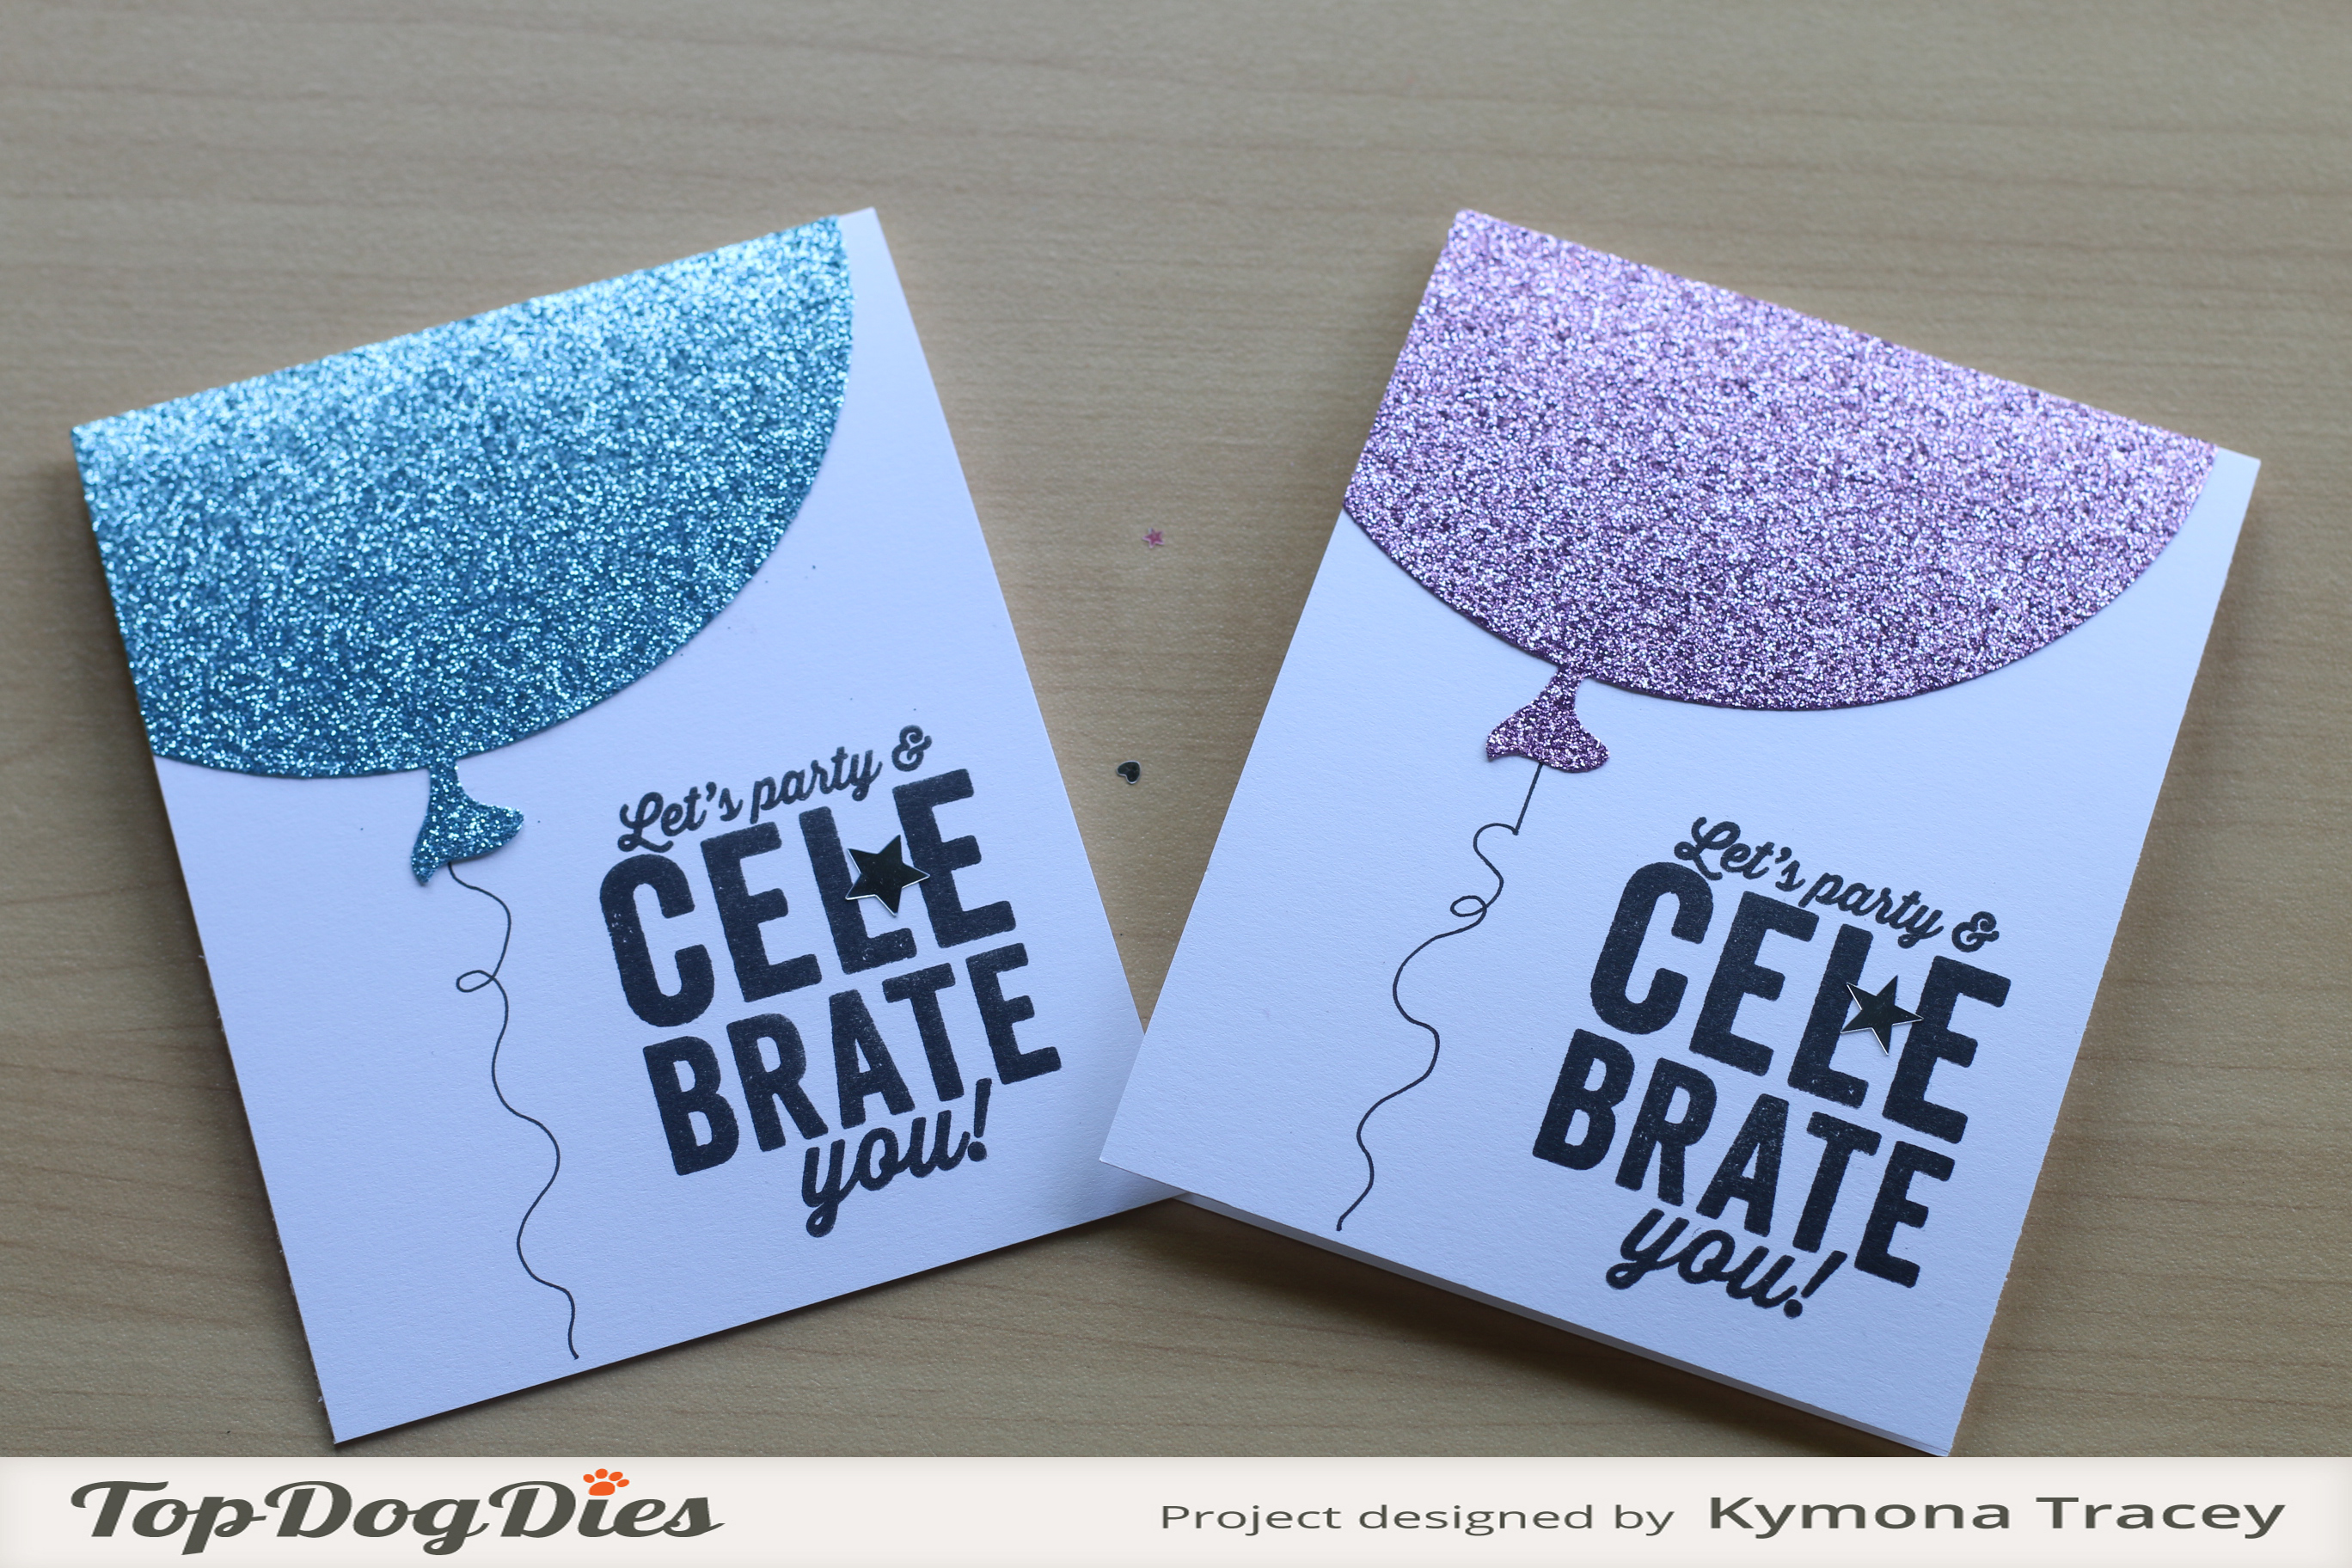
Up next is the Top Dog Dies Balloon Die Set!!  How super cute are these cards?  I used the biggest balloon die to create all of my cards. This set has 6 dies ranging from big to little.  I showcased these balloons last week to get you excited about the new release.

I will showcase the other dies on my Wednesday Series!  So stay tune for that.


Now onto the last die set and card!!  This set and card is my favorite of them all.

Take a look:

Top Dog Dies Unicorn Die Set

Unicorn (TDD)

I just love this card.  I love the colors, the shaker pocket, the splatters and the unicorn!!  I’m super please with how this card turn out.

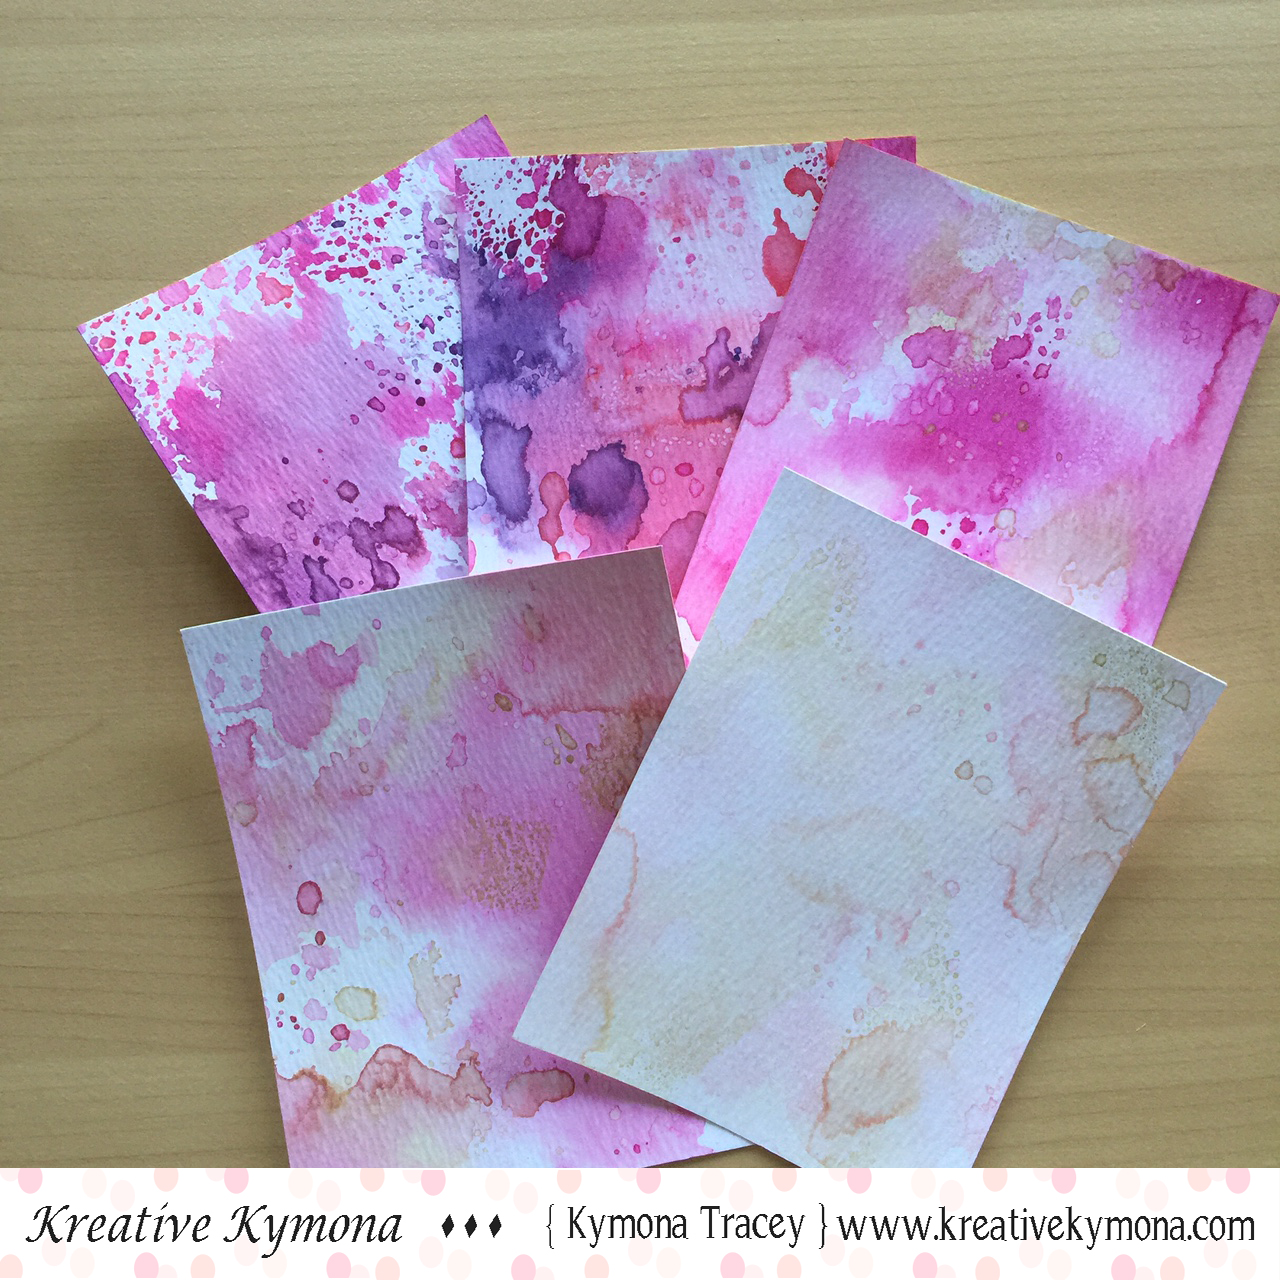
I used Top Dog Dies Unicorn Die Set to create my unicorn.  I cut the mane and horn out of my watercolor panels that I created weeks ago.  I have so much of these panels left.  If you haven’t seen them, take a look.

Watercolor pieces

These panels have gone a long way!

To create this card, I die cut the unicorn out of white cardstock and the mane and horn out of the watercolor panel you see above.

To make the shaker window I cut out the white panel.  I used my Fuse tool to create the circle pocket.  I added Lucy Adams Cherry Blossom Sequin Mix to the packet panel.

I used Mama Elephant Sightseeing Stamp Set to stamp my sentiment with My Favorite Things Hybrid Ink.

I put my card together using foam adhesive.

Once everything was in place, I used my WPlus9 Bloomsberry Spray Mist to create the splatters on my card.

I have to admit, I sprayed wrong and I thought I messed up the entire card.  The big splatters that you see happened because the ink was seeping through the top.  I didn’t realize it until I went to shake the bottle up and it spilled all over my card front.

It turned out to be a Happy Mistake!! I wouldn’t change it for the world.

Wait!!!!!  Before I go I have a giveaway!!

All you have to do is leave a comment below letting me know if you like unicorns.  This giveaway will end 11:59pm August 7, 2015.

I’m giving away the unicorn die set!!

So what do you think of my card?  Please let me know below.

Don’t forget, the full release is will happen tomorrow, August 9th!  Please be sure to come back so you can see what my fellow DT members and myself have created for this release!!

Supplies used:

Cherry Blossom Sequin fuse bundleSIGHTSEEING MFT Hybrid Black Ink WPlus9 BloomsBerry

Thanks for stopping by!

~Kymona

Top Dog Dies – Balloon Sneak Peek

Hey everyone!!!  Its Top Dog Dies Wednesday!!  I’m here with a sneak peek of Top Dog Dies Balloon Die Set!!

This set is super cute and versatile.  This set, along with 4 other die sets will go live August 4!!  Your going to love the new dies, trust me!! Plus I’ll have a giveaway on the release date!!

So stay tune!

Now on to my card:

Go and Celebrate (TDD)

The Balloon Die Set comes with 6 balloon dies ranging from small to big!!

I used the largest die to create this card.  Super easy to use and check out that stitching!!  It gives the balloon such a nice finished look.

To create these cards, I just die cut the balloon adhered them to the top left portion of the card.  I used Stampin’ Up! Whisper White Bakers Twine.  I used Mama Elephant Make A Wish Stamp Set to stamp my sentiment using Lawn Fawn Deep Sea Ink.  I added Clear Wink of Stella to the sentiment and the stars. 

Check these out:

Lets Party Celebrate (TDD)


I used some glitter paper to create these balloons.  I love how they turned out.

To create these cards, I just die cut the balloon adhered them to the top left portion of the card.  I used my Copic Multiliner to draw the strings.  I used Simon Says Stamp Birthday Big Wishes Stamp Set to stamp my sentiment using My Favorite Things Hybrid Ink.

Now you see those two stars in between my sentiment?  Well, I had to add those because some of the black ink caught my paper on the pink balloon while I was stamping it.  I think I saved it pretty well. I used Lucy Adams Star Shine Sparkly Sequin to save the day.

So what do you think?  Let me know below.

I can’t wait for you to see the full reveal!!  You are going to love this die set!

Supplies used:

Big Birthday WishesMFT Hybrid Black Ink Copic MultilinerMAKE A WISHDeep Sea Ink

Whisper White Baker's TwineLA Star Shine Sparkly Sequin Wink of Stella clear


Thanks for stopping by!!

~Kymona

Happy Birthday To Me!!

happy-birthday-images-2

Yes, today is my birthday!!!  I’m super excited!!

I made a couple of cards for myself!!

LOL, for myself (shaking my head)!!

Happy Birthday1

I used the candle stamp and watercolor resist to create this card.

I wonder if my cake will be pink and purple?

Let's Celebrate you

I used the balloon and the largest sentiment stamp to create this card.

The sentiment comes scratchy and I like it.

Yay Its your BirthdayI created a stencil with Your Next Stamp Stripe-tastic Circle Die and the rest of the sentiment stamps from Simon Says Stamp April Card Kit.

Nothing fancy or perfect but its for me!!

What will I do today?

I am going to craft and take my kids out to dinner later this evening.

I hope I can get some rest too, we will see!


Supplies used:

SSS April 2015 CardKit Stripetastic Circle DiePTI Summer Sunrise InkHibiscus Burstblueberry skyPTI Tropical Teal black gumdrops small Doodlebug Bubblegum SprinklesBasic Black Bakers Twine67f65-white2bembossing2bpowder

Thanks for stopping by!

Kymona