We Make Quite The Pear!!

Hello everyone!!  I’m here today with DoubleClick Skittles Design Team for the last time.  This design team has a soft spot in my heart because this was my very first design team.

I remember when I received the email from Carri, I was totally blown away.  As a newbie to the design team world, it felt great to know that someone liked my creations.

I thank Carri for giving me a chance to work with her and my fabulous design team members.

With that said, my last challenge theme is Use Button, Brad or Bow!

Take a look at my card:

We Are Quite the Pair

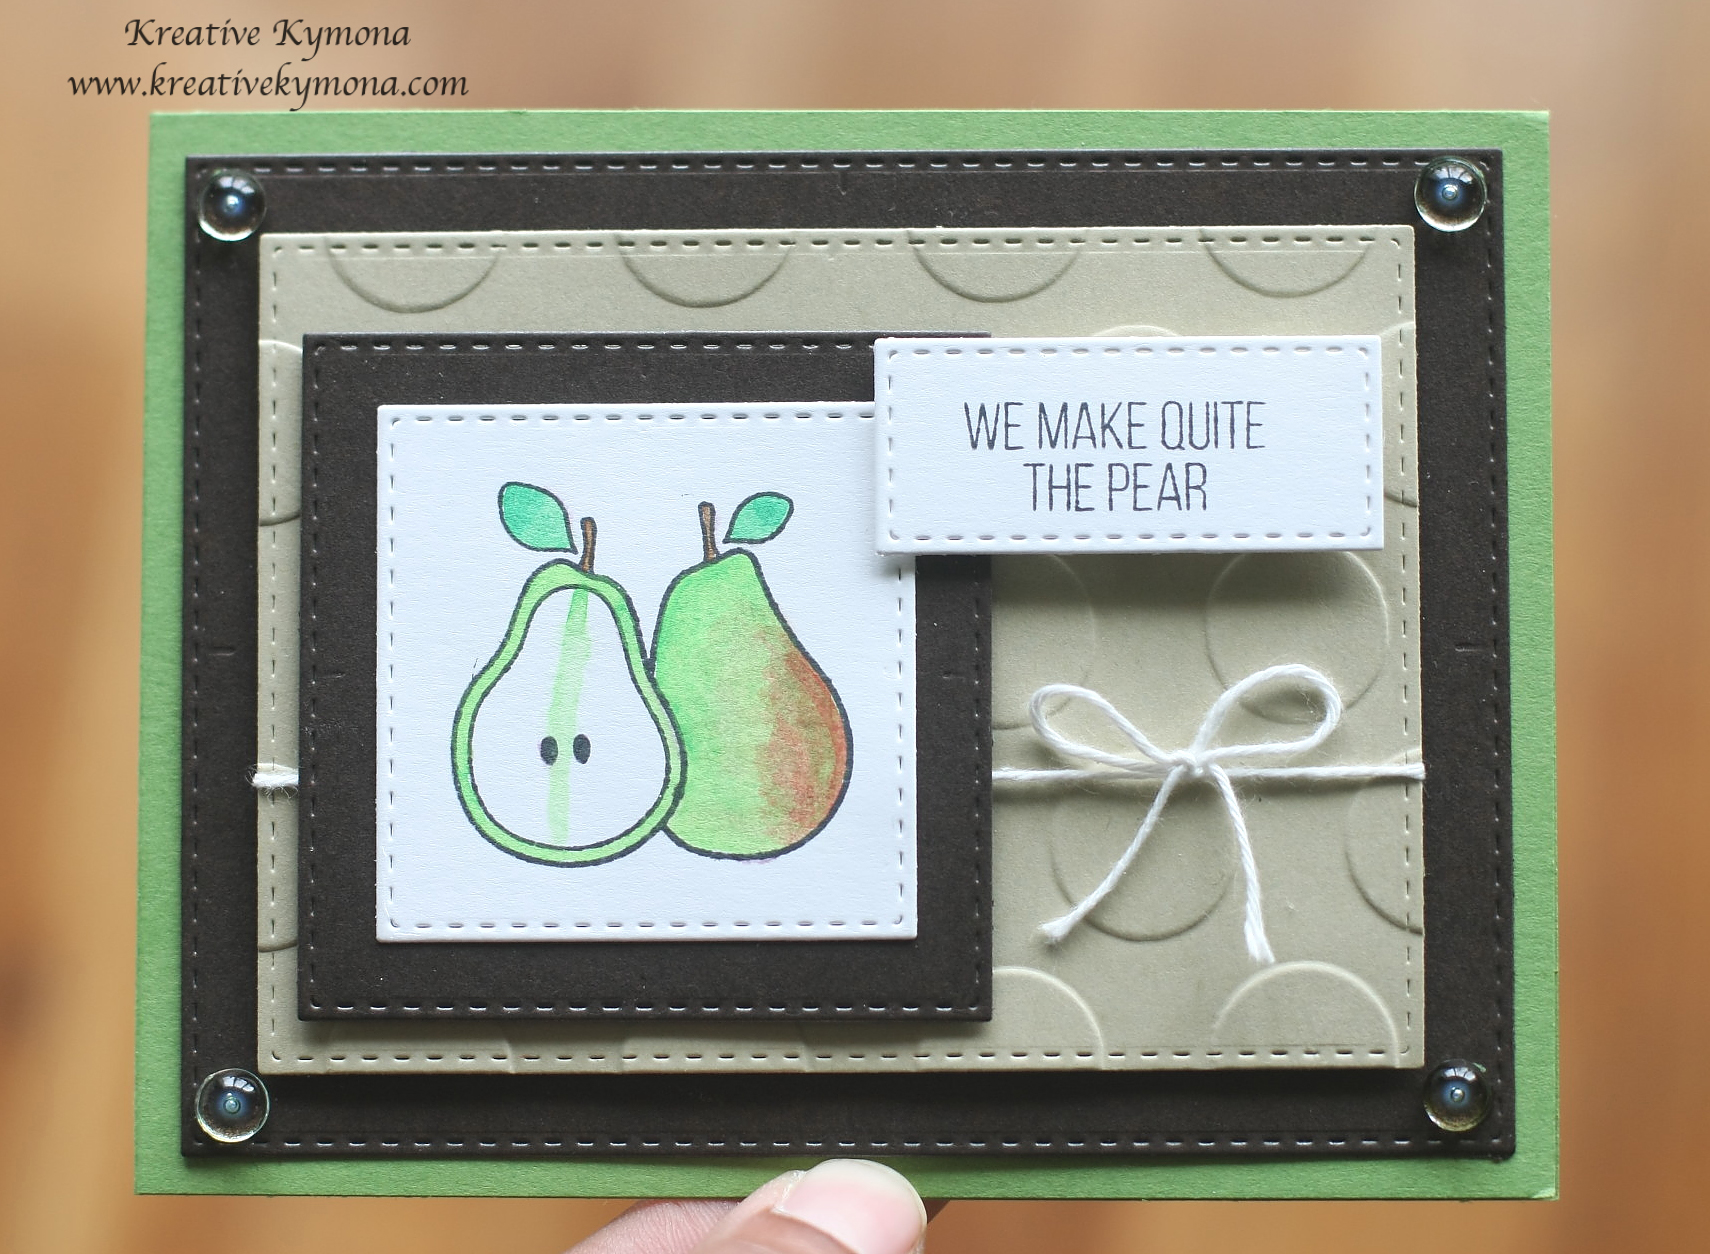
Check out all of the layers on this card!!  I love it.

I also love my pears!  I water-colored them.  My skittles look great in those four corners.

Creating this card was easy.  Here’s how:

1. I cut my Simon Says Stamp Green Leaf cardstock to an A2 size (4.25 x 5.50) scored at 4.25.

2. I used Simon Says Stamp Stitched Rectangular Die 2 and 3 from the outside to cut my Simon Says Stamp Dark Chocolate cardstock and Khaki cardstock, respectively.

3. I used Stampin’ Up! Polka Dot Embossing Folder to emboss my khaki cardstock.

4. I layered the khaki on top of the dark chocolate and then I added Stampin’ Up! Whisper White Bakers Twine and tied a bow.

5. Then I attached the whole piece on top of the green leaf cardstock.

6. I used Simon Says Stamp Stitched Square Die 3 and4 from the inside out to cut my dark chocolate cardstock and Simon Says Stamp 120lb White cardstock.

7. I stamped the pears from Simon Says Stamp Quite the Pear stamp set with Memento Tuxedo Black Ink.

8. I used my Koi watercolors and colored my pears.

9. I attached the white cardstock onto the dark chocolate cardstock.

10. I attached that whole piece to the front of my card.

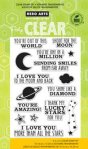
11.  I cut out another stitched rectangular piece from the white cardstock.  I stamped my sentiment using Stampin’ Up! Chocolate Chip Ink.

12. I added Meadow Skittles to all for corners of my dark chocolate cardstock.

I love how this card turned out.  Now its your turn to create something!!  I want to see all of you over at DoubleClick Connection for my last challenge.

Supplies used:

SSS Green LeafSSS Dark Chocolate csSSS Khaki csPolka Dot Embossing FolderSSS Stitched Square DieSSS Stitched Rectanglar DieSSS 120lb white csSSS Quite a PairMemento Black InkWhisper White Baker's TwineKoi WatercolorsChocolate Chip Ink Padmeadow skittles

Thank you so much!

~Kymona

CASology 128 – Date

Hello everyone and Happy New Year!!!

Happy-New-Year-2015-HD-1080p-Wallpaper1

I’m super doper excited to be here today as a Design Team Member for CASology!!!

I still can’t believe it!!  Don’t wake me if I’m dreaming!!

2015 is going to be a great year, I can feel it. It’s starting off to a great start! Wouldn’t you say!!

Starting with today, January 6th, 2015!!  Are you asking why?  Can you guess?  It has a lot to do with the cue word for today. It might seem a little corny but it means a lot to me.

I hope you guessed what the cue word is for this CASology Challenge.  If not, here you go!

Week 128 - Date

Here is my card:

CASology-DateThis date is super important to me because it signifies a new start with an amazing Design Team.

I decided to use the colors red, black and white because those are the colors of the CASology blog.

The heart symbolizes my love for the challenge. Don’t you just love that sketch heart.  Its super cute.

So, I made another card. I just change the colors around.

Take a look:

CASologydateredheart

These card were easy to create and would make awesome valentine day cards for loved ones.

Here’s how I created both cards:

1. I cut my card base to a 4 x 4 card size scored at 4 out of Simon Says Stamp 120lb thick white cardstock.

2. I used my Simon Says Stamp Sketch Heart to cut the heart out of my card base.

3. Then I cut the heart out of Simon Says Stamp Schoolhouse Red cardstock.

4.  For both cards, I added a piece of piece of printer paper to the inside front flap of the card so that the heart would stick perfectly.

5. For the first card, I inlaid the red sketch heart with the white heart base.  I did the opposite for the second card.

6.  I stamped the date using Lawn Fawn Quinn’s 123 Stamp Set using Memento Tuxedo Black ink.

7. I rounded my corners using my corner chomper.

That was easy peasy, right!!  You have to check out my fellow design team members creations for more inspiration.

Design-Team

Ardyth Percy-Robb

Gillian Ross

Hazel Hodgkins

Jen Willis

Joyce Mehrberg

Judy Marino

Kimberly Wiener

Kymona Tracey←you’re here

May Park

Melissa Chipperfield

Tracey McNeely

Guest Designer: Nonni

Now its your turn to play along.  I can’t wait to see what you come up with!!

Cindy B Designs is sponsoring this challenge this week, how awesome is that!!

Supplies used:

Sketch HeartSSS schoolhouse redLawn Fawn Quinns123s Memento Black InkWe R Memory Keepers Corner ChomperSSS 120lb white cs

I’m also linking this card up to the NBUS Challenge #3.

NBUSMy Simon Say Stamp Sketch Heart is brand-spanking-new schtuff!

Thank you for stopping by!

~Kymona


One Little Word 2015 – Determined

Hello everyone!  With a new year comes new things we want to see done differently in our lives.

I’ve decided that 2015 would be my year to accomplish a list of things I didn’t get to do in previous years.  I made a list in my head of all the things I wanted to accomplish but as we all know, if those lists aren’t written down on a piece of paper, they are lost in our brain matter.

So, I decided to jot down some of those things down but as usual I was drawn into my Instagram feed.

I’m hooked if you didn’t know.  Sorry I digress!

While I was there, I saw a post by Andrea Gray from Don’t Forget To Be Awesome and instantly I knew what I had to do.

She introduced me to this “one little word concept” for 2015!

Basically what this concept does, is allow me to set a word and use that word to grow this year.  I thought that was an awesome idea.  I love learning and growing especially if I’m the benefactor.  What more can I ask for.

So I did some searching for my one word.  One thing that I kept coming back to was “this is my year for great things”, what one word said this.


965070_393532030750560_646122740_o

I thought this word is so fitting!!  I’ve always been a determined person but as we grow older and the world influences us we forget who we are.  So going back to who I use to be. This will bring 2015 full circle for me.

So lets begin!

Determined

I’ve made a firm decision that 2015 will be my year to accomplish many crafty things and be a better person by the time December 31, rolls around.

Take a look at what I created:

One Little Word copyYes, pen to paper, I wrote down some of the things I’m determined to accomplish in 2015.  Now that its down on paper and I’ve shared them with you.

I have to do them right?

I have to say I’m a bit nervous but I will set fear aside and be DETERMINED to add some check marks to those boxes.

Like Andrea, I’ve created a Pinterest board called Determined.

Check out some of the motivational pieces I’ve found to get me moving!!

52de16d4b64aee9b5a0555494fb29ae1 12213d996c71b782fa8e4e1b4b75e4ad b2b45981d8d9dd18c676acac1cd7c5a2

ba5bc94d0672bcd2d6c7fce472b8ded0

c4b4c0d49c7e981933c336ffbaa2c6fc e55f812091494d84931da4a84d761d93So with all of that said, I am off running to get my self in line with my plan.  I hope you join me on this journey and encourage me along the way.

I promise this will be a fun ride!!

Thank you for stopping by!

~Kymona


Happy New Year: So Suzy Stamps New Release!!!

????????????????????????????????(photo source)

Happy New Year to all of you!!

I’m so excited we all made it to another year!!

I guarantee you this year will be the best year.  I have a lot planned for you this year!!

I hope your ready for the ride because I’m ready to share with you.

So let me beginning my new year with So Suzy Stamps!!!  She has an awesome January release for you this month.

Lets take a look at my card I created for this release:

Oh la la

Who doesn’t like creamy ice cream!! I decided to go really simple with my card because I wanted the ice cone to be the focal point of my card.

Lets take a closer look at the yummyness!

oh la la close up 3

oh la la close up

oh loa la close up 2

Don’t you just want to touch to see if its soft.  Well it is!  Are you wondering how I did that?  I’m going to tell you.

1. I cut my Kraft cardstock to an A2 size card (4.25 x 5.50 scored at 4.25). I stamped So Suzy Stamps Oh La La stamp to the front of my cardstock.

2. I embossed the front of my cardstock with Stampin’ Up! Chevron Textured Embossing Folder then set it aside to work on my ice cream cone.

3. I stamped my So Suzy Stamps Ice Cone Fun Cone with Versamark ink and then embossed it with Adirondack Espresso Embossing Powder.

4. To create my textured ice, I used Wendy Vecchi Embossing Paste and Ranger Peacock Feathers and Picked Raspberry reinkers to create my delicious colors.

5. I used my palette knife to carefully add the different color paste to my ice cream area.  I pushed past my embossed lines so that you don’t see my embossing.  I let it sit to dry.

6. Once my paste dried, I added glossy accent to my cherry for a pop.

7. I used my Koi Watercolors to added color to my cone.  The embossing gives that added texture to my cone.

8. Once the cone dried, I fuss cut the cone out and attached it to my card front using foam adhesive.

9. I added some Pretty Pink Posh 4mm and 6mm Sparkling Clear Sequins.

10. I rounded the corners using my corner chomper.

Easy and fun!!  My nieces and daughter loved it.  I hope you do too!

Now its your turn to check out So Suzy Stamps new release and a chance to play along with our new challenge!

The month of January beings a lot of news.  Over at the So Suzy Stamps Blog our new challenge is Ready for the New Year – Use Something New!!

You have a month to linkup your new creation to the So Suzy Stamps Blog for a chance to win a $15 gift certificate to the So Suzy Stamps Online Shop!!

I hope to see you there.

Supplies used:

Ice_Cream_Fun_Cone_WM__13576.1418507671.1280.1280VersaMarkAdirondack Espresso Empossing powderChevron Embossing FolderEmbossing PasteDistress Ink Peacock FeathersDistress Inks Picked RaspberryKoi Watercolors3M Mounting TapeOh_la_la_WM__13668.1418508694.1280.1280glossy accentsPretty Pink Posh Sequins 4mm Pretty Pink Posh 6mm Sequins We R Memory Keepers Corner Chomper

Thank you for stopping by!

~Kymona

More Exciting News!!!

Hello everyone!!  I’m here today with some super-doper exciting new to share with you.

I made it on the CASology Design Team!!!!

Design-Team

Can you say back flips!!

When Melissa sent me the email, I was on the train going home from a long day at work.

I remember reading the email and screaming with excitement.

Everyone on the train was wondering what was going on.  I couldn’t contain myself.

For those of you how know me, know that I play along with CASology all the time.

Some times at the 11th hour!!  So to now be apart of the team you can imagine how I feel!

Wait, I have more!!

When I found out that Hazel from Hazel’s Paper Designs made the team with me, I was even more excited.

Hazel and I meet while playing along with the CASology Challenges.

Yayyyyyy, Hazel!!

Stop by her blog and welcome her as well!!

So this came full circle for me!

I can’t wait to see all of you over on the CASology Blog for my First Challenge January 6, 2015!!

See you in the New Year!!!

Thanks for stopping by!!

~Kymona


Pop of Color!!

Hello everyone!!  I’m here today on the a2z Scrapbooking blog today sharing my last card for the year and I’m doing that with a POP of Color!!

The Watercolor Challenge ends in 4 days so you still have some time to play along with us.

Take a look at my card that I created:

Your Amazing front(You have to see this card in person. The purple is so rich but this photo doesn’t display that.)

Lets take a closer look at my flower:

Your Amazing glitter flower

Take a look at my banner:

Your Amazing side

To fine out how I created this card please head on over to the a2z Scrapbooking blog for further details.

So what do you think of my purple flower!! Let me know!! I would love to hear from you!!

All of the supplies I used can be found at the a2z Scrapbooking Store. If you would like to purchase any of the supplies I used please head on over to the store and use the coupon code KYMONA15 to get 15% off your purchase.

I hope my card gives you some inspiration to participate in our Watercolor Challenge.  It runs to the end of the month, which ends in a couple of days. So hurry and create!

You have a chance to win a $25.00 gift card to the a2z Scrapbooking Store. Hope to see you there!

Supplies used:

Hello Flowers Diamond Gems 5mm Wink of Stella Shoot for the Moon Ranger Watercolor PaperWhite Embossing PowderDistress Marker Picked RaspberryDusty ConcordMemento Black

Kymona

Check this out!!

Hello everyone!!  I’m being featured over on the Top Dog Die Blog today. I’m so excited.

DesignerKymonaGraphic_600w

Stop by and check out the interview I did with them here.

While your there, check out my fellow team members.  They are all amazing.

In other news:

I participated in a couple of gift swaps this year.  I love these types of things.

Check out my package for one of my receivers:

FullSizeRender

I hope she likes this gift package.

I still have to buy for one more person.

Its Christmas Eve, so I guess that will have to wait until Friday.

I will add extra special thing in her package for being late.

Well I’m signing off for tonight, I have to go finish wrapping some presents.

Thanks for stopping by!!

~Kymona

Sending Love Your Way…

Hello everyone!!! I’m here today with the new DoubleClick Skittles Challenge!!

This weeks challenge is Something New!! With the new year coming, this theme is so fitting.

I used new goodies to create my card.  I love how it turned out.

Take a look:

Sending Love your way

Don’t you just love the vintage look that this card has?

Here is a list of all the new goodies that I used to create this card:

1. Waffle Flower Holiday Labels – Give Thanks Set

2. Waffle Flower Holiday Label 1 Die

3. Bo Bunny Pop Quiz Pattern Paper

This card was super easy to create.

Here is how:

1. I cut my card base to an A2 size (4.25 x 5.50)

2. I cut 1/2″ strips of pattern paper and adhered them next to each other.

3. I inked the edge of my card with distress ink for a vintage look.

4. I wrapped linen thread around the card and tied a bow on the front of the card.

5. I stamped my sentiment with black ink and die cut it with my label die cut.

6. I adhered the label with foam adhesive.

7. I added Sunshine Yellow Skittles to finish off my card.

I totally love this card.  Such a non-traditional valentines day card.

What do you think about my card?  Please let me know.  I would love to hear from you.

Now its your turn to join us and play along with our challenge this week. 

I hope to see you there.

I’m also linking this card to Waffle Flower’s Anything Goes Challenge.

IMG_0168-0

I’m also linking this card to Simon Says Stamps Anything Goes Challenge.

wednesdayblog-logo

Supplies used:

Holiday Label1 Die Holiday Labels Give Thanks Stamp Set Bo Bunny Pop Quiz Paper Pad Sunshine Yellow Skittles Neenah Desert Storm CS Linen threadWalnut Stain

Thanks for stopping by!

~Kymona

Happy Holidays and Giveaway!!

Hello everyone!!  I’m here today on the Sweet Stamp Shop sharing another gift packaging.

I’m always looking for different ways to present gifts to people that I care about. I think it gives an added touch to the gift. So thanks to my new blogging friend Nicole from Unity Handmade, who taught me how to make this awesome packaging.

Well today’s gift is for my daughter’s teacher. Teacher’s get so many gifts from their students. Which means teacher’s have to write thank you notes to show their appreciation. So as apart of my daughters gift to her teacher, we included thank you cards.

Now you can just give them the cards wrapped in a nice ribbon or clear box but made a really cute package out of pattern paper that houses the thank you cards.

Take a look:

Happy Holiday 1

Can you image getting a set of cards in this packaging. I love this little box.

Take a look at the opening:

Happy Holidays Closeure

The thank you cards fit so neatly inside of the box. This box holds 4 cards and envelopes.

Box with cards inside

I used the following stamp set to create my box and cards.

Holiday SentimentThank You

Check out the complete set:

box and card copy

Want to know how I created this gift packaging and cards, please head on over to the Sweet Stamp Shop to get all of the instructions.

So what do you think? Would you like to receive a set like this? If you leave a comment on the Sweet Stamp Shop blog post by 11:45pm EST, I will pick a lucky winner to receive this set, just in time for the holidays.

You don’t want to miss out on this one!!

Supplies used:

Santa & Co. DSPReal Red Stampin MarkerclassiccrestsolarwhtieWhisper White Baker's TwineFrosted Sequins VersaMarkLiquid Platinum

Thank you for stopping by!

~Kymona