Top Dog Dies Team

Hello everyone!!!  I’m here to announce that I’ve decided to stay on Top Dog Dies Design Team for another term!!!!!

TeamAnnouncementGraphic_650w

I’m super excited about this team.  I love their dies and love sharing my work using them.

Check out my new teammates:

TeamAnnouncementFall2015

Yayyy, I have the pleasure of working with a great set of talented women.  I can’t wait to see what everyone comes up with!!

I invite you to check out all of my new teammates on their blogs!!

Kymona Tracey ←that’s me!
Thanks for stopping by!!
~Kymona

Top Dog Die – Baby Shower Invite

Hello everyone!!  It’s Top Dog Die Wednesday!!  I’m here with a die that was totally a lifesaver for me.

My nieces mom called me a couple of weeks ago and wanted to know if I could make 100 baby shower invitations for her coworker’s daughters.

I said absolutely!!  They wanted a onesie with the colors hot pink and leopard. My first thought was to just create a digital invite but as I created the invite, I wasn’t impressed.

So, I decided to make the card out of an actually onesie.  I knew I didn’t have any die that would make my job easier.  I thought about cutting out the invite, but when the number 100 started swirling, I decided against that.

So I went on a search for a onesie die!! Just my luck, Top Dog Die had actually what I wanted.  Check out these die:

TDD Onesis card TDD onesie die 2TDD Onesie Card Finishers

Take a look at my invite:

I loved how this invite turn out.  Nice and elegant.

When I first started, I messed up about 10 sheets of paper that ended up in the trash.  I tried pattern paper and I wasn’t getting the look I wanted. So I searched high and low for pattern paper that fits with what the customer wanted.

Yayyy, I found the paper in two different Micheal’s store. I bought 50 sheets of this paper.

This is how I created theses invites:

1. I used the die to die cut the onesie out of this leopard paper.

2. I added a white bow to the outside.

3. I typed the invite information and then die cut that out with the finisher die set.

4. I boxed them up and tied a pretty bow on the box.

Nice and easy!!

So what do you think?

The supplies are hard to list since I’m not sure what the paper is called.  The pattern paper and ribbon is from Micheal’s.

You could us any paper you would like and design the card in tons of different ways!

The box is Stampin’ Up! Extra Large Gift Boxes and the ribbon is a retired Stampin Up product.

Thank you for stopping by!

~Kymona

New Spring Dies from Top Dog Dies Blog Hop!

tdd_febrelease

Hello everyone!!  I’m here today with Top Dog Dies!  Welcome to the full reveal and blog hop of their “New Spring Dies”!  If you arrived here from the fabulous Kimberly Wierner blog, then your on the right track.  If you arrived randomly, the blog hop starts at Jeanne Jachna blog.  You don’t want to miss out on any of my design team members cards.  They did a fabulous job.

Check out some of my cards that I created for this hop:

Hello

For this card I used the Typewriter Uppercase Die Set.

Easter

For this card I used the Cross Die Set and the Easter Die Set.

He Lives

For this card I used the Cross Die Set and Typewriter Die Set.

Easter 1

For this card I used the Decorated Eggs Die Set and the Typewriter Uppercase Die.

I love the new dies in this release.  That cross die is amazing.  Its a must have die.

Here is a full visual list of all the dies that are apart of this release:

TC092-D TC092 TC091-DTC091TC093-D TC093 TC094-D TC094 TC095-D TC095TC086-DTC086 TC087-D TC087 TC088-D TC088 TC089-D TC089 TC090-D TC090

If you want to see the complete list of all the New Spring Dies, click here.

Now what is a blog hop without an amazing giveaway!!  Check this out:

Giveaway:

The Top Dog Dies blog is hosting a giveaway, they will be giving away an entire set of their new dies.  So one of each of the new dies, $122.00 worth of products! 

To enter to win, you must enter on the Top Dog Dies blog or right here:

a Rafflecopter giveaway

The Giveaway expires March 6th, 2015 at 11:59pm.   The winner will be posted on the Top Dog Dies Facebook page and the Top Dog Dies blog on March 7th, 2015.

The next stop is the fabulous Marcia Dehn-Nix!!  She created some beautiful cards, you don’t want to miss out.

Just in case you get lost along the way, here is a complete list blog hoppers:

Jeanne Jachna
Kelly Griglione
Kimberly Wierner
Kymona Tracey ←Me
Marcia Dehn-Nix
Natalie Dever
Nicki Scheck
Piali Biswas
Vickie Zimmer

I hope you enjoy what you see and hop along with us.  You won’t be disappointed!!

Thank you for stopping by!

~Kymona

Top Dog Die – Confident Corset

Hello everyone!!  Its Top Dog Die Wednesday!!  I’m here with yet another new die that was release last month!

Check out the new Top Dog Dies Corset Die and Corset Background Die:

Top Dog Die Corset Die  Top Dog Dies Corset Background Die

I also used the new Top Dog Die Borders Die Set:

Top Dog Die Dotted Borders Die Set

Take a look at my card:

Confident Corset

I love this corset die!!  Its so pretty.  Oh, how I remember wearing these corsets when I was younger.  They always look so nice to go out in!

Take a closer look at the corset:

Confident Corset closeup

I paired this set up with my awesome Confidence is Sexy sentiment stamp from So Suzy Stamps.

The pattern paper that I used is Stacked with Love from Stampin Up!

I used Stampin’ Up! Polka Dot Embossing Folder to add dimension to the front of my card.

Here is how I created my card:

1. I die cut the corset from black cardstock and the background corset from pattern paper. I glued them together using glue.

2. I die cut the border using one of the boarder dies at the bottom of the my black card front.

3. I added a small piece of pattern paper behind the border die cut with adhesive.

4. I stamped the sentiment using Versamark ink and add white embossing powder and heat set it.

5. I ran my card front through my embossing machine use the polka dot embossing folder.

6. I adhered my corset to the front of my card using dimensionals.

7. I added a rhinestone to the front of my corset.

Super easy and elegant.  So what do you think?  Let me know below in the comment section.

Confidence Stacked with Love Polka Dot Folder Textured Boutique Embossing MachineVersamarkTombow Multi-Purpose AdhesiveStampin' Dimensionals

Thanks for stopping by!!

~Kymona

Top Dog Dies – True Love

Hello everyone!!  I’m here today with Top Dog Dies and a new elephant die that is totally adorable.

Take a look for yourself:

Top Dog Dies Elephants Die SetA big elephant, small elephant, a heart, balloon and flower!  Great set.

Take a look at the card I created using this set:

True Love

True love between a mother and her child is an amazing feeling.  That is what these two elephants have with one another.

Those hearts are from my watercolor piece that I used the other day.  I loved this paper I used it on all of my cards this week.  LOL!!

Watercolor piece 2

All I did was die cute my elephants from fog cardstock and the hearts out of my watercolor piece.  I adhered them to the front of my cards. I stamped my sentiment and that’s it!!

So tell me what you think ?  I would love to hear from you!!

Supplies used:

Top Dog Dies Elephants Die SetSSS Fog cardstockclassiccrestsolarwhtieKiss Kiss rub onsWe R Memory Keepers Corner Chomper

Thank you so much!!

~Kymona

Top Dog Dies: More Feathers

Hello everyone!!  Its Wednesday again and I’m here with Top Dog Dies!!

I have another card to share with you using their Feathers Die Set. I just love these feathers.  They are so cute and you can create so many thing with them.

Take a look at my card:

Perfect Day

Take a look at all of that detail on those white feathers.  Simply perfect!

Here is how I created this card:

1. I cut Simon Says Stamp Dark Chocolate Cardstock to 8 x 4, scored at 4.

2. I die cut Top Dog Dies Feathers Die Set out of Neenah Solar White Cardstock.

3. I taped the feathers in place using a basic adhesive.

4. I then used Stampin ‘ UP! Early Espresso and created a bow around the base of the feathers.

5. I stamp the sentiment from Waffle Flower Craft In Everyway Stamp Set with Versamark Ink.

6. I sprinkled Ranger White Embossing Powder over the stamped sentiment and then heat set it.

7. I used my We R Memories Corner Chomper to round the left top corner.

Nothing to it!!  You can recreate this card with ease!!

So what do you think?  Let me know below.


Supplies used:

top dog die feathersSSS Dark Chocolate csclassiccrestsolarwhtieEarly Expresso Bakers TwineBasic RGBVersamarkWe R Memory Keepers Corner Chomper


Thank you for stopping by!

~Kymona


Top Dog Dies Dotted Tags

Hello everyone!!  Happy Wednesday!! Friday is in sight now, yes!  I need a day off!!  LOL!!

Wednesday’s are my Top Dog Dies days!!  I’m here today to share another new die they released last week!

Take a look:

TDD Dotted Tags Die SetTop Dog Dies Dotted Tags Die Set

They are super cute and will fit on any box, card and scrapbook page.  The stitched edges are so pretty!

Take a look at my totally awesome gift box:

Be Mine box

You can give this box to anyone, simply change the sentiment from “Be Mine” to something that would suit your recipient.

I used the heart die from Top Dog Dies Heart Mini Album Finishers Die Set, to create all of those small hearts on my box!!

Take a closer look at my box:

Be Mine box closeup tag

I attached the tag under one of the glitter hearts and it fit perfectly.  No string needed!!

Be Mine box side view

I added the glitter hearts on both sides of the box.  This box is big enough to hold a nice size gift!!

I added a bag fill of chocolate to this box.  I’m giving my box to my daughter.  I have to make another one for my son.

Here is how I created this gift box:

1. I stamped the big and small heart from Waffle Flower Crafts DT Mix Stamp Set on my box using Versamark Ink.

2. I put the box together buy folding on the score lines. I added my chocolate to the box now because when I add the decorations to the box, you can’t open it back.

3. I used my retired Stampin’ Up! Scallop border punch to create the scallop border out of Stampin Up! Cherry Cobbler cardstock.

4. I attached the border punched cardstock to the edge of the white cardstock.  Then I adhered the entire piece to the takeout box using Tombow X-treme adhesive.

5. I attached 5 pieces of Stampin’ Up! Cherry Cobbler Baker’s Twine around my box.

6. I die cut 16 small hearts from Top Dog Dies Heart Mini Album Finishers Die Set and attached them to the bakers twine with glue dots.

7.  I die cut my tag from Top Dog Dies Dotted Tags Die Set and stamped my sentiment from Stampin’ Up! You Plus Me stamp set. I adhered it to my box.

That was super easy to create and the recipient will love it.  Head on over to the Top Dog Dies shop to see what they have to offer. You will not be disappointed.

So what do you think?  Let me know below.

Supplies used:

TDD Heart Mini Album Finisher Die SetTDD Dotted Tags Die SetTake out boxCherry Cobbler Baker's TwineRed Glimmer PaperCherry Cobblerclassiccrestsolarwhtieae540-versamarkBasic RGB Tombow XtremeYou Plus Me


Thanks for stopping by!!

~Kymona

Wishing you were here…

Hello everyone!!  Kymona here sharing my very first Top Dog Dies Design Team post with you today!!  I’m super excited to be here and I hope you love what I’m about to share with you!!

Today I’m working with one of the new dies that was released on Tuesday!!

tc084_1Top Dog Dies Feathers Die Set

Take a look at what I created for you:

Wishing you were closer

These feathers are super fun to work with.  I love the detail on each feather! So you want to know how I created this card?

Here you go:

1. I cut a piece of watercolor paper down to 4.25 x 5.50 and taped it down to my work station.

2. I added a good amount of water to my watercolor paper.

3. Then I dropped Distress Inks Broken China and Evergreen Bough to my paper and let the color spread all over my paper.  I heat set it.  Then I sprayed water in my hand and drop some drops of water onto my paper to create blotches of white spots.

TDD feather tutorial

4. Once my watercolor piece dried.  You can see in the next photo how watercolor dries lighter.

TDD feather Tutorial 1

5. I used my feather dies and cut out three feathers.

6. I adhered the flowers together with glue dots and tied a bow using linen thread.

7. I used the same color inks and a clean pencil erasers and added the dots surrounding my feathers.

TDD feather tutorial 3

8. I adhered the feathers over those dots using glue dots.

9. I used Simon Says Stamp Sending & Wishing stamp set to create my sentiment.  I stamped it to the right of the flowers.

TDD feather tutorial 2

10.  I used my corner chomper to round two of the cards corners.

That is all it took to create this card.  I love how it turned out and I hope you will give this technique a try.

Very elegant without any real hard work.

So what do you think? I would love to hear from you.

Supplies used:

Canson Watercolor Paper Distress Ink Broken ChinaDistress Ink Evergreen BoughLinen ThreadStampin Up glue dotsSending and WishingWe R Memory Keepers Corner Chomper

Thanks for stopping by!

~Kymona

Top Dog Die: Love on The Horizon

Hello everyone!!  I’m here today with Top Dog Dies with another Valentine’s day card for you!

Love will be in in the air soon and I hope your getting ready for the ones you love.  If not, I have a really cute card that is super easy to make for those loved ones.

Take a look at my card:

I Love You frontview(TDD)

Aren’t these cats the cutest you’ve seen!!!  When I saw this die, I knew I wanted them to close together looking out to something.

The male cat wasn’t sure how to tell the female cat “I love you” so he decided to have it written in the sky for her to read it herself!!

I love the ombre effect in the background!

Lets take a closer look:

I Love You (TDD)

Check out the glitter on my die cuts letters and heart shape.

I Love you sideview (TDD)

Check out this side view, so you can see the scalloped edge of the heart on the inside of the card.

So you want to know how I created this card?  Here you go:

1. I used Neenah Solar White cardstock for my card base.  I use Top Dog Dies Heart Doily Die to cut out the heart on the front of my card.

2. I created my own heart stencil out of acetate so that I can create a perfect heart ombre effect on the inside of the card.

3. I used Distress Ink Picked Raspberry and Spun Sugar to create the ombre effect on the inside of the card.

4. I cut the letter and shape from Top Dog Dies Heart Mini Album Finishers Die Set out of black cardstock.

5. I adhered it on the inside of my card and added Clear Wink of Stella for the sparkle.

6. I die cut my cats from Top Dog Dies Cool Cats Die Set out of black cardstock.

7. I adhered the cats with regular adhesive.

That’s it!! So what do you think?  I love how the cats are looking at the horizon together.  Beautiful!!

I would love to hear what you think.

Before I go, Top Dog Dies has a Little B Giveaway going one right now. One lucky Winner will receive $113 in Little B Crafting Products.

littleb_promo_150106

You have 3 chances to win. Enter by January 25, 2015!! Check out Little B Dies here.

Supplies used:

classiccrestsolarwhtieTDD Heart Doily DiePicked Raspberry InkSpun Sugar InkMini Ink Blending ToolTDD Heart Mini Album Finisher Die SetWink of Stella clearTDD Cool Cats Die Set

Thanks for stopping by!!

~Kymona

Top Dog Dies: Love Letters

If your looking for the DoubleClick Skittles Challenge, click here.

If your looking for the Waffle Flower Craft Announcement, click here.


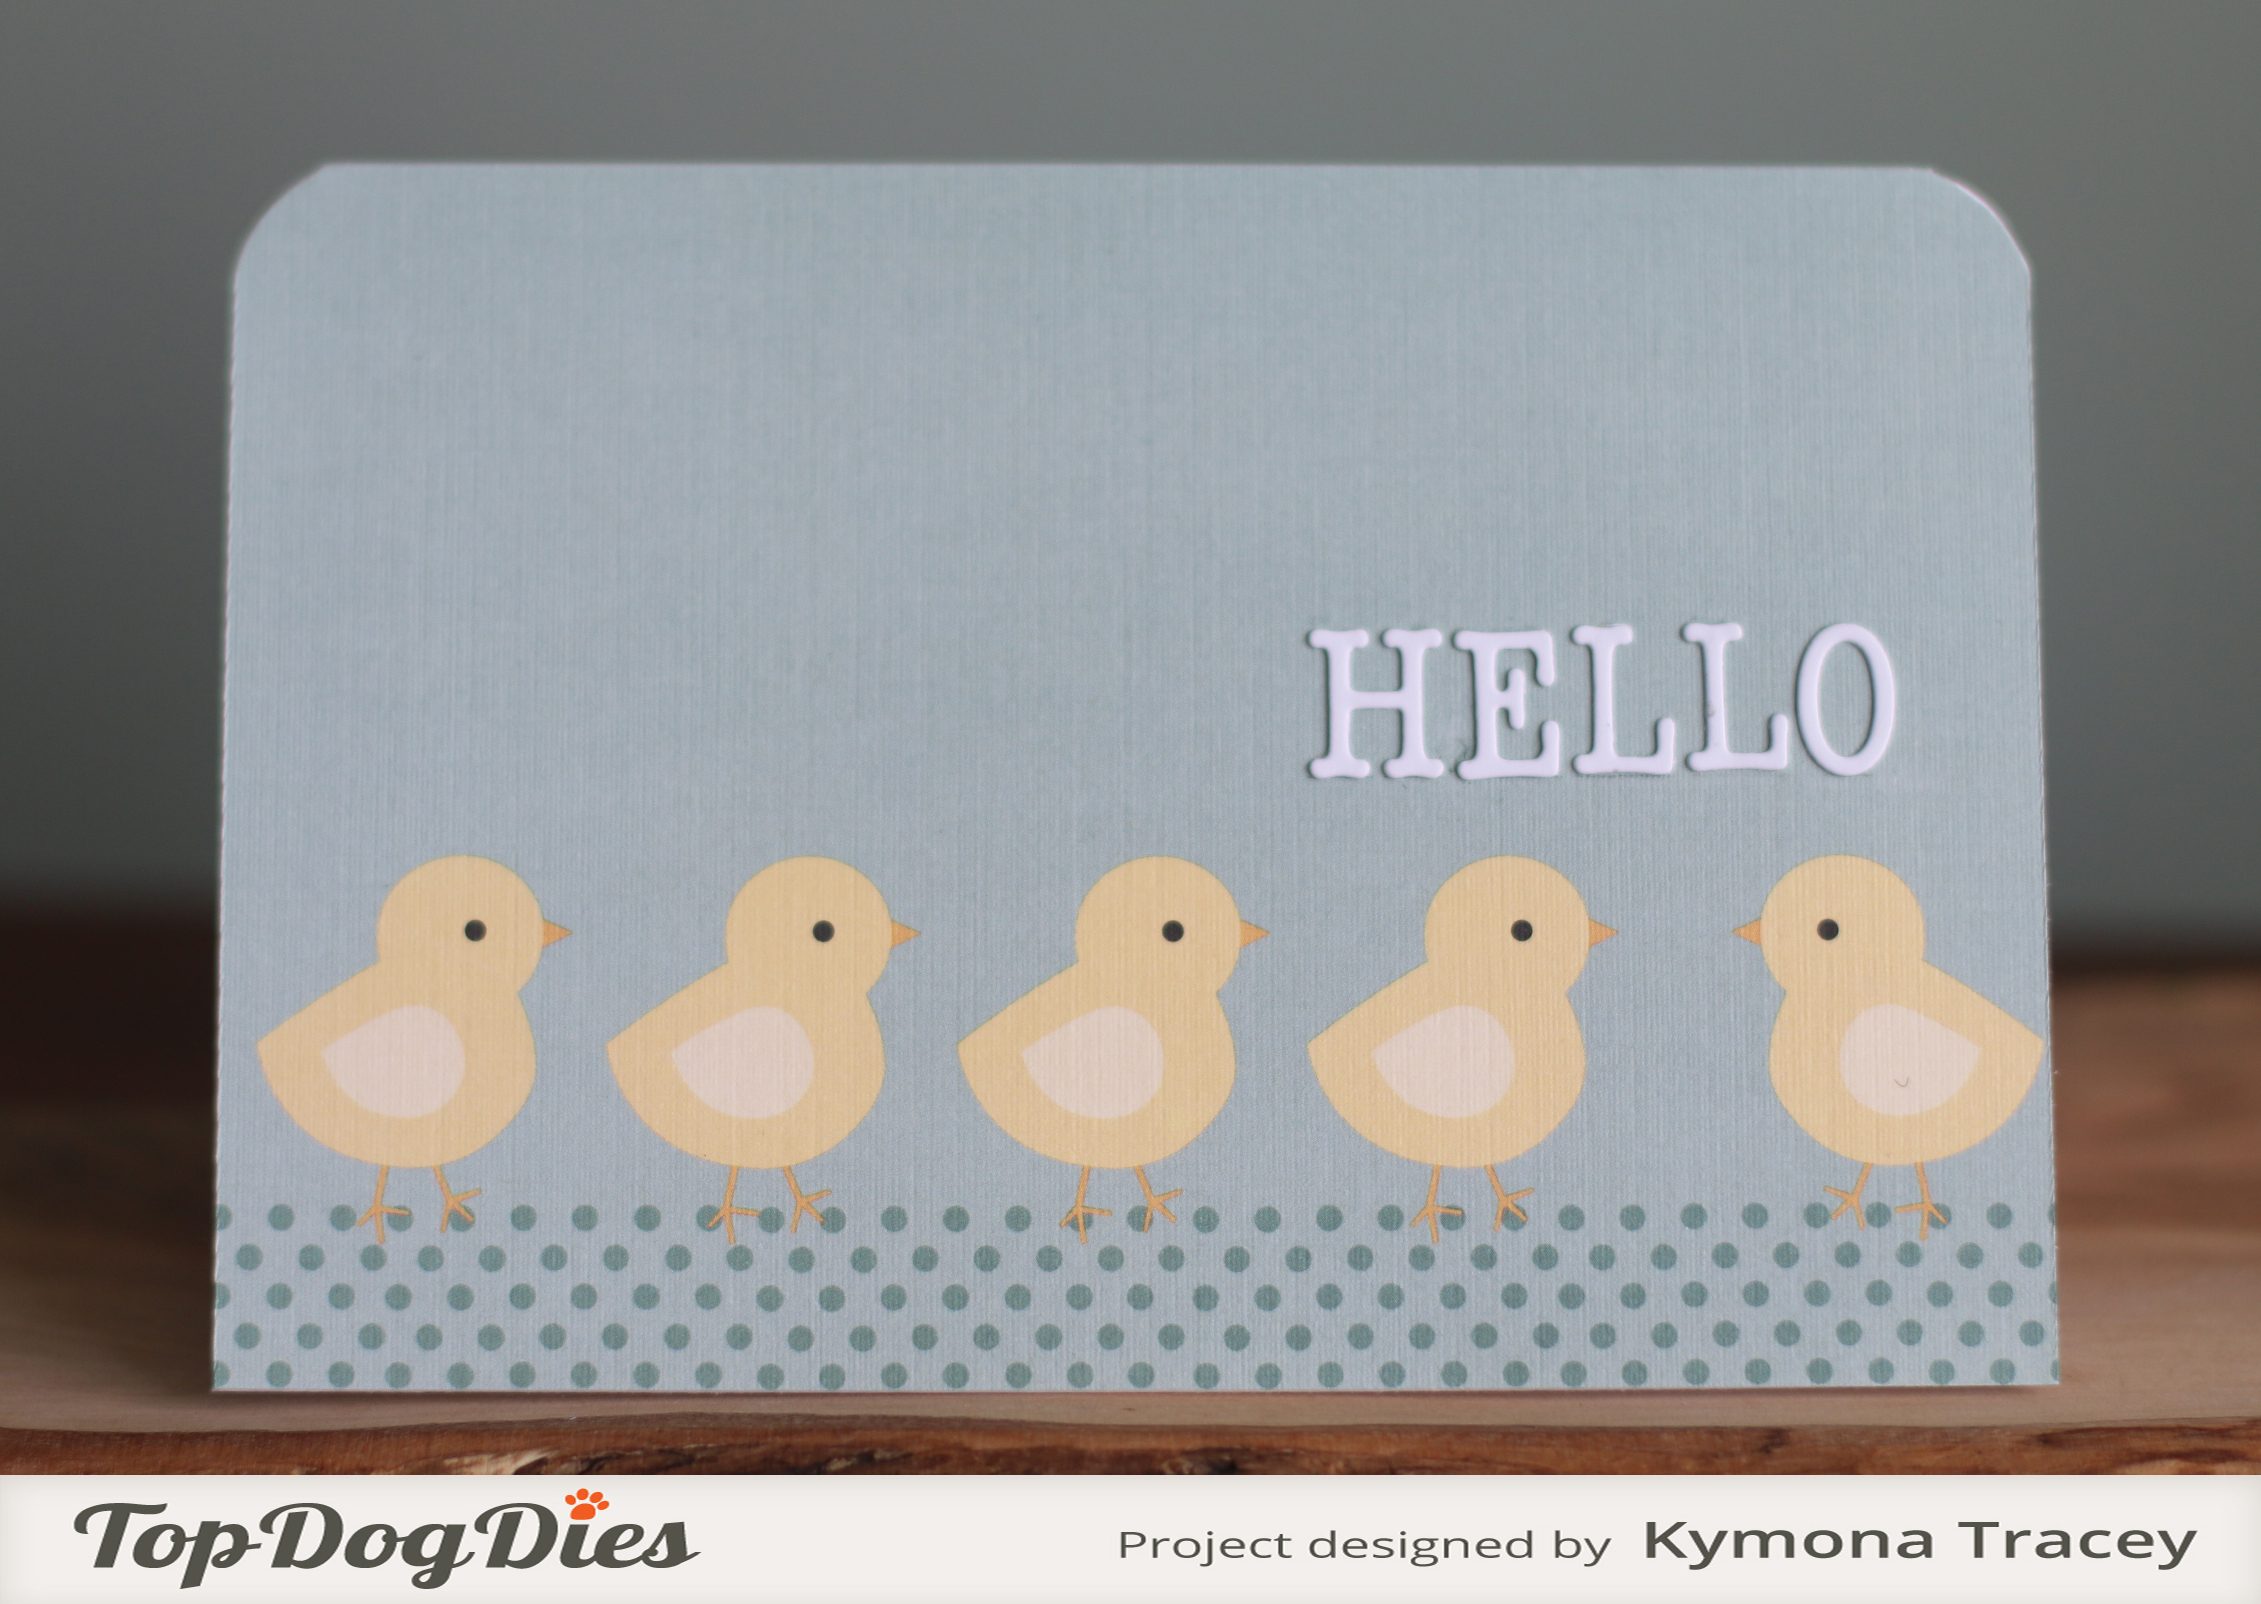
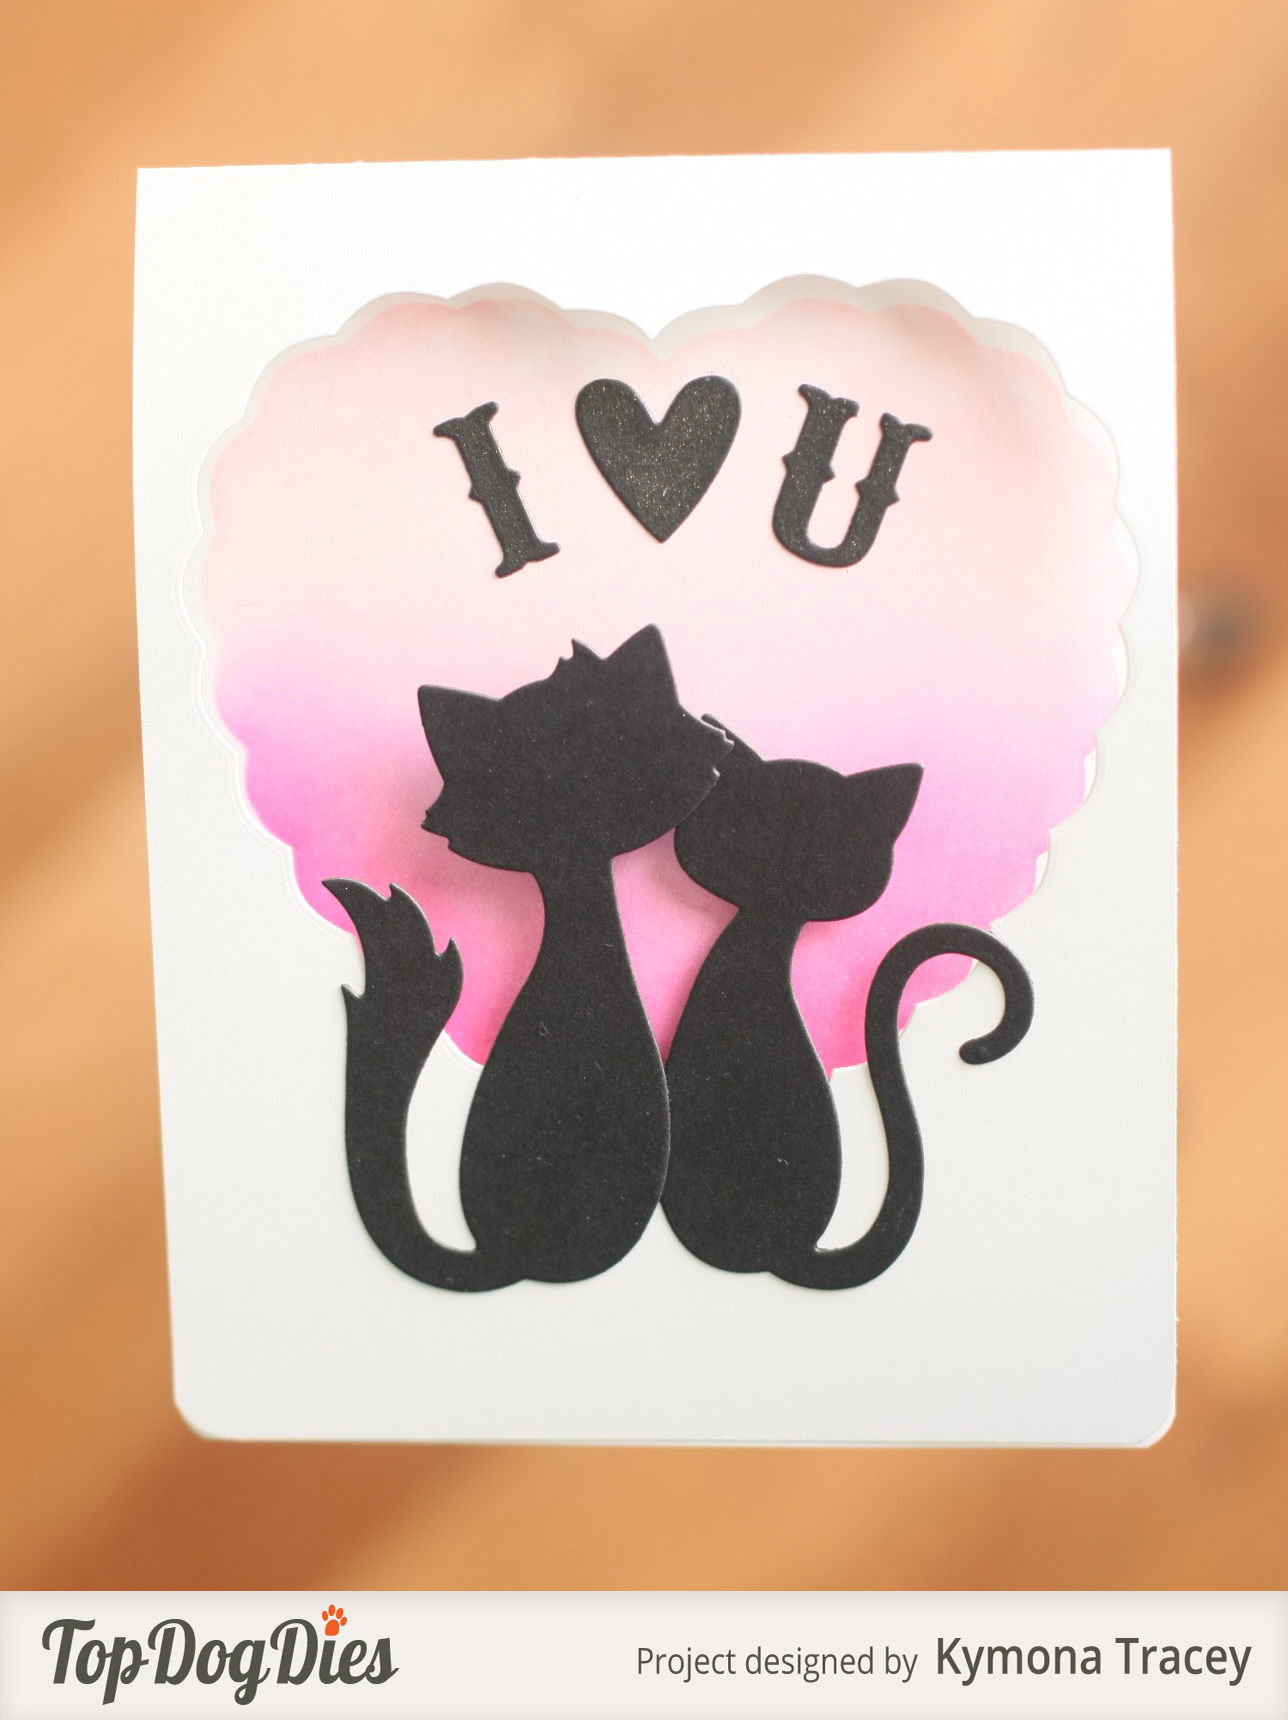
Hello everyone!!  I’m here today with Top Dog Dies for the first time as a Design Team member!! Yayyy!!!

Have you check this store out yet?  If not, you must!  They carry all sorts of amazing dies.
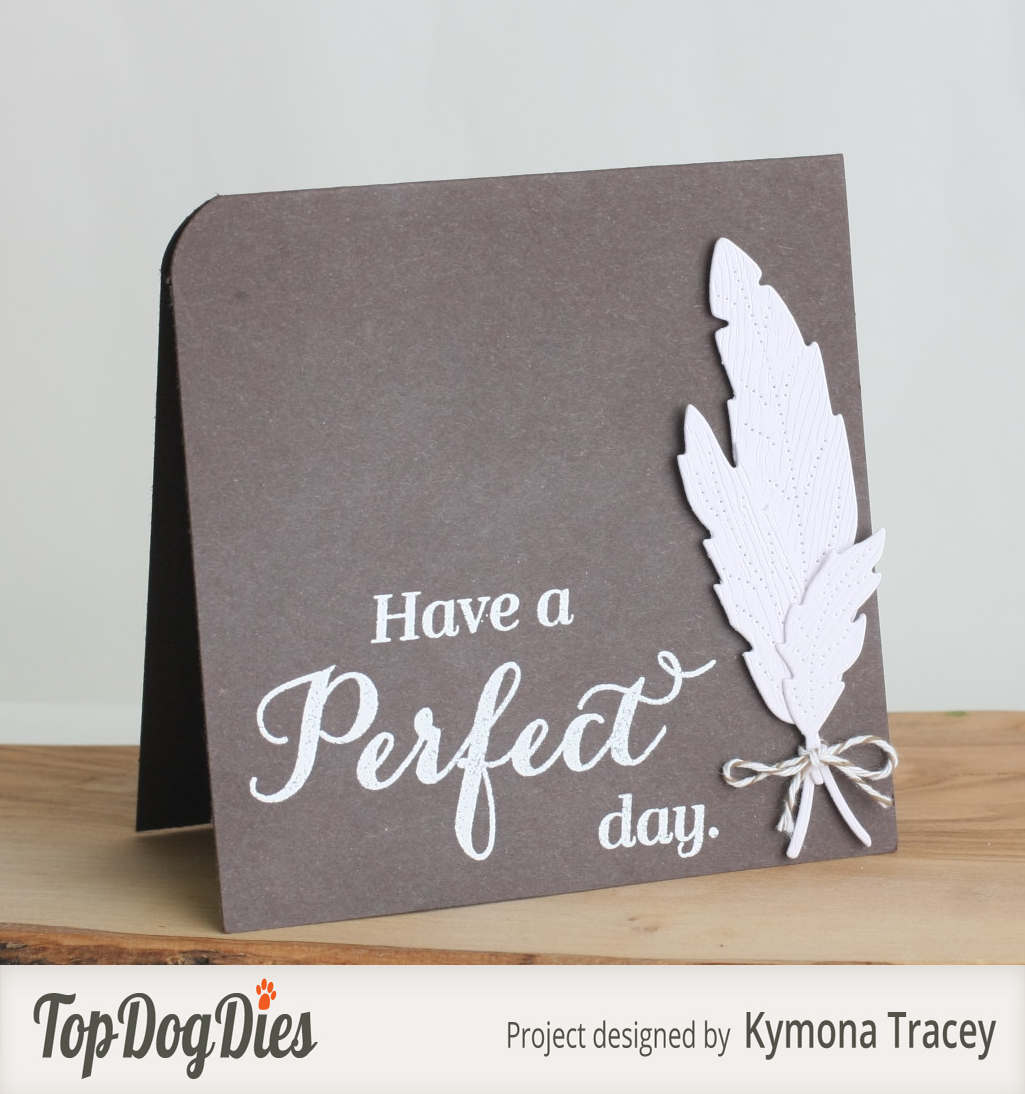
Check out my card:

Love you (dt)

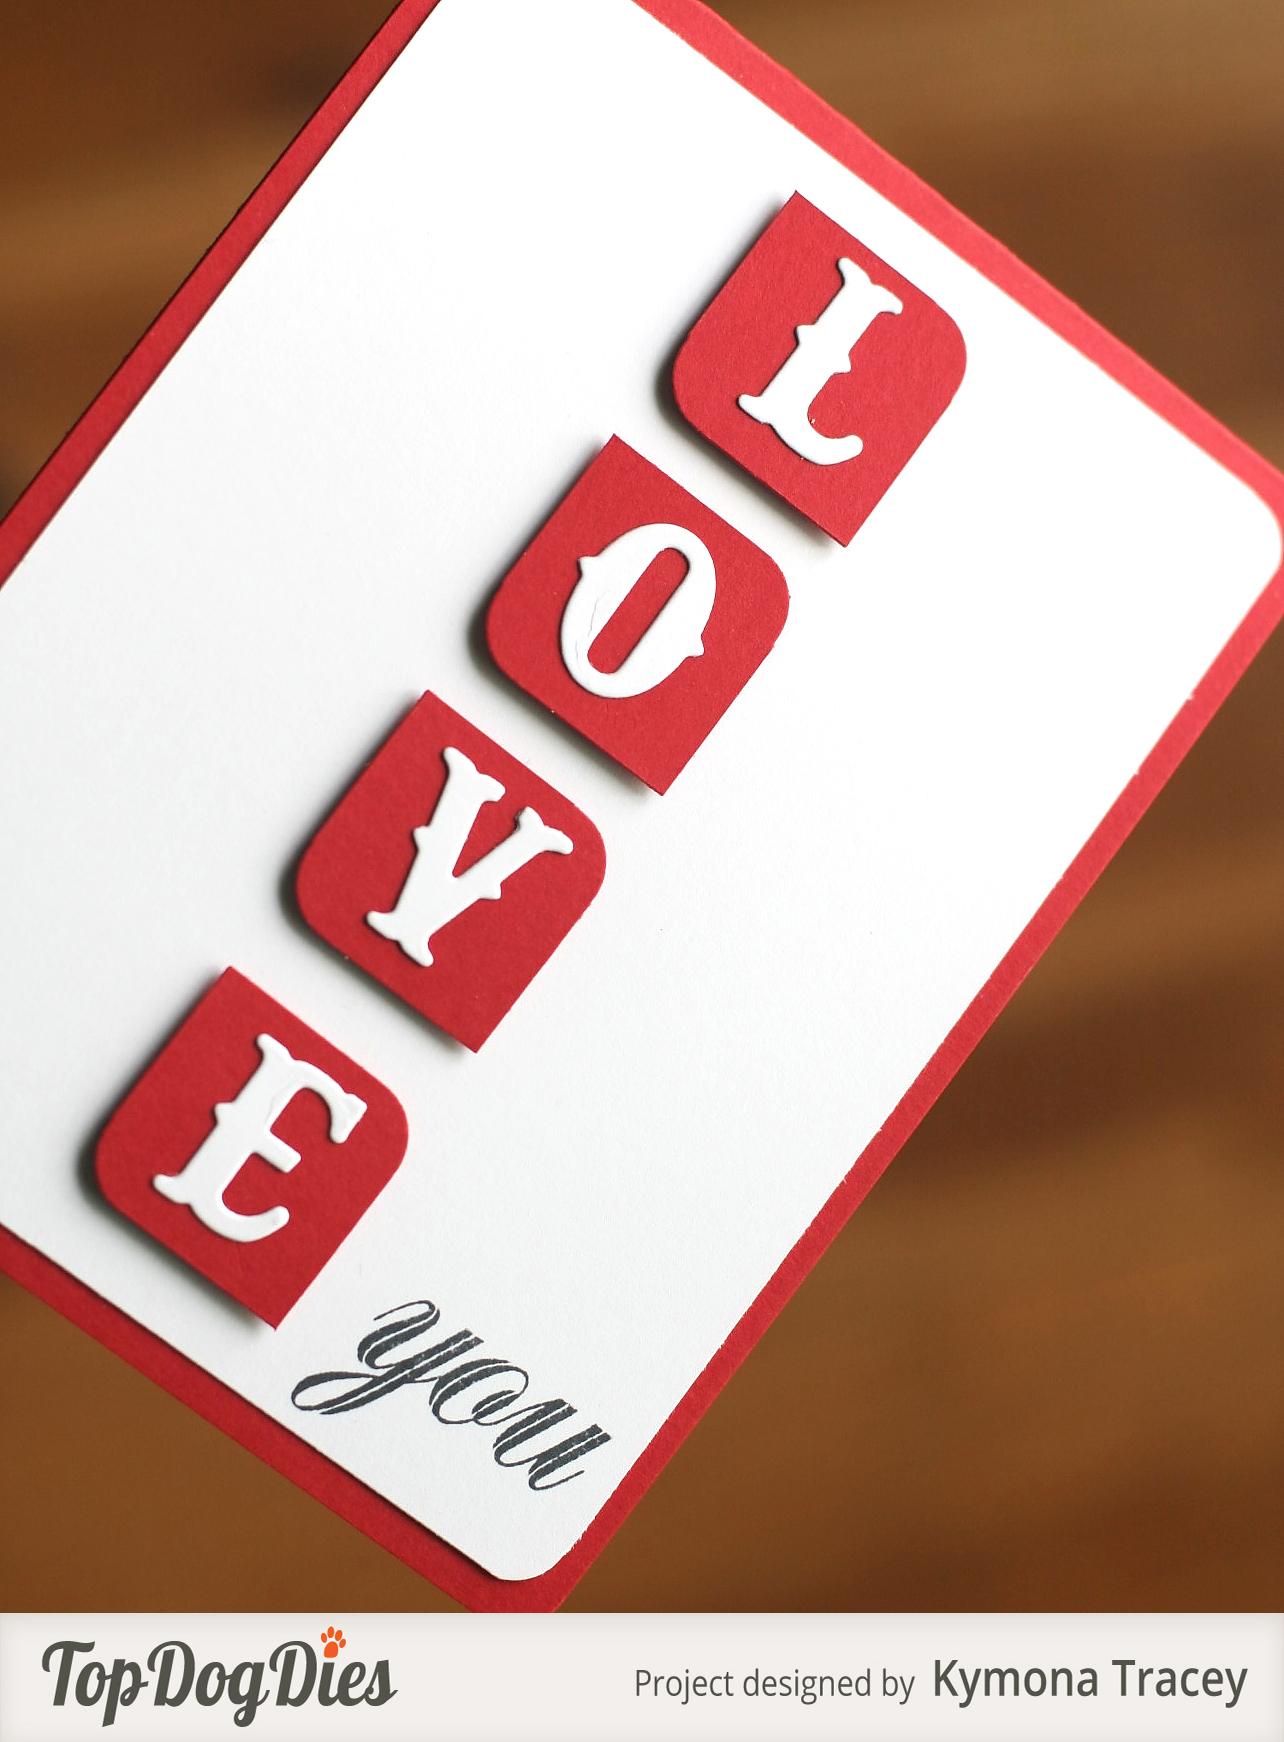
I just love how this card turned out.  I used Top Dog Dies Vintage Alphabet Die to spell out the word love for a super cool valentine’s day card.

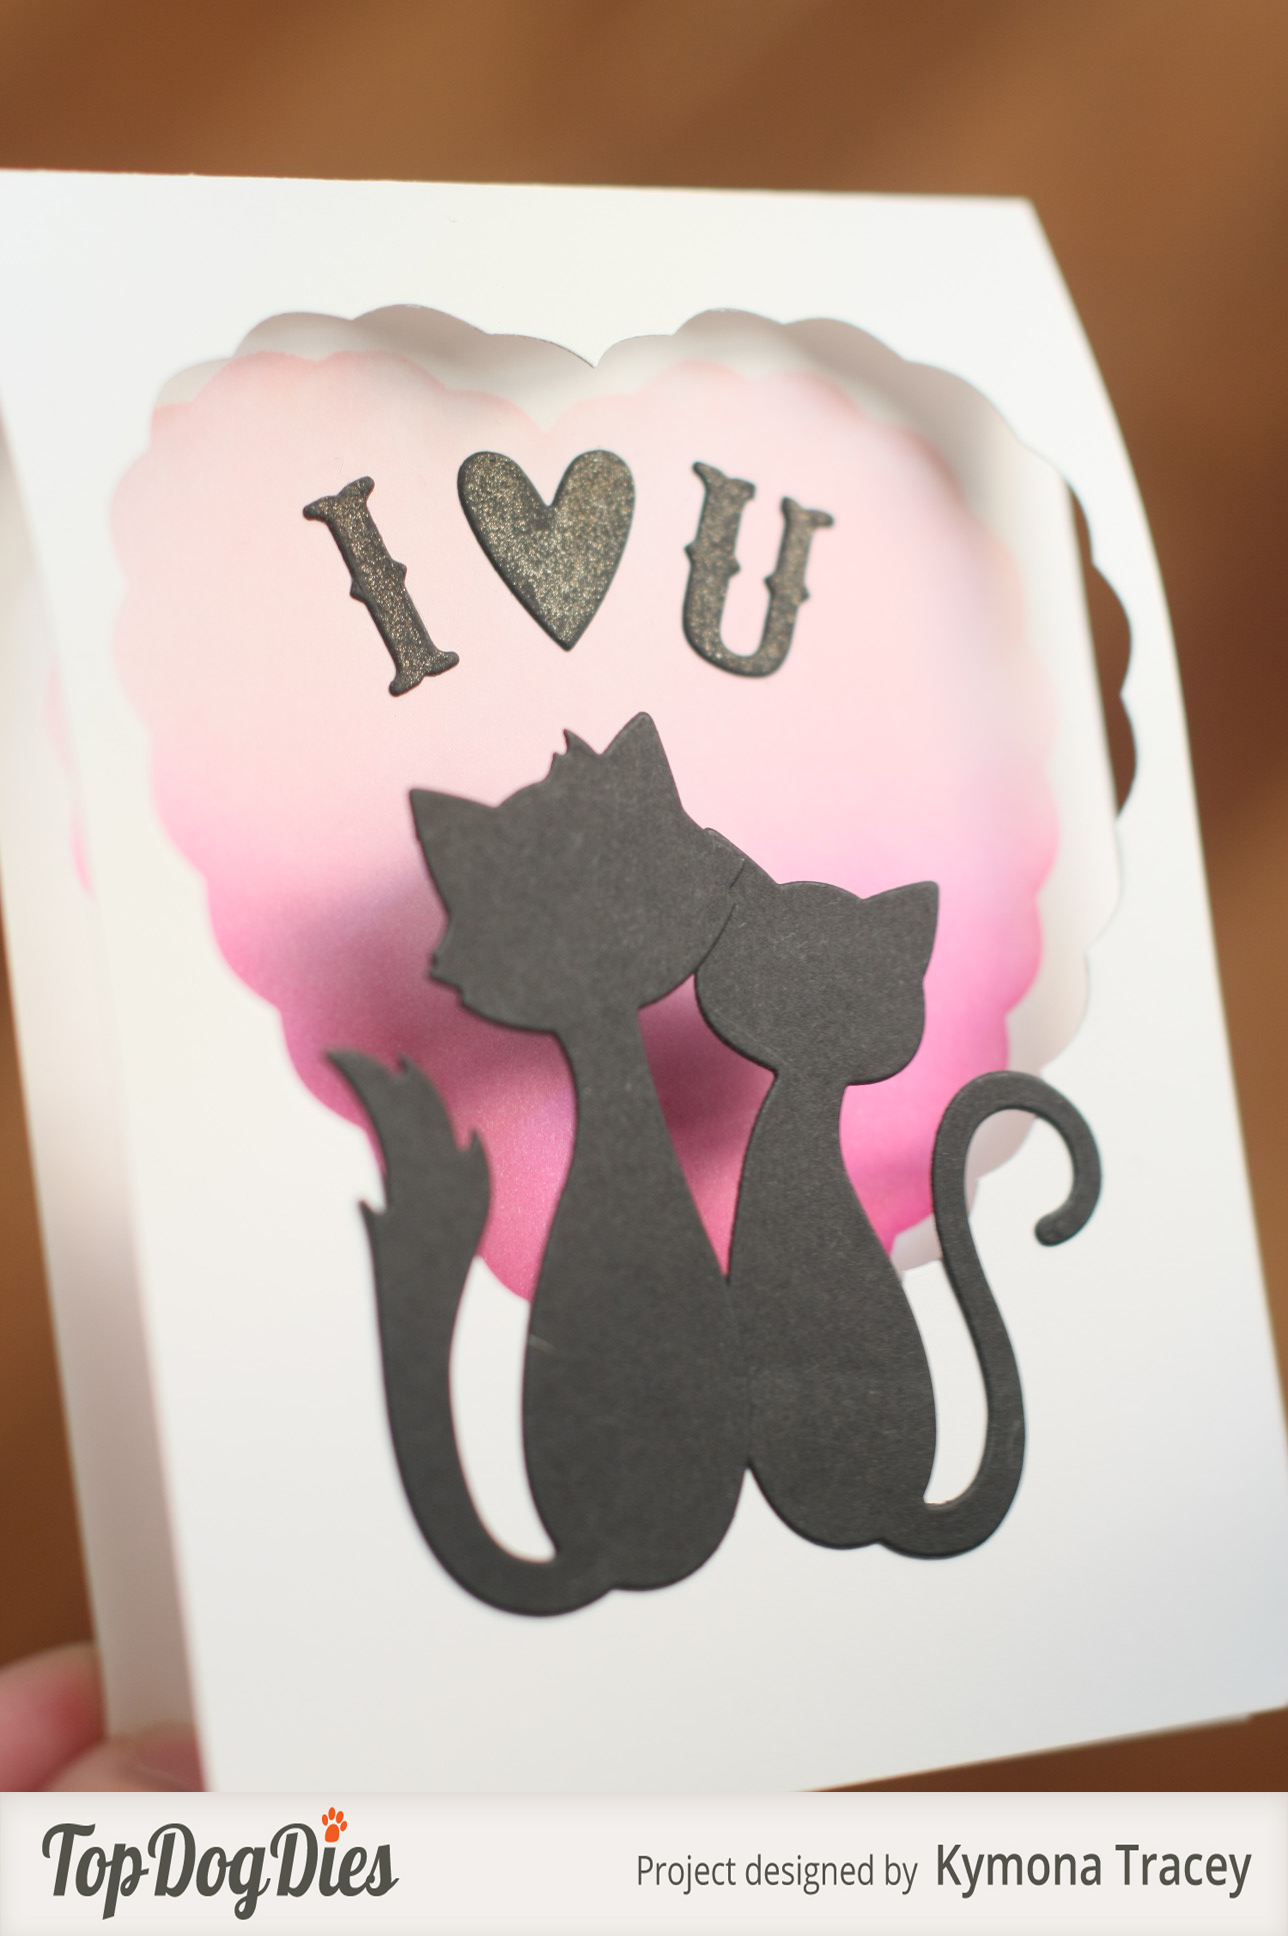
Lets take a couple more looks at my card:

Creative Shot Love 2

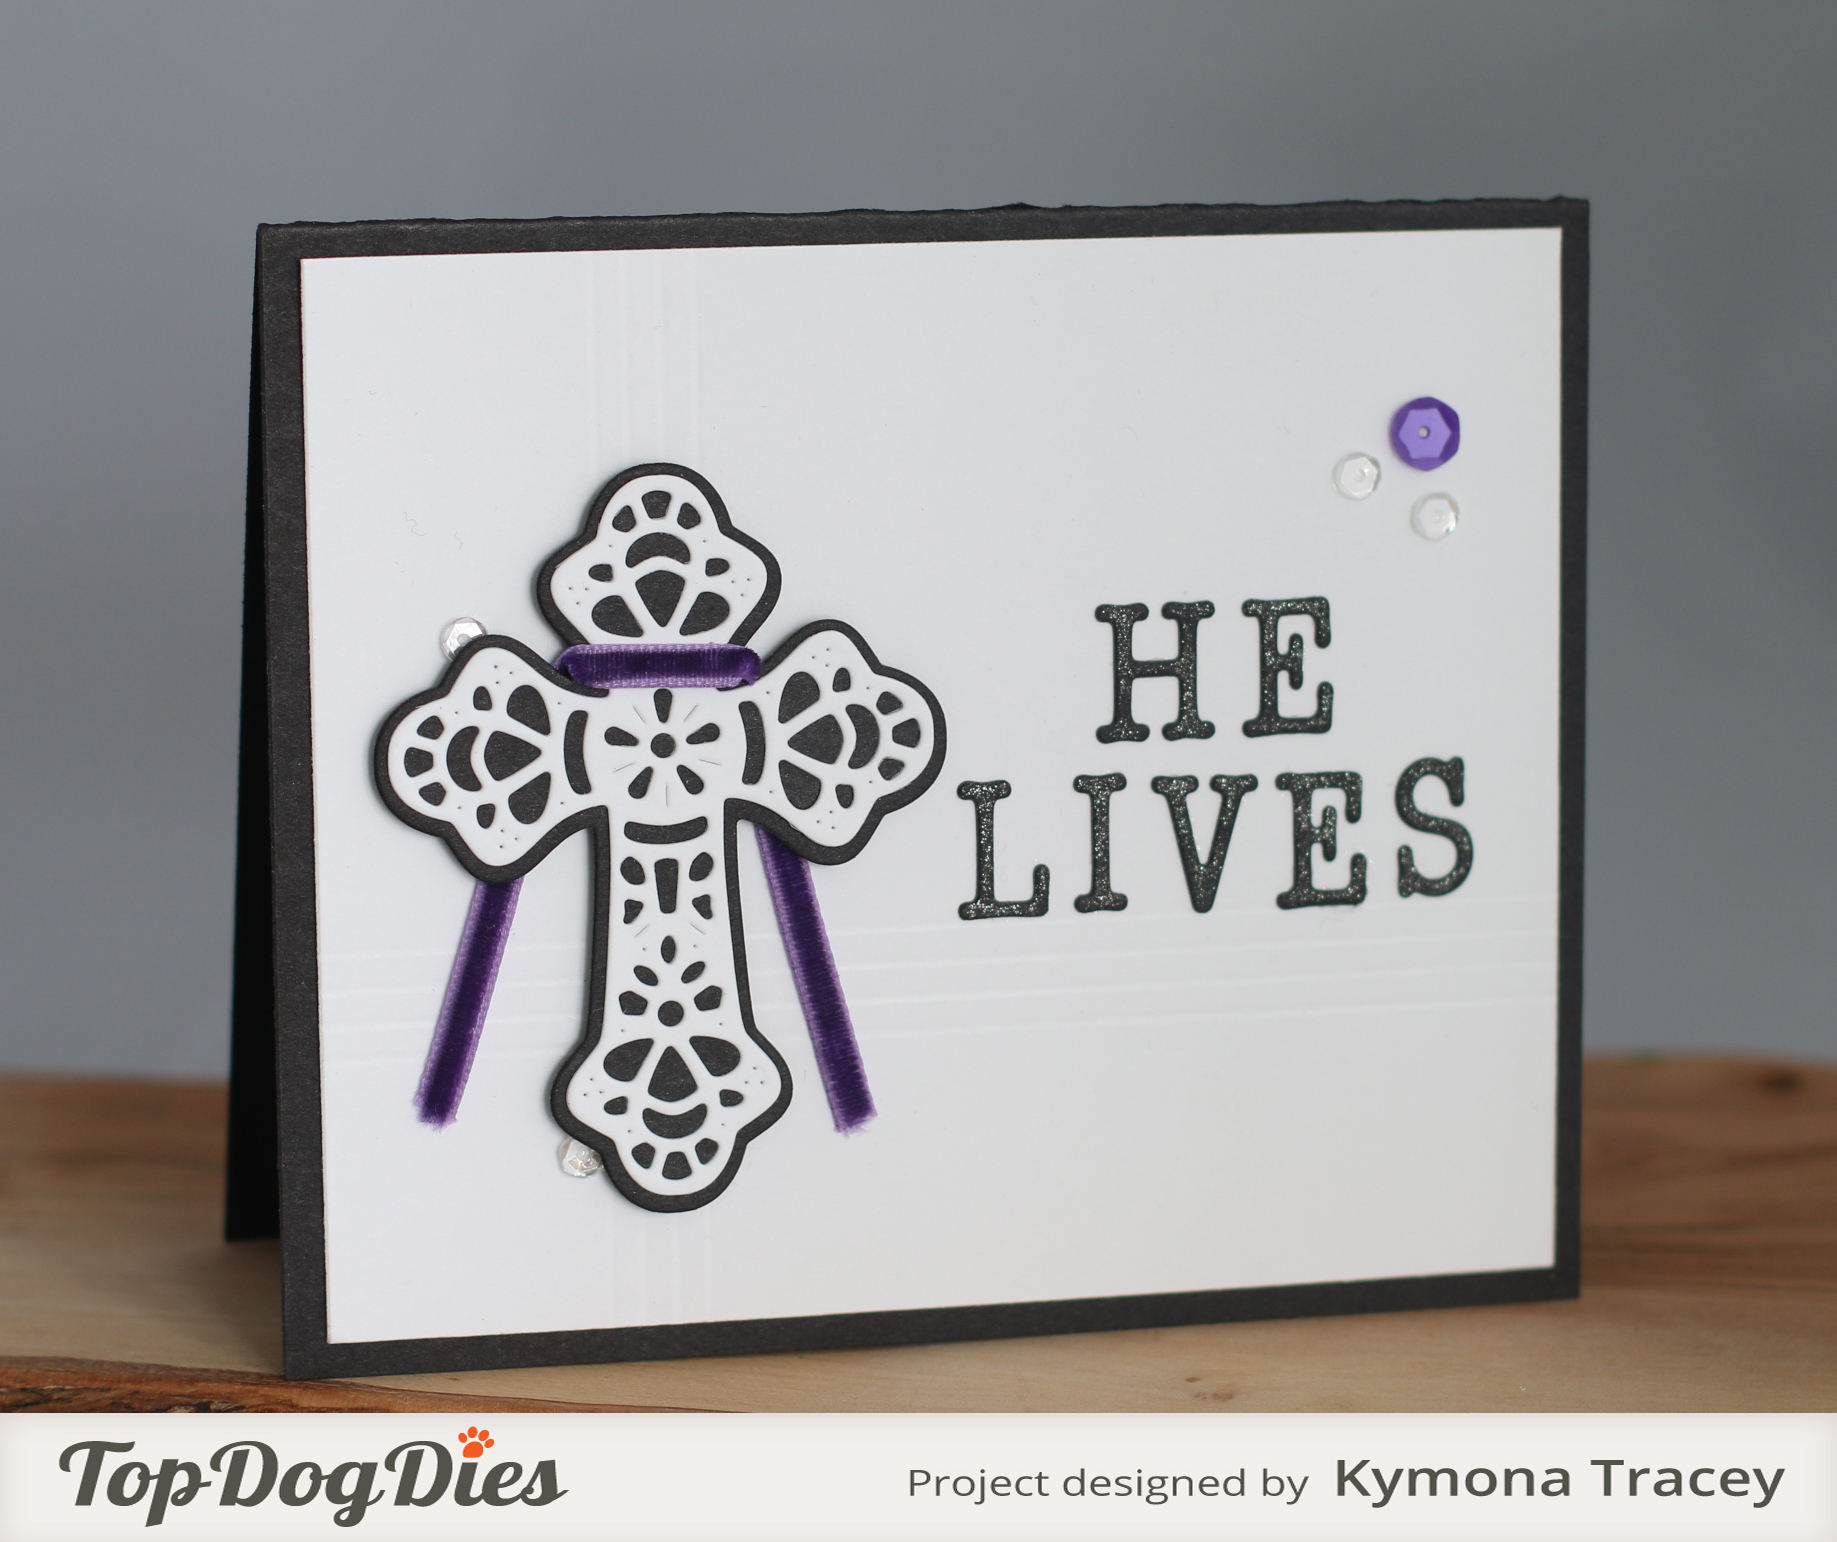
Aren’t these letter the cutest!!  I love the fancy look of each letter.

Creative Shot Love 1

I was going to leave just the letters on the card but at the last minute decided to add a stamped you for more interest.

I’m so glad I made that decision.

Here is how I created this card:

1. I cut my card base from Simon Says Stamp Schoolhouse Red cardstock to an A4 (4.25 x 5.50) size card scored at 4.25.

2. I cut my Neenah Solar White cardstock panel to 4 x 5.25.

3. I attached the white panel to the red card base with some regular adhesive.

4. I cut a 1.5 “strip of the red cardstock and then cut 1.5 squares.

5. I used my corner chomper to round two of the corners.

6. I die cut my letters out of the white cardstock and adhered them to the red square.

7. I adhered the squares to the front of my card panel.

8. I stamp the you sentiment from Mama Elephant Cross My Heart Stamp set using Memento Tuxedo Black ink.

That’s it!!  Very easy card to create again and again using different words.

I would love to see what you come up with using this die set!!

Before I go, Top Dog Dies has a Little B Giveaway going one right now.  One lucky Winner will receive $113 in Little B Crafting Products.

littleb_promo_150106

You have 3 chances to win.  Enter by January 25, 2015!! Check out Little B Dies here.

I’m playing along with Simon Says Stamp: Something New.

wednesdayblog-logo

I’m playing along with the NBUS Challenge.

NBUS

Supplies used:

TDD Vintage Alphabet DieSSS schoolhouse redclassiccrestsolarwhtieWe R Memory Keepers Corner ChomperCROSS MY HEART Memento Black Ink

Thanks for stopping by!

~Kymona