Clean and Simple 4 – Day 1

Hello everyone!!  I’m here today with my first homework project from the new Online Card Class – Clean and Simple 4!!

Before I show you what I created, let me just say I LOVE these classes.  I learn so much from all of the instructors.  Its unbelievable.

Day 1 we learned about:

1. Heat Embossing and Masking

2. 3D Embossing

3. Faux Ceramic Titles

Did your jaw drop?  Yes, it should.  Amazing, Amazing stuff. I can’t wait to share all of it with you.


My card today showcases Heat Embossing and Masking!  The talented Jennifer McGuire taught us how to combine simple masking and stamping with powders to create unique backgrounds that will really add pop to a clean and simple design.

Take a look at my card:

OCC Embossed Love

Amazing right!! Just some pop of color turned this simple card to Wow!! simple card.

Here is a closer look:

OCC Embossed Love 2

Here you can see the white emboss pattern that follows evenly across the card.  Amazing what masking can really do!!

I will be back with more cards from Day 1 class!!

FYI –  a2z Scrapbooking Store has all of your Hero Arts needs.  The best part is, I have a coupon for you to use.  Use KYMONA15 to get 15% off your totally purchase.

Jennifer used a Hero Arts Basic Grey Bold Flower Pattern Background Cling Stamp on her card, that I love but didn’t have. So I ordered it from a2z Scrapbooking and you can too.

Hero Arts Bold Flower Pattern

Supplies used:

Hero Arts Highline Ironwork LF Scripty Love Hero Arts White Embossing PowderHero Arts Snow Layering Paper Hero Arts Black Layering Paper

Thanks for stopping by!

~Kymona


Top Dog Dies Dotted Tags

Hello everyone!!  Happy Wednesday!! Friday is in sight now, yes!  I need a day off!!  LOL!!

Wednesday’s are my Top Dog Dies days!!  I’m here today to share another new die they released last week!

Take a look:

TDD Dotted Tags Die SetTop Dog Dies Dotted Tags Die Set

They are super cute and will fit on any box, card and scrapbook page.  The stitched edges are so pretty!

Take a look at my totally awesome gift box:

Be Mine box

You can give this box to anyone, simply change the sentiment from “Be Mine” to something that would suit your recipient.

I used the heart die from Top Dog Dies Heart Mini Album Finishers Die Set, to create all of those small hearts on my box!!

Take a closer look at my box:

Be Mine box closeup tag

I attached the tag under one of the glitter hearts and it fit perfectly.  No string needed!!

Be Mine box side view

I added the glitter hearts on both sides of the box.  This box is big enough to hold a nice size gift!!

I added a bag fill of chocolate to this box.  I’m giving my box to my daughter.  I have to make another one for my son.

Here is how I created this gift box:

1. I stamped the big and small heart from Waffle Flower Crafts DT Mix Stamp Set on my box using Versamark Ink.

2. I put the box together buy folding on the score lines. I added my chocolate to the box now because when I add the decorations to the box, you can’t open it back.

3. I used my retired Stampin’ Up! Scallop border punch to create the scallop border out of Stampin Up! Cherry Cobbler cardstock.

4. I attached the border punched cardstock to the edge of the white cardstock.  Then I adhered the entire piece to the takeout box using Tombow X-treme adhesive.

5. I attached 5 pieces of Stampin’ Up! Cherry Cobbler Baker’s Twine around my box.

6. I die cut 16 small hearts from Top Dog Dies Heart Mini Album Finishers Die Set and attached them to the bakers twine with glue dots.

7.  I die cut my tag from Top Dog Dies Dotted Tags Die Set and stamped my sentiment from Stampin’ Up! You Plus Me stamp set. I adhered it to my box.

That was super easy to create and the recipient will love it.  Head on over to the Top Dog Dies shop to see what they have to offer. You will not be disappointed.

So what do you think?  Let me know below.

Supplies used:

TDD Heart Mini Album Finisher Die SetTDD Dotted Tags Die SetTake out boxCherry Cobbler Baker's TwineRed Glimmer PaperCherry Cobblerclassiccrestsolarwhtieae540-versamarkBasic RGB Tombow XtremeYou Plus Me


Thanks for stopping by!!

~Kymona

CASology 131 – Birthday

Hello everyone!!  It’s Tuesday and you know what that means, its CASology time.  Yayyyy!!  Last week, there were so many fabulous cards, it was super hard to choose one card.

This weeks cue card it fabulous too.  Check it out:

Week 131 - Birthday

Such a fun word.  The possibilities are endless. I saw a card Laura Bassen created and I and wanted to make a card similar to hers.

Take a look at my card:

Wishing you the happiest Birthday(this photo doesn’t do this card justice, its so pretty in person)

This little lady is all dressed up and ready to attend a birthday party.  Isn’t she the cutest little you’ve seen!!

Here is how I created this card:

1.  I cut my card base to an A2 (4.25 x 5.50) size card.  I cut my card panel to (4 x 5.25).

2. I used Simon Says Stamp Stitched Circle die to create an opening on the card panel.

3.  I use the cut circle to draw a circle on my card base to guide where my stamped imagine should be placed.

4. I stamped the little girl from Penny Black Cool Chicks Stamp Set within the drawn in circle on my card front.  Once the ink dried, I erased the circle.

5. I colored the little girl with Copic Markers.

Hat: BG11, BG 13, BG15, R24, and Y06

Dress: R22, R24, and R27.

Necklace: BG34

Stocking: R24,  and BG34

Shoes: R20 and R24

Skin: E00 and E11

6. I used Copic BG 34 to color a piece of cardstock to match the color in the little girls dress.

7. I die cut Simon Says Stamp Wishing Die 4 times (3 black die cuts and one out of the cardstock that I colored.

8. I stacked that word die on top of each other and adhered it to the front of my card.

9. I stamped the rest of the sentiment from Simon Says Stamp Sending and Wishing stamp set.

What do you think?  What about my coloring? I would love to hear from you.

Check out what my fellow DT Members have created!!!

Design-Team

Ardyth Percy-Robb

Gillian Ross

Hazel Hodgkins

Jen Wills

Joyce Mehrberg

Judy Marino

Kimberly Wiener

Kymona Tracey ← Me!

May Park

Melissa Chipperfield

Tracey McNeely

Hannelie  (Guest Designer)

Our sponsor for this challenge is STAMPlorations.

I can’t wait to see what everyone comes up with.  I hope to see all of you there!

Supplies used:

Stitiched CirclePenny black Cool ChicksCopic MarkersWishing dieSending & Wishingclassiccrestsolarwhtie


Thanks for stopping by!!

~Kymona

Waffle Flower Photo Inspiration Challenge

Hello everyone!!  I’m here today with Waffle Flower’s 2nd Photo Inspiration Challenge!!

What did you thing of the first challenge?  Those colors were a challenge but not to challenging to some of you!  I love seeing all of the entries.

Are you ready to see our new challenge?  Yayyy, here you go:

Photo Inspiration January 26

Here is my take on this challenge:

Perfect Bloom

Sooo, what do you think?  I totally love this new Planted Stamp Set and the Perfect Word Die from Waffle Flower.

If you know the stamp set, that third potted plant was created using the plant from the first stamp!  Ingenious, is what I say, LOL!!

Here is how I created this card:

1. I cut my Simon Says Stamp Fog cardstock to an A2 (4.25 x 5.50) size card.

2. I stamped the first and second potted plant using Memento Tuxedo Black ink because I wanted to color the images using my Copic markers.

3. I used my Copic markers to color in each plant and pot.  I used the same colors in the photo.

4. For the third potted plant, I stamped the empty post first.

5. Then I created a mask for that pot, so that I could stamp the plant inside.  Then I colored the image.

6. I die cut the word Perfect out of Simon Says Stamp School House Red cardstock 4 times..

7. I stacked them on top of each other so that the die could have some dimension. I adhered the die to the front of my card.

8. I stamped the word “Bloom ” underneath the die cut.

9. I added some Pretty Pink Posh sequins to the card and that was it.

Super easy card to create. This card allowed me to practice my Copic coloring.

Come on and join us!! Now I can’t wait to see what you come up with.

Supplies Used:

Basic RGB Word-Die-Perfect Memento Black InkCopic MarkersSSS Fog cardstockSSS schoolhouse red

Thank you for stopping by!

Kymona

Wishing you were here…

Hello everyone!!  Kymona here sharing my very first Top Dog Dies Design Team post with you today!!  I’m super excited to be here and I hope you love what I’m about to share with you!!

Today I’m working with one of the new dies that was released on Tuesday!!

tc084_1Top Dog Dies Feathers Die Set

Take a look at what I created for you:

Wishing you were closer

These feathers are super fun to work with.  I love the detail on each feather! So you want to know how I created this card?

Here you go:

1. I cut a piece of watercolor paper down to 4.25 x 5.50 and taped it down to my work station.

2. I added a good amount of water to my watercolor paper.

3. Then I dropped Distress Inks Broken China and Evergreen Bough to my paper and let the color spread all over my paper.  I heat set it.  Then I sprayed water in my hand and drop some drops of water onto my paper to create blotches of white spots.

TDD feather tutorial

4. Once my watercolor piece dried.  You can see in the next photo how watercolor dries lighter.

TDD feather Tutorial 1

5. I used my feather dies and cut out three feathers.

6. I adhered the flowers together with glue dots and tied a bow using linen thread.

7. I used the same color inks and a clean pencil erasers and added the dots surrounding my feathers.

TDD feather tutorial 3

8. I adhered the feathers over those dots using glue dots.

9. I used Simon Says Stamp Sending & Wishing stamp set to create my sentiment.  I stamped it to the right of the flowers.

TDD feather tutorial 2

10.  I used my corner chomper to round two of the cards corners.

That is all it took to create this card.  I love how it turned out and I hope you will give this technique a try.

Very elegant without any real hard work.

So what do you think? I would love to hear from you.

Supplies used:

Canson Watercolor Paper Distress Ink Broken ChinaDistress Ink Evergreen BoughLinen ThreadStampin Up glue dotsSending and WishingWe R Memory Keepers Corner Chomper

Thanks for stopping by!

~Kymona

CASology 130 – Friend

Hello everyone!!  I’m here today with the new CASology Challenge!

I have to admit, the cue card this week had me stumped for a minute.  I wasn’t sure what to create or even were to begin.  Its not that the word was hard because it wasn’t, I just didn’t now what to do.

You see, for this challenge I love thinking out of the box.  I always look in my dictionary for another meaning of the word.  For this cue, it was hard to get an alternative meaning.  So, I decided to go back to the basics and just play with the my  stamps with no deep meaning behind it!!

Here is the Cue Card:

Week 130 - FriendSo you see what I mean.  When you see the word “Friend”, you know what it means hands down.  How do you interpret that word?

Here is what I came up with:

Friends ForeverI went back the basics here!  I stamped and colored.  I searched my stamps for a stamp set that would either represented a friendship or the word friend.

I came across Lawn Fawn’s Feathered Friends stamp set.  The light bulb went off, how perfect is this set.

My card is simple as simple can be. This is how I created it:

1. I cut my white cardstock to an A2 size card (4.25 x 5.50) scored at 5.50.

2. I stamped all of the images from the stamp set on the front of my card.

3. I used Copic markers to color my image: R22, R24, Y11, Y13, YR68, E35, E37.

4. I added some Clear Wink of Stella to the hearts.

5. That was it!  My card shows the friendship between the two birds.  What could be better then that!!

Don’t forget to check out what my fellow DT members have created.

Design-Team

Our Guest Designer: Ren

Now its your turn!!  I can’t wait to see what you come up with. Our wonderful sponsor this week is DeNami Design. You don’t to miss this one!

I’m also linking this card to the Less is More Challenge.

Less-Is-More-Header

I’m also linking this card to Uniko Studio Challenge#17 Love and Friendship

BlogHeader2

Supplies used:

Feathered Friends Memento Black InkCopic MarkersclassiccrestsolarwhtieWink of Stella clear

Thanks for stopping by!!

~Kymona

Craft Stamper Blog Hop

Blog Hop Logo

Hello everyone!!   Welcome to Craft Stamper Magazines very first Take it, Make It blog hop!

If you have landed here from Jolande blog then you’re in the right place!

A list of all the blog hop links can be found HERE.

The January challenge is called ‘Take A Stamp’, and is really simple…just use a stamp somewhere in your art!

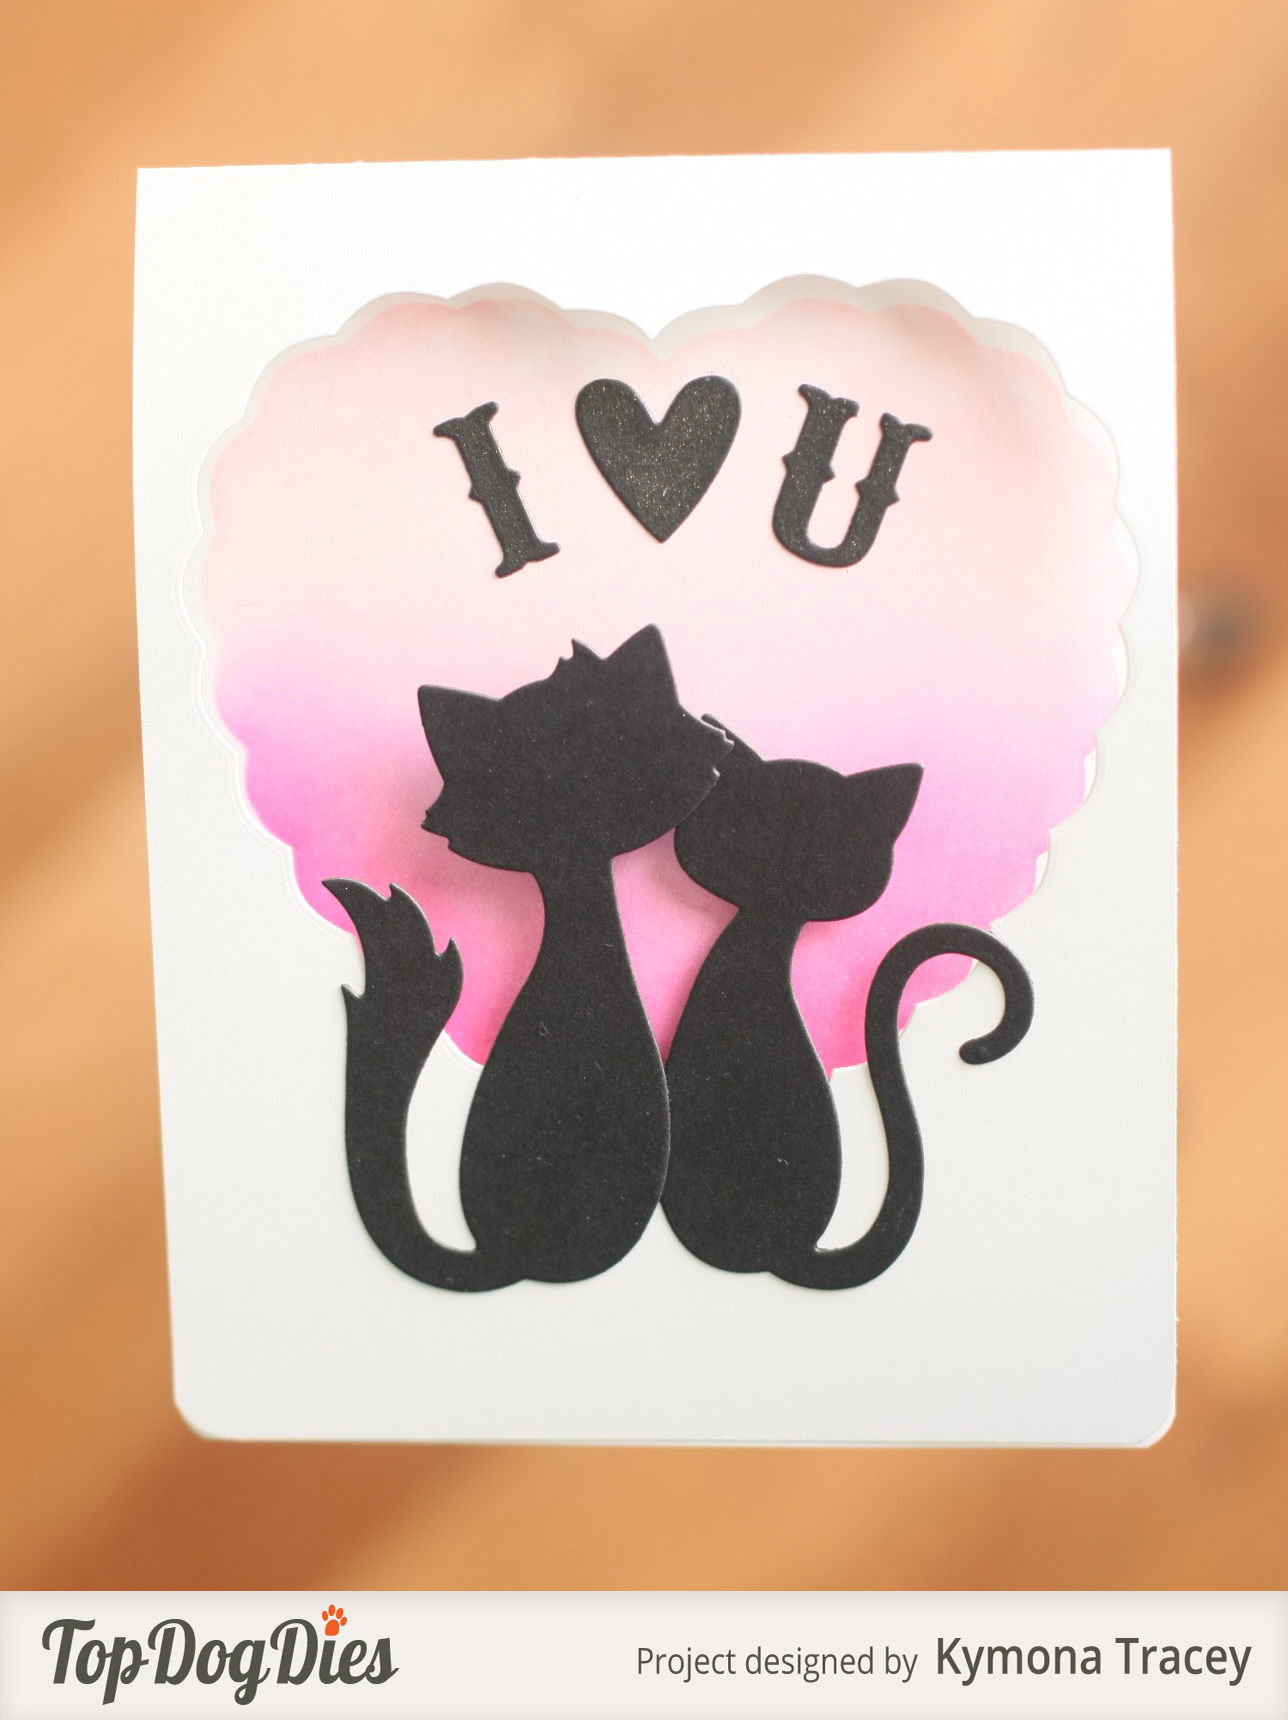
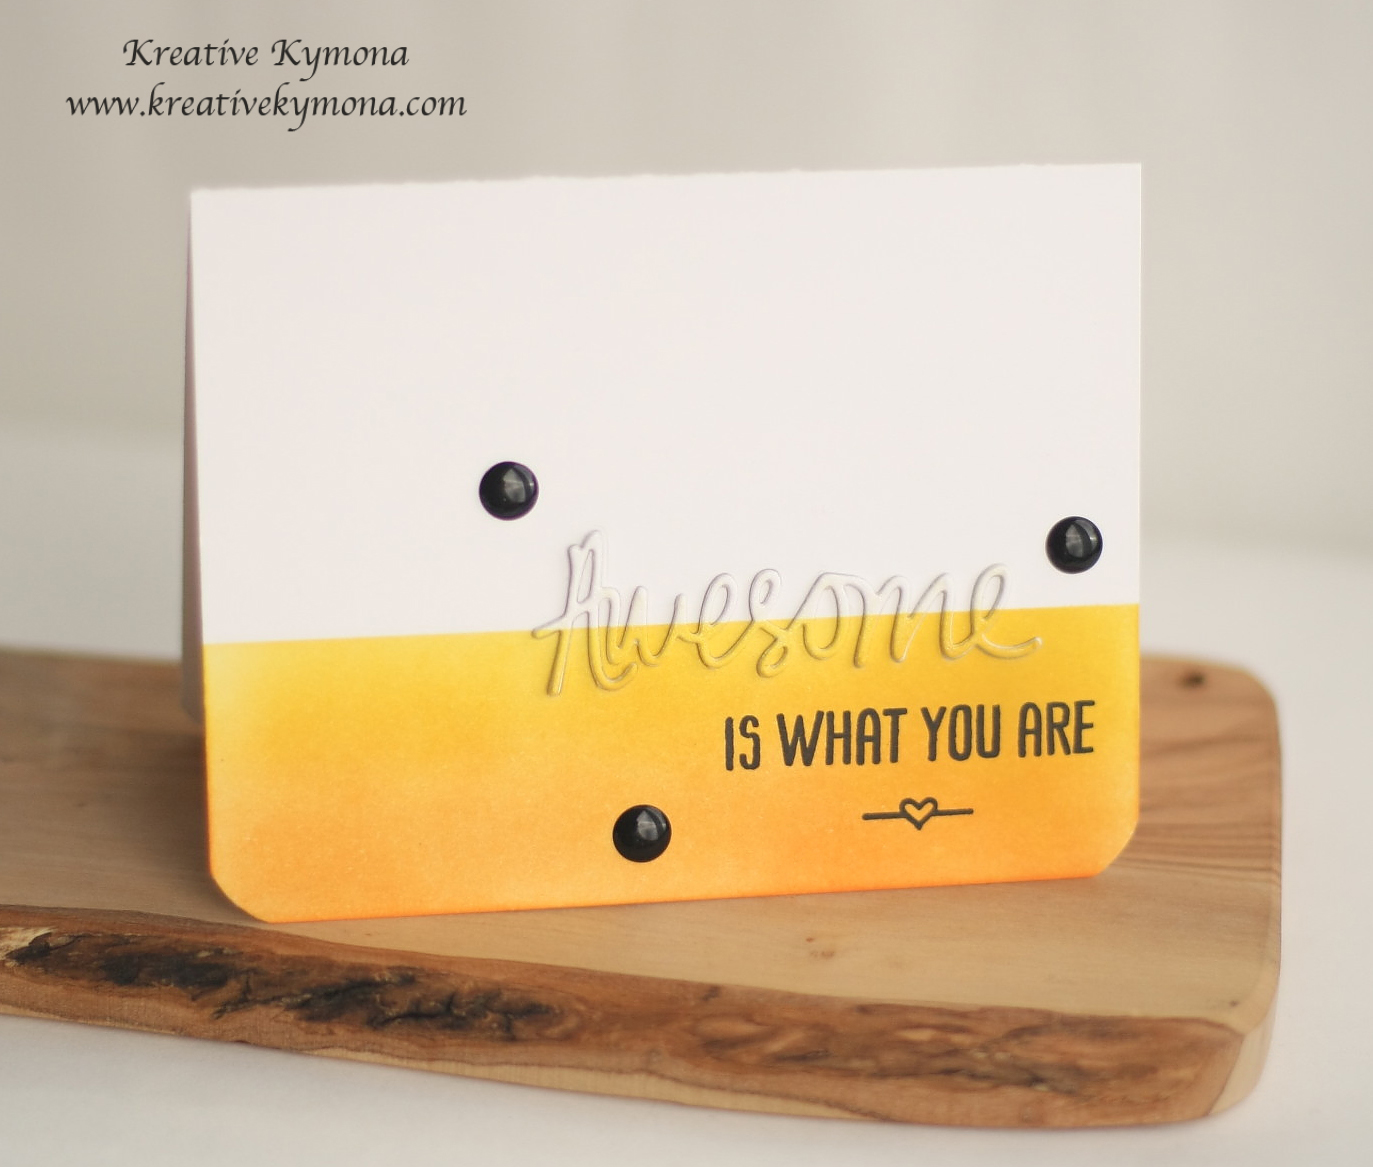
Take a look at the project I am sharing today (the pictures do not do it justice):

Congrats front

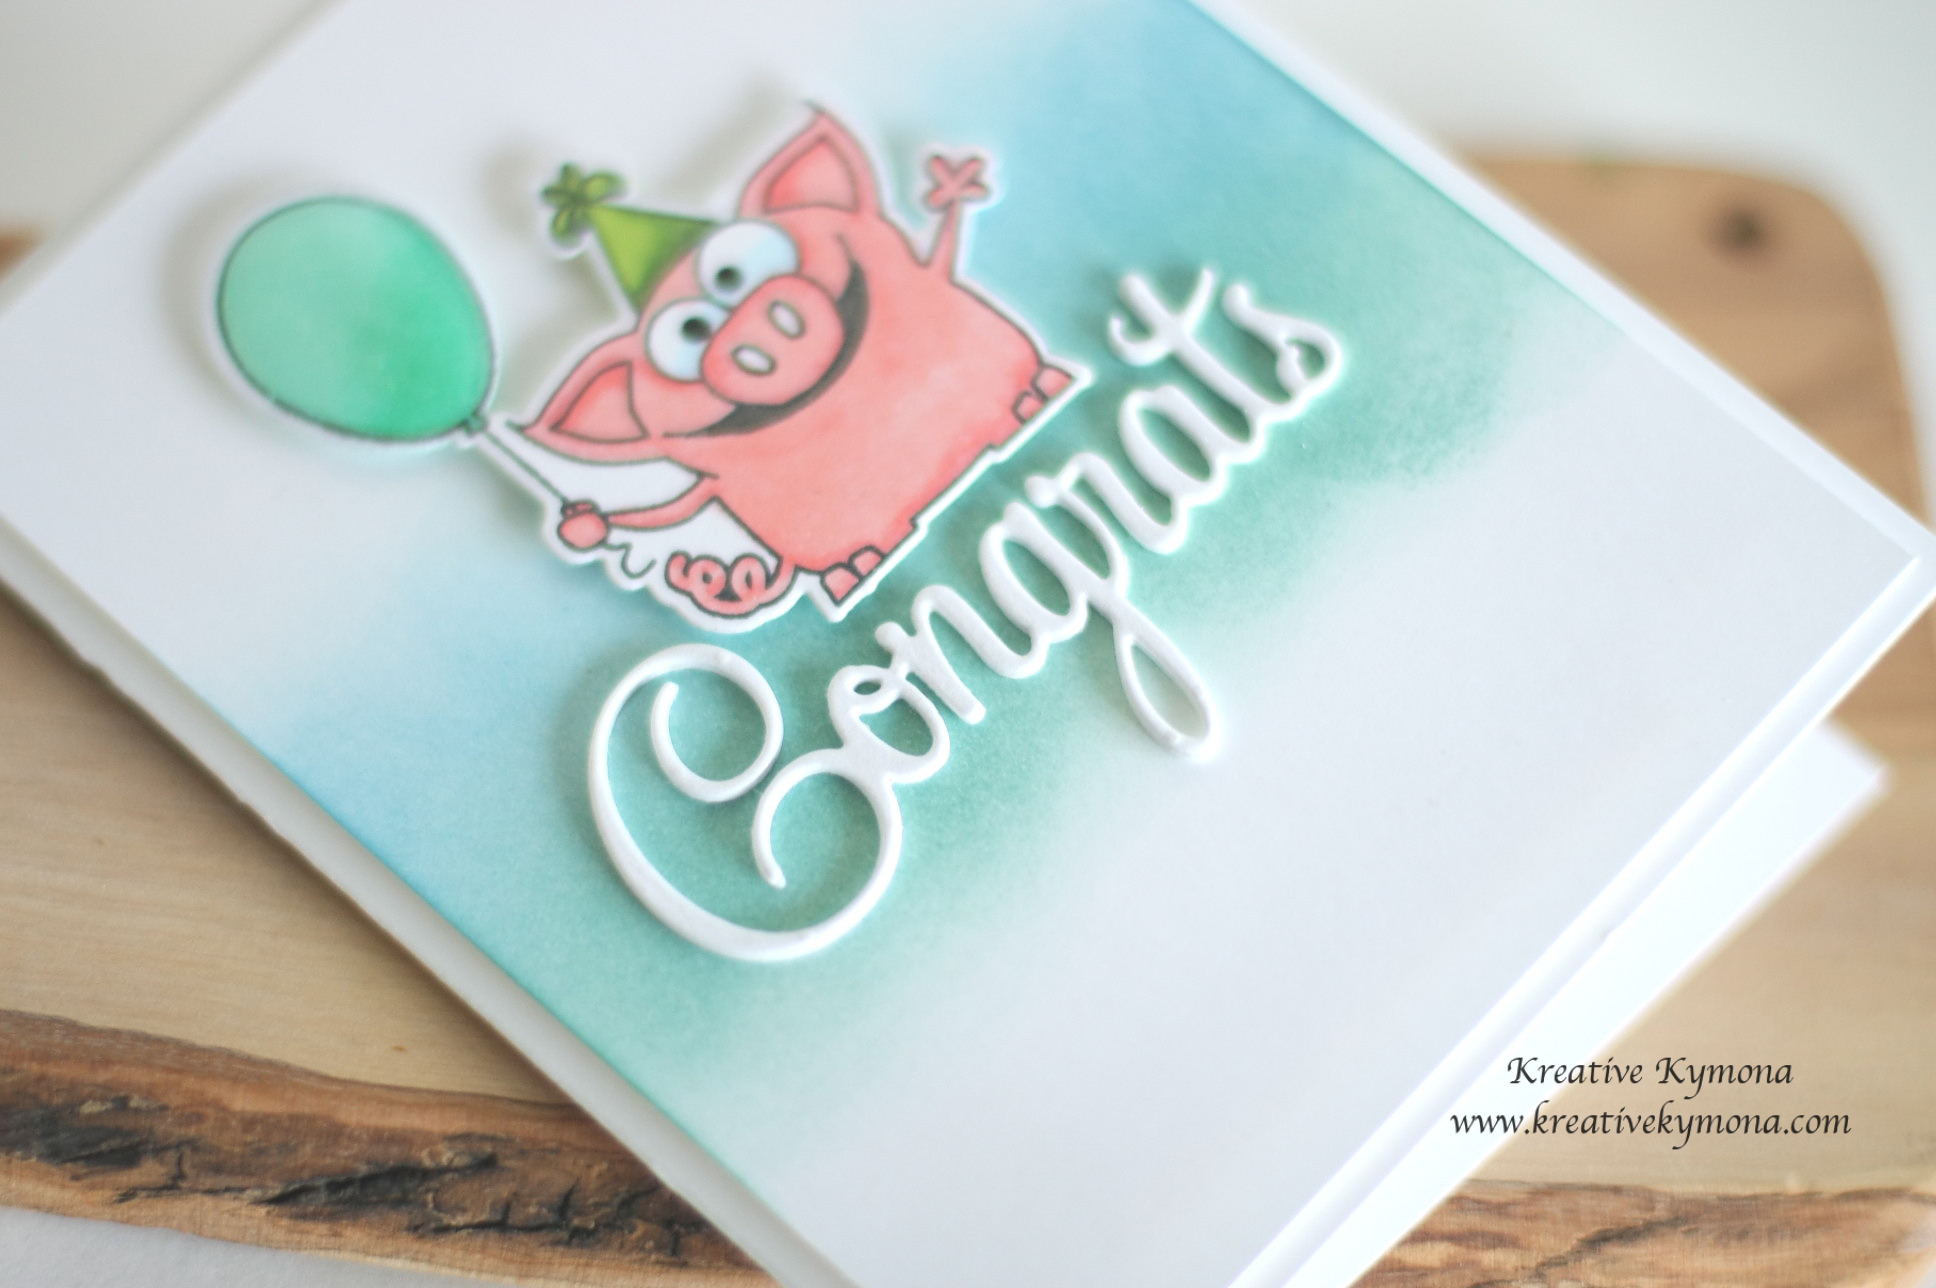
How cool is this little guy!! I had so much fun coloring this little pig from Simon Say Stamps Birthday Farm Animals.  Thanks Kay Miller for the inspiration for this card!!

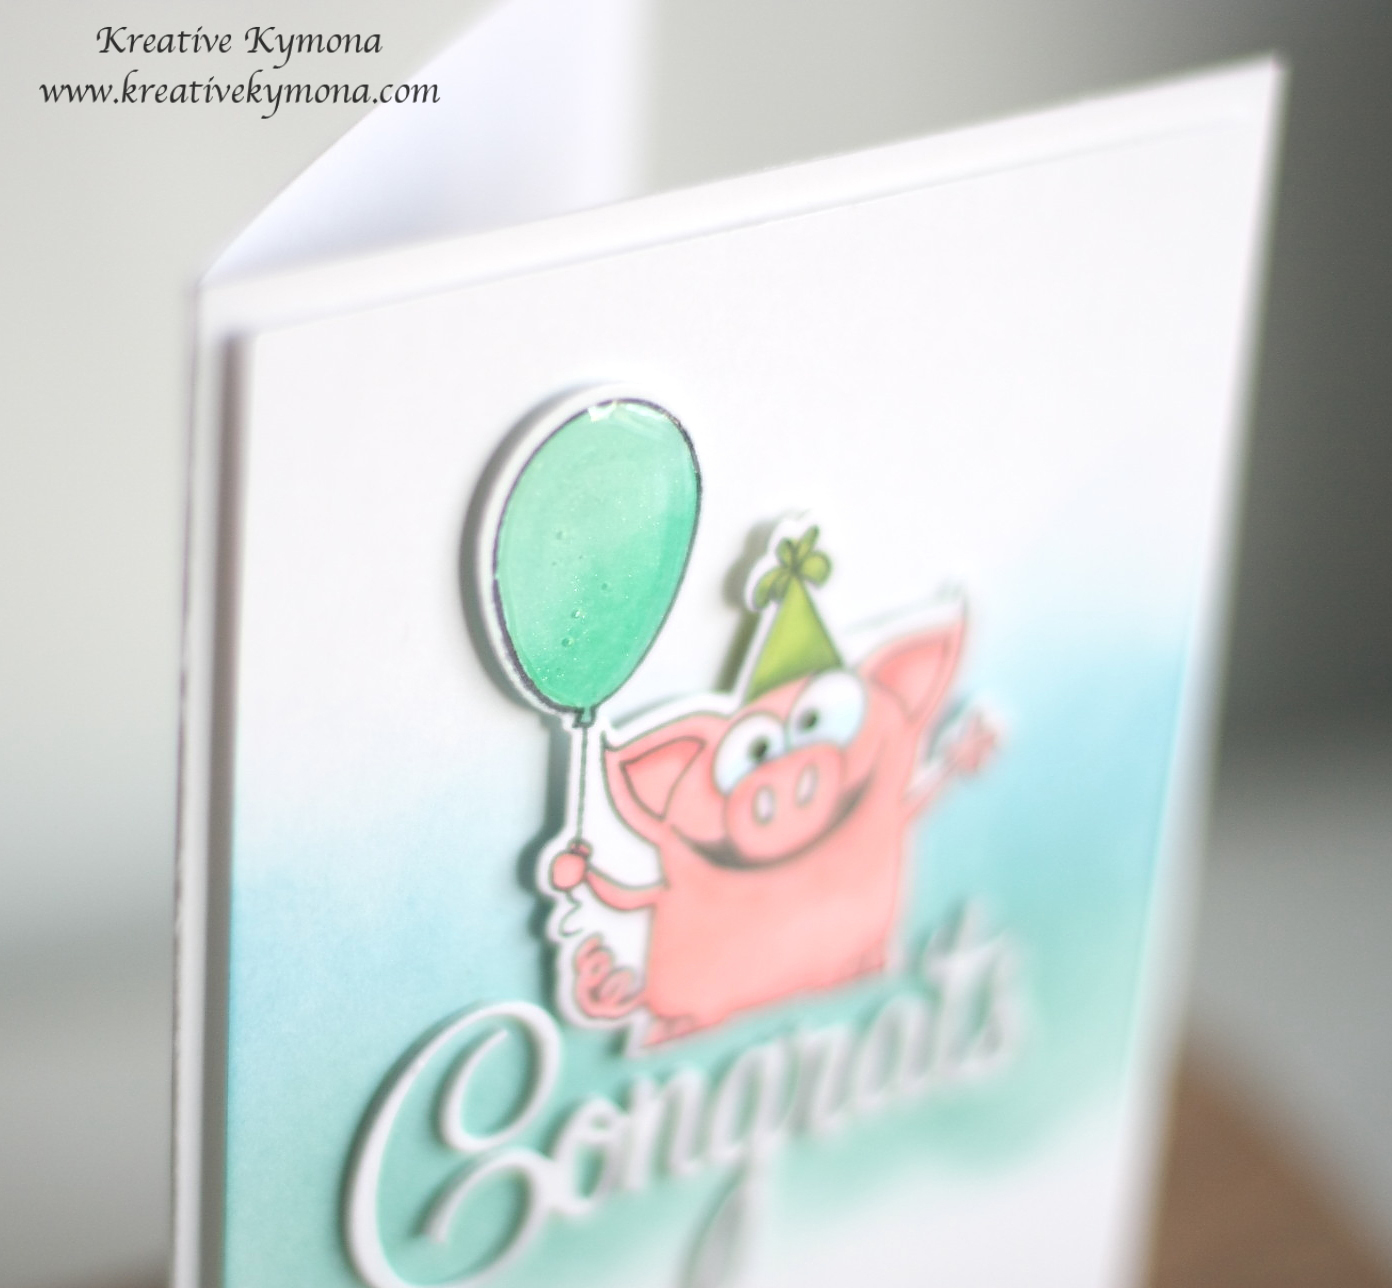
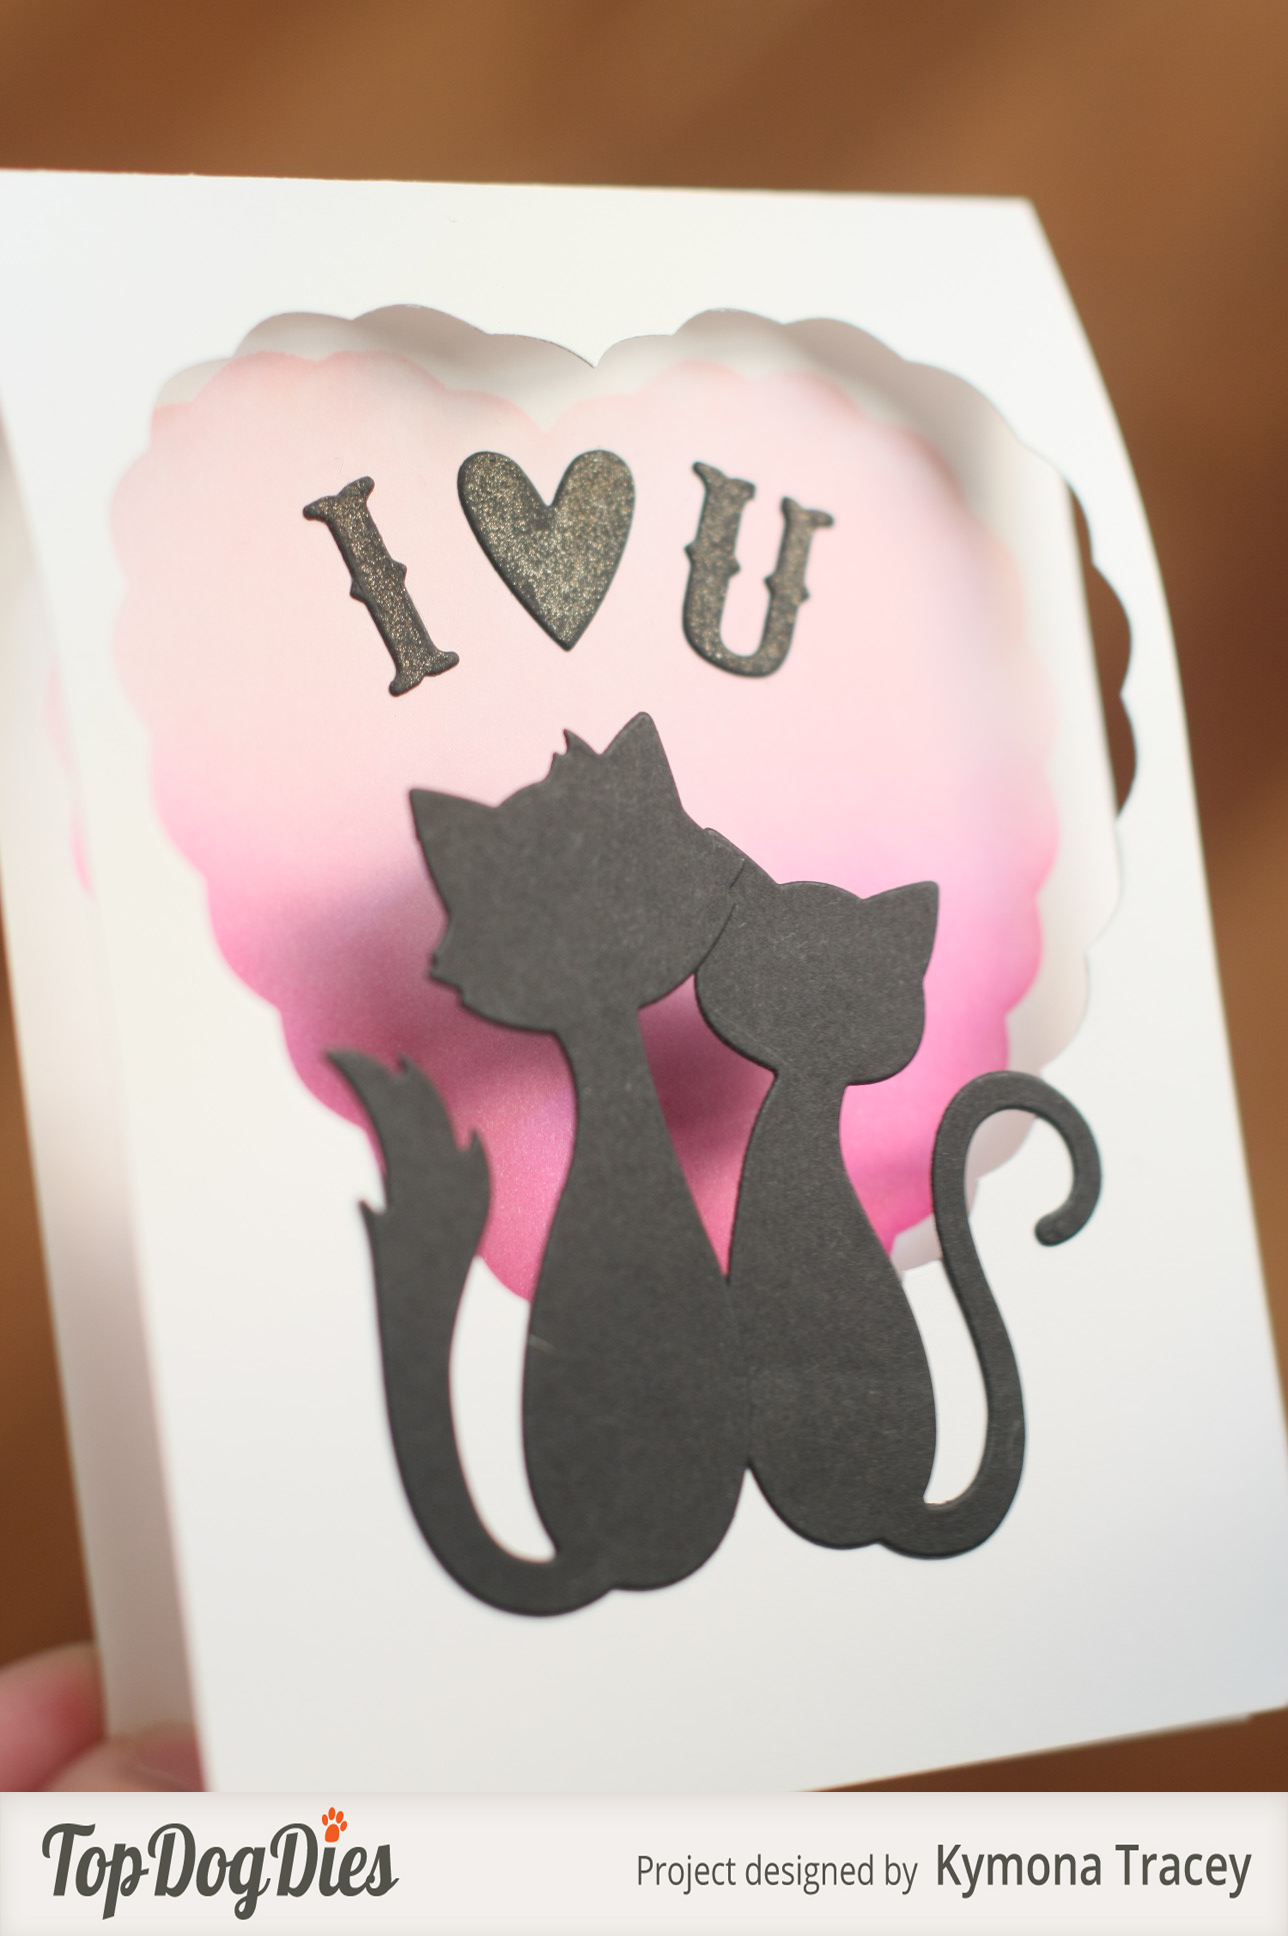
Lets take a closer look at that balloon:

Congrats balloon

Look at that glossy balloon!!  It adds so much to the card.

Lets take a closer look at the die cut “Congrats” from Penny Black’s Creative Dies – Hooray.

Congrats closeup

This card was super easy to create.  I’m going to tell you how.

1. I cut my card base to an A2 size card (4.25 x 5.50) scored at 4.25.

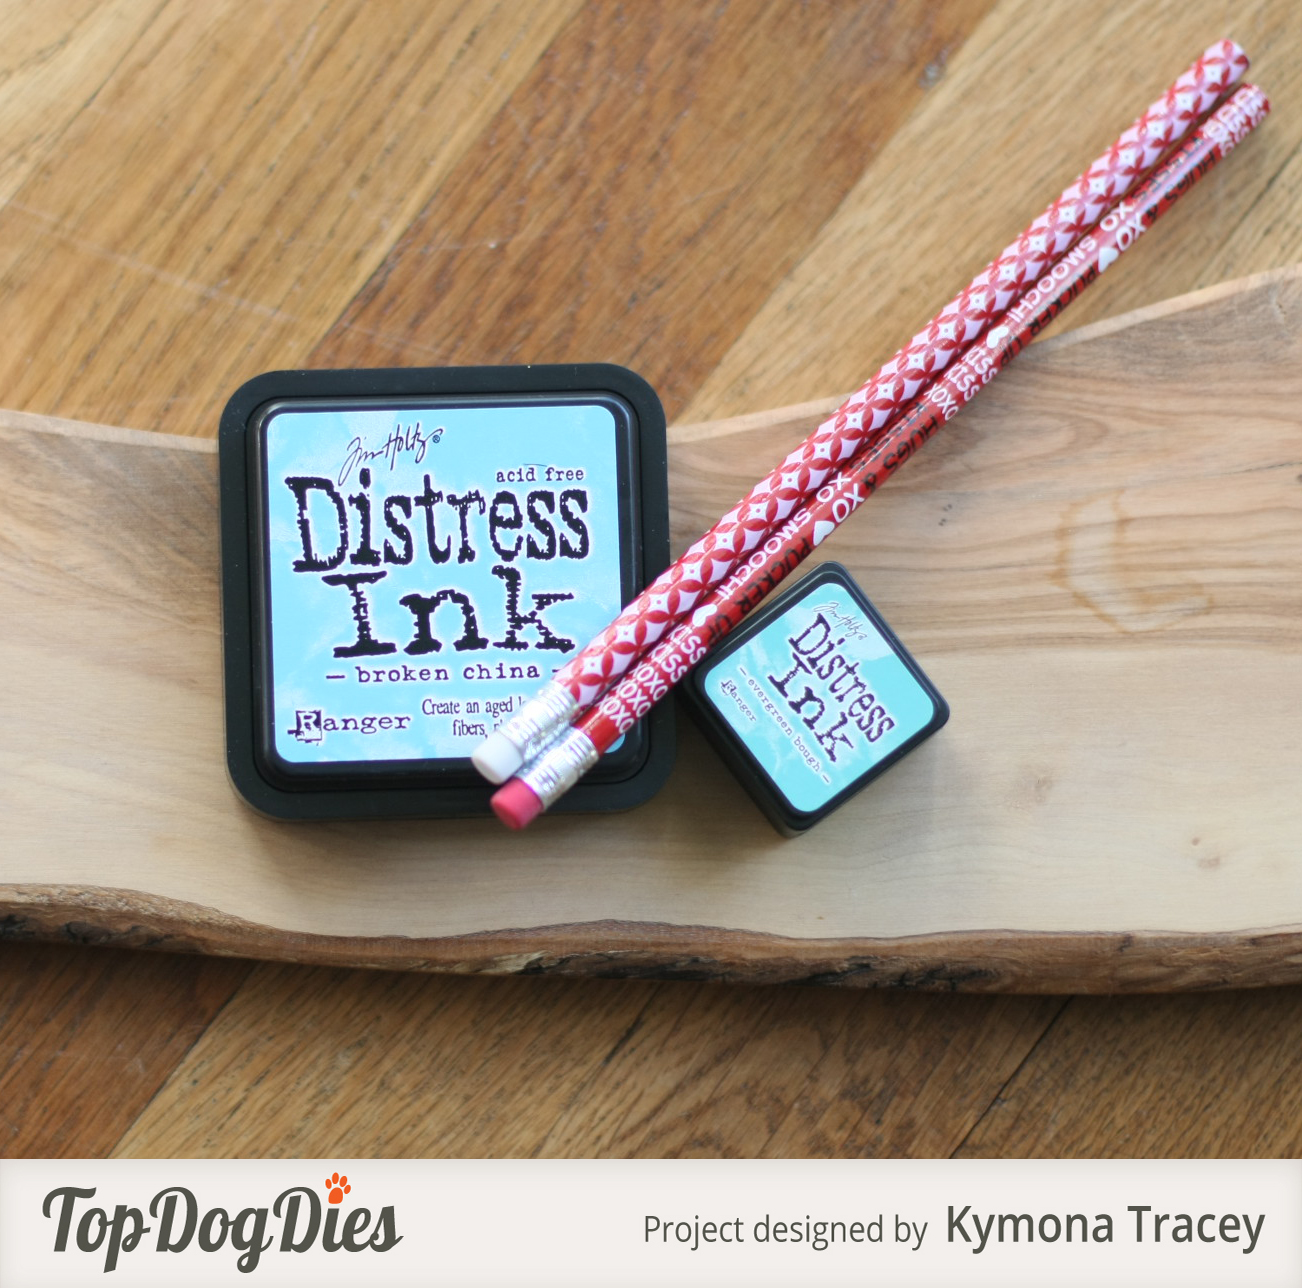
2. I used Distress Inks Evergreen Bough and Salty Ocean to blend the colors across the center of the card.

3. I stamped my party pig with Memento Tuxedo Black Ink because I was using Copic Markers to color in pig.

Copics used: Pig (R20, R22); Pig eyes (BG00); Pig Mouth ( W5, W7); Balloon (BG11, BG34); Party Hat (YG03, YG17, YG67)

4. I added glossy accents to the balloon.

5. I die cut the Congrats 3 times and stacked them on top of each other with  Tombow Multipurpose Adhesive to give the word some dimension, then adhered the word to the center of my card.

6. I added foam adhesive to the back of my pig and balloon and adhered it right above my die cut sentiment.

7. I attached my card panel with foam adhesive and that was it!!

Soooo, what do you think?  Now its your turn!!

The main challenge this month has a HUGE prize up for grabs, all you need to do is enter a project into the challenge to earn your place in the random draw!

As well as the main prize, we are also offering blog hop prizes too….

You can win this fabulous mixed media substrate pack:

Mixed Media prize pack

We have:
MDF collage frame (22cm x 22cm)
2 x Greyboard squares (6″ x6″)
Chunky Box Canvas (5″ x 5″)
MDF plaque (8″ x 6″ x 6mm)
Wooden cube (5cm)
Wooden candlestick (to be used as a stand for the cube, or anything else!) (7.6cm)
Papier Mache House (6cm x 8 cm x 5cm)
Papier Mache Heart (10.5cm)


To win, simply leave a comment on this (or any of the other blog hop) post. When the challenge ends, we will randomly draw a name from the comments left! There is one prize on offer for EACH blog post….so 12 chances to win (13 if you count the HUGE prize for the challenge winner!)

The lucky winners from each blog will not only win a mixed media substrate pack, they will win a piece of original art from the blog author! So, the lucky winner chosen from the comments left here will win the project I have shared above! Winners from the other blogs along the hop will receive the original art shared there too…how cool is that?!

So, leave your comment here, and then hop along to the next blog, the fabulously talented: Linda

Once you’re all done with the hop, don’t forget to enter the main challenge! All the details can be found HERE!

Have fun! I can’t wait to see what you come up with!!

Supplies used:

Birthday Farm Animals51-029_sentimentDistress Ink Evergreen BoughDistress Ink Salty OceanMemento Black InkCopic Markersglossy accents

Thanks for stopping by!!!

~Kymona

So Suzy Stamps – Something New!

Hello everyone!!  I’m over on the So Suzy Stamps blog today showing off her new fancy Phineas the Peacock stamp set!!

Take a look at my card:

Peacock

I totally love this stamp set.  Its so pretty when you get it down on paper.  I went with a white and black color scheme with a pop of Peacock Blue!!

If you want to see how this card was created, head on over to So Suzy Stamps blog to get all of the instructions.

So what do you think? Please let me know.

Now its your turn to play along.  You have time to enter our January Challenge.  The doors closes on January 31st, 2014 at 11:59pm.  I hope to see you there.

Supplies used:

Thank you for stopping by!!
~Kymona

Top Dog Die: Love on The Horizon

Hello everyone!!  I’m here today with Top Dog Dies with another Valentine’s day card for you!

Love will be in in the air soon and I hope your getting ready for the ones you love.  If not, I have a really cute card that is super easy to make for those loved ones.

Take a look at my card:

I Love You frontview(TDD)

Aren’t these cats the cutest you’ve seen!!!  When I saw this die, I knew I wanted them to close together looking out to something.

The male cat wasn’t sure how to tell the female cat “I love you” so he decided to have it written in the sky for her to read it herself!!

I love the ombre effect in the background!

Lets take a closer look:

I Love You (TDD)

Check out the glitter on my die cuts letters and heart shape.

I Love you sideview (TDD)

Check out this side view, so you can see the scalloped edge of the heart on the inside of the card.

So you want to know how I created this card?  Here you go:

1. I used Neenah Solar White cardstock for my card base.  I use Top Dog Dies Heart Doily Die to cut out the heart on the front of my card.

2. I created my own heart stencil out of acetate so that I can create a perfect heart ombre effect on the inside of the card.

3. I used Distress Ink Picked Raspberry and Spun Sugar to create the ombre effect on the inside of the card.

4. I cut the letter and shape from Top Dog Dies Heart Mini Album Finishers Die Set out of black cardstock.

5. I adhered it on the inside of my card and added Clear Wink of Stella for the sparkle.

6. I die cut my cats from Top Dog Dies Cool Cats Die Set out of black cardstock.

7. I adhered the cats with regular adhesive.

That’s it!! So what do you think?  I love how the cats are looking at the horizon together.  Beautiful!!

I would love to hear what you think.

Before I go, Top Dog Dies has a Little B Giveaway going one right now. One lucky Winner will receive $113 in Little B Crafting Products.

littleb_promo_150106

You have 3 chances to win. Enter by January 25, 2015!! Check out Little B Dies here.

Supplies used:

classiccrestsolarwhtieTDD Heart Doily DiePicked Raspberry InkSpun Sugar InkMini Ink Blending ToolTDD Heart Mini Album Finisher Die SetWink of Stella clearTDD Cool Cats Die Set

Thanks for stopping by!!

~Kymona

CASology 129 – NBUS

Hello everyone!!  I’m here today with the CASology Design Team this weeks Challenge.

We are combining challenges with Darnell Knauss NBUS (Never Been Used Schtuff)!

Week 129 - NBUS          NBUS

Yayyyyy, how much fun is that!! I have sooooo much schtuff that I’ve never used before, choosing what to use was not hard at all.

Take a look at my card:

AwesomeThe die cut and stamp set from Lil’ inkers designs are new!!

Here is how I created this card:

1. I cut my Neenah Solar card stock to an A2 size card (4.25 x 5.50) scored at 5.50.

2. I used painters tape to score off the bottom have of my card so that I could do some ink blending.

3. I used Distress Ink Spiced Marmalade and Mustard Seed to create the color at the bottom of my card.

4.  I die cut Lil’ inker designs Awesome Word Die out to the card base between the white and the color blend.

5. I cut a piece of lightweight cardstock, added adhesive and attached it to the inside of my card front.

6. Then I die cut the word Awesome 3 more times so that the word will pop up off of the card. I stacked the word on top of each other with Tombow Multipurpose Adhesive.

7. I inlaid the word back in the card. The adhesive was already on the the card panel that I added in step 5.

8. I stamped my sentiment underneath the die cut word using Lil’ inker designs Hello, Awesome.

9.  I added some My Mind’s Eye Charmed Black Enamel Dots to the front of the card.

Easy peasy!!

What do you think?  I would love to hear from you.

Supplies used:

classiccrestsolarwhtieSpiced MarmaladeMustard SeedMini Ink Blending ToolLID Awesome Word DieTombow Multi-Purpose AdhesiveLID Hello Awesome Stamps My Mind's Eye Enamel Dots

Thanks for stopping by!!

~Kymona