Tag You’re It Challenge

Hell everyone!!  I popping in really quickly to play along with Tag You’re It Challenge this week.

Marybeth is the Designer this week and this is what she came up with:

TYIC+%2326


I love the butterfly on her tag so I wanted to give it a try!

I created these watercolor background pieces the other day and want to use one of them to create my tag.

Watercolor pieces

Take a look at my tag:

You make me smile upright

I love that watercolor piece and didn’t want to hide it so I decided to create my second tag using acetate to create my second tag.

You might be able to see it better here:

You make me smile tag flat


My sentiment is from Papertrey Ink Lunchbox Love Stamp Set and I stamped it in Versamark Ink and embossed it with Stampin’ Up! Gold embossing powder.

I punched out two butterflies using Stampin’ Up! Elegant Butterfly Punch and their Bitty Butterfly Punch out of the same watercolor piece.

I adhered everything with glue dots and added the Papertrey Ink Baker’s Twine Cream Cotton to finish off my tag.

Easy Peasy!! What do you think?  Let me know below in the comment section.

Supplies used:

PTI Lunchbox Love  VersamarkSU Gold Embossing PowderElegant Butterfly PunchSU Bitty Butterfly PunchPI Bakers Twine Cream Cotton


Thank you for stopping by!!

Kymona

Valentine Tag

Hello everyone!!  I’m here today with a couple of challenges that I haven’t played along with for a while now.

I couldn’t sleep last night so I decided to do what I do best which is to craft!!  I made a ton load of cards.  I’m so excited about that.

So, today I’m playing with:

DoubleClick Skittles Challenge

Use a heart!

DoubleClick Skittles

and

Tag  You’re it! Challenge

TYIC_Header

Debby Hughes is the guest designer for Challenge #14.  I totally love her work so I knew I wanted to play along with her.

Take a look at her tag:

Debbie Hughes 14graphic

I created a water color piece for another card and decided to use some of that for a focal point on my tag.

Watercolor piece 2

I used my Koi Watercolors to create this piece.  I spritz some Heidi Swapp Gold Color Shine (which is on sale at Michael’s for $5.99 (in the store)). I love the gold shimmer.

Now take a look at my tag:

ValentineDon’t you just love that heart!!  I love how that watercolor piece turned out. I punch a bunch of hearts from that watercolor piece.

Take a closer look at my tag:

Heart close up

I added some gold shine to that watercolor piece.  I love how it turned out.  So do you want to know how I create this tag?

Well here you go:

I die cut my tag using Reverse Confetti Tag Me, Too Confetti Cuts out of Crate Paper “Kiss Kiss” patterned paper.

I used Crate Paper Kiss Kiss Rub Ons to add the circle hearts to the center and the sentiment at the bottom of my tag.

I used Stampin’ Up! Sweetheart Punch and punch a heart out of my watercolor piece that I created.

I adhered the heart to the center of that circle.

I added Rose DoubleClick Skittles from the Sweet Love Release to the bottom of my tag.

I added Ruby True Hemp to the tag.

So what do you think?  Let me know, I would love to hear from you.

Supplies used:

Tag Me Too SSS February CK 2014Kiss Kiss rub onSweetheart PunchRuby True HempHeidi Swapp Color Shine PackKoi Watercolors

Thanks for stopping by!

~Kymona


Winter Friends Gift Tags!!

Hello everyone!!  I’m here today with the DoubleClick Skittles Challenge!!

This month’s theme is Christmas!!!  I’m super excited about this challenge.  There are so many neat stamps, stencils, die cuts with a Christmas theme that the possibilities are endless.

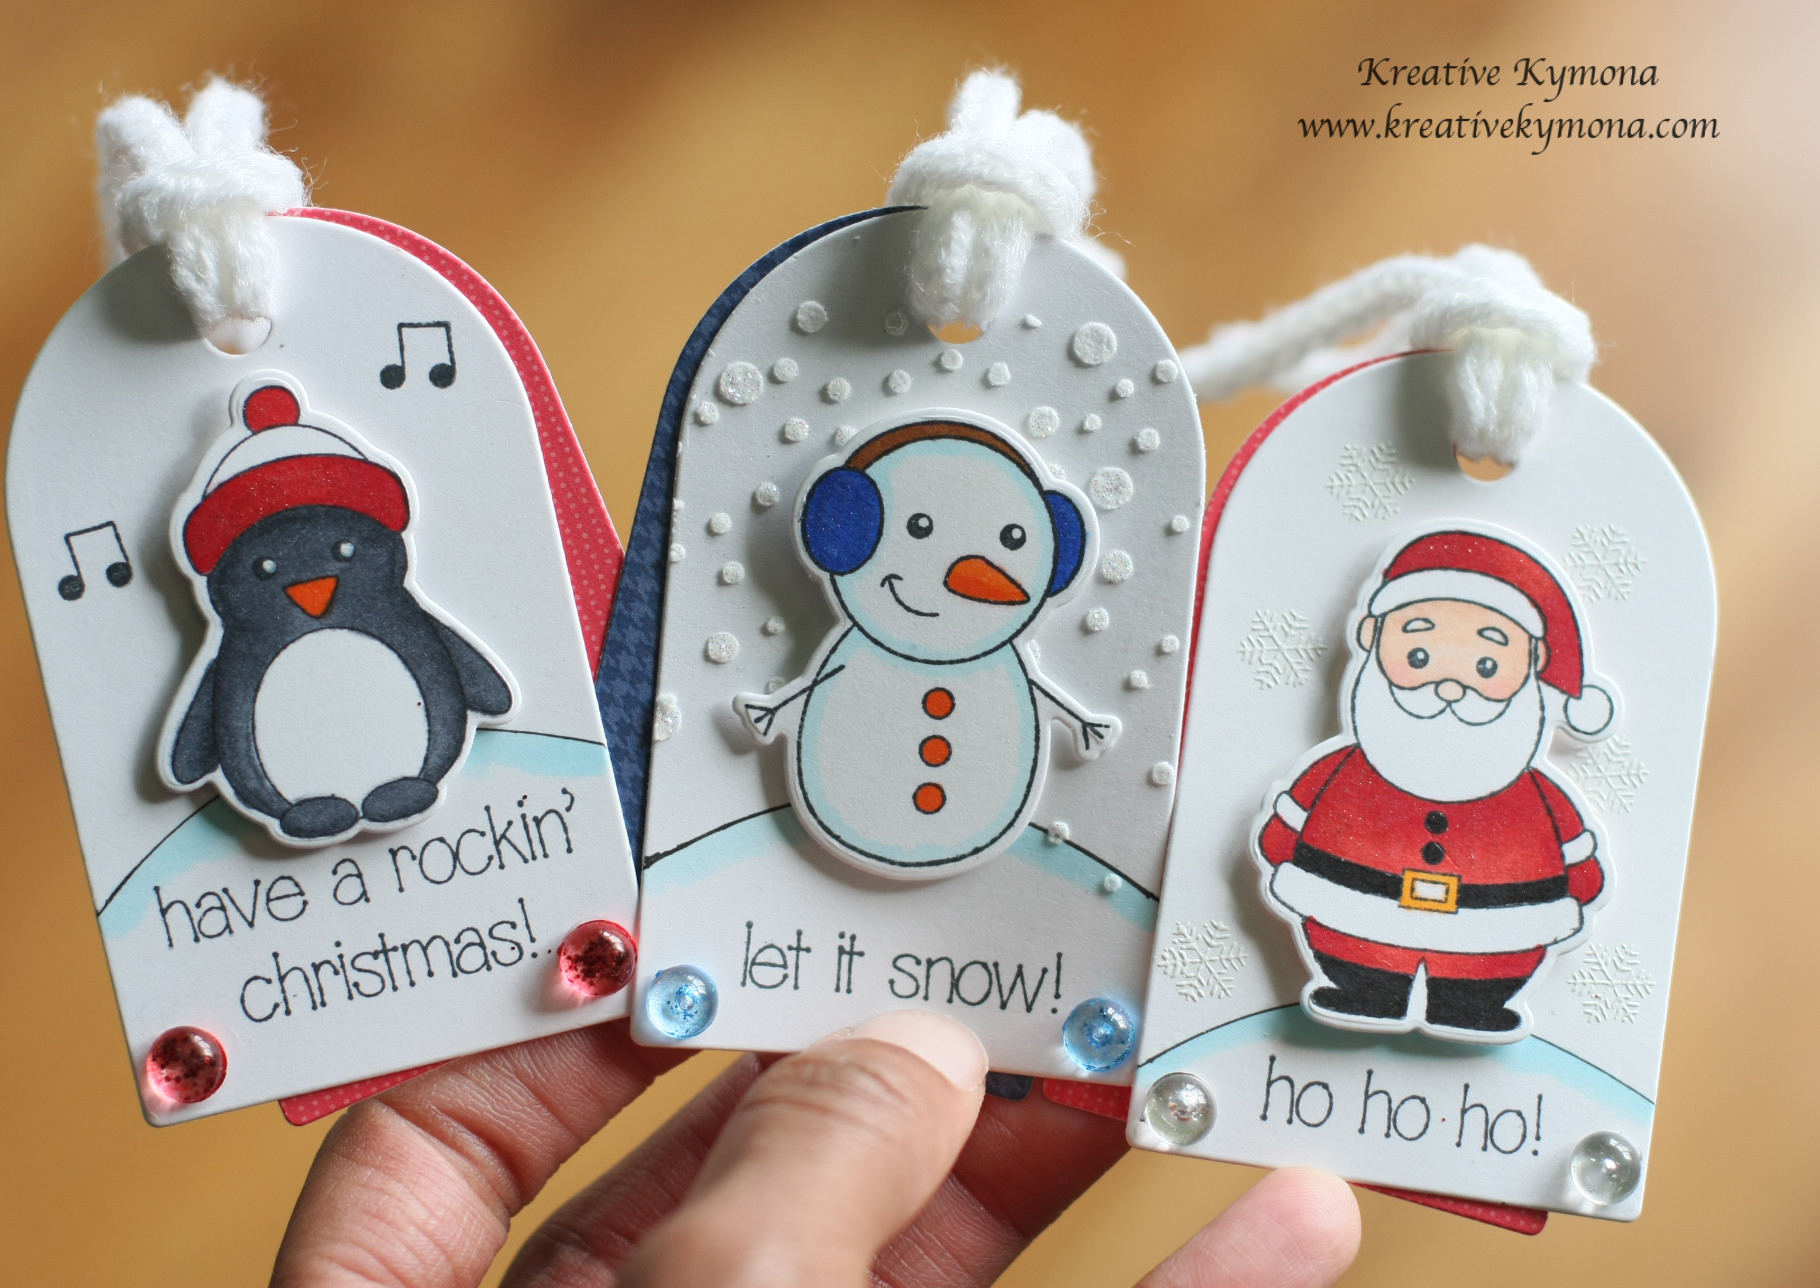
I decided to create Christmas gift tags for this challenge.  Oh boy did I have fun with this challenge.  I created not one, not two, but three tags for you today.

Take a look at my tags:

Winter Friends Gift Tags

Aren’t these the cutest tags you’ve seen.  I love these winter friends paired with my Skittles of different colors!!

For all of these tags:

1. I die cut these tags using Clearly Besotted Rounded Tag die.

2. The pattern paper that I used was Lawn Fawn Snow Day and Sweater Weather.

3. I stamped and die cut my images using Simon Say Stamp Winter Friends stamp set and die cut.

4. All of them have a different color Skittles: Rudolph, Slate and a Frosty Glitter.

5. Each image was colored with Copic markers.

Now lets take a closer look at each tag:
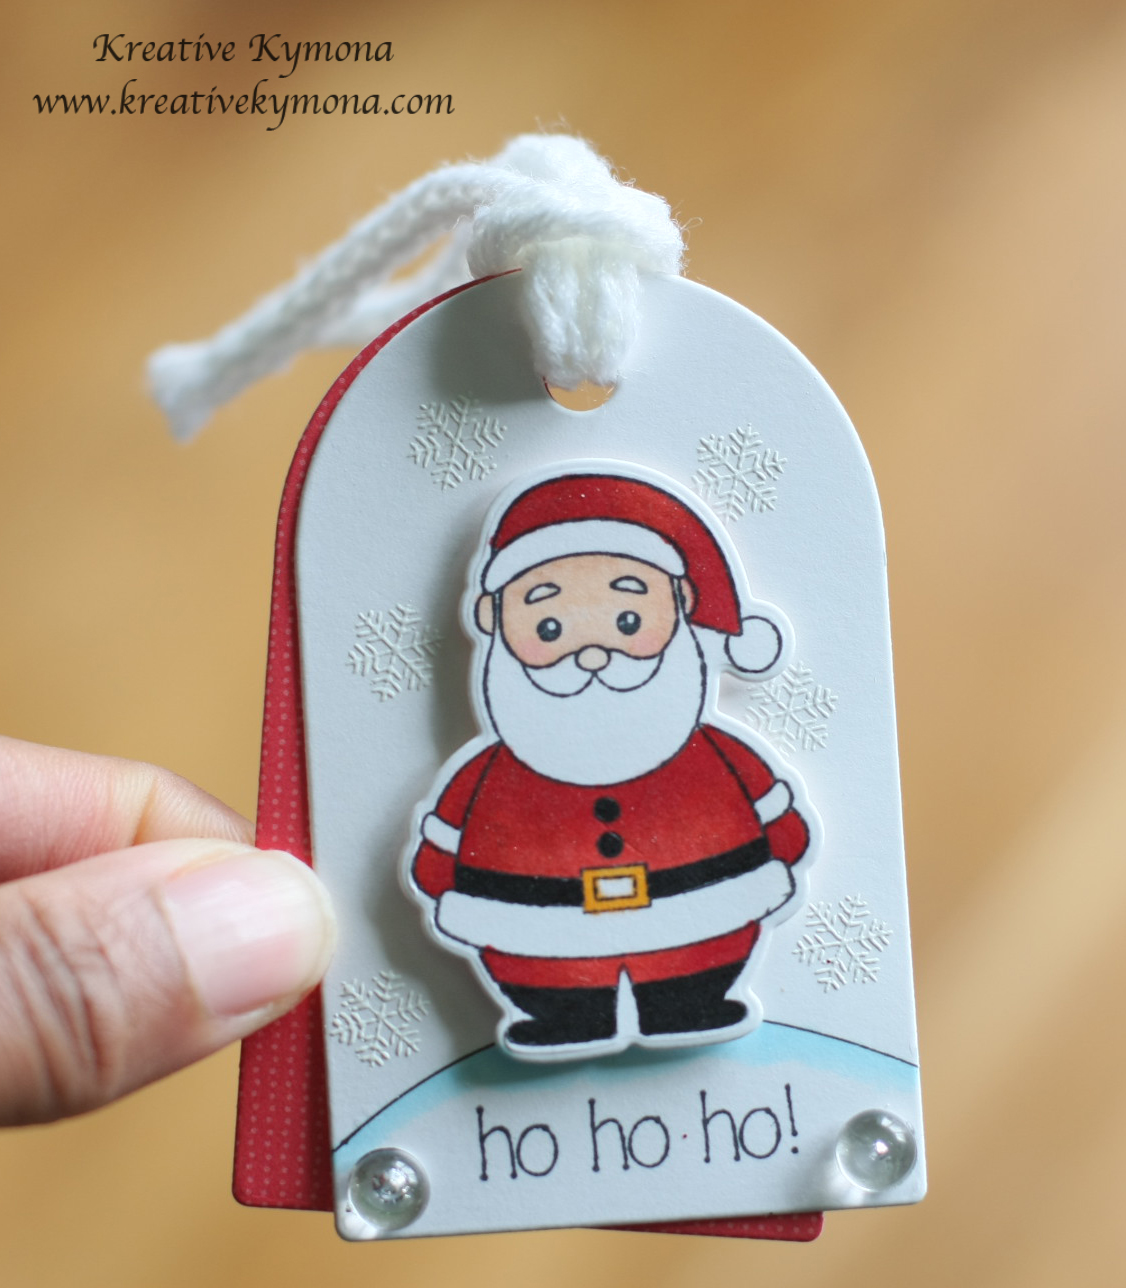
Santa Tag

For this tag:

1. I stamped the snowflake with Versamark ink and covered them with Hero Arts White Embossing Powder.  I heat set the images.

2. I drawn in a curved line and used my B000 Copic Marker to create a shadow that resembled snow.

3. I stamped my sentiment under the hill.

4. I stamped my image with Memento Black Ink and colored him in with Copic Markers: Coat and hat: R24, R27, R29, R46; Belt: 100; Buckle Y35; Face: E00, E11, R20. Then he was die cut out.

5. Foam adhesive was used to pop him up off the tag.

6. The front tag was adhered to the red tag with regular adhesive.

7. I added Slate Skittles to the left and right of the sentiment.

8. I used Stampin’ Up! retired Sweater ribbon to finish off my tag.

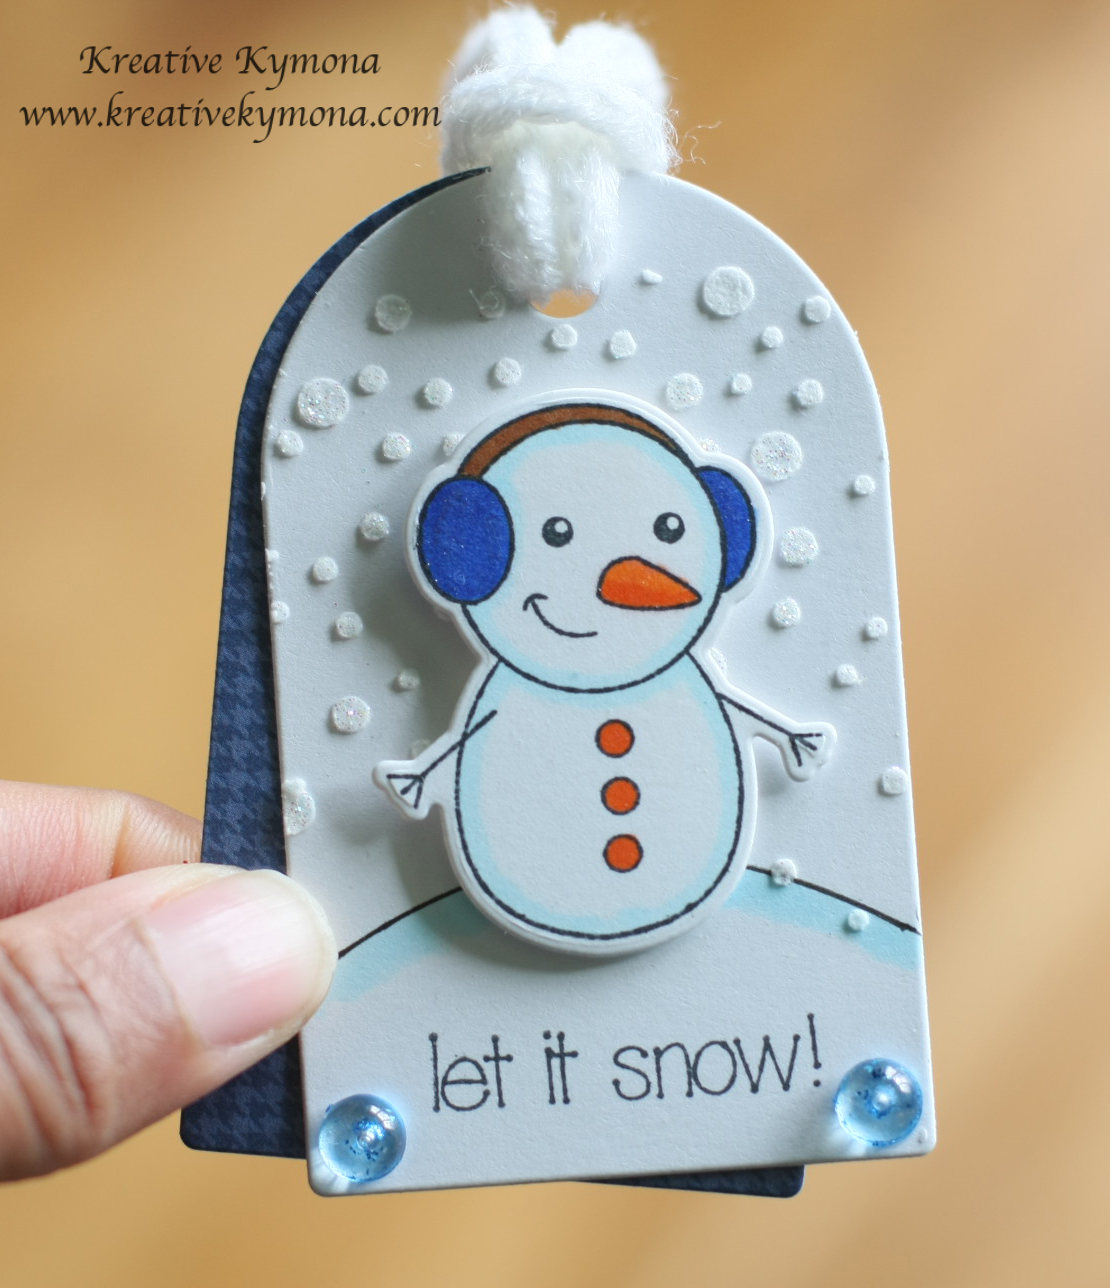
Take a look at my second tag:

Snowman Tag

For this tag:

1. I used Simon Says Stamp Falling Snow Stencil and Embossing Paste to create the snowy background.  I added Distress Glitter Clear Candy Rock  for the glitter look.

2. I stamped and colored my image with Copic markers. Then I die cut it out.

3. The rest of the directions are above.

4.I’m entering this tag into the Simon Says Stamp Flickr Stencil Challenge.

Now to the last tag:

Penguin tag

For this tag:

1. I stamped the musical notes for this tag.

2. Then I followed all of the directions up above.

What do you think about my give tags!!  Please let me know.  I would love to hear from you.

Now its your turn to join us and play along with our challenge this month.  I hope to see you there!!

I’m also entering these tags in the Tag You’re It Blog Challenge.

TYIC_12


Supplies used:

Clearly Besotted Rounded Tag DieSweater Weather Petite Paper Pack Lawn Fawn Snow Day PaperWinter FriendsRudolph Red Skittle slate skittles Frosty Glitter Skittle Copic MarkersVersaMarkHero Arts White Embossing PowderMemento Black Ink3M Mounting TapeTombow XtremeSSS Falling SnowEmbossing PasteDistress Stickles clear rock candy

Thanks for stopping by!!

~Kymona

Warm Holiday Wishes Tag

Hello everyone!!  I’m here today playing with Tag You’re It!!  This is my first time playing with them.  I’m happy I found them.  I recently started making tags and I love them.  They are super fun to make.

TYIC_12

The TYIC Designer for his challenge is Tracey McNeely and her tag is fabulous!!

When I looked at her tag, I thought of pops of color.  So I decided that I wanted to have a pop of color on my tag too.

Take a look at my card:

Warm Holiday Wishes

I love that pop of that Cable Car Red Wow embossing powder on my gloves.

Warm Holiday Wishes sideview

Not along is it a tag, but it doubles as a card too!!  So you can write your message inside instead of the back.

This is how I created my tag:

I cut two tags out of Bazzill Marshmallow cardstock using Reverse Confetti Tag Me, Too.

I used Simon Says Stamp Big Holiday Wishes stamp set to stamp my snowflakes with Versamark ink.  Then I embossed them with Hero Arts White Embossing Power.

I stamped my sentiment using Versafine Onyx Black Ink.

I stamped the mitten string with Versafine Onyx Black ink around the hole in the tag.

I stamped my mittens using Versamark ink and embossed with Cable Car Red Wow Emobossing Powder.

I fussy cut the mittens out and adhered them with foam adhesive. I added Clear Wink of Stella on my mittens for a sparkly shine.

I attached my second tag to the back of the first tag with adhesive to create a tag that opens.

I strung Stampin’ Up! Retired Whisper White Sweater Ribbon to finish off my tag.

Nice and easy.  So what do you think?


Supplies:

Cable Card Red embossing powderTagMeToo1 Bazzill Marshmallow CS Big Holiday WishesVersaMarkHero Arts White Embossing PowderOnyx Versafine Ink3M Mounting TapeWhite Sweater RibbonWink of Stella clear

Thank you for stopping by!

~Kymona