{Clean and Simple} CASology 230 – Cold

Hello everyone and Happy New Year CASology Family!!  It’s CASology Tuesday!!  We are back with another Clean and Simple Cue Card just for you!!

This week’s cue card:

week-230-cold

Take a look at my card:

happy-winter-cas

For this week’s cue card I used the snowman and sentiment from the Rubber Dance Stamp Frosty Friends stamp set.  I picked up my Copic Markers again this week.  I actually miss using them so it was fun to play with them for this challenge.

I simple stamped the snowman and the sentiment using the Mini Misti for precision stamping. I love seeing crisp black edges so using the Misti is so important.

I colored the snowman with  BG0000,B000, C4,C6, R37,R39, R89, E37, Y38 and YR68.

Nice and easy!

Are you inspired to play along?  Please let me know below!

For more inspiration, check out my fellow Design Team members blog for more awesome work.

Deidre Payne

Hannelie Bester

Hazel Hodgkins

Jacquie Southas

Janet Ribet

Jen Wills

Joyce Mehrberg

Judy Marino

Kymona Tracey

Melissa Chipperfield

Rachel Bergfeld

Sherrie Mannion

Our sponsor this week is Rubber Dance Stamps!

I’m playing along with Rubber Dance Stamps Challenge too!!

rdjan2017ch

Supplies used:

frosty-friends

Thank you so much for stopping by!

~Kymona

YNS Feature Day – Tags

Hello everyone!!!  I’ here today with another YNS creation to inspire you and a chance to win a stamp set of your choice!!

On the 22nd of the month, YNS Design Team creates more samples featuring YNS products and shares them with all of you!!

The super duper awesome part of it all besides our awesome samples, you could win a stamp set of your choice!!  Now how super cool is that!!

Scroll to the bottom to find out how!!

This month we are focusing on “Tags”!!  The DT created a set of tags for this project.

My favorite technique is creating shaker tags. I love creating the shaker pockets.  Its so much fun and relaxing.

Now take a look at the tags I created to inspire you:

merry-and-bright-yns

YNS Supplies: Cool Tag Three Die Set, Snow Much Fun Snowman Stamp Set

Other Supplies: We R Memory Keepers Fuse Tool, We R Memory Keepers Fuseables Clear Sheets, Lucy Abrams Sequin (retired), Stampin Up! Sweater Ribbon (retired)

What do you think?  Would you give this technique a try? Let me know below.

Now on to that prize!!

DTDare2candy-547x232

All you have to do is leave a comment on the YNS blog by November 26th for a chance to WIN a YNS stamp set of your choice!!  Super simple and easy!!  You will get to see my fellow DT’s projects as well.

So head on over, you don’t want to miss this one!!

Thanks for stopping by!

~Kymona

Your Next Stamp November 2016 New Release


nov2016hopbadge-1

Hello everyone!!  Yayyy, I love this blog hop featuring new products from Your Next Stamps makes squeal!! LOL!!

This release is super cute!!  Yesterday’s sneak peek was fun.

If you’ve been hopping along, you would have arrived from Elle‘s blog and if you’d like to start from the beginning, you can click on over to the linky at the bottom of this post and start at Martha‘s blog.

My favorite set from this release is the Snow Much Fun Snowman Stamp Set! Its down below.

Are you ready for my big reveal?

Take a look at my cards:

Card one:

thank-you-snow-much-yns

YNS Supplies: Snow Much Fun Snowman Stamp Set, Winter Scene Border Die

Other Supplies: Recollections Heavyweight White Cardstock ,Colorbox Archival Wicked Dye Ink, Copic Markers, Bo Bonny Altitude Paper pad (discontinued)

Working with this snowman was so much fun.  I’m not a snow fan but this snowman would be fun to play with.

Card Two:

holiday-hello-yns

YNS Supplies: Huggles Christmas Star Stamp Set

Other Supplies:Recollections Heavyweight White Cardstock, Colorbox Archival Wicked Dye Ink, Tombow Irojiten Tranquil Coloring Pencils, Wendy Vecchi Embossing Paste, Simon Says Stamp Falling Star Stencil

This bear and his gingerbread man were so easy to color.  I enjoyed working with both of these stamp sets.  I promise you, you will too.

So, what do you think?

I had so much fun creating these cards to inspire all of you and show you the versatility of the stamp sets! Which one of these items are favorite?  I would love to hear from you!

Be sure not to miss any blog along the way, because 1 lucky commenter will have a chance to win a $25 YNS gift certificate. Winner will be announced on the YNS blog on November 10th.  So don’t forget to leave a comment on each of the blogs participating in the blog hop.

Don’t forget to take advantage of the special promo code to get
20% off your entire purchase!!

nov2016hopsalebadge

Thank you for stopping by!!

~Kymona

Your Next Stamp October 2016 New Release

oct2016hopbadge

Hello everyone!!  Yayyy, I love this blog hop featuring new products from Your Next Stamps makes squeal!! LOL!!

This release is super cute!!  Yesterday’s sneak peek was fun.

If you’ve been hopping along, you would have arrived from Deborah’s blog and if you’d like to start from the beginning, you can click on over to the linky at the bottom of this post and start at Kendra’s blog.

My favorite set from this release is the Merry Christmas Chickie Stamp Set! Its down below.

Are you ready for my big reveal?

Take a look at my cards:

Card one:

happy-holidays-yns

YNS Supplies: Holiday Buddies

Other Supplies: Recollections Heavyweight White Cardstock ,Colorbox Archival Wicked Dye Ink

These mini cards were made as a gift for my daughters teacher.  She will get 32 cards one for each student to color and address to a family member of their choice!  My daughter can’t wait to give these to her.

Card Two:

merry-christmas-snowglobe-yns

YNS Supplies: Joy to the World

Other Supplies:Recollections Heavyweight White Cardstock, Colorbox Archival Wicked Dye Ink, Arctic Skies Sparkly Shaker Selection by Lucy, Bo Bonny Altitude Paper pad (discontinued), We R Memory Keepers Fuse Tool, We R Memory Keepers Photo Sleeves

Now I’m a sucker for shaker cards so I had to create one using this stamp set with the snowglobe.  How cute is this.  Nice and simple yet super interactive.  I can’t wait to create more of these.

So, what do you think?

I had so much fun creating these cards to inspire all of you and show you the versatility of the stamp sets! Which one of these items are favorite?  I would love to hear from you!

Be sure not to miss any blog along the way, because 7 lucky commenter will have a chance to win a $25 YNS gift certificate. Winner will be announced on the YNS blog on October 5th.  So don’t forget to leave a comment on each of the blogs participating in the blog hop.


Don’t forget to take advantage of the special promo code to get
20% off your entire purchase!!

oct2016sale

Thank you for stopping by!!

~Kymona

YNS Sketch and Color Challenge #26

Hello everyone!!!  I’m here today with Your Next Stamp (YNS) and the Sketch and Color Challenge #26!!

Each challenge has a sketch and a color combo to choose from.

Take a look at the sketch:

YNSSketch26

Take a look at the color combo:

YNScolor-26

I went with the sketch this time around.  I’m not sure I totally went with the entire sketch.  I have to admit, this one was hard.  I hope I inspired you.

Take a look at my card:

Hugs (YNS)

YNS Supplies: Sprinkles – Hoppy Holidays Stamp Set, Crystal Clear Gumdrops

What do you think?  Did I follow the sketch? Let me know below.

So are you ready for the new challenge?

You have until November 12th at midnight EST to play along and submit your project on the YNS Blog post.  One random participant will win a $15 gift certificate to the Your Next Stamp Store.  If YNS stamps or dies are the focal point then the winner receives and additional $5 gift certificate fro a total of $20.  The winner will be announced on the YNS Blog the Sunday after the challenge closes.

I hope to see your projects!!

Supplies used:

clear gumdrops small Sprinkles-Hoppy HolidaysFaber-Castell Polychromos Pencils Bo Bunny Altitude Pattern Paper Charcoal

Thank you for stopping by!

~Kymona

Top Dog Dies – Texture

Hello everyone!!!  I’m here with Top Dog Dies!!  I’m here showcasing one of their new dies that was released 3 weeks ago!!

Lets jump right in!

Today I’m working with the Top Dog Dies Snowman Die Set!! It’s a super doper cute die set and the possibility are endless!!

TDD Snowman Die Set

Take a look at my that I created with this die:

Dashing through the snow2 (TDD)

I love this cute snowman die!!  Look at all of that stitching!  Nice texture.

Here is how I created this card:

  1. I die cut my snowman out of different colors of paper. I put the snowman together.
  2. Then I draw a hill line on my cardstock.
  3. I stamped The Ton Stamps Holiday Lyrics using My Favorite Things Hybrid Ink.
  4. After that, I place Simon Says Stamps Stencil Falling Snow  on top of the cardstock and layered Wendy Vecchi Embossing Paste.
  5. Before the paste dried, I sprinkled some Distress Glitter Clear Rock Candy on top of the snow to give it some sparkle and shine.

Super fun to create!!

What do you think? Let me know below!!

Supplies used:

holiday lyrics MFT Hybrid Black Ink SSS Falling SnowEmbossing PasteNeenah Desert Storm CS

Thank you so much for stopping by!

~Kymona

Top Dog Dies – October 2015 Release

Second post for today
If your looking for the Your Next Stamp October 2015 Release, click here

hpr-newdies-101315

Hello everyone!!  I’m Top Dog Dies Wednesday and their October 2015 Release!!

This one is a good one.  You’re going to love these dies!

Take a look:

TDD Polar Bear Die SetTDD Penguin Die SetTDD Cardinal Die SetTDD Snowman Die SetTDD Pocket Page Winter Die SetTDD Snowflake Mosaic Die Set

Don’t you just love these dies!!!

Check out a couple of cards I created using three of these sets:

All you need is love 2 (TDD)

TDD Supplies:  Top Dog Die Polar Bear Die Set

Other Supplies: Mama Elephant Smitten Stamp Set, Bo Bunny Altitude Pattern Paper, Ranger Distress Glitter and My Favorite Things Hybrid Ink

Baby its cold outside2 (TDD)

TDD Supply: Top Dog Dies Snowman Die Set

Other Supplies: Lawn Fawn Toboggan Together Stamp Set, Ranger Distress Glitter,  The Ton Holiday LyricsMy Favorite Things Hybrid Ink and Distress ink Chip Sapphire and Salty Ocean

You're My Favorite (TDD)

TDD Supplies: Top Dog Dies Cardinal Die Set

Other Supplies: Mama Elephant Smitten Stamp Set, Copic Markers, My Favorite Things Hybrid Ink

Supplies:

ME Smitten Stamp Setholiday lyrics Distress Glitter Bo Bunny Altitude Pattern Paper TobogganTogether MFT Hybrid Black Ink Copic Markers Chipped SapphireSalty Ocean mini

Thank you so much for stopping by!!

~Kymona

Winter Friends Gift Tags!!

Hello everyone!!  I’m here today with the DoubleClick Skittles Challenge!!

This month’s theme is Christmas!!!  I’m super excited about this challenge.  There are so many neat stamps, stencils, die cuts with a Christmas theme that the possibilities are endless.

I decided to create Christmas gift tags for this challenge.  Oh boy did I have fun with this challenge.  I created not one, not two, but three tags for you today.

Take a look at my tags:

Winter Friends Gift Tags

Aren’t these the cutest tags you’ve seen.  I love these winter friends paired with my Skittles of different colors!!

For all of these tags:

1. I die cut these tags using Clearly Besotted Rounded Tag die.

2. The pattern paper that I used was Lawn Fawn Snow Day and Sweater Weather.

3. I stamped and die cut my images using Simon Say Stamp Winter Friends stamp set and die cut.

4. All of them have a different color Skittles: Rudolph, Slate and a Frosty Glitter.

5. Each image was colored with Copic markers.

Now lets take a closer look at each tag:

Santa Tag

For this tag:

1. I stamped the snowflake with Versamark ink and covered them with Hero Arts White Embossing Powder.  I heat set the images.

2. I drawn in a curved line and used my B000 Copic Marker to create a shadow that resembled snow.

3. I stamped my sentiment under the hill.

4. I stamped my image with Memento Black Ink and colored him in with Copic Markers: Coat and hat: R24, R27, R29, R46; Belt: 100; Buckle Y35; Face: E00, E11, R20. Then he was die cut out.

5. Foam adhesive was used to pop him up off the tag.

6. The front tag was adhered to the red tag with regular adhesive.

7. I added Slate Skittles to the left and right of the sentiment.

8. I used Stampin’ Up! retired Sweater ribbon to finish off my tag.

Take a look at my second tag:

Snowman Tag

For this tag:

1. I used Simon Says Stamp Falling Snow Stencil and Embossing Paste to create the snowy background.  I added Distress Glitter Clear Candy Rock  for the glitter look.

2. I stamped and colored my image with Copic markers. Then I die cut it out.

3. The rest of the directions are above.

4.I’m entering this tag into the Simon Says Stamp Flickr Stencil Challenge.

Now to the last tag:

Penguin tag

For this tag:

1. I stamped the musical notes for this tag.

2. Then I followed all of the directions up above.

What do you think about my give tags!!  Please let me know.  I would love to hear from you.

Now its your turn to join us and play along with our challenge this month.  I hope to see you there!!

I’m also entering these tags in the Tag You’re It Blog Challenge.

TYIC_12


Supplies used:

Clearly Besotted Rounded Tag DieSweater Weather Petite Paper Pack Lawn Fawn Snow Day PaperWinter FriendsRudolph Red Skittle slate skittles Frosty Glitter Skittle Copic MarkersVersaMarkHero Arts White Embossing PowderMemento Black Ink3M Mounting TapeTombow XtremeSSS Falling SnowEmbossing PasteDistress Stickles clear rock candy

Thanks for stopping by!!

~Kymona

Winter Wishes and Black Friday Scavenger Hunt!!!!

Hello everyone!!  Kymona here from Kreative Kymona and I’m super excited to be here with all of you today.  I get to make a big announcement!!!

Happy Black Friday!!! 

I hope everyone enjoyed their Thanksgiving!  So much food and family, I love this having all of my brothers and sisters around.  All of us live in different states, so the holiday time is always special for me.  So now that all of the eating, laughing and reminiscence is over, its time to shop for all of those great deals.  Yayyy!!!!!

Wait, wait before I get into the fun we have in store for you, let me share the card I made for our current challenge:

Anything Goes copy

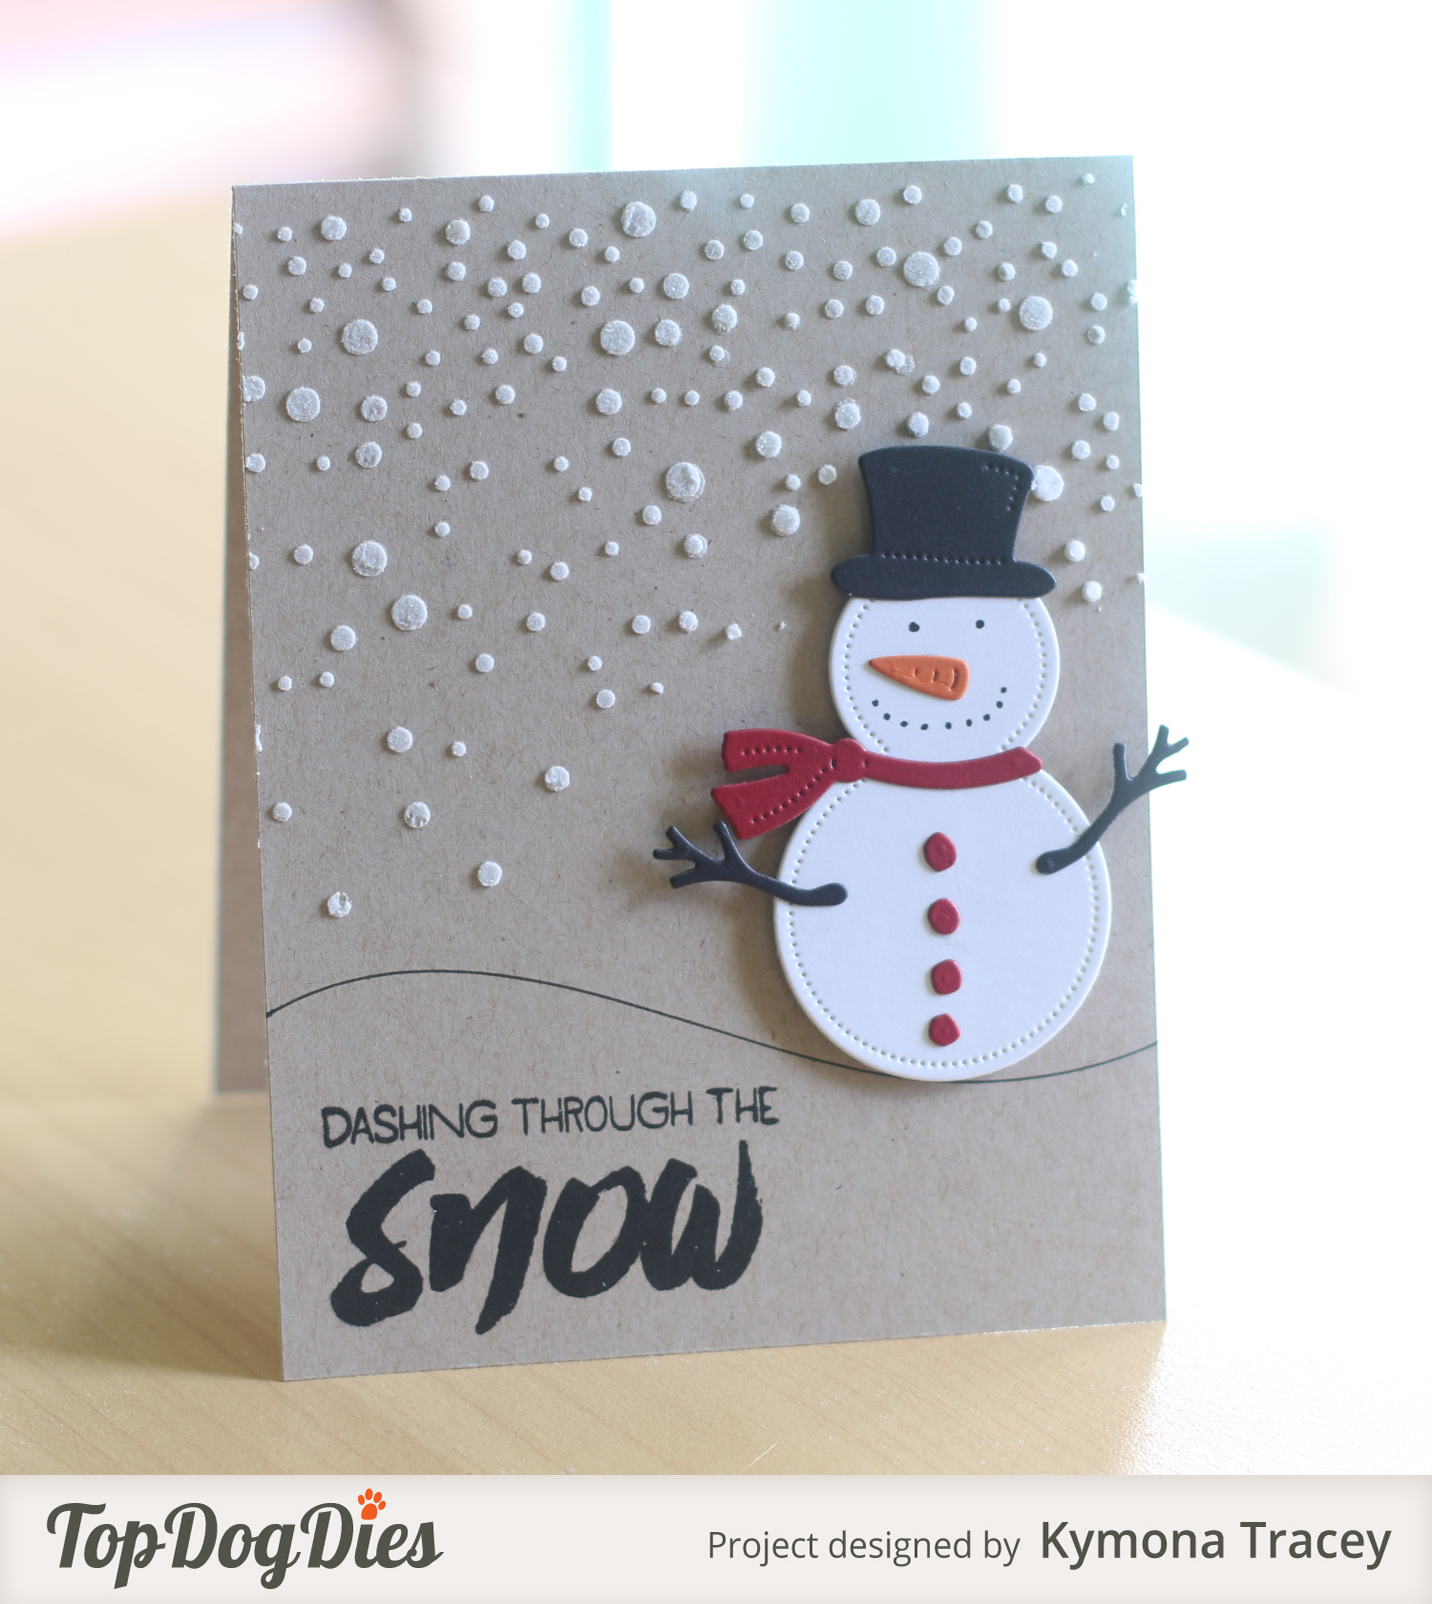
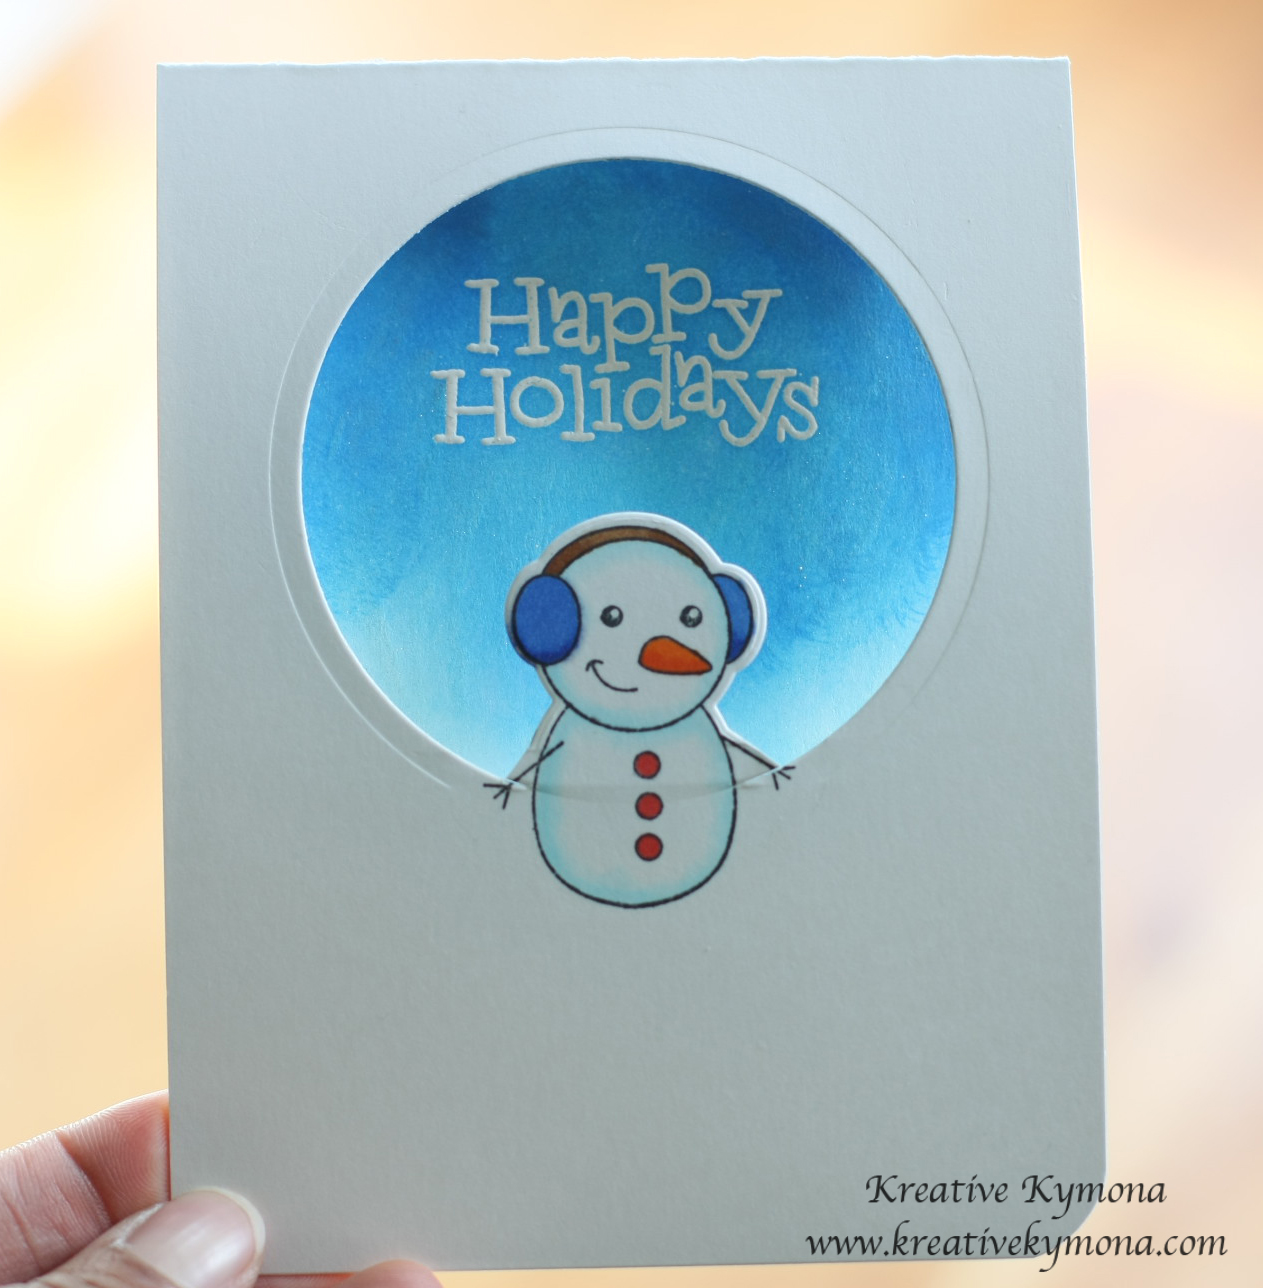
My card uses on of my favorite Hero Arts stamp set and die. Take a look at my card:

Warm Wishes

I love this snowman! I think he so cute. I love how we can decorate him however we want. I also thought he was appropriate for my post today since everyone shops for Christmas presents today. This little guy should get you ready for a long lines today.

Take a closer look at the glitter on his hat and scarf:

Warm Wishes close up

Isn’t he just the cutest!! I combined this set with the sentiment from the Hero Arts Stamp and Cut Let it Snow set.

To fine out how I created this card please head on over to the a2z Scrapbooking blog for further details.

So what do you think of my snowman!! Let me know!! I would love to hear from you!!

The snowman, snowman die cut, the sentiment and gems can all be found at the a2z Scrapbooking Store. If you would like to purchase any of the supplies I used please head on over to the store and use the coupon code KYMONA15 to get 15% off your purchase.

I hope my card gives you some inspiration to participate in our Current Challenge. It runs to the end of the month, which ends in a couple of days. So hurry and create!

You have a chance to win a $25.00 gift card to the a2z Scrapbooking Store. Hope to see you there!

Now onto our special event for Black Friday!!

Scavenger Hunt

Photo source

a2z Scrapbooking is sponsoring a super fun contest that starts right now and ends Midnight (EDT) on Monday – December 1st.

Here is how it will work:

1. On the blog today you will fine Ten Questions that need to be answered. The only way to get the answers is to go on a Scavenger Hunt in the a2z Scrapbooking store.

2. When you find all of the answers, you have to email them to: a2zScrapbooking@comcast.net No later then Midnight, December 1st.

3. One winner will be chosen from all of the correct entries and will be announced on the a2z Scrapbooking Blog on Wednesday, December 3rd.

4. The prize is a $25 Gift Certificate to the store!!! How awesome is this!! No lines, no pushing or shoving, your in the comforts of your own home. Don’t you just love this!!

Off you go to find the answers to all of these questions. Good luck to all of you who participate in this contest. Who will be the first to find all of these answers? I can’t wait to see who wins.

Reminder, the scavenger hunt ends Monday, December 1st at Midnight. So email your answers in before that time.

One more thing before I go, did you know that we are on Twitter, Instagram and Facebook. If you haven’t done so already, please follow us on these different social media outlets!! You don’t want to miss out on any fun promotions!!

I’m also entering this card into Simon Says Stamp Wednesday Challenge: Anything Goes.

wed-newchallenge-header

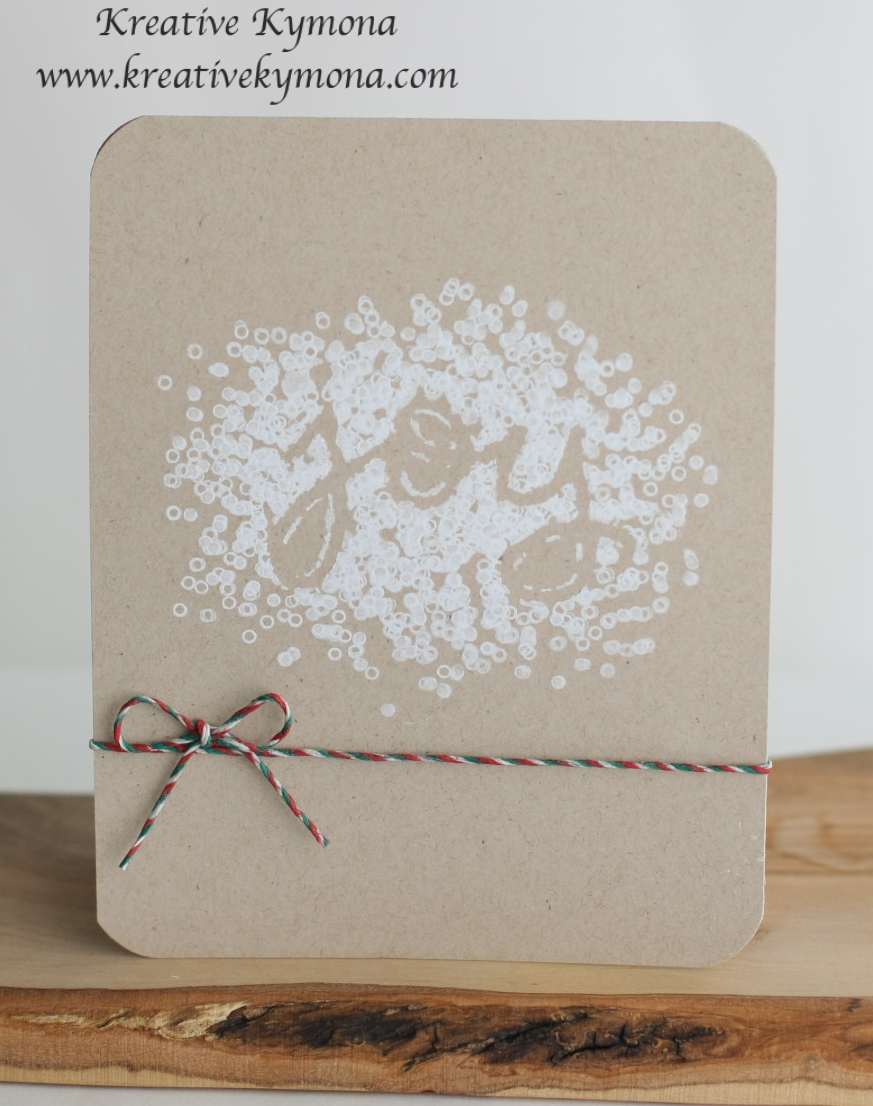
I’m also here with Simply Create Too SNOW, SNOW, SNOW or All White Challenge #75 for the first time.

1 - SC2  GROUP BADGE

Supplies used:

Snowman Die cuts Frosty Wishes Hero Arts Black Ink Raspberry JamDiamond Gems 5mmSnow Layering PaperKraft CS Let It Snow

Thank you for stopping by!!

Kymona

Holiday Card Workshop Day 4

Hello everyone!!  I’m here with my homework from Day 4 from my Online Card Class Holiday Card Workshop.  I’m so happy I’m able to complete some of my homework.  There are times when I don’t get to finish all my assignments, so to be able to get them done this time around is great for me.

Day 4 lessons focused on One-Layer Cards.

Our instructors today were:

1. Jennifer McGuire with a Window Card

2. Laura Bassen with Create a Scene

3. Julie Ebersole with Simple Masking

Now on to my cards.  Lets start with:

1. Jennifer taught us a double partial die cutting trick.  I really love this technique and will be using it on more of my cards.

Here is my card:

Snowman

Yes, this card has two separate die cuts.  Can you believe that?  I know, neat isn’t it.

Lets look at the inside of the card:

Snowman InsideI heat embossed my sentiment, cut a circle stencil and inked my circle with distress inks.  I add clear wink of stella to the circle.  I colored a piece of white cardstock with the same Copic marker I used on the snowman’s buttons.  I punch a heart and adhered it to the circle.

I loved the card so much I made another.  Take a look at my second card:

Santa Die cut

Isn’t this Santa just the cutest you’ve seen.  I really like my coloring of this Santa.  I’m not to fond of the background but it will do.

In fact the snowman should have this background and the Santa should have the other background.

Take a look at the inside of the card:

Santa Inside

I think I put to much glitter on this circle.  What do you think?

Now on to the next card:

2. Julie taught us how to mask off an area and stamp in that area to create a silhouette.

I’m not sold on my card but I tried, take a look:

Joy

Julie used die cut of a deer with antlers, her cards look so much better.  I have to give this technique another try.

Julie created another card that I will try to do tomorrow.  I also have to work on the card Laura taught us.

I will be back tomorrow with those cards.  Stay tuned!!

Supplies used:

Snowman and Santa Card:

Winter FriendsCopic MarkersSalty Ocean Distress InkTumble Glass Distress InkCircles Framelits DieItty Bitty Accents Punch PackWink of Stella clearclassiccrestsolarwhtie


Joy Card:

Scripty Joy Mistletoe Lawn Trimmings Hero Arts Unicorn Pigment InkSSS Khaki cardstockconfetti

So what do you think?

Thanks for stopping by!

~Kymona