Craft Fantastic Slide Bangles

Second Post for today
If your looking for the Rubber Dance Stamp post, click here


Hello everyone!!  I’m up on Craft Fantastic blog today showcasing the new Craft Fantastic Slide Bangles.

Take a look:

To get the supply list and to hear who I created this charm for, please stop on by the Craft Fantastic blog!  I would love to hear from you about what you think!

Thank you so much for stopping by!

Rubber Dance Stamp July 2017 Theme Challenge

Hello everyone!!  I’m here today with the Rubber Dance Stamp for the last time as a design team member!!  I had so much fun being on this team.  I’ve learned so much from the talented ladies on this team.  Their creativity is endless and beautiful and for that I’m grateful for the opportunity to work along side of them.

So Bibi, Susanne and the entire team – Thank You from the bottom of my heart!  I have a love for mixed media and can’t wait to play along with your challenges as a participant.

Now onto today, July 2017 Theme Challenge!

rubber dance stamps

Take a look at my tag:

Rubber Dance Stamps Beautiful Bugs

I had so much creating this tag.  I recently took an online class that taught me about the color wheel and how to use colors.  I created a postcard size switch using three colors next to each other.  I used blue, green and yellow green.

When I saw the theme for this challenge I knew I wanted to use this postcard.

Using Neat and Tangled Scalloped Die set cut out the tag.

Using the Mini Misti, stamp the Dragonfly and the sentiment from Rubber Dance Stamps Beautiful Bugs and Something Wonderful stamp set using black ink.

Rubber Dance Stamps Something Wonderful

Then use We R Memory Keepers Crop-A-Dile Power Punch to punch a hole in the tag.

Now it time to get the ribbon colored.  Using Tim Holtz Crinkle Ribbon, cut three pieces.

Spray them with Altenew Ink Spray Ocean Wave, Frayed Leaf, and Warm Sunshine. Crinkle in your hand and then dry it with a heat tool.

Add them to the tag and your done.

Crinkled Ribbon

I love how this turned out and I love that is is my last project as a member of this team.

What do you think?  Please let me know below.  I would love to hear from you.

Guess what!!!  If you like this stamp set or any other stamp set from Rubber Dance Stamp, use coupon code: KTFreeShip for free shipping!!  YES, Free Shipping.

Now onto the challenge prizes!

The winner will win five fabulous stamps fromRubber Dance Stamp!! Wait, if the winner used stamps from Rubber Dance Stamp, they will winner another five stamps! That’s a total of 10 stamps!! Wow!!!

You have until July 31, 2017, midnight Central European Time.  Which is 6:00 PM, July 31, 2017!! Please pay attention to this time. Here in NY, we are 6 hours behind Norway! 
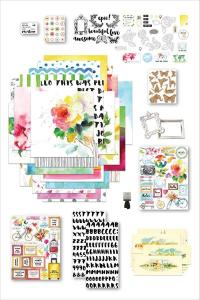
Supplies used:

(Thank you so much for stopping by. Compensated affiliate links used at no cost to you.  All products were personally purchased.  This post was not paid or sponsored. ) 

rubber dance stampsrubber dance stamps something wonderful We R Memory Keepers - Crop-A-Dile - Power Punch - 1/4 InchMini MISTI - Most Incredible Stamp Tool InventedNeat and Tangled SCALLOPED Die Set Tim Holtz Idea-ology CRINKLE RIBBON TH93020 ink spray

Thank you so much for stopping by!


Altenew Scrapbook Collection Blog Hop + Giveaway

Hello everyone and welcome to Altenew’s Scrapbook Collection Blog Hop!! Today we are showcasing the amazing Reflection Scrapbook Collection.  If you’ve arrived here from awesome Elsie Robinson’s blog, then you are on the right track. If you arrived here on your own, then you will want to start at the beginning, the Altenew Scrapbook Blog so that you don’t miss a thing!

Take a look at my layout:

reflection scrapbook collection

For this layout, I used the pattern paper from the Reflection Scrapbook Collection to create the circle patten behind my photo.

I used a 2in circle punch to punch out 4 circles out of the different pattern papers that has matching colors in the photo.

Then I trimmed the photo down to fit over the circles without totally covering them.

To add dimension behind the photo, I cut two black and white pieces of the pattern paper and adhered it to the back of the photo.

Once the circles and the photo were adhered down, the page looked to white so I used Altenew Frayed Leaf Ink Spray to add splatters around the focal point of the page.

After the ink dried, I placed the title down using the letter stickers that come in the kit.

To finish the page off, I placed some the the chipboard in the kit on top of the photo and under the title of the page.  Adding the date to the bottom of the page using the rotary stamp which is also included in the Reflection Scrapbook Collection.

Let’s take a closer look:

So what do you think?  Would you use pattern paper to create different shapes to use on your layouts?  I would love to hear what you think below!

What is a blog hop without an amazing gift? Yayyy!!

Prizes

  • Altenew is giving away a $50 gift certificate to THREE lucky winners! Please leave a comment on the Altenew Scrapbook Blog by Wednesday, July 19th at 11:59pm EDT for a chance to win. The winners will be announced on the Altenew Scrapbook Blog on Saturday, July 22nd.
  • In addition I have a $30 gift certificate to giveaway from comments left on this post by Wednesday, July 19th at 11:59pm EDT for a chance to win.

Next Stop on this Blog Hop is the talented:

Irit Landgraf

You do not want to miss out on her beautiful creations!!  It is sure to please, trust me!!

Just in case you lose your place along the way, here is the complete list of participants so that you can find your way back:

Altenew

Enza Gudor

Paige Evans

Missy Whidden

Sandra Dietrich

Meghann Andrew

Stefanie Ried

Flora Monika Farkas

Claudia van Rooijen

Elsie Robinson

Kymona Tracey ← you are here

Irit Landgraf

Elena Morgun

AhSang Jung

Eunyoung Lee

Anna Komenda

Lilith Eeckels

Terhi Koskinen

Before you go, check out Altenew’s new promotions:

Supplies used:

(Thank you so much for stopping by. Compensated affiliate links used at no cost to you.  All products were personally purchased.  This post was not paid or sponsored. )

scrapbook collection kit ink spray

Thank you so much for stopping by and enjoy hopping along!!!

Embossing – Where Creativity Meets C9

Hello everyone!!  I’m here today with the Where Creativity Meets C9 Blog Challenge Design Team!! Our challenge this month is Embossing!

Take a look at my card:

For this card I use the heart die from Concord and 9th Heartstrings Die to create an embossed heart on the card front. I have to confess, when I ran the paper through the Big Shot, I didn’t expect the paper to ruffle up.

Once I took the paper off of the cutting plate, I started to get upset.  Thinking I had to start over, I took a second look at the paper. I actually loved the way the ruffles looked on the card front. The paper looks handmade so I decided to go with it.

So I decided to watercolor inside the heart.  Once that dried I added the word kind from Concord and 9th Kind Card Frame Add on Die across the heart.

To finish the card off, I used Tonic Aqua Shimmer Glitter Gloss to add shimmer to the watercolor and the sentiment and some New Day Card Kit Enamel Dots.

Take a look:

I love how this card turned out!! What do you think?  Please let know below.

I can’t wait to see how you interpret our challenge theme this month.

c9-banner

Did you know that we have a giveaway going on? Yes, we do!! Our sponsor Concord and 9th is giving away a $25 gift certificate to their shop!!  Yes!!!  Isn’t that big.  Plus the winner gets to be a guest designer for a future challenge.

Here’s how: Create a project using Concord and 9th and upload it on the Where Creativity Meets C9 blog by the 29th of every month of for a chance to win.  A random winner will be chosen and it could be you!!

Are you ready?  So, go and create!!

Please don’t forget to follow Where Creativity Meets C9 on Facebook, Instagram and the Blog.

Supplies used:

(Thank you so much for stopping by. Compensated affiliate links used at no cost to you.  All products were personally purchased.  This post was not paid or sponsored. ) 
KIND Card Frame Add-On DieHeartstrings DiesTonic Studios - Nuvo Collection - Aqua Shimmer - Glitter Gloss - 2 Pack

Thank you so much for stopping by!!

Art Journaling Series – Imagine

Hello everyone!!  I’m starting a new series on my blog called the Art Journaling Series!!  I’m having so much fun with paints and stencils that I want to do more and share more!! I will try and post at least once a month for now but we will see how this goes!!

I posted a page yesterday, if you didn’t see it, you can check it out here.

Let take a look at my new page:

art journaling

Here’s how I created this page:

  1. I applied different size washi tape to my 8 x 10 Gel Press Plate.
  2. Then I randomly added Vicki Boutin Acrylic Paint in yellow and orange on top of the washi tape plate.
  3. I used a brayer to even out the paint.
  4. Once the plate was covered, I remove the washi tape, leaving the pattern you see above.
  5. After the paint dried, I used some stencils from The Crafter’s Workshop (Mini Ledger, Mini Time for Love, and Mini Specimens) and Liquitex Black Gesso to add the different marking on the page.
  6.  To finish the page off, I stamped Visible Image Face It! and Imagine Dream Inspire stamps using Ranger Archival Jet Black Ink.

I totally love how this page turned out.  I thought about writing on this page but it didn’t need it at all.

I’m linking my page up to Craft Stampers Take It Make It Challenge this month.


Supplies used:

(Thank you so much for stopping by. Compensated affiliate links used at no cost to you.  All products were personally purchased.  This post was not paid or sponsored. )

Gel Press 8 x 10 REUSABLE GEL PRINTING PLATE 10802 Speedball Art Products - Pop-In Soft Rubber Brayer - 4 inchesThe Crafter's Workshop - 6 x 6 Doodling Templates - Mini Ledger    The Crafters Workshop - 6 x 6 Doodling Templates - Mini Time for Love  The Crafter's Workshop - 6 x 6 Doodling Template - Specimens American Crafts - Mixed Media Collection - Acrylic Paint - Set 1face stamp set sentiment stamp set

Thank you so much for stopping by!!

Art Journaling – My Magical Garden

Second Post for today
If your looking the the Altenew Traveler’s Notebook post, click here


Hello everyone!!  I’m here today with a new found love of mine.  I recently started keeping an art journal and I’m having an amazing time with it.

I’m a beginner and I totally love getting my fingers dirty with paint!! It is totally freeing to just play!

Once I finished getting my paint down and dried, I used Lavinia Stamps to add my magical garden.

Take a look:

Lavinia Stamps

I love how this turned out!! I love that I created it!! I can’t wait to give this a try again.  I’m such a clean and simple crafter that when I see pieces like this I’m amazed.  It all makes sense to me now.

I’m going to enter this into the Craft Stampers Take It Make It Challenge. I miss those ladies so I’m stopping by to share my work with them.  I hope I’m able to amaze them.


Supplies used:

(Thank you so much for stopping by. Compensated affiliate links used at no cost to you.  All products were personally.  This post was not paid or sponsored.)

Thank you so much for stopping by!!

Create Your Own Traveler’s Notebook Insert

Hello everyone!!  I’m up on Altenew’s Scrapbook Blog today showing you how to create your own traveler’s notebook insert.

Here’s a sneak peek:

Reflection Scrapbook Collection

To see how I created this traveler’s notebook insert and how I decorated this insert head on over to Altenew’s Scrapbook Blog.  I can’t wait to see what you think!

Supplies used:

(Thank you so much for stopping by. Compensated affiliate links used at no cost to you.  All products were personally purchased.  This post was not paid or sponsored. )

Thank you so much for stopping by!

{Clean and Simple} – Pizza

Hello everyone!!!  It’s CASology Tuesday!!  We are back with another Clean and Simple Cue Card just for you!!

This week’s cue card:

Now I have to admit, I was having a hard time with this cue card this week because I didn’t have a pizza stamp.  I know I couldn’t believe it.  I search and search, but to no avail, I had nothing.

So this morning, I searched for a digital image that I could use and in seconds I found a couple. the one I love just so happen to be free!!!  Yayyyyy!!  I love free, LOL!!

That is how I was able to create my card and get it up just in time for this challenge!!  I love when things come together in secs.

Take a look at my card:

I love this Pizza Chef Toodle image is so cute.  Its a Broken Book Design Digi Stamp that I found on google.  This image comes in black and white and in color.  I couldn’t find the artist name but thank you to that artist for saving the day for me.

To use this image I simple pulled the image in Photoshop, resized it and added color to the pizza and dough.  Very easy to do.

This image did come in color so here you go:

It came ready made for you. I could have just used this image but I only wanted to have the pizza and the dough in color.

Great digi image right!! (Wiping the sweat off of my forehead!)

Here are the two images side by side:

What do you think?

Are you inspired to play along?  Please let me know below!

For more inspiration, check out my fellow Design Team members blog for more awesome work.

Deidre Payne

Hannelie Bester

Hazel Hodgkins

Jacquie Southas

Janet Ribet

Jen Wills

Joyce Mehrberg

Judy Marino

Kymona Tracey

Melissa Chipperfield

Rachel Bergfeld

Sherrie Mannion

Guest Designer

Maja

Our sponsor this week is SugarPea Design!

Supplies used:


Thank you so much for stopping by!


How to Create a Calendar using Deflecto’s Pouches

Hello everyone!!! I’m here today to show you how to create a calendar using Deflecto’s Pouches.

These pouches come in a 7-3/8 x 6 inch size and are package 5 to a pack.  They can we used for tons of things: a recipe card holder, picture holder, display piece or even a banner!!

I created a flip calendar.  Lets take a look:

deflecto flexible pouch

I used 6 pouches to create this cute calendar.  Two months in one pouch.

Here’s how:

I used the Cinch to punch evenly spaced holes in each pouch.

deflecto flexible pouch

Then I created a cover and put the book to together.

Create your calendars and add them to the pouches.

Deflecto flexible pouches

Before you put all of the calendars inside their pouches, use an enamel dot to make off important dates.

Nice and simple!! I keep this calendar on my desk so that I do not miss another birthday.

So what do you think? Will you use the flexible pouches to create a calendar for yourself?  I would love to hear from you.

Thanks for stopping by, I hope you were inspired here today.

Simple Stamping with Shimmer

Hello everyone!! I’m up on Where Creativity Meets C9 blog today, sharing a cared with some simple stamping.

Take a look at my card:

orange you sweet

For the full tutorial post, head on over to Where Creativity Meets C9 blog.

Supplies used:

(Thank you so much for stopping by. Compensated affiliate links used at no cost to you.  All products were personally.  This post was not paid or sponsored.)

Orange You Sweet Stamp Set Mini MISTI - Most Incredible Stamp Tool InventedTonic Studios - Nuvo Collection - Aqua Shimmer - Glitter Gloss - 2 PackFour Scoops Mini Cube Set

Thank you so much for stopping by!!