Second Post for today
If your looking for CS Take It Make It Inspiration Post, click here
Hello everyone!! I’m super excited today. I was asked to participate in The Ton’s Spring 2016 Release Blog Hop!!! Yayyyyyy!!
I was totally siked when Effie reached out to me and asked if I would like to hop along with her team. I jumped at the opportunity to work with her fabulous team.
Enough about my excitement, lets get started on this hop!! If you arrived here from the talented Eunji blog then you are on the right track. If you arrived here on your own, you will want to start at the beginning, The Ton blog, as to not miss any of the amazing projects!
I’ve created two cards for this awesome hop.
Card Number One:

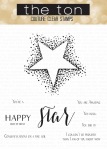
When I first saw this Bokeh Burs Star stamp set, I fell in love. Such a pretty stamp set with so many things that you can do with it.
I knew it would look super pretty embossed with some distress inks blended on top.
Here is how this card was created:
- Stamp the image using Versamark ink in the center of the Recollection White Heavyweight cardstock.
- Apply Hero Arts White Embossing Powder on top of the stamp image and heat set. This will resist the ink that will be added on top.
- Lay your card flat on your table and start applying your first distress ink Mustard Seed. Tap off before you apply your first coating of ink.
- Then blend the next color, Spiced Marmalade, to create a pretty blend between the two colors.
- Next blend the last color, Festive Berries, to create a contrast between the other colors. Together all three of them are amazing.
- Make sure you cover all of the white embossing powder with the distress ink so that everything pops.
- Now you can stamp the sentiment in the center of the star using Versafine Ink for a clear, crisp impression.
- To finish the front of the card off, add several Pretty Pink Posh Sparkling Clear Sequin randomly.
I hardly ever stamp the inside of my cards. I decided that this card would totally rock, with a sentiment on the inside.

Use Versafine ink again to stamp the sentiment for a crisp, clear impression.
What do you think? Isn’t this set fabulous!! I think so!!
Card Number Two:

Isn’t this just fabulous!! This stamp set is called Brushed Hello. I love everything about this card. From the background to the “HELLO” sentiment. Everything about this card screams BOLD!!! I love it.
Here is how to create this card:
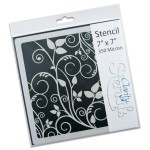
- Tape down the Clarity Stencil to the cardstock so that it lays flush over the paper.
- Select two-three colors to blend. The colors used above Fossilized Amber, Cracked Pistachio, Mermaid Lagoon.
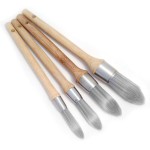
- Use the Clarity Stencil Brushes to blend the colors over the stencil.
- Check out the video below on how I achieved that look. Its a 5 minute video from start to finish in real time.
- Trim the blended cardstock down to the desired size.
- Stamp the Hello sentiment from the Brushed Hello stamp set using Versafine Black Ink. Then stamp another sentiment if you like.
- Add rhinestones to finish the card front off.
- Adhere the card front to your cardbase using Tombow Stamp Runner Adhesive.
Finished!! What do you think? I love both cards using both of these stamp sets. Such a great way to bring in Spring!!
Let me know what you think below!! I would love to hear from you.
Your next stop on this hop is the super talented Mayline!! You will want to see what she has come up with.
Giveaway!!
What is a blog hop without giveaway!!! In order to qualify for one of the three $25 gift codes to The Ton’s online store, you must leave a comment on each stop on the blog hop. The comment period will close on Wednesday, April 13th at 11:59pm EST. Winners will be chosen randomly from the comments left on all of the blogs.
Just in case you get lost along the way, here is the lineup:
The Ton
Ruby Naz
Lisa Harrolle
Jessica Frost-Ballas
Virginia Lu
Keeway Tsao
Amy Tsuruta
Emily Midgett
Laura Sterckx
Vera Yates
Laurel Beard
Enuji Jung
Kymona Tracey ← you are here
Mayline Jung
You will not be disappointed!! Have fun hopping!!
Supplies:


Thanks for stopping by!
~Kymona