One Stamp Set, Two Ways!!

Hello everyone!!  I’m here today Guest Designing for Gerda Steiner Designs.  Super Doper Awesome!!!

Have you seen her latest stamps?  Totally awesome!  She has clear stamps, digital stamps and good old rubber stamps!!  You can’t bet that!

If you haven’t checked her out, you have to go on over and pay her visit!!

Today, I’m playing with a clear stamp called Peeking Friends!  Super cute images and easy to color!

Peeking Friends

I’ve created two projects.  I have a third one, but as I’m writing this post, I’m having a creative block.  Crazy right.  I just can’t figure out what I want to do with what I have.  As soon as I do, I will do a separate post on it.

Take a look at what I did create:

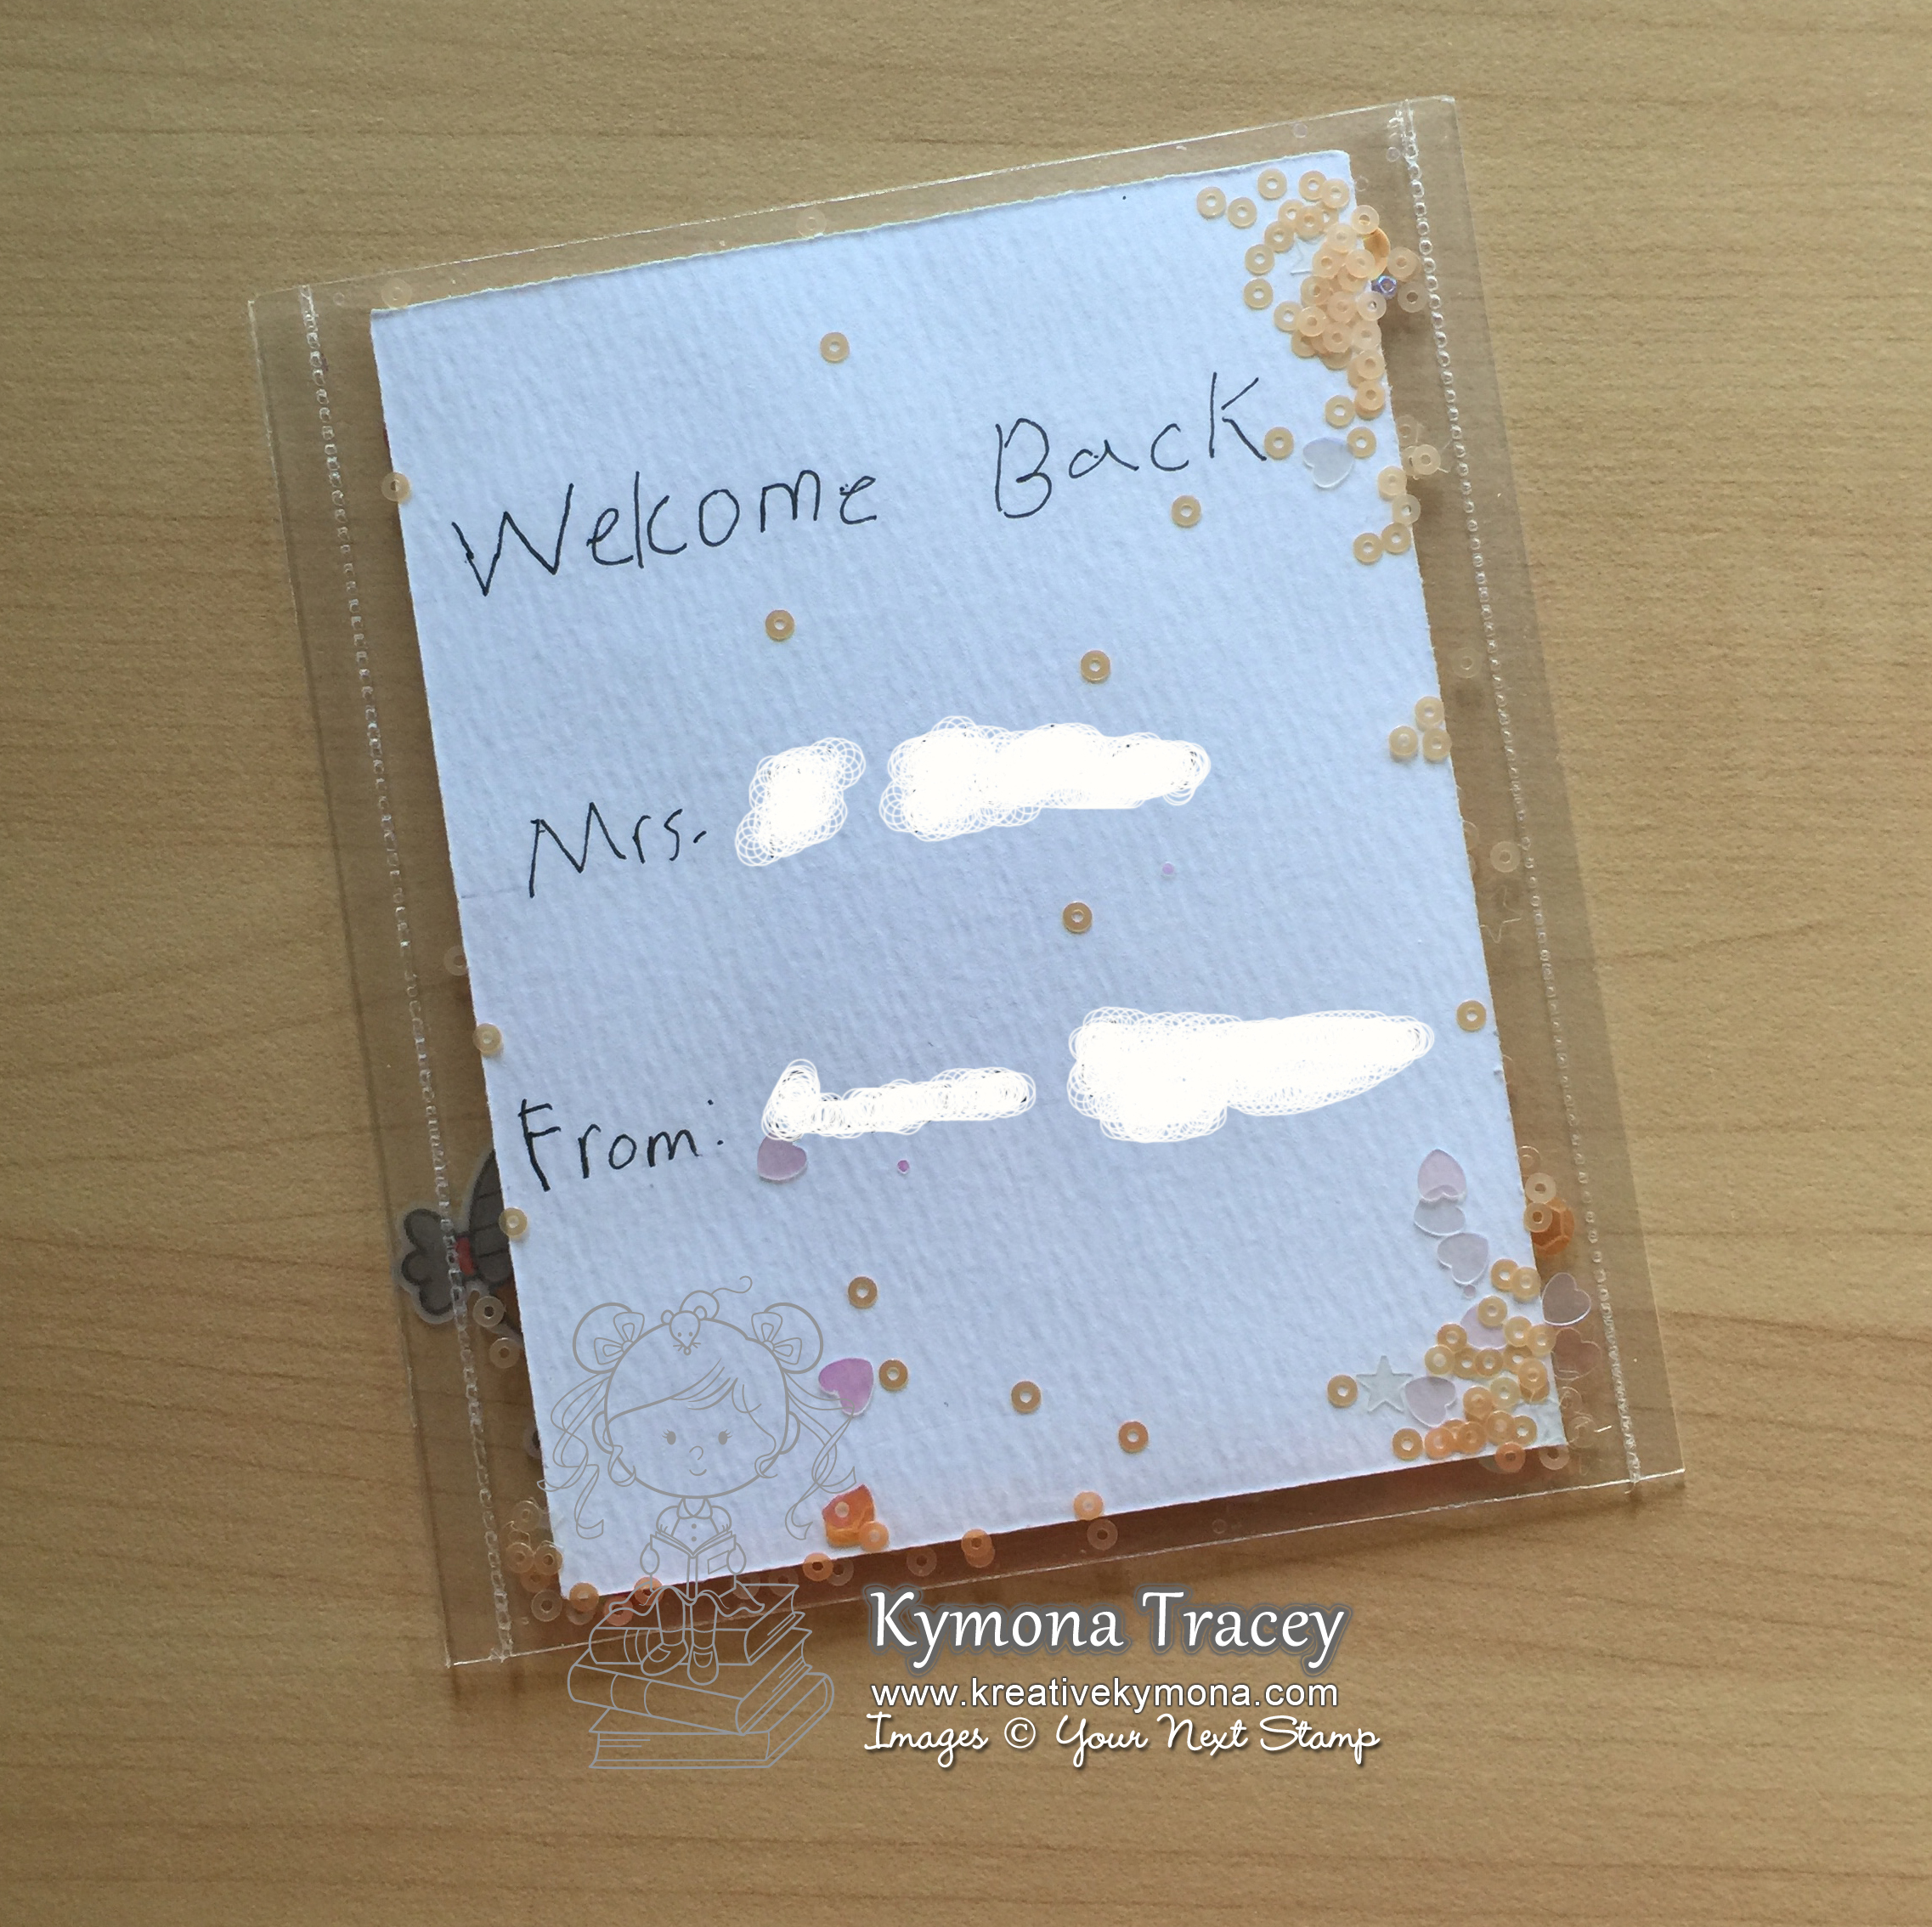
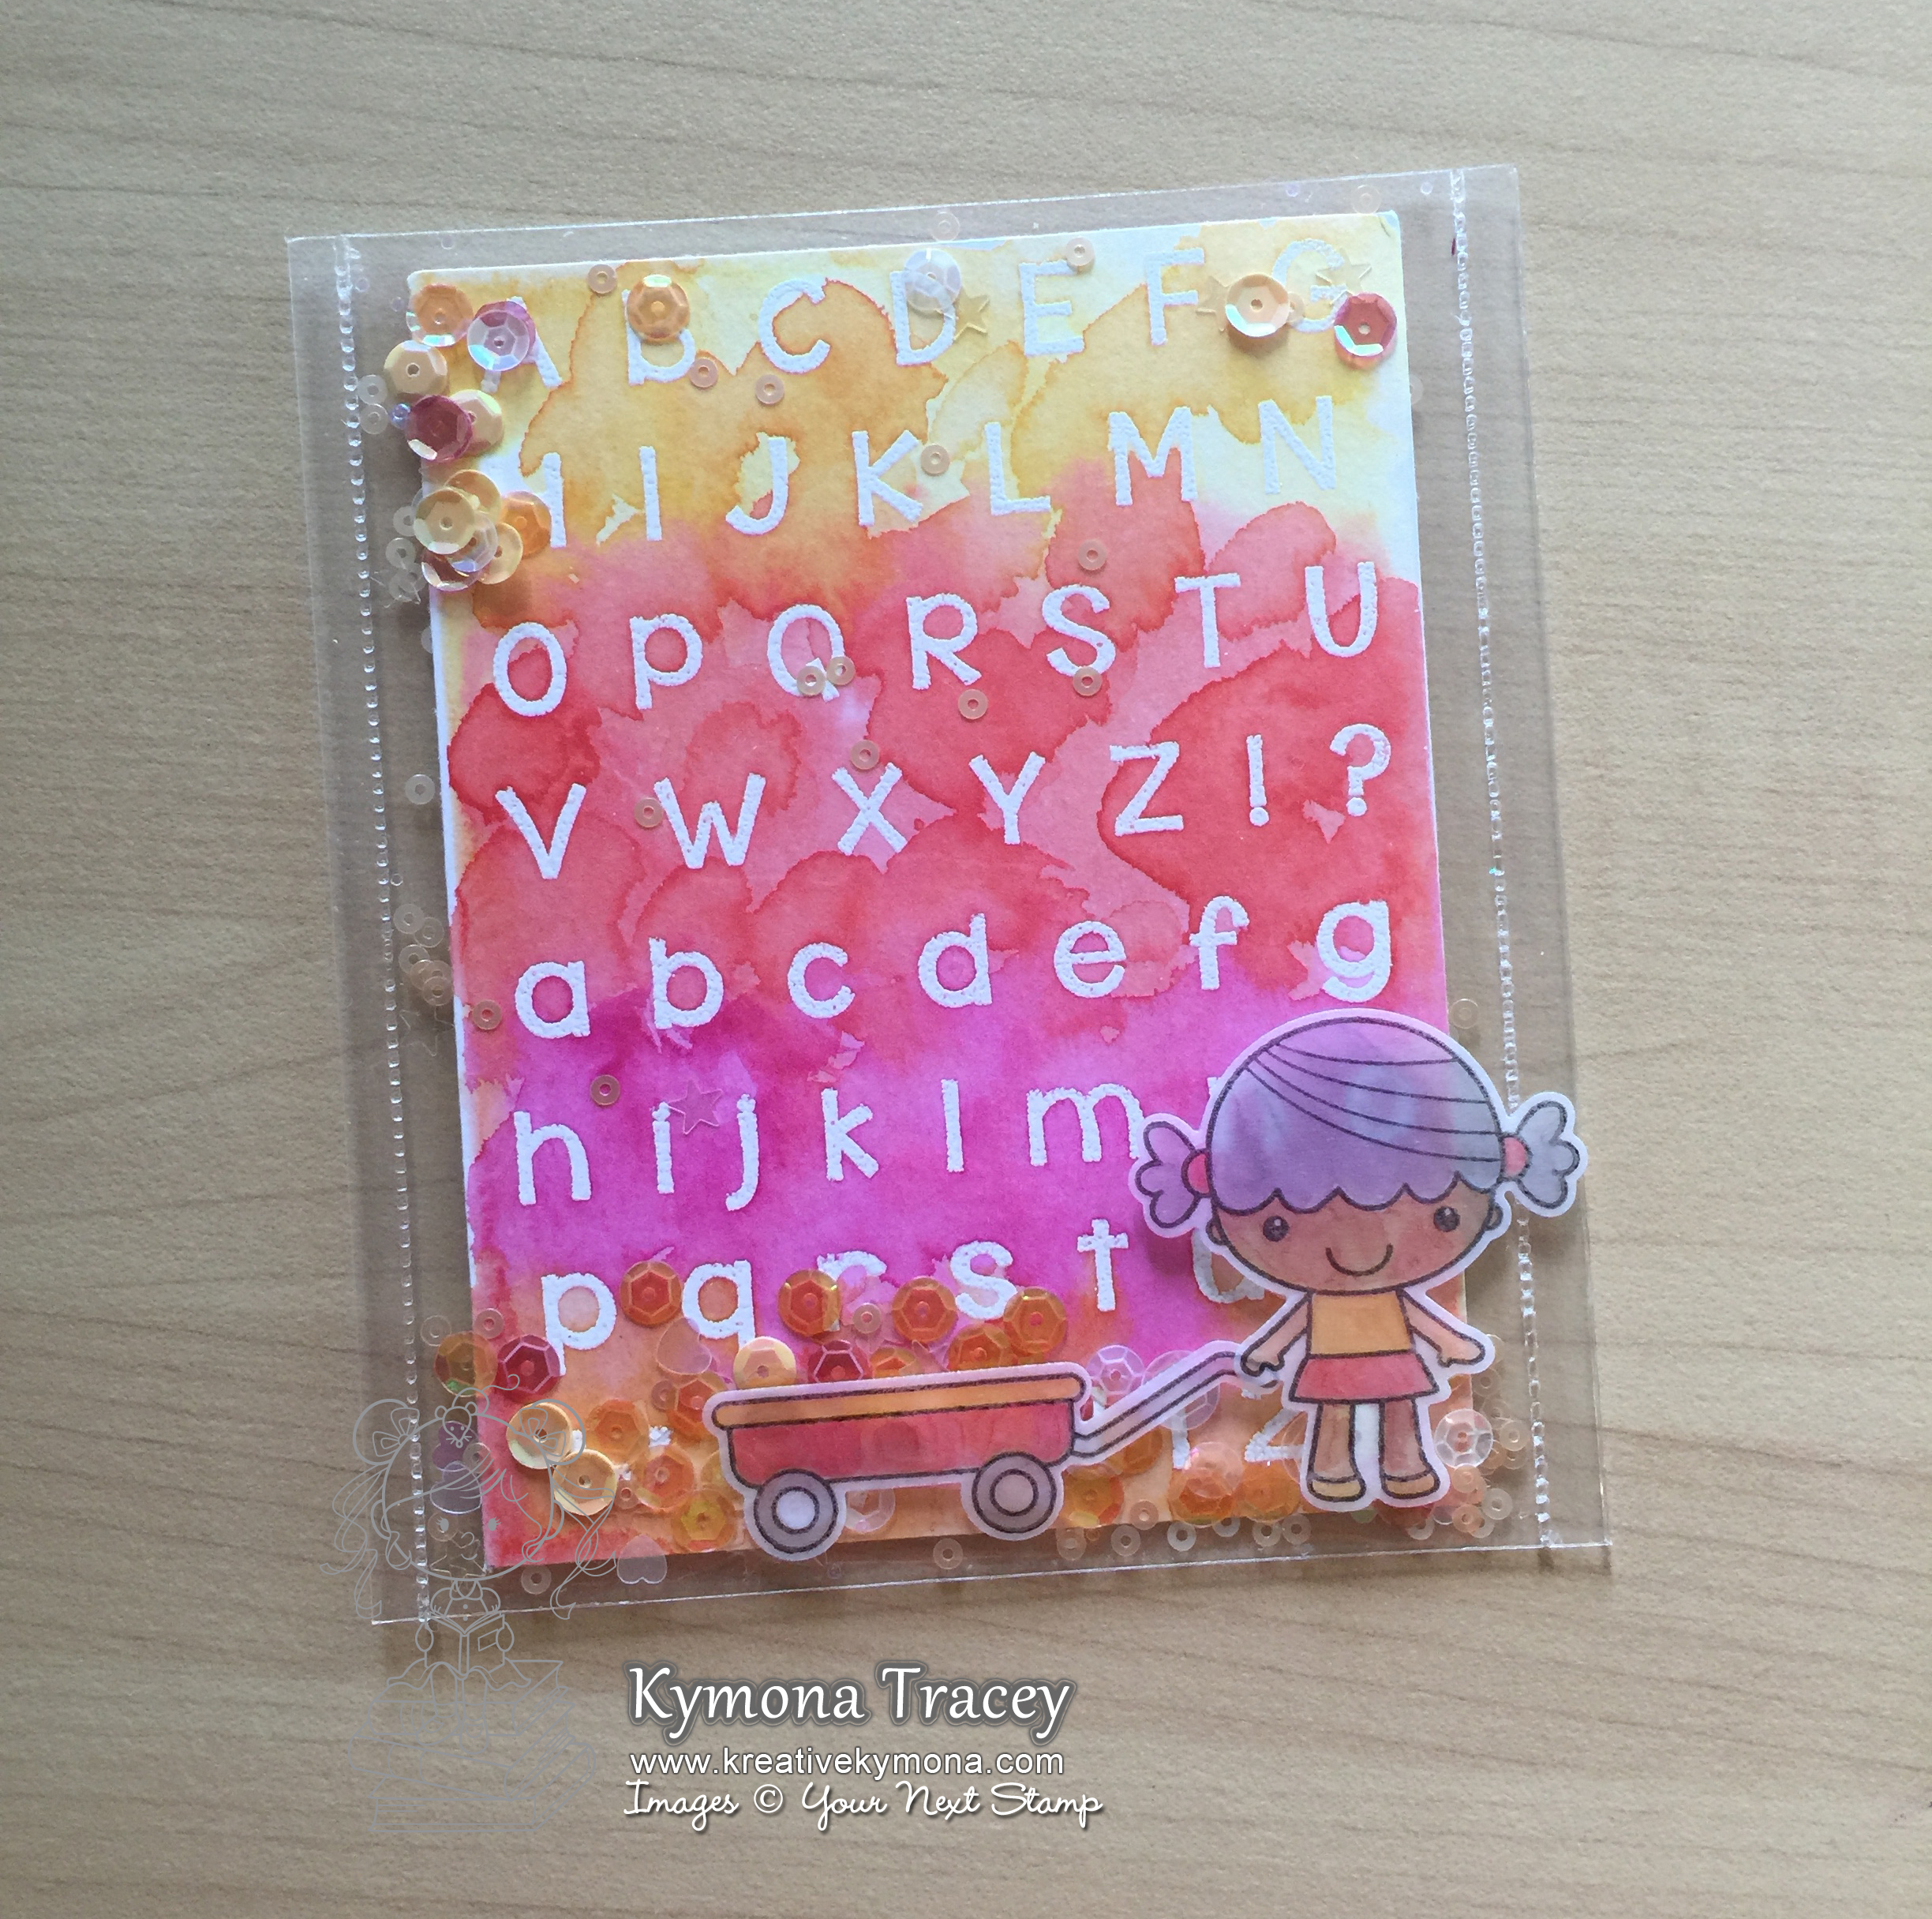
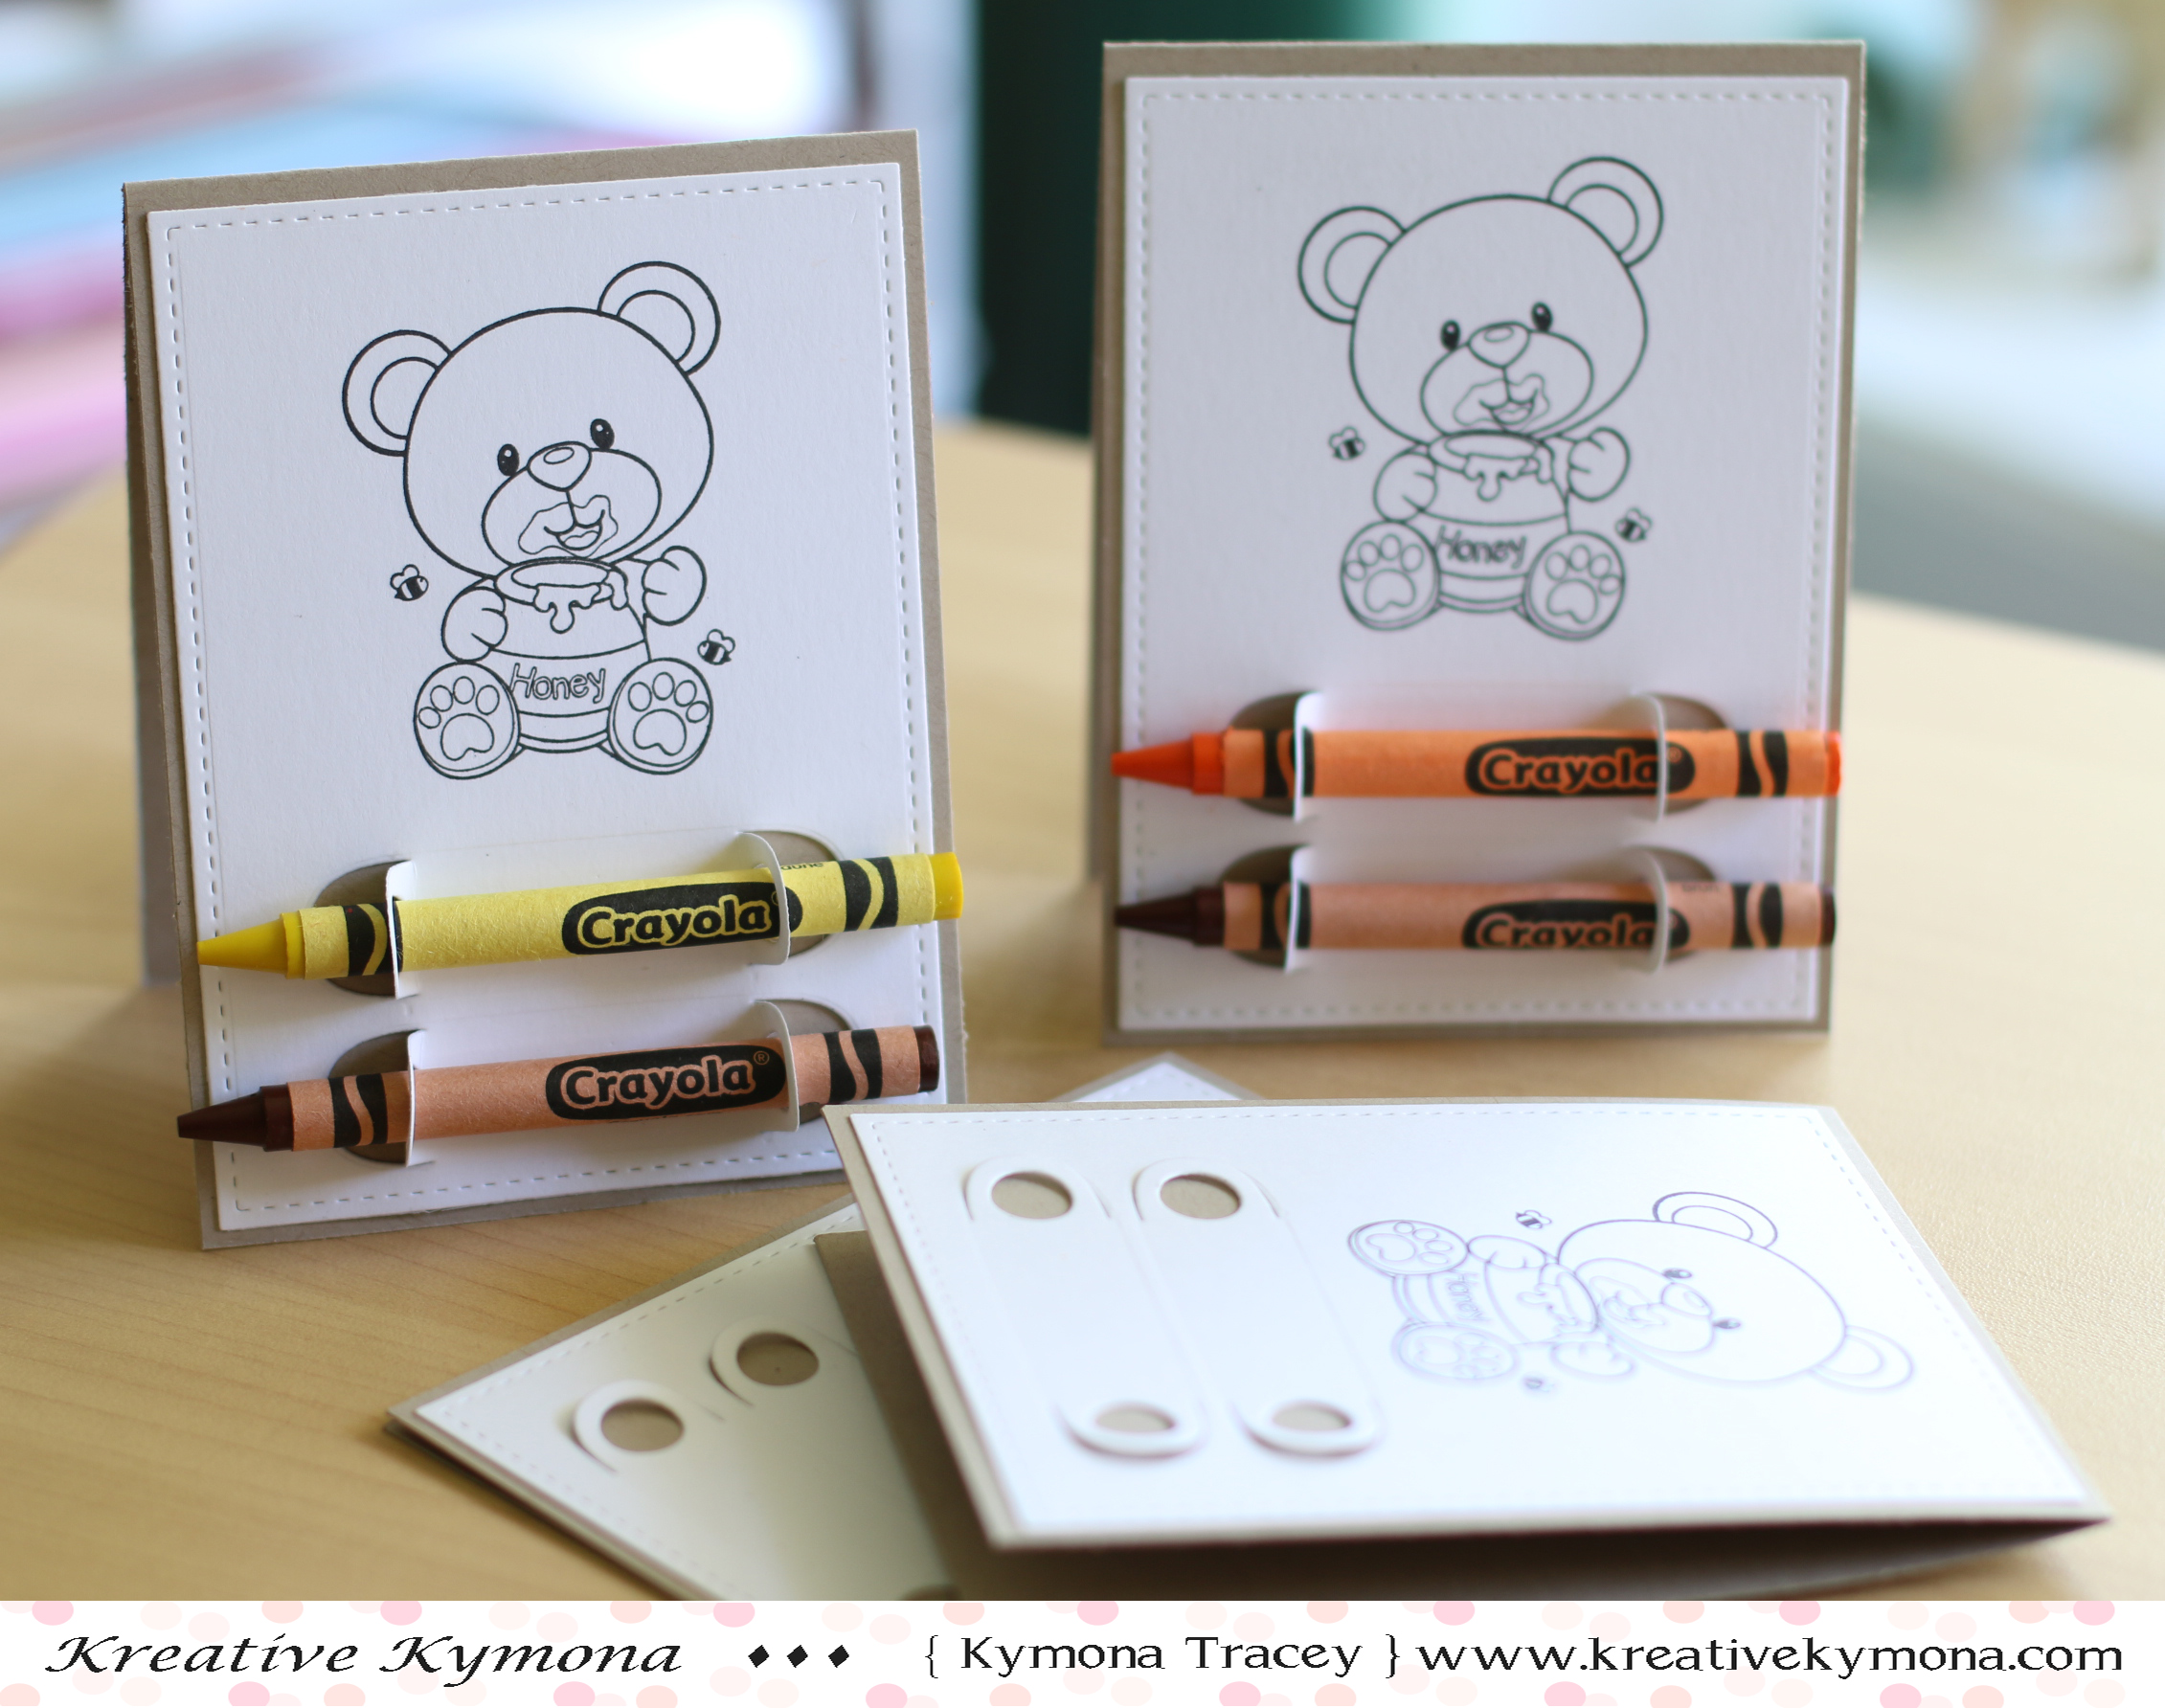
First up is a gift tag that doubles as a card since it opens.

No Peeking (GSD)

This is how I created this tag:

  1. I stamped the image using My Favorite Things Hybrid Ink and colored the elf in with Copic Markers; G07, R37, Y13, E11 and E25.
  2. Then I used my Brother Scan and Cut to cut him out.
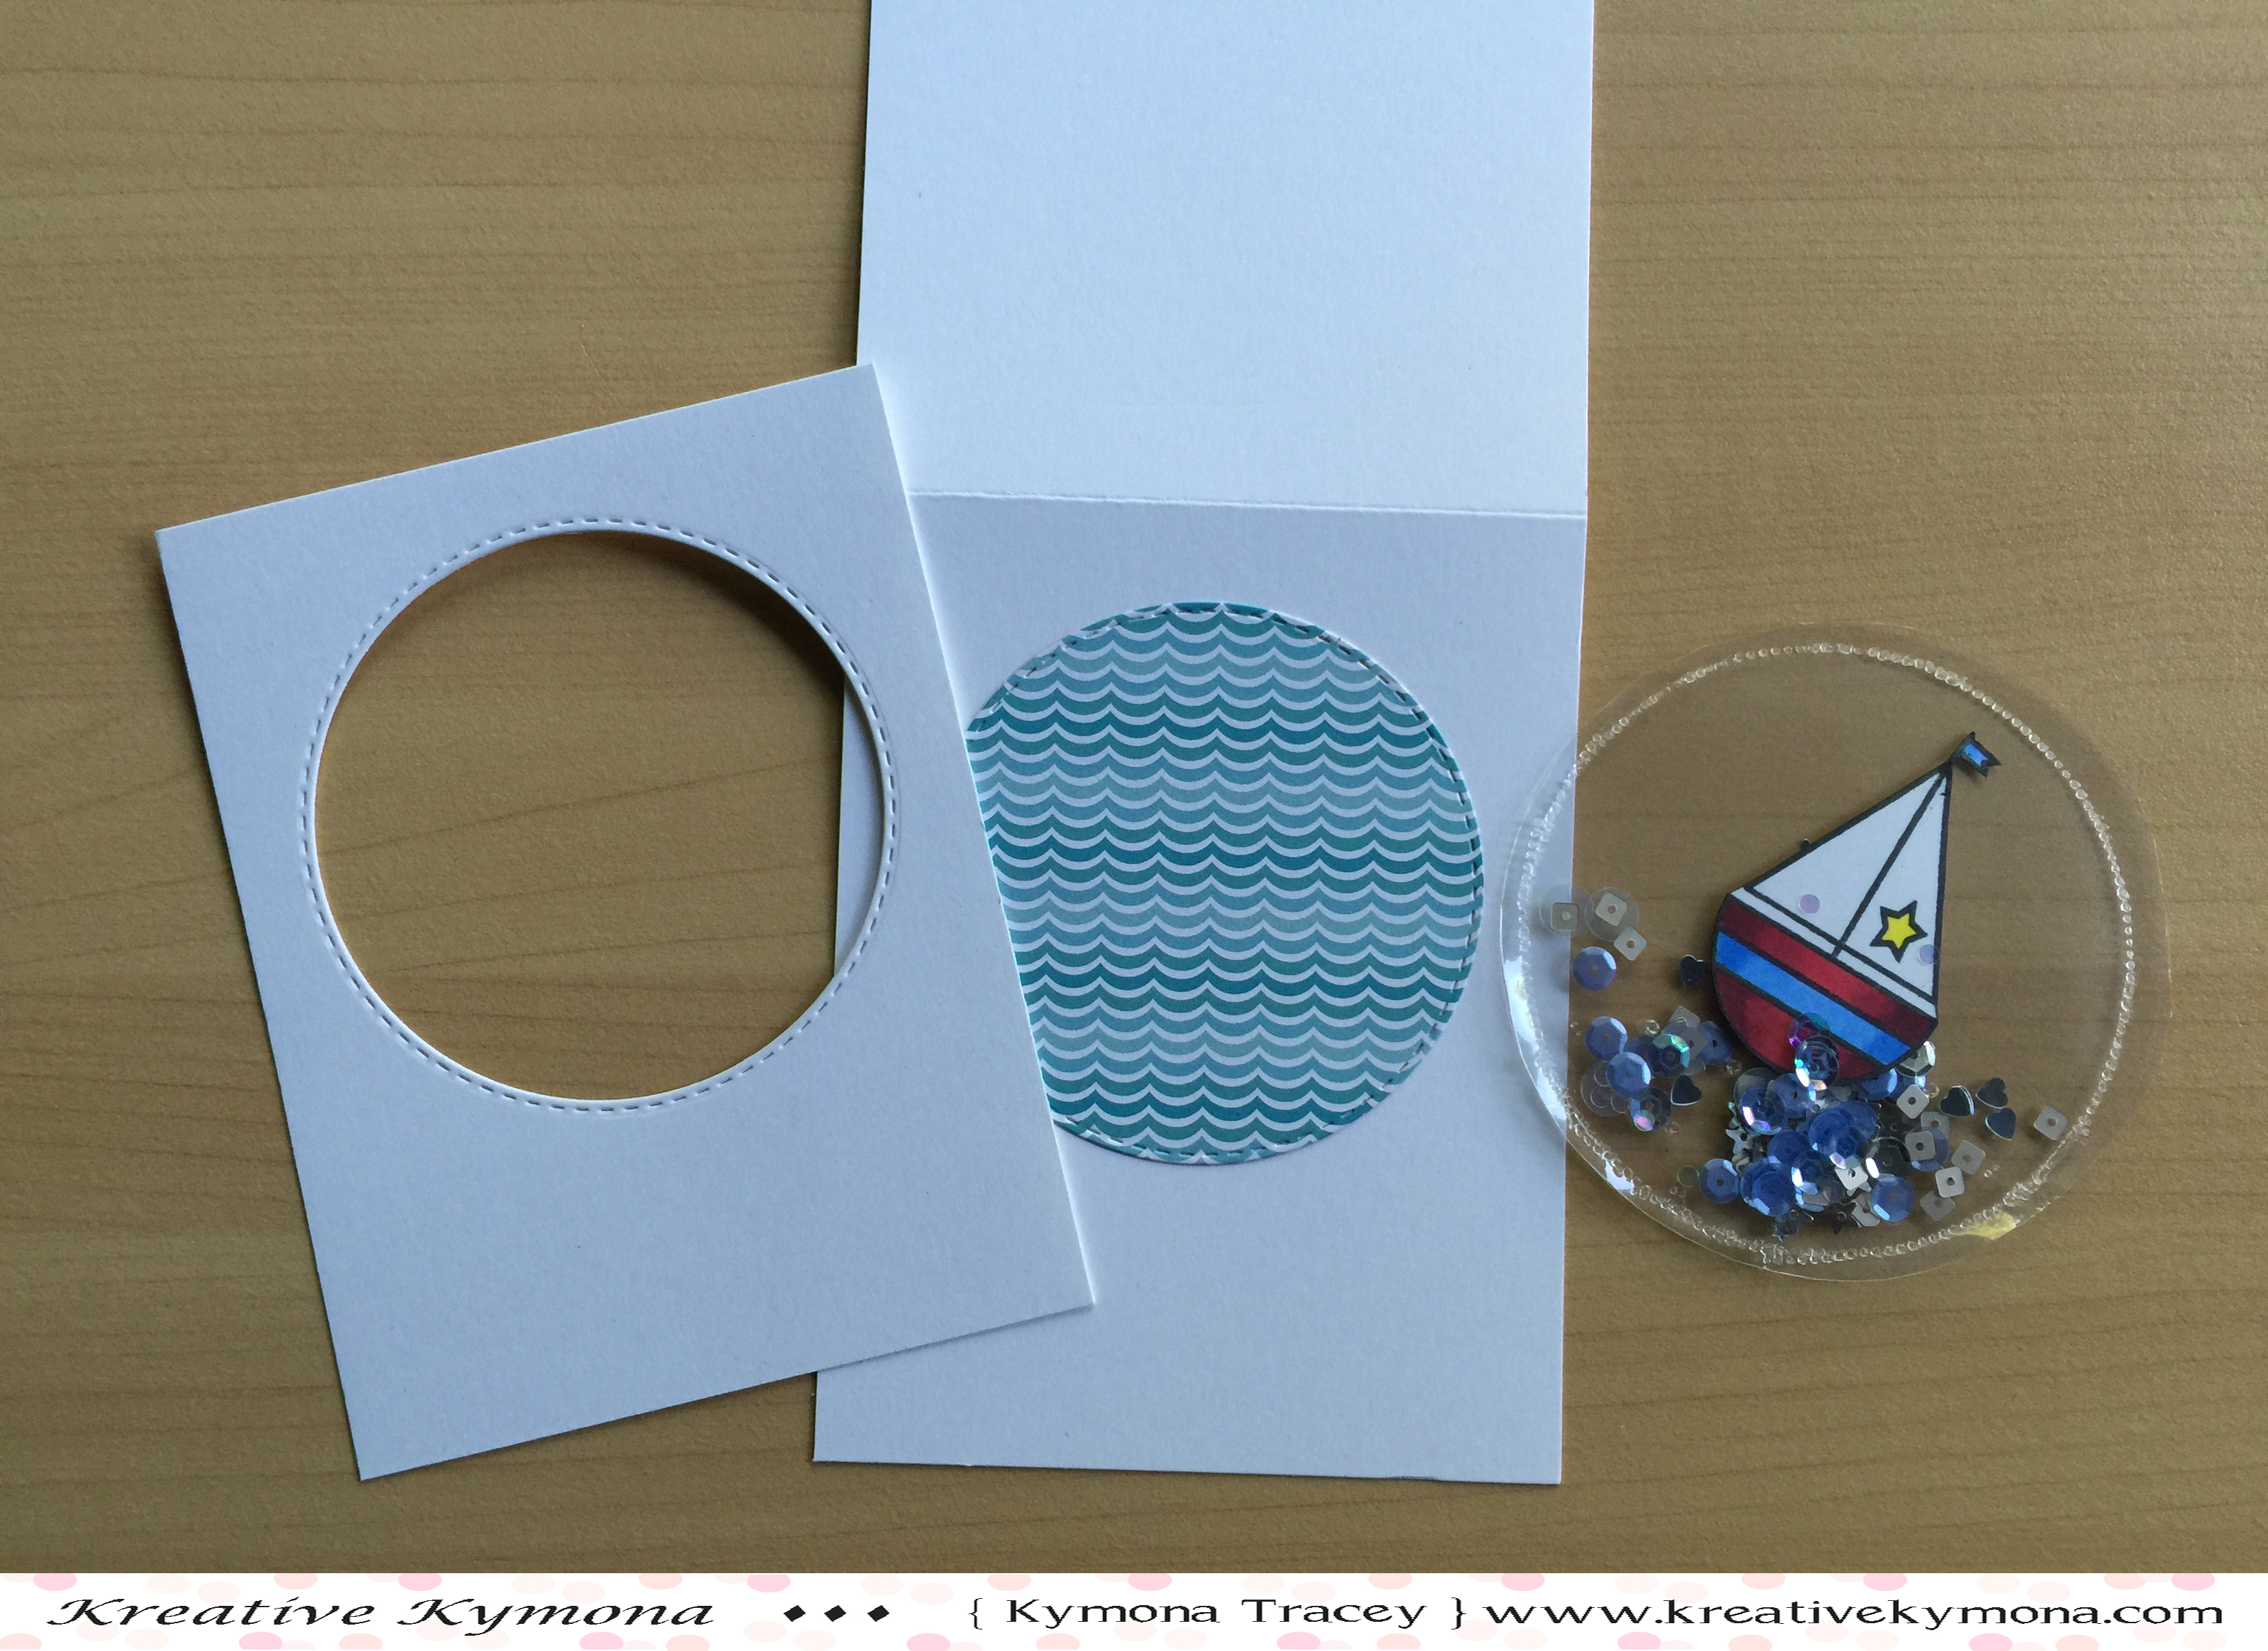
  3. Then I used Pretty Pink Posh Stitched Banner Duo 2 Dies to cut out 3 tags, 2 out of white cardstock and 1 out of retired Stampin’ Up! Season of Style.
  4. I used the circle die to cut out a circle in the pattern paper.
  5. I adhered the pattern paper to one of the white tags.
  6. I used my score board to score the back tag so that I could Tombow Multipurpose Glue to hold the tag together.
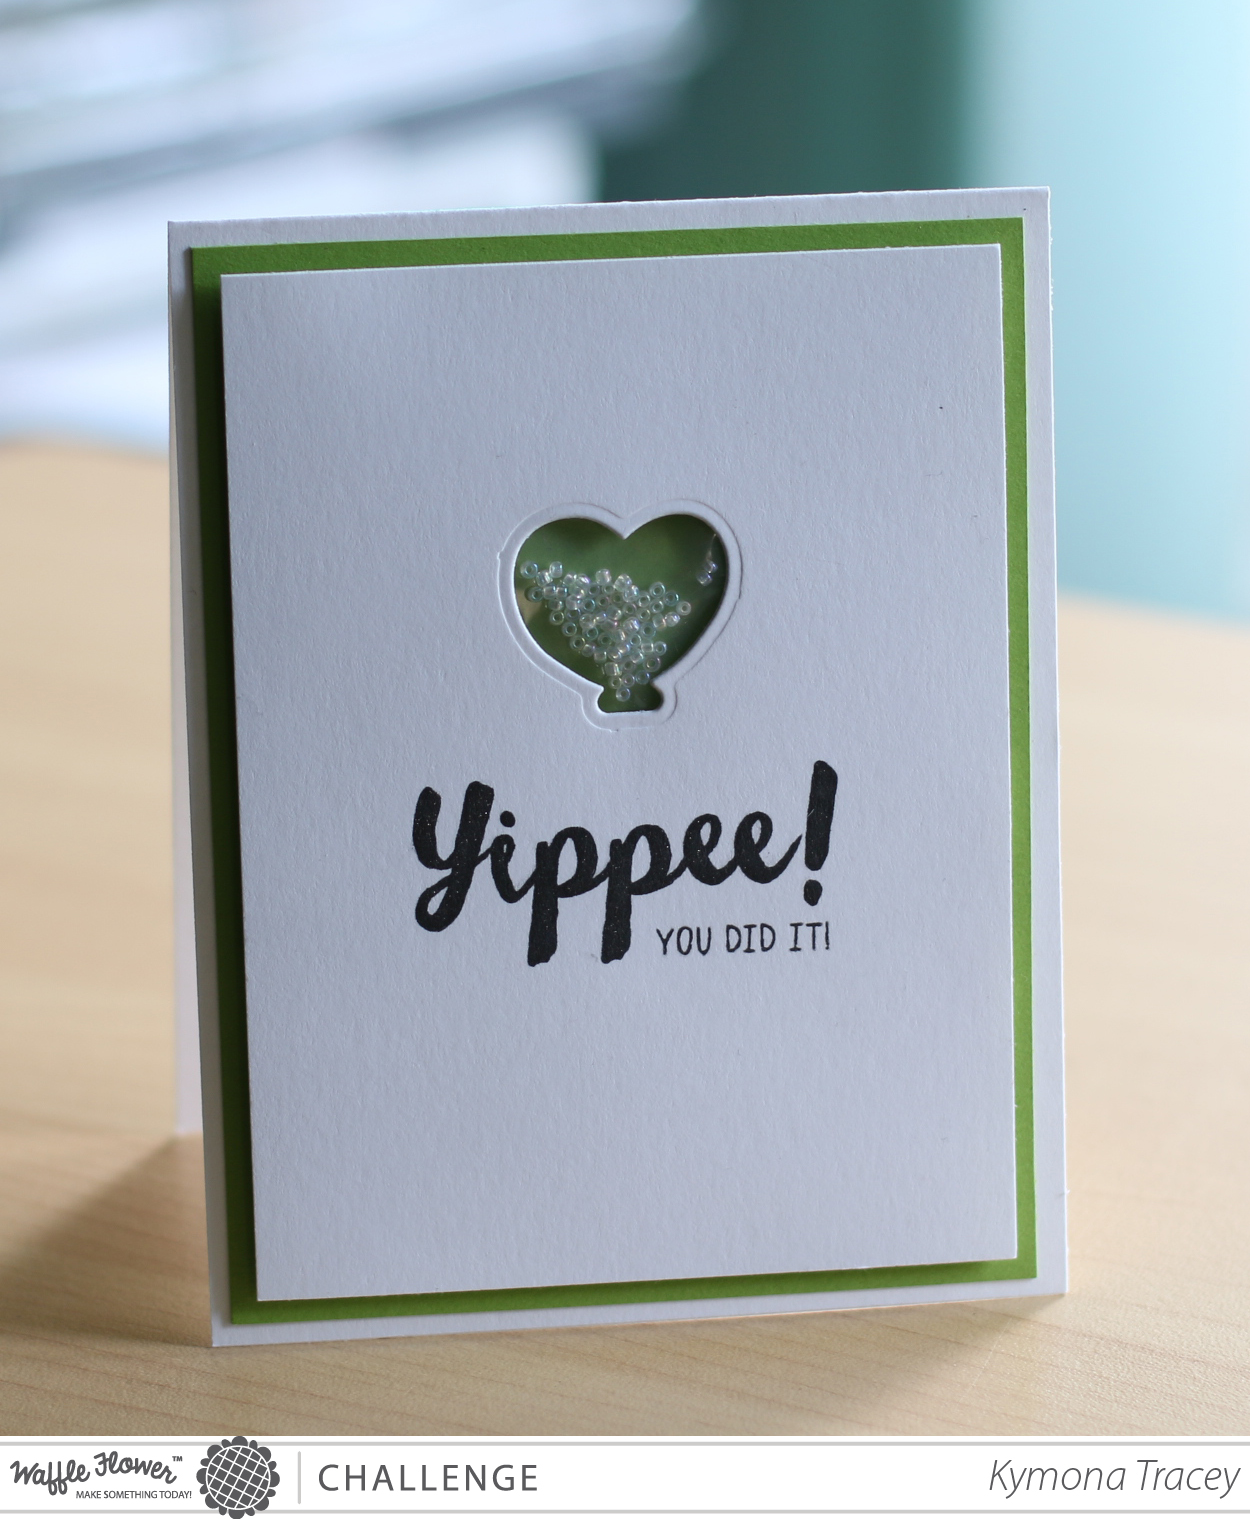
  7. I stamped my sentiment in the circle.
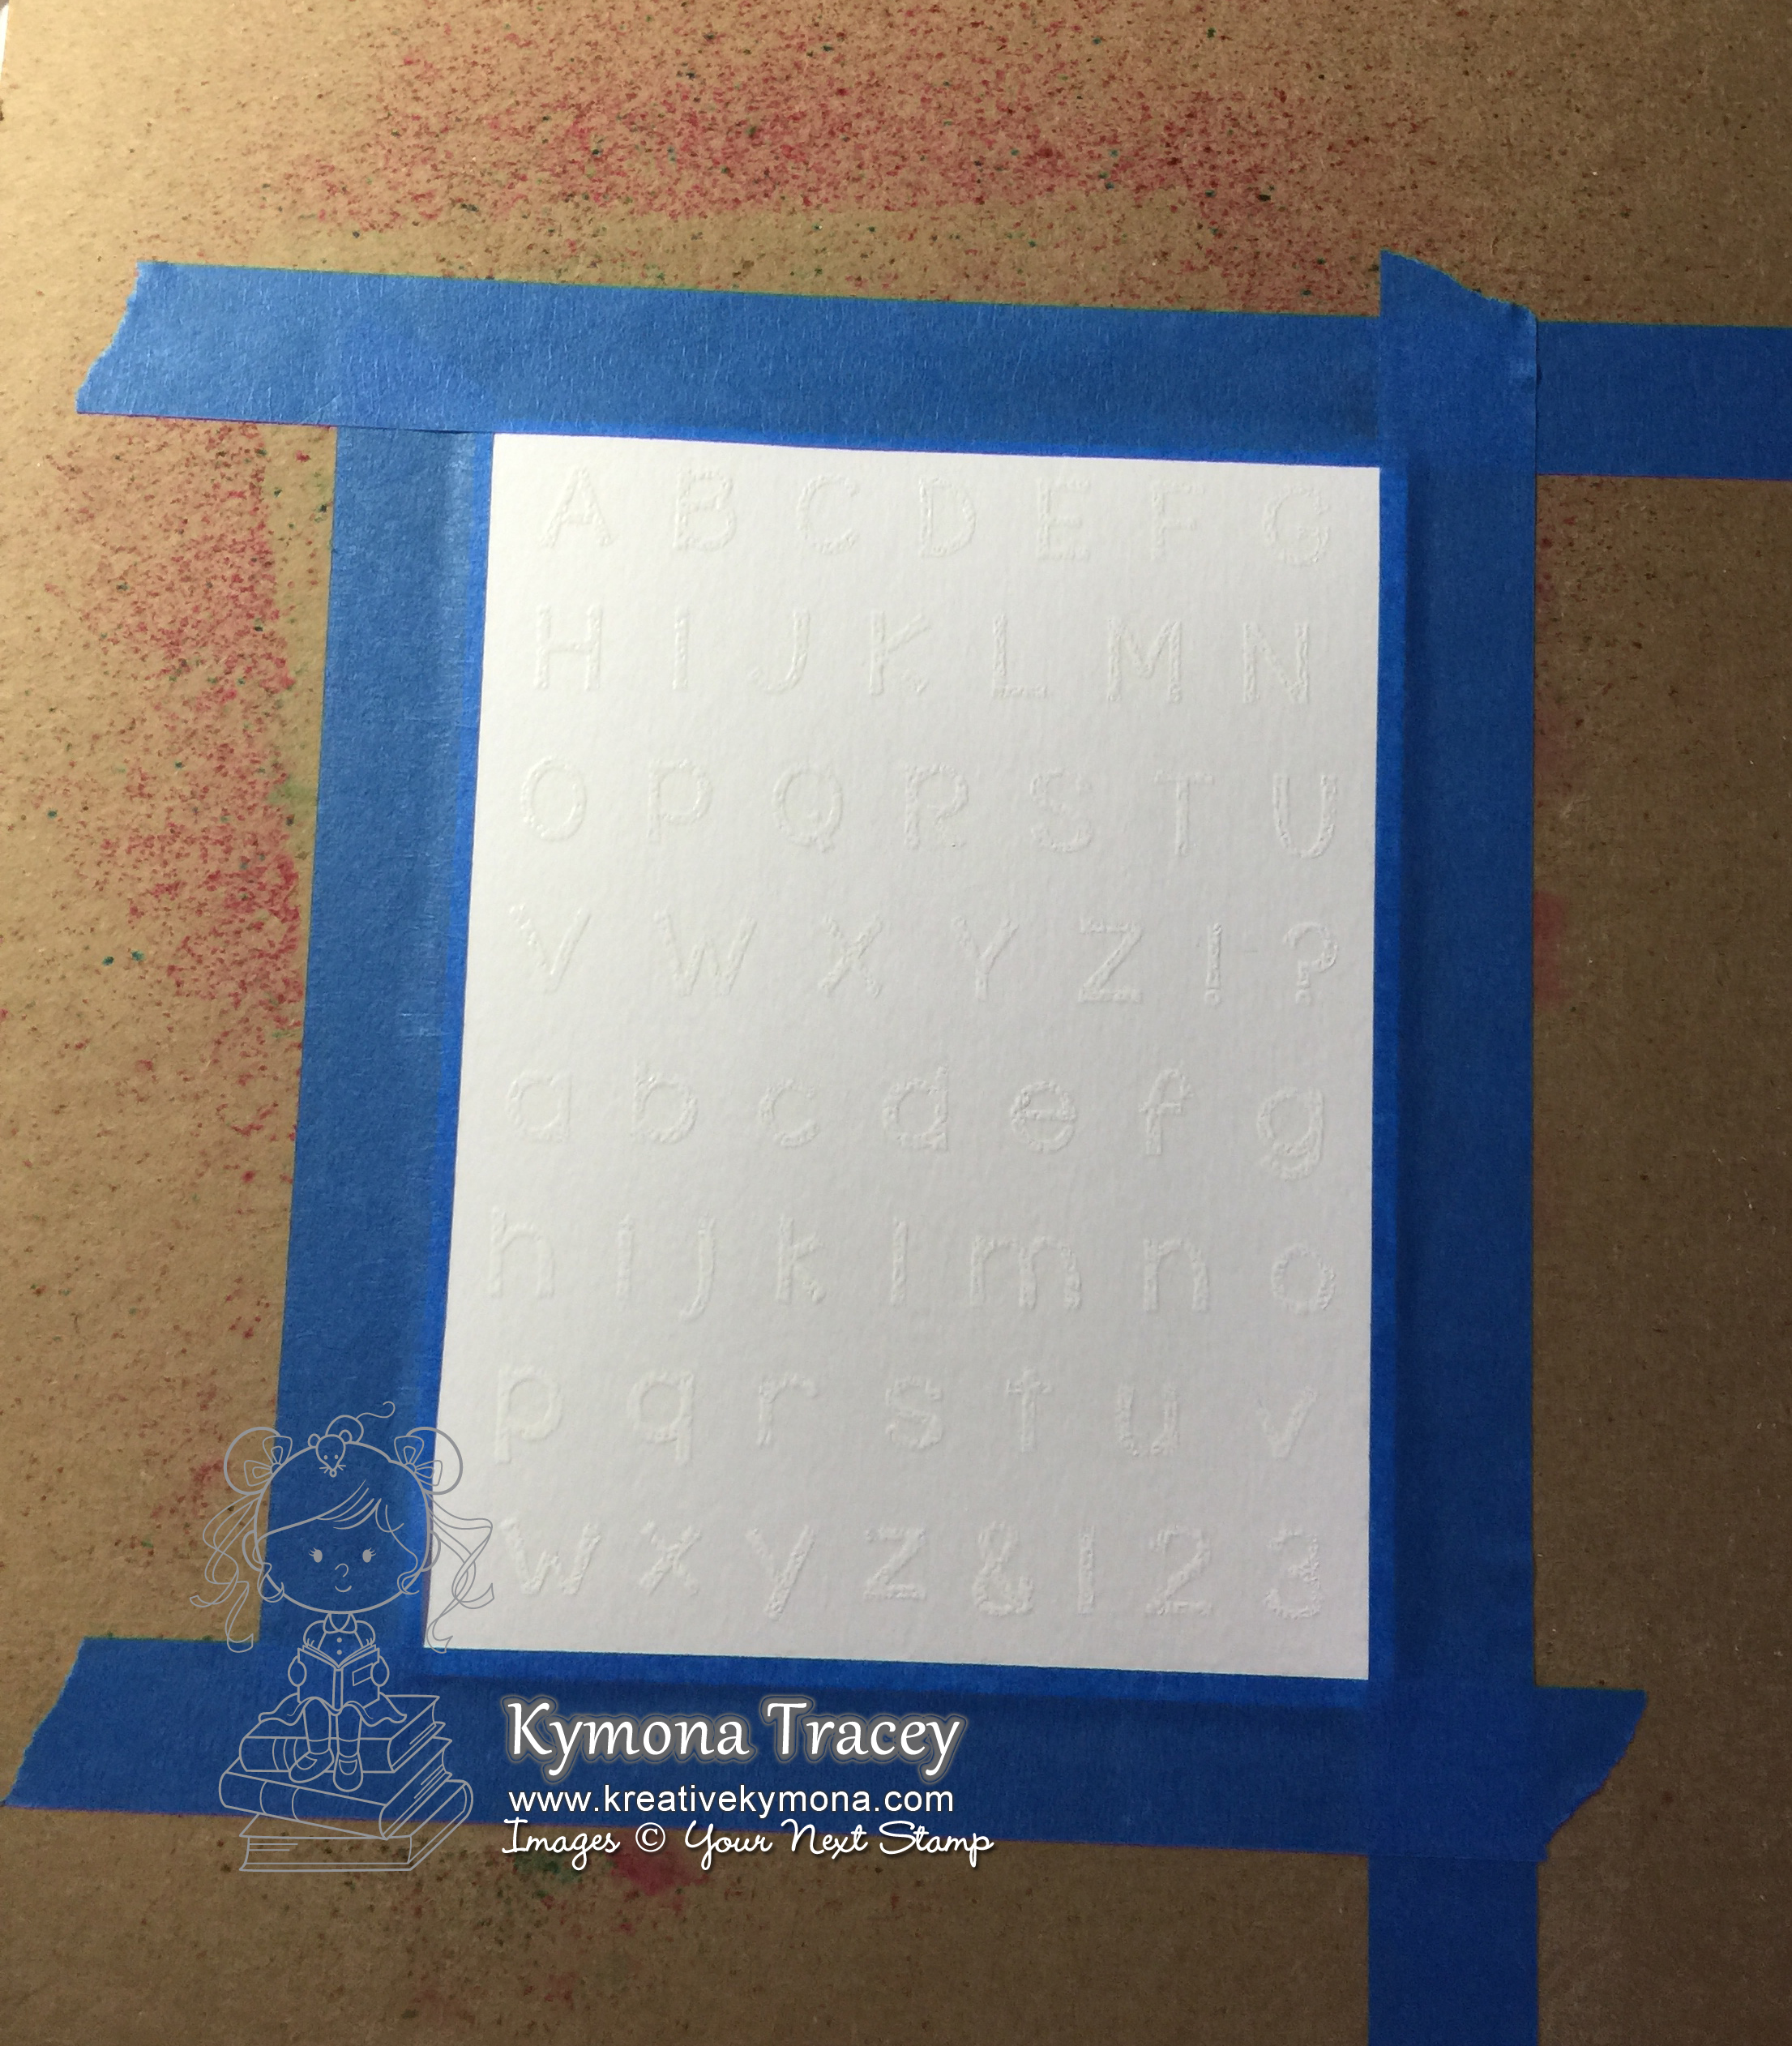
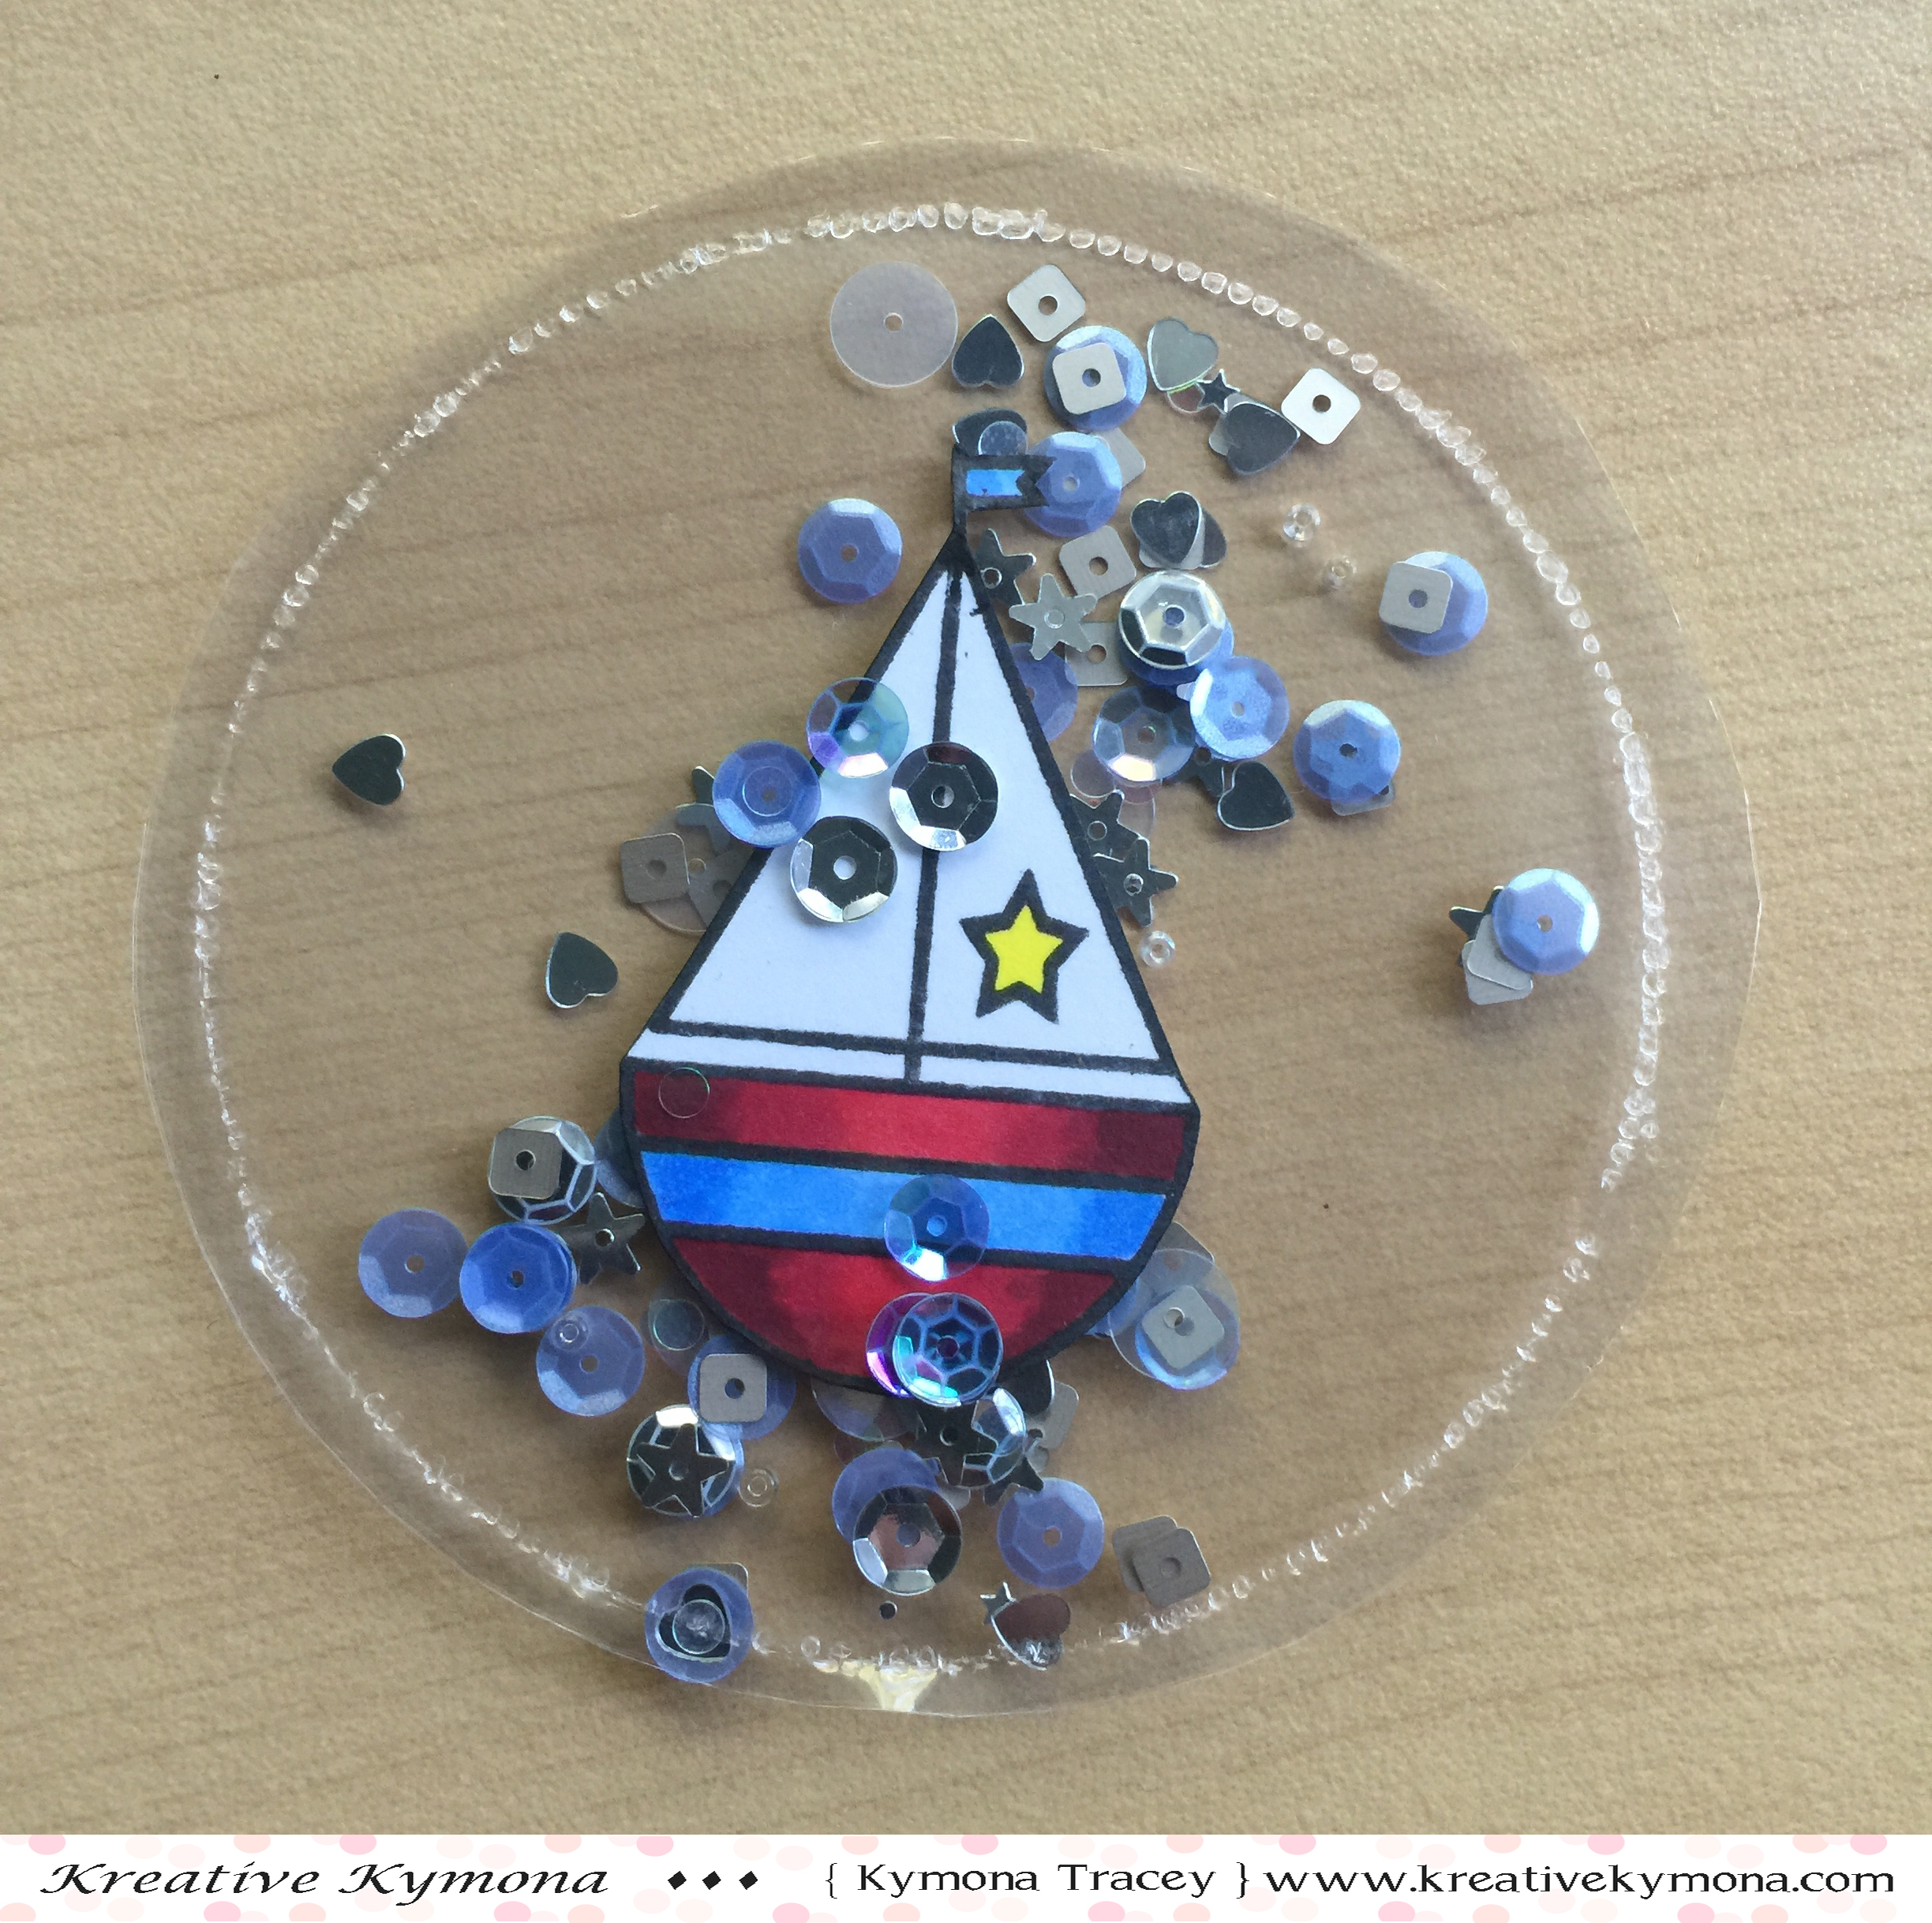
  8. I created a shaker pocket using the We R Memory Keepers Fuse Tool, click here if you want to see a tutorial.
  9. I added random sequin to my shaker pocket and sealed it up.
  10. I attached the pocket to the back of the pattern paper using Tombow Extreme tape.
  11. Then I added 3M Foam tape to the back of the pattern paper, to add dimension.
  12. I put all of the pieces together.  Then I added my colored elf to the front of the window.
  13. I punched a hole at the top of the tag using the We R Memory Keepers Crop-A-Dile.
  14. I added some ribbon to the tag.

Awesome outcome!!

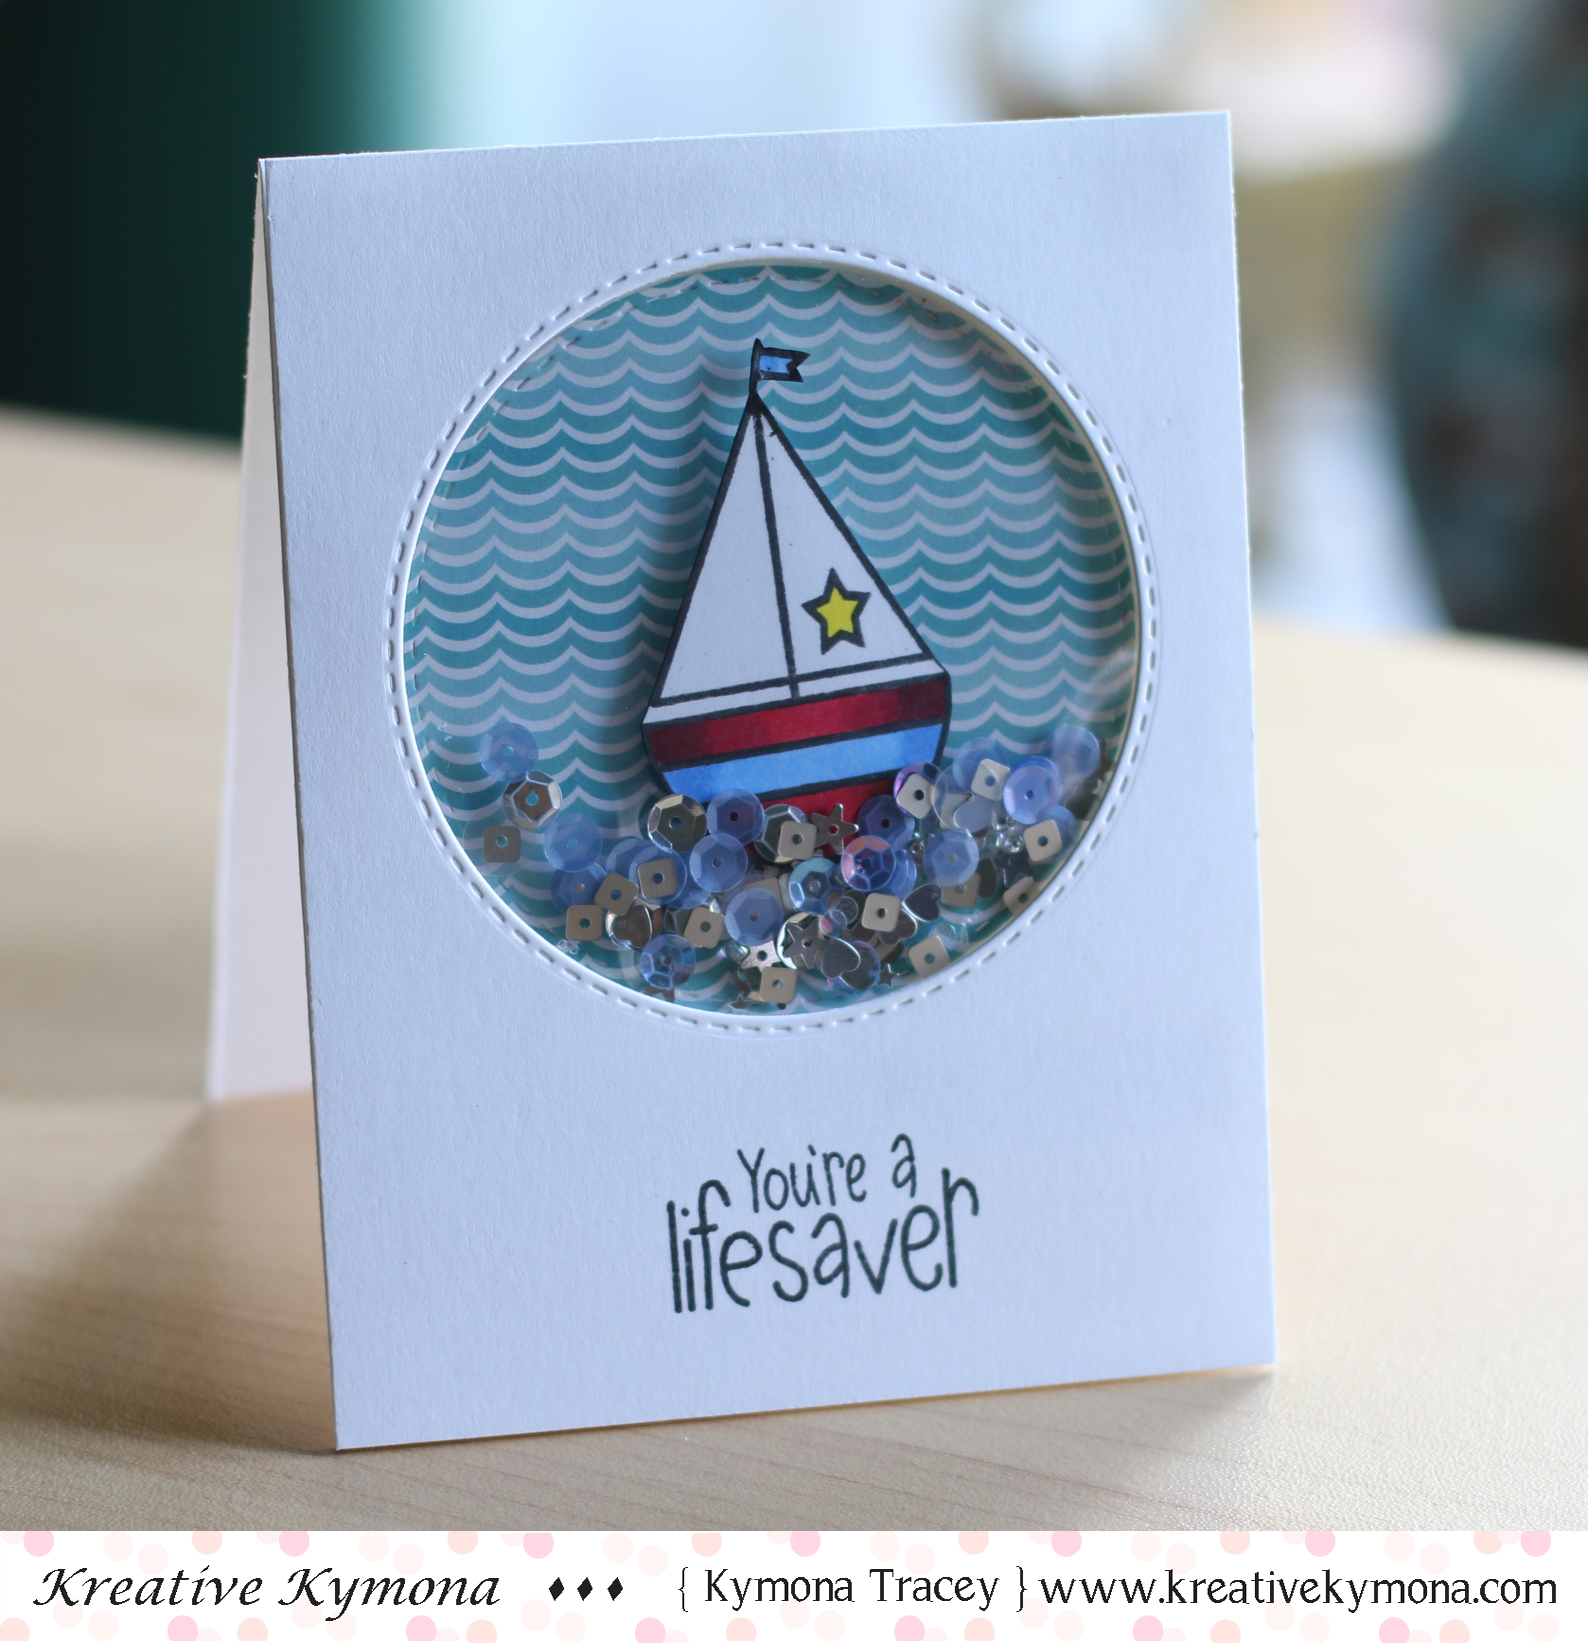
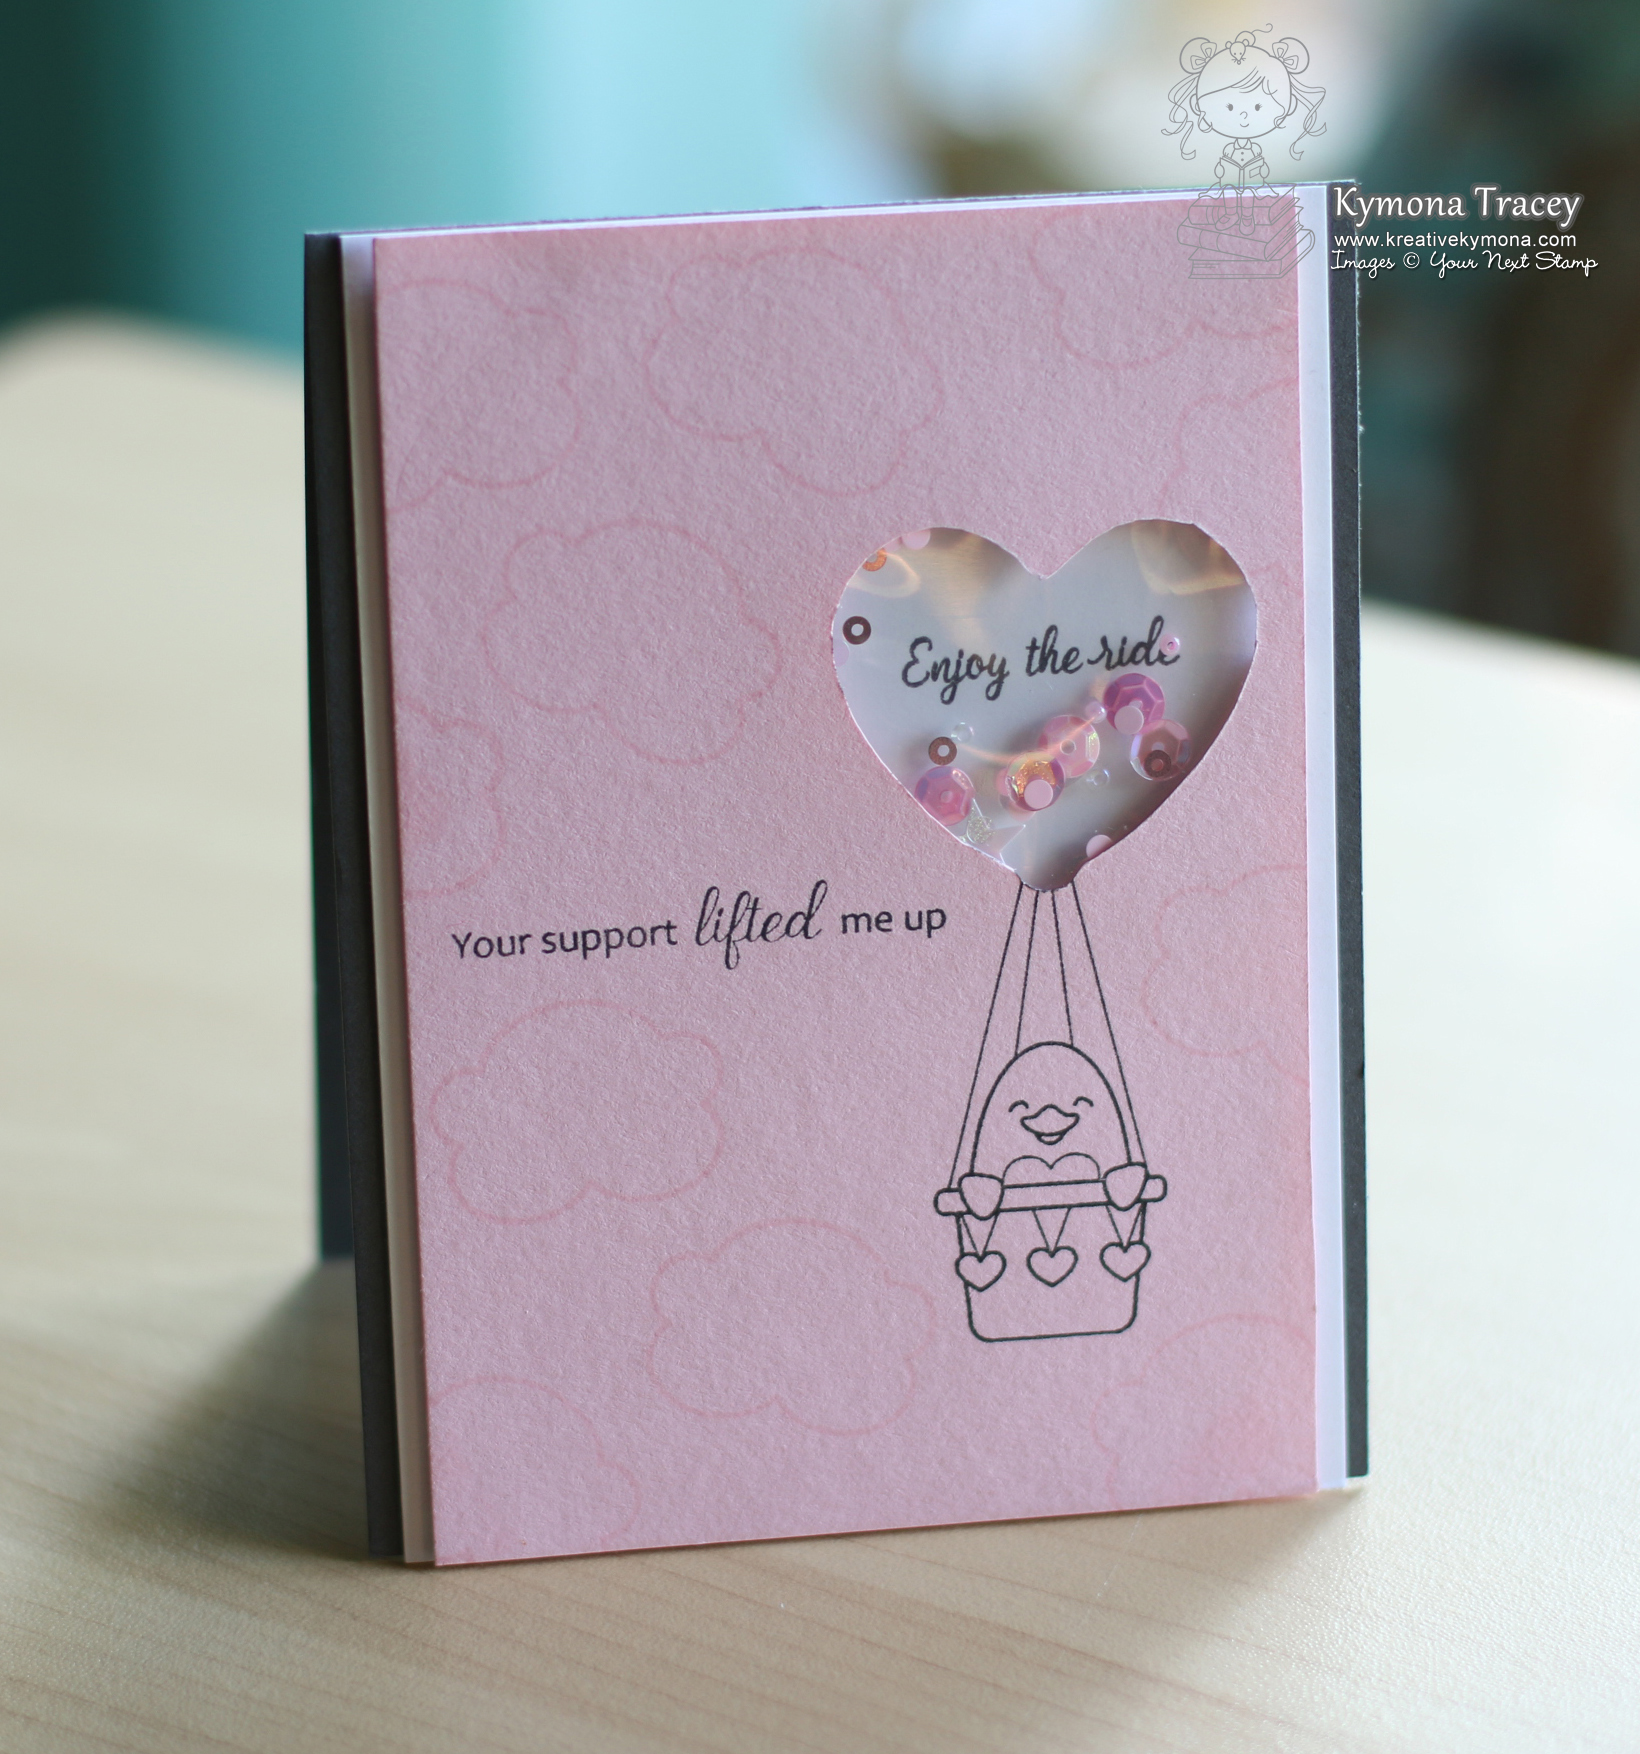
Second up is a card:

HO, HO, HO

Check out my santa!!  I love how he looks like he is peeking into your window!!  Hope you’ve been nice this year.

Check out this picture I also took of this card using some props!!  I wanted to give it a try.

Santa

I picked up this porcelain palette plate and was excited to use it!!  I love how the card looks surrounded by different embellishments.

Here’s how I created this card:

  1. I cut my front card panel to 4.25 x 5.50 and used My Favorite Things Jumbo Peek-a-Boo Circle Windows Die.
  2. I used Simon Says Stamp Falling Snow Stencil and Wendy Veechi Embossing Paste to add snow to the front of the card panel.
  3. I attached the front panel to the card base using Tombow Extreme adhesive.
  4. I stamped my the santa and used Copic Markers: R37, R39, R89, E00, E11, C1 and colored him in.
  5. I slipped the santa between the front panel and the card base to give the impression that he is peeking into your window.
  6. I stamped the sentiment and WaLa, I was done!1

Super sweet and pleasant card!!

Soooo, what do you think?  Please leave a comment below!!

Stay tune for my third card as well!

I’m entering my tag into the Tag You’re It Challenge #33

TYIC #33

Supplies used:

Peeking FriendsMFT Hybrid Black Ink Copic Markers Brother Scan and Cut2PPP Stitched Banner Duo 2 Dies Tombow Multi-Purpose AdhesiveFuse Tool3M Double Coated Foam Tape We R Memory Keepers Crop A DileRecollections White HeavyweightNeenah Desert Storm CS MFT Peek-a-Boo Circle DieEmbossing PasteTombow Xtreme

Thank you so much for stopping by!!

~Kymona

a2z Scrapbooking September 2015 Challenge

Hello everyone!!  I’m here with a2z Scrapbooking today with our September Challenge!!!

Our new challenge is sure to please you this month!!  Our challenge this month is Shake it Up!! 

I love shaker cards!!  For those of you who follow me know that I love shaker cards because I make them all the time. You can find a full tutorial on how to create a shaker card using a fuse tool here

Check out the card I created for this challenge:

Joy to the World (a2z)

Here is how I created this card:

  1. I cut the Bo Bunny Altitude Pattern Paper to 4.25 x 5.50, which is the size of my card base.
  2. Then I used a circle die to cut a circle in the center of my patten paper.
  3. After that I used the same die and my fuse tool and created a circle pocket for my sequin.
  4. I filled the pocket up with Lucy Abrams Iridescent White Sparkly Sequin.
  5. I attached the shaker pocket to the back of the pattern paper using Plus Glue Tape.
  6. I used my Misti to line the sentiment up with the open circle on the pattern paper so that my sentiment placement is correct.
  7. I used Hero Arts Joy To The World Stamp Set to stamp my sentiment with Hero Arts Memories Black Dye Ink.
  8. Once the ink dried completely, I added foam tape tot he back of the pattern paper and attached that to the card base.

Joy to the world 1 (a2z)

Done! Finish! Complete!  Now its time to Shake, Shake, Shake!!

Amazing isn’t it!! I hope you love what you see and that it inspires you to join us this month. You have the entire month to create a new project and enter it into our challenge. By entering you will have a chance to win a $25 Gift Certificate to the a2z Scrapbooking Store. Winner will be announced on the 7th of May.  Good Luck!

The stamp sets that I used can be found at the a2z Scrapbooking Store. If you would like to purchase any of those stamp sets I used please head on over to the store and use the coupon code KYMONA15 to get 15% off your purchase.

Supplies used:

Bo Bunny Altitude Pattern Paper Iridescent White Sequin Plus Glue TapeHero Arts Memory inkMisti HA Joy To The World. jpg3M Double Coated Foam Tape We R Memory Keepers Fuse Tool

Thank you so much for stopping by!!

~Kymona

YNS Sketch and Color Challenge #20

Hello everyone!!!  I’m here today with Your Next Stamp (YNS) and this week’s Sketch and Color Challenge #21!!

Each challenge has a sketch and a color combo to choose from.

Take a look at the sketch:

YNSSketch21

Take a look at the color combo:

YNScolor-21

You know me, I went with the sketch!!  I never seem to have the colors need for this.  I hope I can change for the next challenge, LOL!

Take a look at my card:

Let's Celebrate (YNS)

Yes, another shaker card.  I’m addicted to these cards.  Or is it the sequin that I love seeing move about in the card. LOL, LOL, LOL!!

YNS Supplies: Happy 6th Birthday Stamp Set, Balloon Buddies Die Set

Other Supplies: Retired Stampin’ Up! Watercolor Wonder DSP, My Favorite Things Hybrid Black Ink, Foam Tape, Lucy Abrams Peachy Sequin, We R Memory Keepers Fuse Tool, Recollections White Heavyweight Cardstock, Recollections Black Heavyweight Cardstock

Creating this card was a bit easy.

All I did was cut my DSP to make the sketch.  I adhered the yellow panel to the card base with a tape runner.

I die cut a circle in the front card panel.  That is where my shaker packet will go.

I created my shaker pocket using my Fuse Tool.  If you want to know who to do that you can check out my tutorial here.

I attached the shaker pocket to the card panel with the tape runner.  I added foam tape the back of that card panel and attached the entire piece to the card base.

I cut two strips of DSP to different sizes.  I stamped the sentiment on the bigger piece and attached both pieces with the tape runner.

I die cut the two balloons out of the same DSP and attached them to the front of the shaker window.  I die cut the balloon strings out of black card stock and attached them to the balloons.

I told you it was easy.  Now its your turn!!

So are you ready for the new challenge?

You have until September 3rd at midnight EST to play along and submit your project on the YNS Blog post.  One random participant will win a $15 gift certificate to the Your Next Stamp Store.  If YNS stamps or dies are the focal point then the winner receives and additional $5 gift certificate fro a total of $20.  The winner will be announced on the YNS Blog the Sunday after the challenge closes.

Supplies used:

YNSBDay2015  Balloon Buddies DieMFT Hybrid Black Ink 3M Double Coated Foam Tape Just peachy fuse bundleRecollections White HeavyweightRecollections Black Heavyweight

Thank you so much for stopping by!!

~Kymona

Your Next Stamp DT Dare – Shake, Shake, Shake

Hello everyone!!  I’m here today with Your Next Stamp and our DT Dare!!!

What is a DT Dare you ask? It’s a fun monthly challenge for the YNS design team to show case more fabulous projects using the new release products!!

YNS-DARE-Badge

Fun right!!

Wait there is more!!  If you leave a comment on the YNS blog post you could Win a YNS Stamp Set of your choice!!! 

Exciting right!!  It sure is for me!!

The DT Dare Challenge this month is Shake, Shake, Shake!!  The design team was asked to create a project using that has a shaker pocket.

Take a look at my card:You're so sweet

 YNS Supplies: Scrapworks Mini Sunburst Dies, Zero Calories

Other Supplies: We R Memory Keepers Fuse Tool, MFT Hybrid Black Ink, Lucy Abrams Star Shine Sequin, 3M Foam Tape

Here is how I created this card:

1. I cut my card base to a A2 size card, 4.25 x 5.50 scored at 5.50.

2. I cut the white card panel to 4.25 x 5.50 and used Your Next Stamp Scrapworks-Mini Sunburst Die Set to cut a flower in the center of the paper.

3. I used a retired Stampin’ Up! embossing folder to add dimension to the card front.

4. I stamp the sentiment and the smily faces from the Your Next Stamp Zero Calories stamp set with My Favorite Things Hybrid Black Ink.

5. I used the We R Memory Keepers Fuse Tool to create my shaker pocket.  I added Lucy Abrams Star Shine Sequin to the pocket then sealed it.

6. I added the shaker pocket to the card panel with tape adhesive.  I added foam take to the back of the panel and added it to my card base.

Whoa La!!  My card is complete!!

So tell me what you think of this challenge?  I would love to know, let me know below!

Don’t forget we have Blog Candy for you!

DTDare2candy-547x232

Just a reminder….we have a Birthday Sale!!!

2015 special bday stamp set badge

Don’t for get to take advantage of the special promo code to choose your own discount!!

sale badge 6th birthday

Supplies used:

Zero CaloriesScrapworks Mini Sunburst Diesfuse bundleMFT Hybrid Black InkStar Shine Sequins 3M Double Coated Foam Tape

Thank you so much for stopping by!!

~Kymona

Your Next Stamp Birthday Blog Hop!!!

Aug92015-hopgraphic

Hello everyone!!  Yayyy, my second blog hop featuring new products from Your Next Stamps tickles me pink!!

If you’ve been hopping along, you would have arrived from Deborah’s blog and if you’d like to start from the beginning, you can click on over to the linky at the bottom and start at Jeanie’s blog.

I’m over the top excited about this birthday blog hop and this great release!  All of the sets and dies are amazing!!  My favorite one is the Cute Alpha Stamp Set and die!  I used that set on one of my cards below.

Are you ready for my big reveal?  I made two cards to inspire you!

Take a look at my first card:

Your Paw-some (YNS)

I have to admit, I’m not a dog or cat fan.  I’m totally afraid of them but this card makes me change my mind for just a minute, LOL.  I love the how this card turned out.  I also love how this stamp set comes with so many small pieces that can be used for so many different card looks.

YNS Supplies: Phoebe with a Wagon Stamp Set and Die Set

Other Supplies: Neenah Desert Storm Cardstock, Black and White Cardstock

Take a look at my second card:

Back to school 3 (YNS)

This is my favorite card.  I created this card for my daughters new teacher.  It’s a back to school card that my daughter will give to her new teacher.  I really thing she will enjoy this.

I love making shaker cards.  They are super fun and interactive.  For this card I decided that I wanted the entire card to be a shaker card.  I created the watercolor panel and didn’t want to add anything to it.  So I decided to project it behind the plastic.

Check out my process:

Watercolor back to school (YNS)

I used Versamark Ink and inked up my entire stamp set without taking the stamps off of the sheet they came on. That allowed me to keep letters and numbers nice and even.

Watercolor Back to school 2 (YNS)

After I stamped onto the watercolor paper, I added embossing powder and heat set it.

Watercolor Back to School 3 (YNS)

I used my paint brush and added a good amount of water to the watercolor paper.  Then I added my distress ink colors one at a time to the watercolor paper.  I did two watercolor washes, heating setting in between each wash.  I totally love how this turned out.  How could you add anything directly on top of it?  So the only way to decorated it with out touching it was to create a full shaker card.

Back to school (back)

My daughter did write on the back of the watercolor panel before I sealed it in the plastic. I blocked out both names to protect them.  I just wanted you to see what the back looks like.

My daughter loves how this card turned out.

Lets take another look at the card:

Back to school 2 (YNS)

YNS Supplies: Phoebe with a Wagon Stamp set and die, Cute Alpha Stamp set

Other Supplies: We R Memory Keepers Tool Bundle, Lucy Abrams Just Peachy Sequin, Copic Markers R27, Y17, C3, Vellum, Versamark Ink, Hero Arts White Embossing Powder

So what do you think?  I had so much fun creating these cards to inspire all of you and show you the versatility of the stamp sets! Which one of these cards are favorite?  I would love to hear from you!

Be sure not to miss any blog along the way, because three lucky commenters will have a chance to win a YNS $50 YNS gift certificate. Winner will be announced on the YNS blog on August 12th.  So don’t for get to leave a comment on each of the blogs participating in the blog hop.

2015 special bday stamp set badge

Also, don’t forget to take advantage of the special promo code to choose your own discount!!!

sale badge 6th birthday


Thanks for stopping by!!

~Kymona


Playing with Secondary Colors

Hello everyone!!  I popping in here with some homework for My Favorite Things Summer School Lesson this week.

Lesson #9 is all about Secondary Colors!!

What are Secondary colors you ask?  They are the direct counterparts of the primary colors, red, yellow and blue.  They are Orange, Green and Purple!!

Colors Wheel

Take a look at my card:

Best of Luck

For my card I used 2 primary and one secondary color!! I love how my card turned out.  I was able to combine two of my favorite products from My Favorite Things!  The Adventure is Calling Stamp Set and the New Jumbo Peek-A-Boo Die Set!!

I used my Fuse Tool to create my shaker pocket and I added Lucy Adams French Lavender Sequin.

I colored the little girl with : R39, E23, E00, E11, E33, V15, R20.

I stamped the sentiment using My Favorite Things Hybrid Black Ink.

If you want to know how to make the shaker pocket, check out this post!

So how do you think I did with this lesson?  Let me know below!!

Supplies used:

MFT Adventure Is CallingMFT Peek-a-Boo Circle DieFrench Lavender fuse bundleCopic MarkersMFT Hybrid Black Ink


Thank you for stopping by!

~Kymona

TAWS July Guest Designer

Second Post for today

If your looking for the Your Next Stamp Blog Hop, click here

Edited to add more photos

Hello everyone!!  I’m here today Guest Designing for The Alley Way Stamps (TAWS)!!  I’m excited about this opportunity!!

Take a look at my card:

You're a lifesaver (TAWS)

I used The Alley Way Kids n’ Caboodle Stamp Set to create this shaker card!!  I had a ton of fun working with this stamp set.

kidncaboodle

All of the images in this stamp set are cute and chunky!!  Great for coloring!

When I saw the sailboat, I knew I need to make a shaker card.  I also knew I wanted the boat to be in the shaker pocket with the sequin, riding the waves!!  LOL!

Here is how I created this card:

1. I cut my card base to an A2 size card, 4.25 x 5.50.

2. I cut my card panel to the same size.

3. I used Simon Says Stamp Circle Stitched Circle Dies to cut the window in card panel.  I used the same stitched circle die to cut a circle out of a piece of pattern paper.

4. I used the panel as a guide to adhere the pattern circle to my card base.

5. I colored my sailboat with Copic Markers: R35, R37, R89, B24, B32,Y06 then cut it out.

Sailboat inside (TAWS)

6. I used my We R Memory Keepers Fuse Tool to create my shaker pocket.  I added my Lucy Adams Blue Topaz Sequin and my colored sailboat in the pocket before sealing it up.

If your unsure how to use the fuse tool to create a shaker pocket, check out this post.

7. I stamped my sentiment from the stamp set in My Favorite Things Hybrid Ink.

8. Once the pocket was sealed, I adhered it to the back of the card panel and added foam adhesive.

Sailboat pieces (TAWS)

9. I added the panel to the card base and I was done!!!

When you shake the card the boat moves along with the sequin.  It’s super cute.

So what do you think? Please leave a comment below.

I hope I’ve inspired you to check out The Alley Way Stamps Store if you haven’t already!!

Supplies used:


kidncaboodle Stitiched Circlefuse bundleBlue Topaz Sequin MFT Hybrid Black Ink

Thank you so much for stopping by!!

~Kymona


Your Next Stamp July 2015 Sneak Peek

Hello everyone!! This is my first post as a Your Next Stamp Design Team member!!  I’m over the top excited about this opportunity.

We are getting ready for our July Release Blog Hop tomorrow with a sneak peek today.  Are you excited?  Well me too!!

Take a look at my card that I’m giving you a sneak peek of:

Lift me up (YNS Peek)I couldn’t resist making a shaker card with this super stamp set!! Shaker cards are so much fun to make and this heart called for it.

This stamp set is called Waddles Rainbow Fun and there are 15 clear stamps in this set.

I actually cut that heart out using and old fashion craft knife because I didn’t get the die set in time. That was fun and back to the basics.

How did I create this card:

1. I cut my base cardstock to an A2 size card, 4.25 x 5.50.  I cut the white cardstock to 4 x 5.50. I cut the pink cardstock to 3.75 x 5.50.

2. I used the cloud stamp and stamped a few clouds using Versamark Ink eyeballing where I wanted to stamp my hot air balloon.

3. I stamped my sentiment using My Favorite Things Hybrid Ink to the left of where I wanted my hot air balloon to be.

4. I finally stamped my hot air balloon using My Favorite Things Hybrid Ink on the right of the sentiment.

5. I use my craft knife to cut out the stamped heart.  I positioned my pink panel over the white panel so I could stamp the sentiment within the heart shape.

6.  I created my shaker pocket and added Lucy Adams Cherry Blossom Sequin before sealing the pocket up.

If you want step by step instruction on to create a shaker pocket click here.

7. I added the shaker pocket to the pink panel.  Then I added foam tape to the entire panel so that its raised off the white cardstock.

8. I decided to not color my image because I loved the simplicity of the card.

So are you excited about what you see?  You have to see what my fellow team members came up with the rest of the release!

You can find all of the new projects on the Your Next Stamp Blog!!

I hope I see all of you tomorrow for the July 2015 Release Hop!!

Supplies used:

VersamarkMFT Hybrid Black InkCherry Blossom Sequin fuse bundle

Thanks for stopping by!!

~Kymona


Waffle Flower Crafts – Inspiration Photo

Hello everyone!! I’m here with our new Waffle Flower Crafts Photo Inspiration Challenge!!!

This is my eleventh and final challenge for 2015 with Waffle Flower Crafts! Time really went by so fast, 6 months really went by in a blink of my eyes.

I had a really great time on this team.  The ladies that I worked with are all amazing and talented designers.  Thank you Nina and Tessa for the opportunity to be apart of this amazing company Inspiration Photo Team.

This weeks photo really stumped me.  I was lost up until the day my photo was due.  I think the colors confused me.

Take a look:

Waffle Flower PhotoYou know that I’m a shaker card lover so I decided that I would chose one color from this photo and create a very cute and simple shaker card for the last time for this challenge.

Take a look at my photo:

Yippee (WFC)

Isn’t that little heart shaker cute!!  I created that with my We R Memory Keepers Fuse Tool, Waffle Flowers Crafts Congrats Die and V’s Sweet Ideas shaker balls.

I stamped my sentiment using Waffle Flower Crafts Congrats Stamp Set and My Favorite Things Hybrid Ink.

If you want a refresher on how I create my shaker pockets, click here.

So this is my last card for this challenge, how did I do?

Now its your turn!!  I can’t wait to see what you come up with.

Supplies used:

fuse bundleCongrats Die WF Congrats Stamp Set MFT Hybrid Black Ink

Thanks for stopping by!

~Kymona

CASology 151 – Kids

Hello everyone!! It’s CASology Tuesday!! We are back with another Cue Card for you!!

This week’s cue card is super cute and sweet.  You will have fun with this cue card!

This week’s cue card:

Week 151 - Kids

I had so much fun creating cards for this challenge.  Yes, I couldn’t just make one, I made four!!

Take a look at my card:

Kids Card 3 (CAS)

Isn’t this card just the cute card you’ve seen today!!!  I created these cards for my daughter and nieces.  They always want to play with my stamp sets and inks.  So I decided to create these so they can color their own card and give it away.

You can also send this card to a well deserving recipient who can color their own card!  I would love to receive a couple of these.

Kids Card (CAS) 4

My nieces will have fun when they see these.

To create these were super easy:

1. I cut my base card to 3-3/4 by 10-2/16 scored at 5-1/16.

2. My card panel was cut using Mama Elephant Femme Frames.

3. I used my Misti to stamp So Suzy Stamps Bear With Honey multiply times with My Favorite Things Hybrid Black Ink.

4. I used Papertrey Ink Write Stuff Holders Die to cut a crayon holder twice on each card.

5. I pushed the crayon through the holes and that was that!!! What do you think?

Take a look at another:

Kids Card (CAS)

For more inspiration, check out my fellow Design Team members blog for more awesome work.

Design-Team

Gillian Ross

Hazel Hodgkins

Jen Wills

Joyce Mehrberg

Judy Marino

Kimberly Wiener

Kymona Tracey ←Me

May Park

Melissa Chipperfield

Tracey McNeely

Our Guest Designer this week:

Claire

Our Sponsor this week is Your Next Stamp.

Supplies used:

FEMME_FRAMES-CC_largeHoney BearMistiPTI Write Stuff Holders. jpgMFT Hybrid Black Ink


Thank you so much for stopping by!

~Kymona