Top Dog Dies – Insta Mini Wedding Brag Book

Hello everyone!!  Its Top Dog Die Wednesday!!  I’m here today showcasing Top Dog Dies Heart Mini Album Die!!

TDD Heart Mini Album DieThis die is amazing.  Its so easy to use and you could mass produce mini albums/brag books with no problem.

As you know, these days easy is what I need and this project fit perfectly in my schedule.

Take a look at the mini brag book I created:

Just Married Brag Book

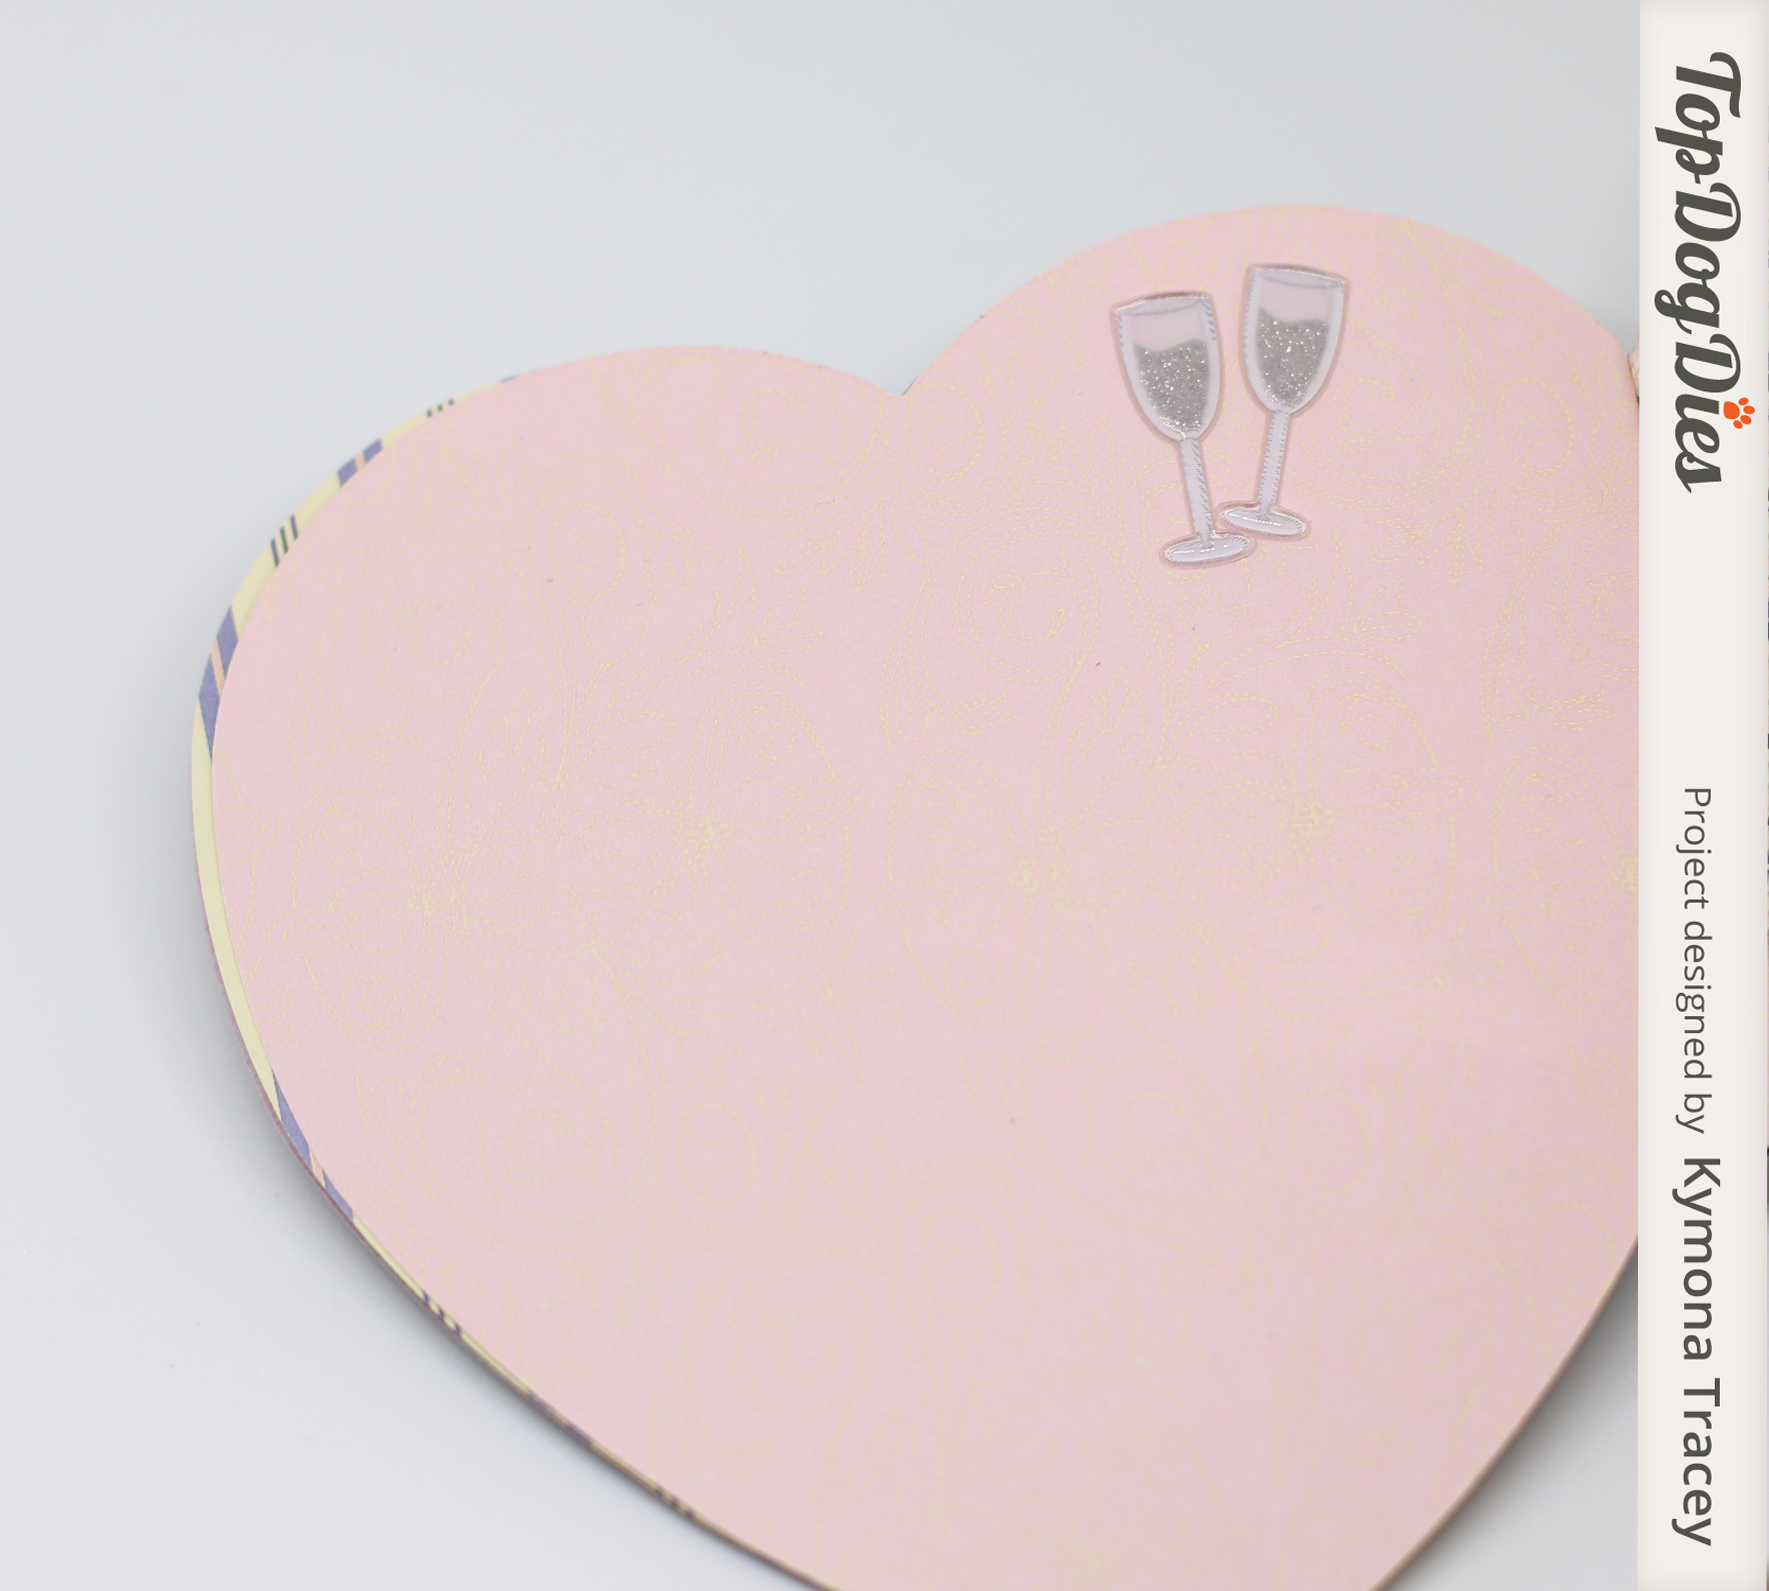
Yes, its a mini wedding brag book perfect for a new bride to show off her wedding at anytime.

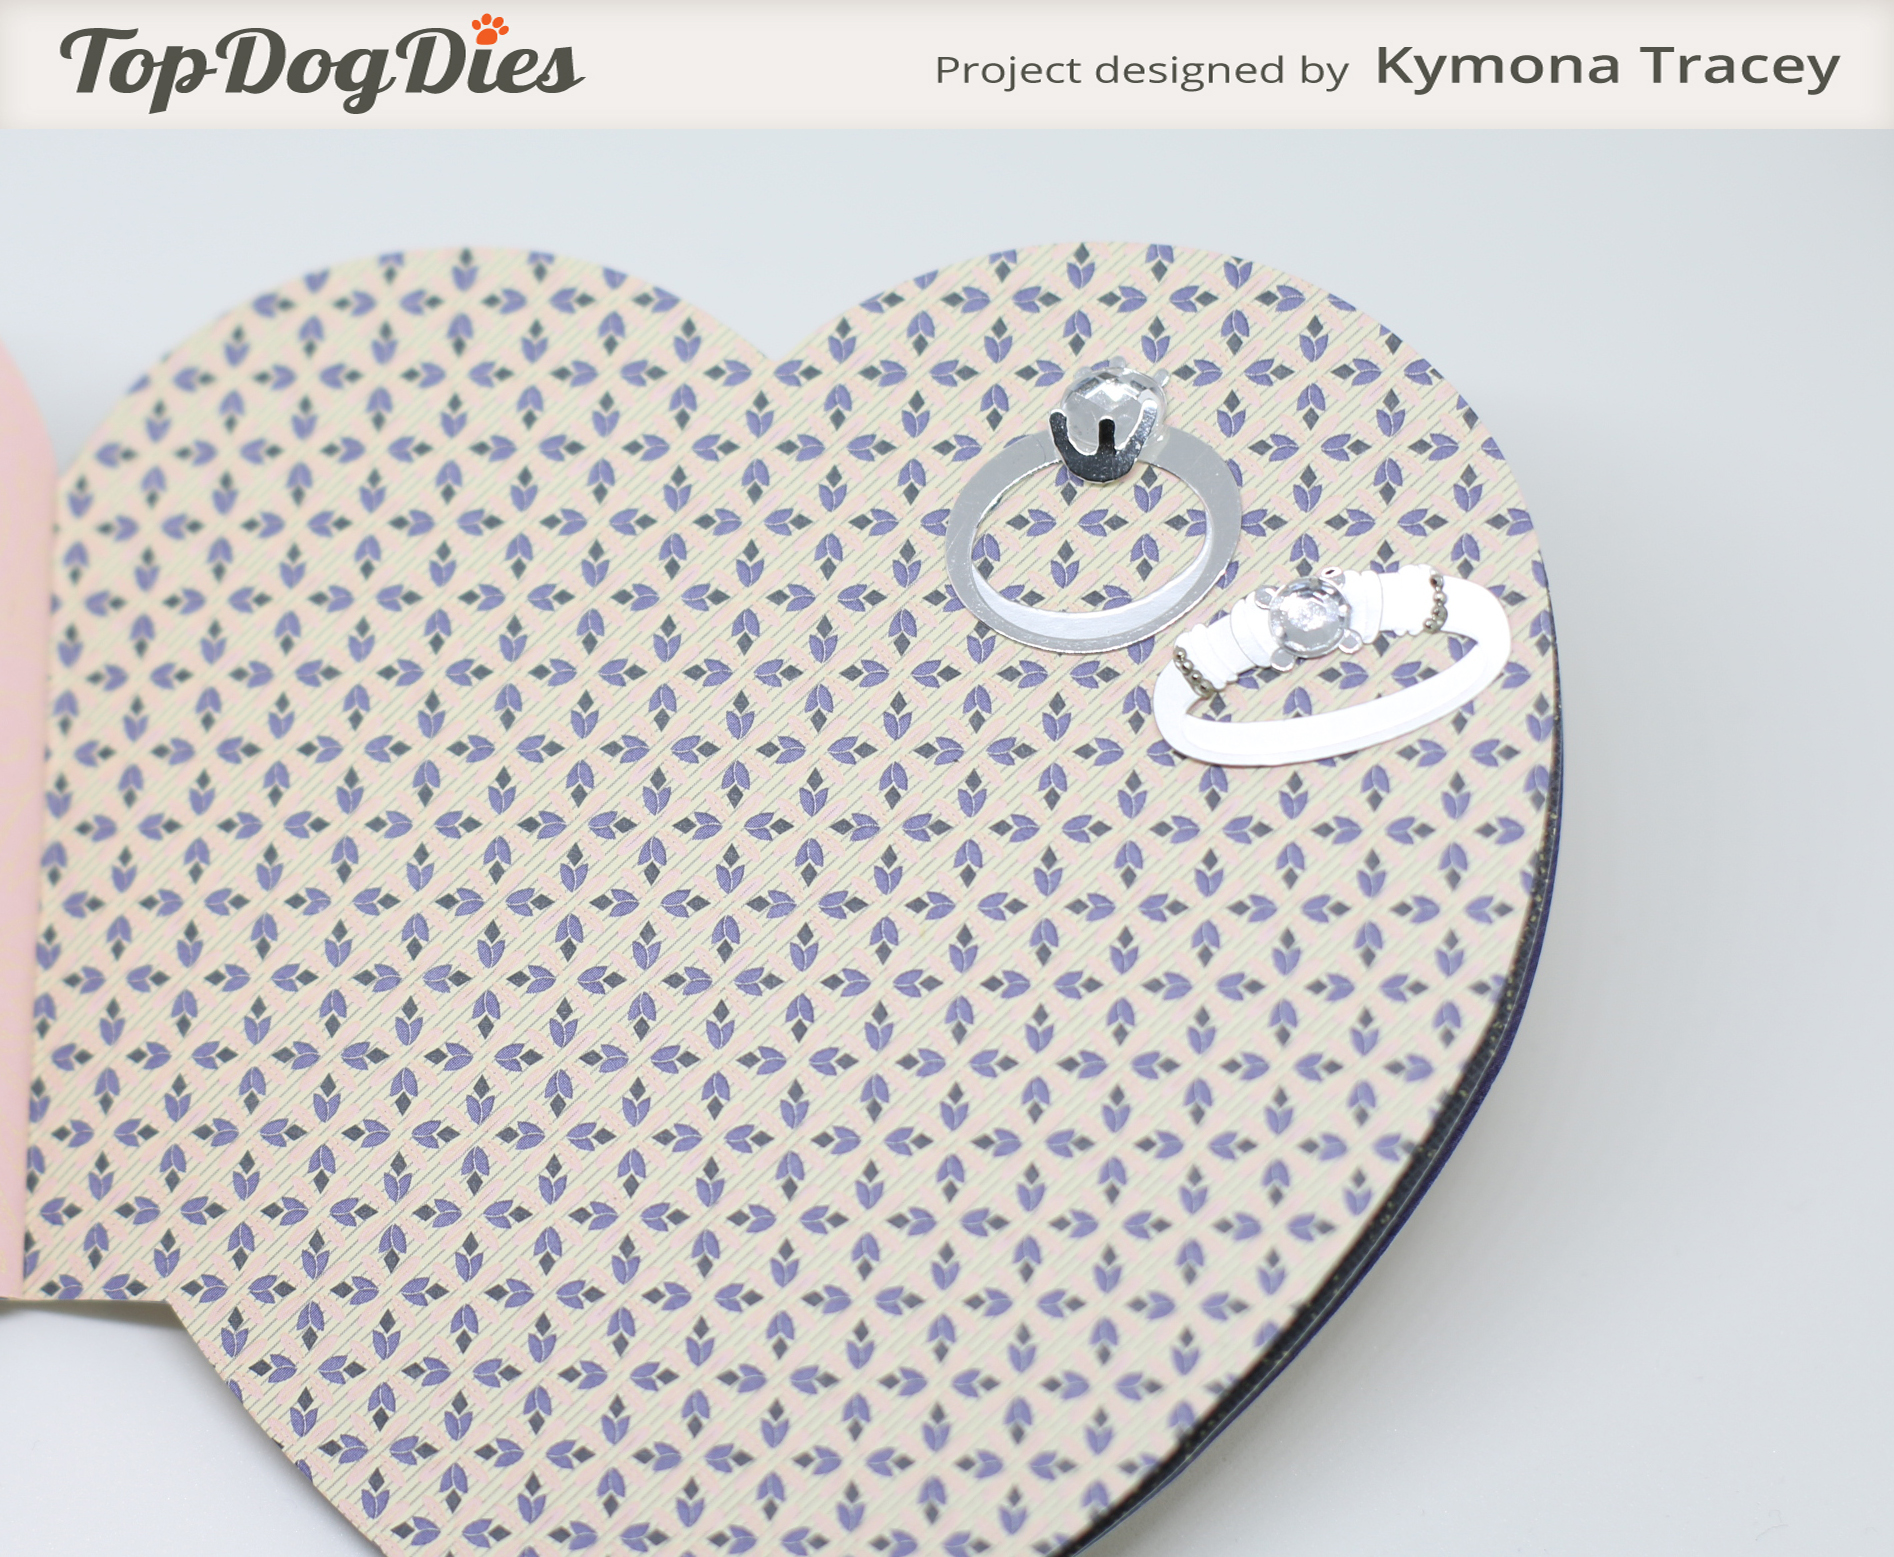
Lets look at some of the inside pages:

Mini Brag Book 1

Mini book 3

Mini Brag Book 4

Mini Brag Book 5

Mini Brag Book 6

Mini Brag Book 9

Mini Brag Book 10

Here is how I created this mini brag book in 3 easy steps:

1. I used Top Dog Dies Heart Mini Album Die to cut 6 pages of some retired Stampin’ Up! DSP.

2. I punch 3 holes on the side panel of the book and add 3 retired Making Memories Mini Silver Brads to bind the pages together.

3. I added some random stickers I had left over from years ago to each page of this book.

That’s it!  No stamping or anything fussy!

So I know your asking, what size pictures will fit in this mini brag book?

I have the solution for that.

Check out my new Instax Mini 8 Camera!!  I love the size and the sizes of the pictures.  They are Instagram perfect pictures. This camera comes in many different colors: black, blue, yellow, pink and white.

Instax Camera

The pictures are instant so you can snap and add to your book all in one swoop! You can’t beat this!

So what do you think?  Let me know below!  I would love to hear from you.

Supplies used:

TDD Heart Mini Album DieInstax Camera   Making Memories mini brads

Thank you so much for stopping by!

~Kymona


CASology 146 – Music

Hello everyone!!  It’s CASology Tuesday!!  We are back with another Cue Card for you!!

First let me say thank you to everyone for your well wishes and prayers.  My dad’s progress is day by day.  Everyone day is different but I’m just glad he is still here. So I ask that you still pray for my dad.

Now on to our cure card this week.  I love this our cue card this week.

Week 146 - Music

When I saw “music”, I knew exactly what I wanted to create. I had some retired Stampin’ Up DSP that had a music sheet that I never got a chance to use, so why not open the package now.

Take a look at my card:

Just a Note (CAS)

This card was super easy to make, which is what I need right now.  I was able to make this card while my dad slept.

Here is how I created this card:

1. I used Simon Says Stamp Stitched Slopes and Hills Dies to cut and add the stitched lines on my card panel.

2. I added the cut panels to Stampin’ Up! retired Modern Medley DSP.

3. I used Papertrey Ink Fancy That Stamp Set to stamp my sentiment.

4. I used Versamark Ink and embossed the sentiment with Hero Arts White Embossing Powder.

5. I attached the front panel to the card base with fun foam for even coverage.

Easy and Classy!

What do you think? Let me know what you think.

For more inspiration, check out my fellow Design Team members blog for more awesome work.

Design-Team

Gillian Ross – taking a break

Hazel Hodgkins

Jen Wills

Joyce Mehrberg

Judy Marino

Kimberly Wiener

Kymona Tracey ←Me

May Park

Melissa Chipperfield

Tracey McNeely

Our Guest Designer this week:

Loll

Our Sponsor this week is STAMPlorations.

Supplies used:

Stitched Slopes and HillsModern MedleyFancy That Versamark 67f65-white2bembossing2bpowder

Thank you for stopping by!!

~Kymona

Waffle Flower Crafts – Photo Inspiration

Hello everyone!!  I’m here with our new Waffle Flower Crafts Photo Inspiration Challenge!!!

This is our eighth challenge for 2015 and the weather has finally warmed up for us up her in the Northeast!  Much better then two weeks ago!!

This weeks photo is pretty and super springy (is that a word?).

Take a look:

Photo Inspiration May 11

Perfect colors for a Mother’s Day brunch!  Wait, for all of you who are mothers and mothers-to-be, Happy Mother’s Day!!  Its a day late, but better late then never!!

For this challenge, I decided to use the colors instead of the picture for inspiration.

Take a look at my card:

Congrats

I’m playing with a couple of new dies from the last release.  Did I tell you I love all of the stamps and dies that were released.  All of them are totally amazing.  If you haven’t seen them, you must head on over to Waffle Flower Craft Store and check them out.

I decide to go with an all black background so that those pretty colors can shine through.

I inked my cardstock with Distress Ink Mustard Seed and Spiced Marmalade then cut it with Waffle Flower Craft Doily Circle Die.

I adhered the die cut off to the side of the card front with adhesive and cut off the excess.

Then I used the Congrats Die Cut and cut it 4 times to have a stacked sentiment.

Super easy!  The doily is so pretty once its cut out.  Its a must have.

So what do you think?  Please let me know.

Now its your turn!! I can’t wait to see what you come up with.

I’m linking my card up to Virginia’s View Challenge.

Layers and Dimensions

Supplies used:

Doily Circle Die Congrats Die Mustard SeedSpiced Marmalade

Thank you for stopping by!

~Kymona


Get Sketchy Challenge

Hello everyone!!  First let me say thank you to all of you for your well wishes for my dad.  We have a long way to go but day by day, we are getting there.  Please continue to pray for him.

While he slept last night, I had a chance to play with some of my craft stuff.  The week before he took sick, I received a lot of WPlus9 goodies that I haven’t had a chance to play with.  So I decided to play along with their Get Sketchy With Joni #1 Challenge.

JoniSketch1Take a look at my card:

You are my sunshine

Oh man did I have fun creating this card.  I knew I had to be fast because my dad is dead set on going back to work.  He use to work nights so when 11pm comes he jumps up to go to work so we have to be prepared to stop him.

So, I need to make a card that didn’t require all of my time.  So I decided to make a shaker card and use my We R Memory Keepers Fuse!!

I bought my Fuse some months back from HSN when they had the bundle for a great price.

I’m not sure why I bought it, maybe the price was right but in any case, I’m glad I bought it.

So last night, I opened the package an started to play.

Take a look:

Fuse at work

Jennifer McGuire used her fuse to create a shaker card and I knew I wanted to give it a try.  Check out my circle that was created using one of the photo sleeves that came with my fuse.

I used my circle die as a guide to fuse the plastic together.

Check out my shaker pocket after I add my Star Shine sequin from Lucy’s Card Little Things Collection.

IMG_2829

OMG, super easy and fun.  Now I know what I can create as my dad sleeps.  I will have to create some more.

For the rest of my card:

1. I used Studio Calico’s May Card Kit pattern paper to create the rest of my card.

2. I cut the pattern paper using Wplus9 Sunshine Layers Die to create my card panels.

3. My tag was created using Pretty Pink Posh Stitched Duo 3 Die and Simon Says Stamp Stitched Circle.

4. I used the 3rd biggest circle die to cut a circle in the tag and the gray pattern paper.

5. I added my shaker pouch in between the tags die and the gray pattern paper with Tombow Extreme adhesive.

6. I die cut the Sunshine sentiment out the pink pattern paper 4 times and adhered them together with Tombow Multipurpose adhesive.

7. I stamped the sentiment from WPlus9 Sending Sunshine right above the Sunshine die cut in My Favorite Things Hybrid Ink.

8. I added Doodlebug Design Birthday Girl Sprinkles to my card front to finish my card off.

Take another look:

You are my sunshine2

I love how this card turned out and I finished in time before my father woke up!!  Yayyyy!

It felt good to craft again.

So what do you think? I love how this card turned out turned out.

Let me know what you think below.

I’m also linking my card up to Virginia’s View Challenge.

Layers and Dimensions

Supplies use:

fuse bundleStar Shine May Card Kit Sunshine DieStitched Duo 3 Die Stitiched CircleTombow XtremeTombow Multi-Purpose AdhesiveDoodlebug Sprinkles Birthday Girl

Thank you so much for stopping by!

~Kymona

CS Take It Make It: Take a Stamp Inspiration Photo

Hello everyone!  I’m here today with CS Take It Make It Design Team for our CS Take It Make It: Take a Stamp Challenge Inspiration Photo!!!

This month’s theme is Take a Stamp!!  That means take any stamp and create something, anything goes!! Now if that isn’t easy, I’m not sure what is!!

Mother’s Day is this Sunday.  Happy Mother’s Day to all of you who are mother’s, mothers-to-be, and who are mother figures to others.

Take a look at my card:

Thank You Mom

I decided to create a CAS Mother’s Day card for my mother to inspire you to take a stamp, any stamp to create your project for Mother’s Day!!

Don’t you just love these bears from Mama Elephant called Bear Hugs.  This mama bear really shows her cub that she loves them. The eye to eye contact is an amazing feature with this stamp set!

I decided to keep my mother’s card very, very clean and simple.

Here’s how:

1. I stamped my bears on a watercolor card panel using Ranger Archival Jet Black Ink.

Ranger Archival Jet Black Ink is a waterproof ink so it won’t bleed when I watercolor. 

2. I used my new Akashiya Sai Watercolor Brush Pen Set to watercolor the bears and the ground.

I love these watercolor pens.  They are super vibrant and moves well with water. I love how the bears looks like they have texture. 

3. I stamp the “thank you”, from Mama Elephant Bear Hugs stamp set.

4. I stamped the “mom”, from WPLUS9 Love Mom stamp set.

5. I was going to add some sequin to the card panel but I decided to leave it without it.

6. I attached my card panel to the card base with a piece of fun foam.

Super simple and easy.  I used 3 different stamp sets and so can you!!

We have two prizes to offer this month, the first is our sponsor prize. This winner will be chosen randomly from all of the entries in the challenge! The sponsor for May is: WOW! Embossing Powders.

Wow

Here are the prizes this month:

A set of 6 vintage embossing glitters in a case and a lace stamp!!

Wow embossing powder Wow Stencil

Our second winner is our Design Winner. This winner is chosen by our DT, who all vote for their favorite design from all of the entries. This winner will have their winning project published in Craft Stamper Magazine, they will have a GDT slot for an upcoming challenge, and will also feature in their very own Winners Profile blog post!

Now if that isn’t a reason to play along I’m not sure what is!!

I can’t wait to see what you come up with.

Supplies used:

BEAR HUGS  Canson Watercolor Paper Archival Jet Black Akashiya Sai Watercolor Brush Pen Love Mom

Thanks for stopping by!!!

~Kymona

CASology 145 – Shape

Hello everyone!!  It’s CASology Tuesday!!!  We are back again with another Cue Card for you!! This past week has been such a hard week for me.  My dad had a stroke right after last weeks post went live and I haven’t slept since.

This week’s cue card had me stumped for a minute, check it out:

Week 145 - Shape

Shape??  Super easy, right? Circle, triangles, squares, diamonds, stars and many more came to mind when I thought of this word.  I realize when there are so many options, it makes it harder to choose.

I just happen to look on my desk and saw the new Circle Dots Stencil by Simon Says Stamp and knew I had to use that stencil on my card.  The pattern was how I was feeling dealing with my dad’s stroke.  My head was going in circles!!

Take a look at my card:

Thank You So Very Much

I decided that I wanted to add color to my textured paste.  So I decided to go with Distress Inks Mustard Seed, Peacock Feathers and Picked Raspberry.

All of those circles shapes are different in size.  I love them.

I stamped my sentiment using Simon Says Stamps Circle Saying Stamp Set and My Favorite Things Black Hybrid Ink.

I trimmed my card base down so that you could see the black card stock on both sides.

I added Clear Wink of Stella to each of the dots.

What do you think? Let me know.

For more inspiration, check out my fellow Design Team members blog for more awesome work.

Design-Team

Gillian Ross – taking a break

Hazel Hodgkins

Jen Wills

Joyce Mehrberg

Judy Marino

Kimberly Wiener

Kymona Tracey ←Me

May Park

Melissa Chipperfield

Tracey McNeely

Our Guest Designer this week:

Karren

Our Sponsor this week is Cindy B Designs.

Supplies used:

Circle DotCircle Sayingtextured pasteDistress Ink Mustard SeedDistress Ink Peacock FeathersDistress Inks Picked RaspberryMFT Hybrid Black InkWink of Stella clear

Thank you so much!!

~Kymona

a2z Scrapbooking May Challenge

Third Post for today

If your looking for So Suzy Stamps April Release, click here

If your looking for the CS Take It Make It post, click here

Hello everyone!!  I’m here with a2z Scrapbooking today with our May Challenge!!!  The theme is Anything Goes!!

Our new challenge is super duper easy this month!!  Our challenge this month is Anything Goes!!  Use any Hero Arts product to create anything that fits your fancy.  This will be fun and interesting.  The possibilities are endless.

Check out the card I created for this challenge:

Thanks for being my friend

Oh boy, I love how this card turned out!!!

Here is how I created this card:

1. I used Neenah Desert Storm cardstock and cut it to an A2 size card, 8.50 by 5.50 scored at 4.25.

2. I used Stampin’ Up! Decorative Dots Embossing Folder and embossed the card front.

3. I cut two pieces of pattern paper from Create a Smile Feel Good Paper Pack and layered them uneven on my card base.

4. I stamped my cat and dog from Hero Arts Playful Animals stamp set using My Favorite Things Hybrid Black Ink onto a white piece of cardstock.

5. I colored both images using Copic markers: Y35, Y38, C3, C6

6. I stamp the sentiment using Hero Arts Friends stamp set.

7. I attached the white cardstock to my pattern paper using regular adhesive.

8. I added some Stampin’ Up! Brights Candy Dots, Basic Hodgepodge Clips and Whisper White Bakers Twine.

Super easy and fun.

Amazing isn’t it!! I hope you love what you see and that it inspires you to join us this month. You have the entire month to create a new project and enter it into our challenge. By entering you will have a chance to win a $25 Gift Certificate to the a2z Scrapbooking Store. Winner will be announced on the 7th of May.  Good Luck!

The Playful Animals stamp set can be found at the a2z Scrapbooking Store. If you would like to purchase any of the supplies I used please head on over to the store and use the coupon code KYMONA15 to get 15% off your purchase.

Supplies used:

playful animals Decorative Dots Embossing Folder Feel Good Paper Pack Copic Markers Brights Candy DotsBasics Hodgepodge Clips Whisper White Baker's TwineNeenah Desert Storm CS

One more thing before I go, did you know that we are on Twitter, Instagram and Facebook?. If you haven’t done so already, please follow us on these different social media outlets!! You don’t want to miss out on any fun promotions!!

I’m also linking my card up to Virginia’s View Challenge.

Layers and Dimensions

Thanks for stopping by!!

Kymona

So Suzy Stamps May Challenge!!

Second post for today

If your looking for the CS Take It Make It post, click here

Hello everyone again!! I’m here with So Suzy Stamps and our May Challenge!!

Have you seen the new stamps that were released today!! Simply amazing!!  Head on over to the store and see for yourself.  I also included a link up above for you.  All of the stamps are super cute and adorable.  Perfect for our new challenge this month which is Thank You!!

1450095_10203311420565552_2248967912574082881_n

Check out the card I created for this challenge:

Thank you release

This is just the beginning!!  The rest of the Design Team created some amazing projects featuring some of the new stamps as well. Check out Suzy’s blog.

Creating this card was rather simple.  It’s a matter of layering the cardstock and pattern paper.

The amazing thing about this particular stamping is the repetitiveness of the it.  To achieve that I used my Misti tool!!  I have to say, this tool really comes in handy for me when doing stamping like this.

Take a look:

Misti stamping

I used So Suzy Stamps Dress Form to create this repeated stamping.

I used So Suzy Stamp Thank You to stamp my sentiment using Hero Arts Ombre Butter to Orange Ink.

I attached my layers with adhesive. I added Pretty Pink Posh 4mm Sparkling Clear Sequin and 6mm of Sparkling Clear Sequins to my card front.

I rounded the corners of my card panels with my We R Memory Keepers Corner Chomper.

Nice and easy!!! Now its your turn and I can’t wait to see what you come up with!!!

Supplies used:

Dress Form Set Thank you HR Ombre Orange Pretty Pink Posh Sequins 4mm Pretty Pink Posh 6mm Sequins We R Memory Keepers Corner Chomper

Thank you for stopping by!

~Kymona

CS Take It Make It: Take a Stamp Challenge

Hello everyone!  I’m here today with CS Take It Make It Design Team for our CS Take It Make It: Take a Stamp Challenge for the month of May.

This month’s theme is Take a Stamp!!  That means take any stamp and create something, anything goes!! Now if that isn’t easy, I’m not sure what is!!

Take a look at my card:

There is Beauty in Simplicity (CS)

OMG!!  That butterfly is super amazing.  That butterfly comes from the new Tim Holtz’s Perspective stamp set.  I’m so glad I ordered it.  I will get a lot of mileage with that stamp.

Here is how I created this card:

1. I cut my card base to an A2 size card (4.25 x 5.50 scored at 4.25).

2. I stamped the butterfly and the sentiment from Tim Holtz’s Perspective stamp set using My Favorite Things Hybrid Black Ink.

3. I colored the butterfly using Copic Markers: BV02, BV04, BV08 and R81.

4. I added Clear Wink of Stella to the butterfly for extra shimmer.

5. I cut a mask out of the butterfly to cover my pretty butterfly up.

6. I used WPlus9 Bloomsberry Spray Mist and the Shimmer Spray Mist to add splatters to my card front.

Those sprays are awesome.  Such a great added touch to my card.

7. I rounded the corners with the We R Memory Keepers Corner Chomper.

Pretty neat right!!  Now its your turn to play along with us.

We have two prizes to offer this month, the first is our sponsor prize. This winner will be chosen randomly from all of the entries in the challenge! The sponsor for May is: WOW! Embossing Powders.

Wow

Here are the prizes this month:

A set of 6 vintage embossing glitters in a case and a lace stamp!!

Wow embossing powder               Wow Stencil

Our second winner is our Design Winner. This winner is chosen by our DT, who all vote for their favorite design from all of the entries. This winner will have their winning project published in Craft Stamper Magazine, they will have a GDT slot for an upcoming challenge, and will also feature in their very own Winners Profile blog post!

Now if that isn’t a reason to play along I’m not sure what is!!

I can’t wait to see what you come up with.

Supplies used:

Tim Holtz Perspective MFT Hybrid Black InkCopic BV02 Copic BV04 Copic BV08 Copic R81Wink of Stella clearWPlus9 BloomsBerryWPlus9 Shimmer Spray MistWe R Memory Keepers Corner Chomper

Thank you so much for stopping by!

~Kymona