Top Dog Dies – Die Cut Card

Hello everyone!!!  I’m here with Top Dog Dies!!  I’m here showcasing one of their new dies that was released 3 weeks ago!!

Lets jump right in!

Today I’m working with the Top Dog Dies Onesie Dress Die Set!! It’s a super doper cute die set and the possibility are endless!!

Top Dog Dies Onesie Dress Die Set

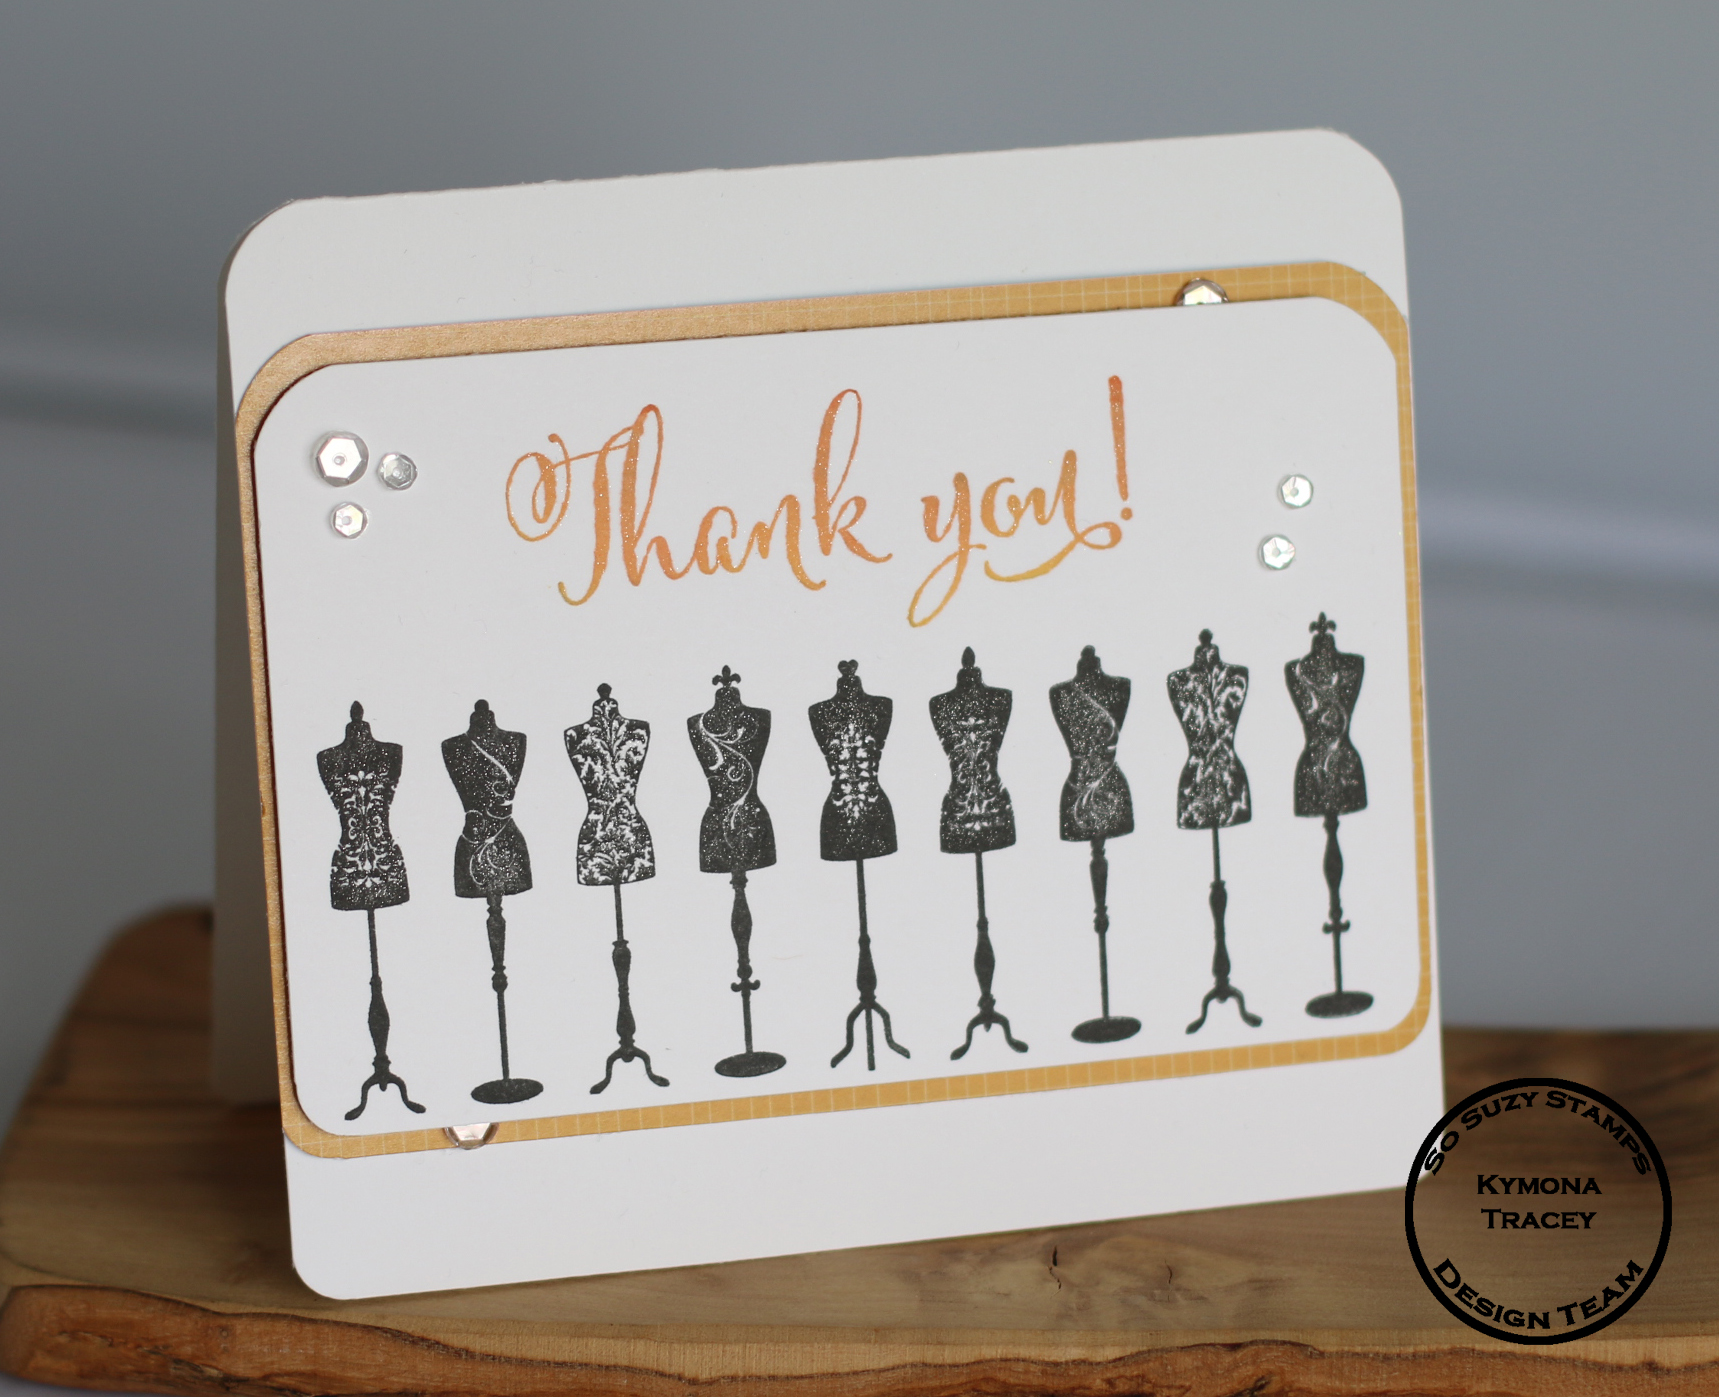
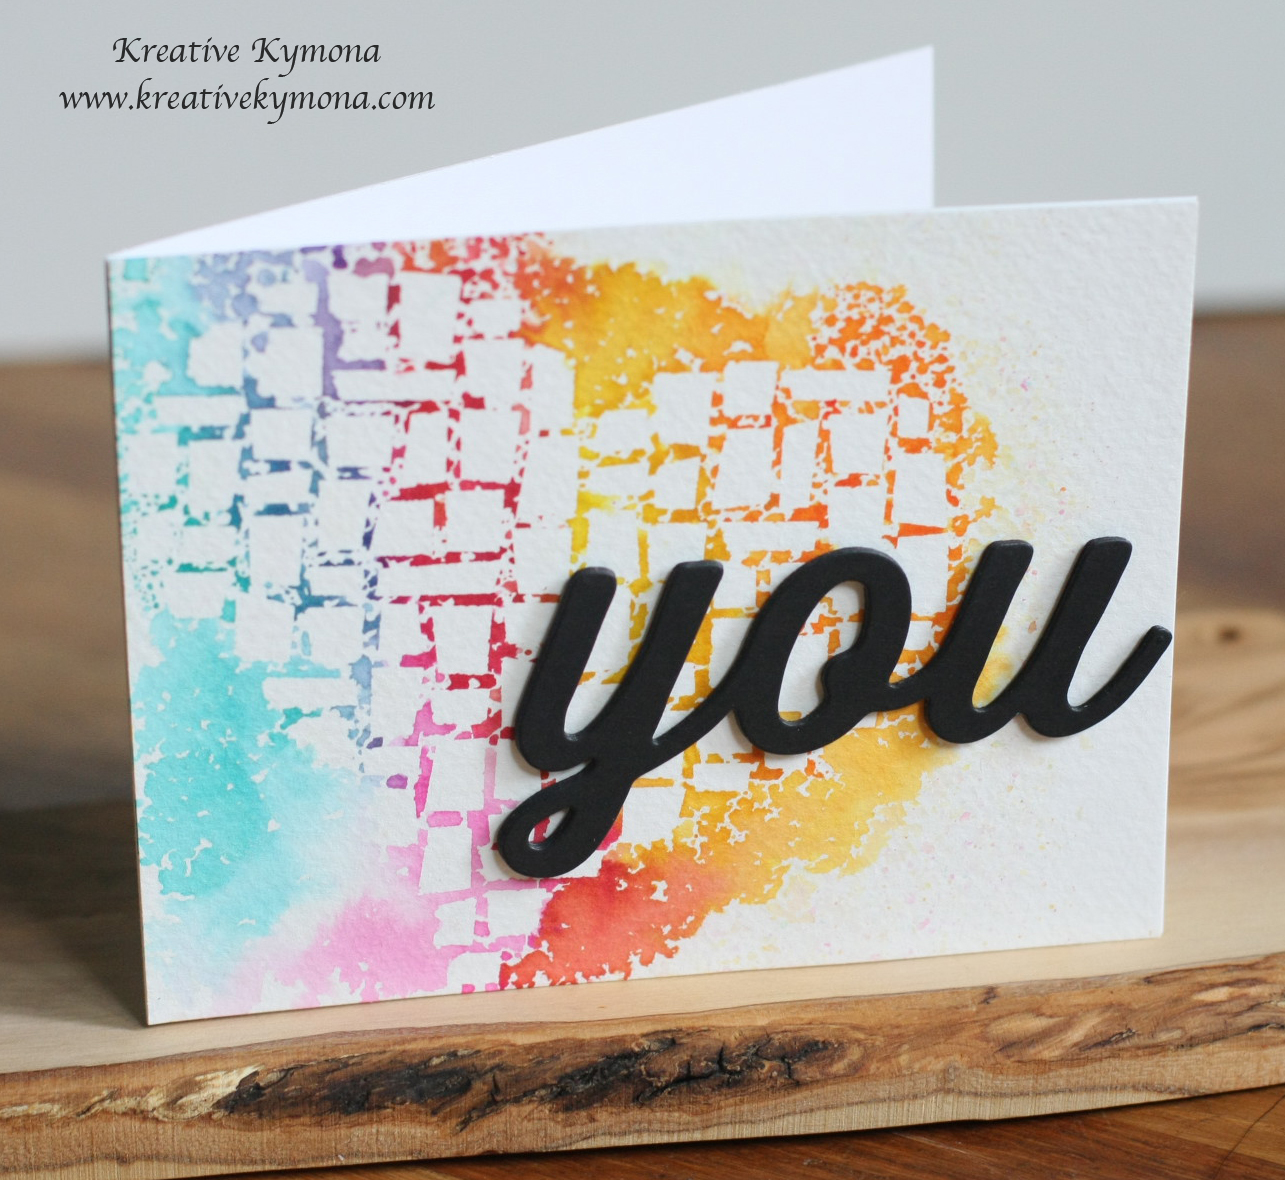
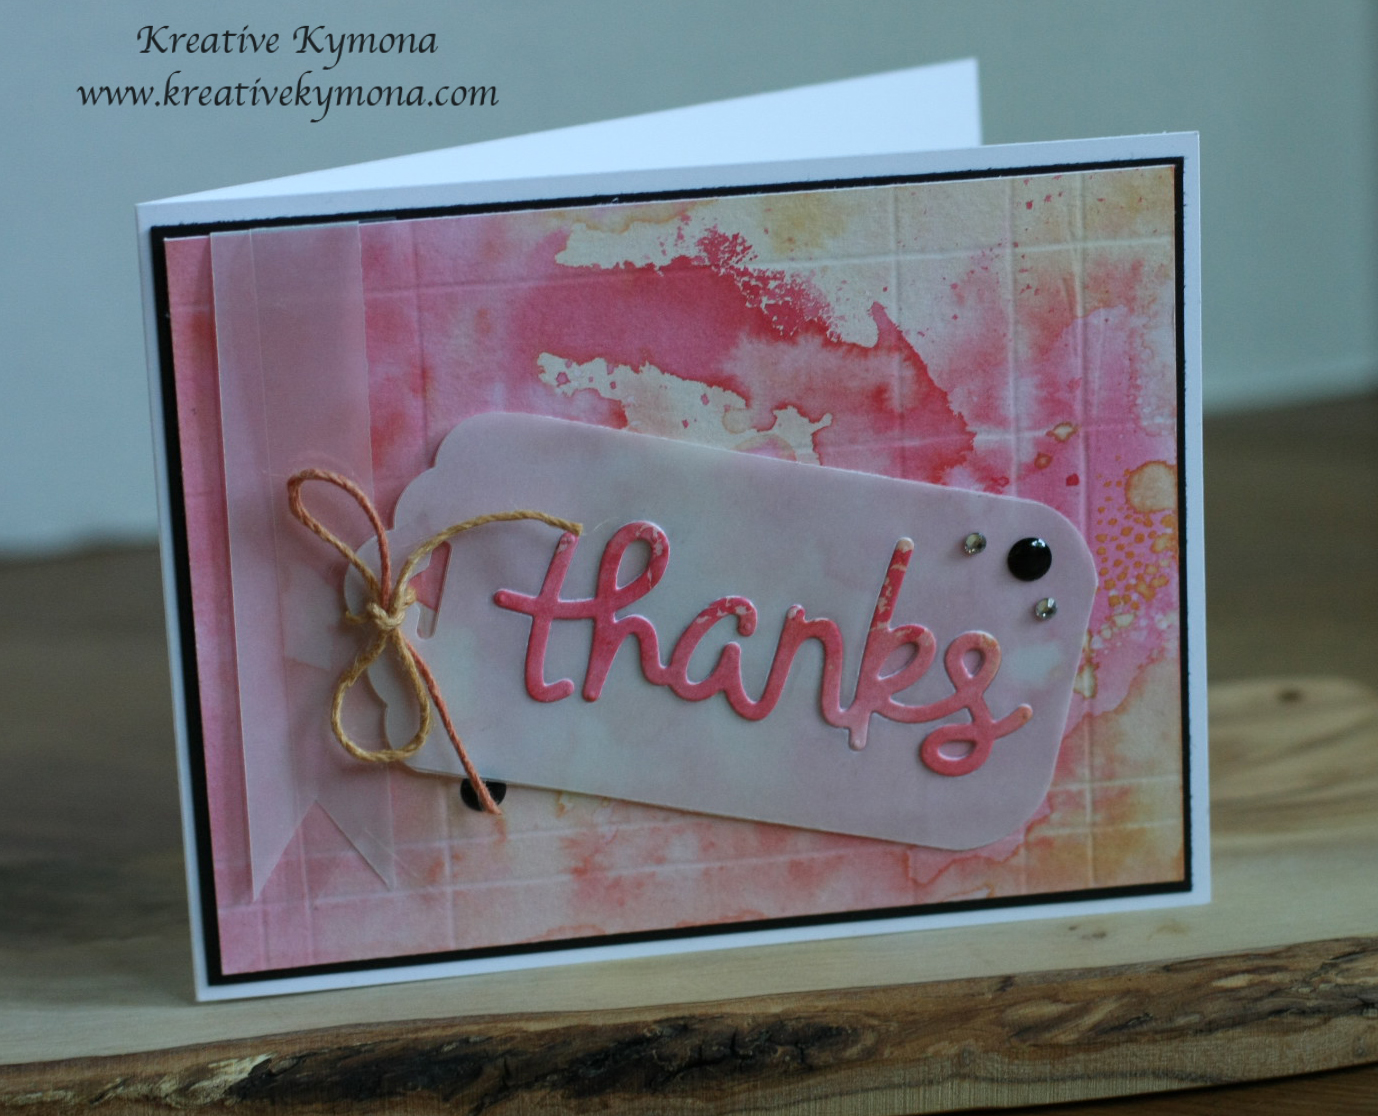
Take a look at my card that I created with this die:

Baby Onesie Dress

This card is all about die cutting and no stamping. I just die cut all of the pieces then I needed.

I die cut the card base using Top Dog Dies Onesie and retired Stampin Up! Peach Parfait cardstock.

Then I cut the dress pieces from Top Dog Dies Onesie Dress Die Set and retired Stampin’ Up! Just Add Cake DSP and Micheal’s Heavyweight White Cardstock.

Then I used a Plus Glue Tape Runner to adhered all of the pieces to the card base.  Super easy if you needed to create tons of these cards.

Baby dress onesie 1

So what do you think?  Can you see yourself creating cards like this? Let me know below.

Supplies used:

TDD Onesis cardjust add cake dsp Peach Parfait Recollections White HeavyweightPlus Glue Tape

Thanks for stopping by!!

~Kymona


So Suzy Stamps May Challenge!!

Second post for today

If your looking for the CS Take It Make It post, click here

Hello everyone again!! I’m here with So Suzy Stamps and our May Challenge!!

Have you seen the new stamps that were released today!! Simply amazing!!  Head on over to the store and see for yourself.  I also included a link up above for you.  All of the stamps are super cute and adorable.  Perfect for our new challenge this month which is Thank You!!

1450095_10203311420565552_2248967912574082881_n

Check out the card I created for this challenge:

Thank you release

This is just the beginning!!  The rest of the Design Team created some amazing projects featuring some of the new stamps as well. Check out Suzy’s blog.

Creating this card was rather simple.  It’s a matter of layering the cardstock and pattern paper.

The amazing thing about this particular stamping is the repetitiveness of the it.  To achieve that I used my Misti tool!!  I have to say, this tool really comes in handy for me when doing stamping like this.

Take a look:

Misti stamping

I used So Suzy Stamps Dress Form to create this repeated stamping.

I used So Suzy Stamp Thank You to stamp my sentiment using Hero Arts Ombre Butter to Orange Ink.

I attached my layers with adhesive. I added Pretty Pink Posh 4mm Sparkling Clear Sequin and 6mm of Sparkling Clear Sequins to my card front.

I rounded the corners of my card panels with my We R Memory Keepers Corner Chomper.

Nice and easy!!! Now its your turn and I can’t wait to see what you come up with!!!

Supplies used:

Dress Form Set Thank you HR Ombre Orange Pretty Pink Posh Sequins 4mm Pretty Pink Posh 6mm Sequins We R Memory Keepers Corner Chomper

Thank you for stopping by!

~Kymona

Striped Thanks

Hello everyone!  I’m here with Papertrey Ink Make It Monday #176: Backgrounds with Embossing Paste.  It’s been a while since I’ve played along with them.  So, I’m glad I had a chance to play today.

Laura Bassen showed us how to use our dies to create stencils so that we could make pretty backgrounds using embossing paste.

I’ve done this before so it was nice to do this technique again.

Here is my card:

Thanks {watercolor}2

Here is how I create my card:

1. I used Papertrey Ink’s Stripes Horizontal Cover Plate to create my stencil.  I just ran the cover plate through my big shot twice for some thickness.

2. One at a time I mixed my distress reinkers with Wendy Vecchi Embossing Paste.  I mixed the paste and  Mustard Seed Distress Ink and spread my paste on the top of my stencil thick.  Then I mixed Peacock Feathers Distress Ink and spread it in the middle of the stencil, thick.  The last I mixed Picked Raspberry and spread it on the bottom of my stencil, thick.

3.  I lightly spread the paste upwards from the bottom to mix the colors going up.  Once I removed all of the excess paste, I removed my stencil to reveal the colorful stripes.

4. I set my card panel to the side and die cut my middle Papertrey Ink Circle Scribbles Die out of Stampin’ Up! Vellum.

5. Then I die cut Lawn Fawn Scripty Thanks out of Basic Black Cardstock.

6. I adhered the vellum scribble to my striped card panel with Glossy Accents.  I added my scripty thanks to the vellum scribble with Tombow Multipurpose Glue.

7. I rounded my corners with my We R Memory Keepers Corner Chomper (which by the way broke today, I’m so sad, I have to buy another one.).

8. The “thanks” looked to plain so I added Glossy Accents for a little shine.

That’s how I created this card!!  Oh by the way, my card size is 4-1/4 x 5-1/2 scored at 5-1/2.  My card panel measures 4 x 5-1/4.

So what do you think?  Let me know.


Supplies used:

Stripes Horizontal Cover Plate PTD-0536Distress Ink Mustard SeedDistress Ink Peacock FeathersDistress Inks Picked RaspberryEmbossing PasteLF Scripty ThanksBasic BlackWhite Vellumglossy accentsTombow Multi-Purpose AdhesiveWe R Memory Keepers Corner Chomperranger craft sheet

Thank you for stopping by!

~Kymona

Are You A Square?

Hello everyone!!!  I have such great news to share.

I received AAA Cards CAS Honors today for my Love you watercolor card.  Just in case you missed it here it is.

Watercolor Love you

I am so grateful to the lovely women who voted for me.  This really made my day!! Such a nice way to start the week.

I’m back again with AAA Cards Game #11 Enjoy challenge and Virginia’s View Challenge #5 Die Cut this week.


AAA Card Games #11 is looking for a “window box pattern”, 4 up squares, 4 up matching embellishments, 4 up holes you name it.

AAAcardGame11

Virginia’s View Challenge #5 Die Cut are looking for cards that contain die cuts.

V. V. Challenge #5 (2)


I decided to have one large square with 4 up squares with 4 smaller squares attached at the center.  Confused, don’t be.

Take a look at my card:

A Tweet Thank You

Doesn’t the smaller squares look like leaves? Take a closer look.

A Tweet Thank You close up

I die cut 8 squares (4 big ones and 4 one size smaller) with Stampin’ up!’s Square Collection Framelits Die and my Big Shot out of Lawn Fawn’s Into the Woods pattern paper.

I used my We R Memory Keepers Cropadile Corner Chomper to round the corners of two corners on each square.

I used my Stampin’ Up! 1″ circle punch and my 3/4″ circle punch to create the circle in one of the squares, the circle behind the button and the white circle behind the orange square.

I used Simon Says Stamp Giving Thanks Stamp set for the sentiment and the heart with Stampin’ Up! chocolate chip ink pad.

I added a retired Stampin’ Up! button and linen thread in the center.

What do you think?


Supplies used:

Big Shot Die-Cut MachineSquare Collection Framelits DieWe R Memory Keepers Corner Chomper3_4 circle punch1 inch circle punchGiving ThanksChocolate Chip Ink PadNatural-Buttons-300x300Linen ThreadStampin' TrimmerFuse Fast AdhesiveIntoTheWoodsCollectionKit-1_1024x1024

Thank you for stopping by!

~Kymona

Can You Have To Much Watercolor?

Hello everyone, I’m here today with a watercolor card {my favorite} for Freshly Made Sketches #139.

FMS Final 139-001Today’s sketch was created by Rita.

When I say this sketch I knew I wanted to create a watercolor background.  I couldn’t help myself.  Watercolor makes everything look pretty. I wanted a pretty card with a pretty tag that you could take off of the card and use on a gift.

Take a look at my take on Rita’s sketch:

Thanks tag card

To create the watercolor background:

For this card I applied 3 different distress ink’s to my craft sheet in a random order very close to one another.

I spritz water on the colors to activate the color to mix them a bit.

I took my watercolor paper and gently placed it on top of the ink to create my watercolor background.

I let the paper dry completely before I added it to my card base.

If you take a closer look at my watercolor paper you will see I scored it for added texture.

Thanks tag texture

For the flagged banners, I used vellum and window sheet to create them.  I didn’t want to complete cover the background because it was so pretty so, I used them to create a see through look.

Thanks flagged banner

For my tag, again I wanted the viewer to  somewhat see through it, as to not take away from the background.

I created an inlay die cut with the word thanks.  Added a few black enamel dots for contrast and the rhinestone for some bling.

I adhere the watercolor piece to black cardstock and then to the white card base.

I had fun creating this card.  I created another card using the same technique.

Hello tag card

Like I said many times over, Water-coloring is my favorite.

Let me know what you think!!

Supplies used:

Distress Ink Dried marigoldDistress ink Antique linenDistress Ink Worn LipstickLF690_ScriptyThanks_granderanger craft sheetRanger misterTim Holtz Watercolor CardstockMy Mind's Eye Enamel DotsWindow SheetsWhite VellumBasic Rhinestones Jewel AccentsTombow Multi-Purpose AdhesivePink Lemonade CordStampin' TrimmerSimply ScoredTag Topper Scallop PunchBasic Black CSWhisper White

Thanks for stopping by!

~Kymona

You Can Never Have To Much Watercolor on Mother’s Day

photo credit

photo credit

Happy Mother’s Day to All of YOU Mothers!!!

I hope all of you are relaxing like myself.  Wait, I’m not relaxing.  I’m making breakfast and doing laundry! A Mother’s job is never done.

watercolor for card makers

What I want to do is play with my watercolors some more.  I have some time right now between the spin cycle to create a card for the Less is More: One Layer theme challenge this week.  Day 2 of my Watercolor for Card Markers Class, Jennifer McGuire, taught us how to use Liquid Frisket to mask of an area of the card so that the watercolor will not penetrate the image.

This technique is soooo cool!!!  I will create a PDF for this technique later and share it with all of you.

You use this cream color liquid and paint over the image you want to stay color-free.  Once it dries, you do your water-coloring without worrying about messing up the image.  You MUST let the watercolor dry before you can lift the liquid mask off of the paper.  I simple used my finger and rubbed the mask and WALA! Your image is embedded in your watercolor!

Here is my card!!  The colors are beautiful, perfect for a flower.

Thank you for caring

So you see on the bottom right side of the flower some of the color seeped onto my flower.  That is because I didn’t put any of the mask on that area.  I missed it, I guess.  I actually like it like that because water-coloring isn’t suppose to be perfect and this flower definitely isn’t perfect so it’s a perfect match!

This card can be given to any women in your life that isn’t your mother who really cared about you in one way or another!!  I have a couple of mothers in my life that I want to thank for steering me in the right direction.

I hope you like my new creation.  My younger brother told me today that my “cards are getting better and better”, thanks Garrett!

Let me know what you think.

Supplies used:

Liquid FrisketCanson Watercolor PaperPelikan WatercolorHappy Watercolorlots ThanksOnyx VersafineStamp-a-ma-jigStampin' TrimmerSnail Adhesive

Watercolor Embossed Thank You

Second Post for the Day

I’m back again today with a card that I made with my new Koi Watercolors.  In my last post, I introduced that set of watercolors and the colors that I used to create this card.

I stamped the “Thank You” with VersaMark and embossed it with clear embossing powder.  By doing that, I created a watercolor resistant area.  Which means the watercolor will roll off the embossed area.  It is so cool to see.  It took me awhile to create this effect but I finally got it.

Take a look:

Thank You Watercolor

I just love it.  I love how the thank you has small splotches of watercolor on it.  I could have wiped the color off the sentiment but I really loved how it looks.  I used the colors that I said I loved in my last post. Numbers 15, 19, and 23. They combine so pretty.

I decided that I wanted to add a border around the card mask before adhering it to the card base.  I used Papertrey Ink’s Stitching Lines Die.  I love them.  The die made it easier to add dimension to my card.

Please let me know what you think? I would love to hear from you.

Supplies used:

Stitching Lines DieAnother Thank You Photopolyer Stamp SetclassiccrestsolarwhtieKio WaterColors

-Kymona

Clean & Simple 3 Card Class – Day 9 Textural Effects

In today’s class we learned a couple of different techniques that had textural effects.  The first one was Dry Embossing.  I’ve seen this technique before but haven’t really played around with it until now.  My card features a variation on selective dry embossing that leaves a portion of the design flat, while the remainder is embossed.

I was so excited about starting this technique, but quickly became discouraged because the embossing wasn’t coming out clean and crisped.  I tried at least five times before giving up.  Take a look at what I mean.

Textual Effect Mistake

When you look at the above picture you can see where the embossed image fades out and it isn’t suppose to.  The embossed image shouldn’t fade, it should only be in the area you actually want the embossed image.  So, I turned to my fellow classmates and teachers for some suggestions on what I’m doing wrong.  After trying again, I finally got it right.  Take a look.

Thank You textual effect

You can see exactly where I wanted the embossed dots and where I wanted a clean clear circle with no dots.  That’s dry embossing.  I’m so glad I was able to get this technique down pack.

What do you think?

Supplies used:

Classic Crest Solar White CS

Classic Crest Solar White CS

Perfect Polka Dots 117335

Perfect Polka Dots
117335

Big Shot Die-Cut Machine 113439

Big Shot Die-Cut Machine
113439


Tim Holtz  Embossing Diffusers

Tim Holtz
Embossing Diffusers

Another Thank You 133454

Another Thank You
133454

Strawberry Slush 131178

Strawberry Slush
131178


Coastal Cabana 131175

Coastal Cabana
131175

Wink of Stella Clear Glitter

Wink of Stella Clear Glitter


Signature