It’s A Crayola World Curtains

Hello everyone! I’m here today to show you my brand new It’s A Crayola World Curtains!

Yes, I made some curtains for my small craft space. The great thing about them is the color. They match the colors on my wall. They were so easy to make, I know for sure you can create some for yourself.

Let’s take a look at my curtains:

Finished curtains

I’m giddy with glee. Look at how cute they are.

Let’s talk about this fabric collection:


Five amazing fabric panels were inspired by nature and loaded with color. The amazing thing about these images, you will find Crayola® crayons blended into the artwork. It’s amazing. My sisters stopped by when I was working on the curtains; they were blown away by the crayons they spotted in the flowers.

This collection is the newest official licensed fabric line from Crayola®.

Here’s how to create these curtains:

curtain materials

Materials:

Note: Some of the links below contain affiliate links.

It’s a Crayola World fabric
Sewing Machine
Matching Thread
Cutting Mat
Pins
Rotary Cutter
Curtain Grommets
Scissor
Ruler

Step 1: Cut the panels

Cut the panels into two pieces. They measure 36 inches by the WOF.

cut the fabric

Step 2: Prepare the panels

Double hem three sides of the panel by a 1/2 inch.

double hem

For the top hem, fold the raw edge over a 1/2 inch and press. Fold 3 inches and press again.

Step 3: Sew the hems

Using the 10D# Edgestitch Bernina presser foot, sew on the panel’s right side as close to the folded edge.

sew on the right side

Repeat on all sides.

Step 4: Prepare the top edge for grommets

Measure the width of the fabric and multiply it by the number of grommets you want to use.

The grommet will be placed at 4.25, 8.50, 12.75, 17.25, 21.50, 25.75, and 30.25 inches.

equally measure grommets

equally measure grommets

Using the template that comes with the grommets, draw circles at the points above.

draw circles

Cut the circles out.

cut circles

Step 5: Adhering the grommets

adhering grommets

Place one side of the grommet underneath the circle and one on top.

adhere grommets

Snap the grommets into place.

adhere grommets

adhere grommets

Repeat for all of them.

Step 6: Finish the curtains

Press both curtains and snip any loss threads.

Done!! This is an afternoon project, and you can do it.

finished curtains

Now it’s your turn!

Supplies used:

  Bernina 570QE              
Thank you so much for stopping by!

YNS October 2016 Release Sneak Peek

Hello everyone!!! I’m back again for this month’s Your Next Stamp Sneak Peek!!

We are getting ready for our October Release Blog Hop tomorrow with a sneak peek today. Are you excited? I am!!

Take a look at my card that I’m giving you a sneak peek of:

merry-christmas-yns

YNS Supplies: Merry Christmas Chickie

Other Supplies: Distress Ink Seedless Preserves and Salty Ocean, Colorbox Archival Dye Ink, Simon Says Stamp Falling Snow Stencil, Textured Paste, Distress Glitter Clear Rock Candy

I love how this card turned out.  It makes me want to go out in the snow and play.

What do you think?  Please let me know below.

I hope I see all of you tomorrow for the October 2016 Blog Hop and Birthday Celebration.

Thanks for stopping by!

~Kymona

YNS Feature Day – Spooky/Scary

Hello everyone!!!  I’ here today with another YNS creation to inspire you and a chance to win a stamp set of your choice!!

On the 22nd of the month, YNS Design Team creates more samples featuring YNS products and shares them with all of you!!

The super duper awesome part of it all besides our awesome samples, you could win a stamp set of your choice!!  Now how super cool is that!!

Scroll to the bottom to find out how!!

This month we are focusing on “Spooky/Scary”!!  The DT created projects related to anything scary or spooky.

Now take a look at the card I created to inspire you:

happy-batty-halloween-yns

YNS Supplies: Batty Background Ink Splatter Stamp Set, SpookTacular Halloween

Other Supplies: Distress ink Black Soot, Seedless Preserves, Salty Ocean, Blending Tool, Bristol Smooth Paper, Clearsnap Colorbox Black Embossing Powder, Versamark Ink

I love how those bats look so real on this card.  I would be scared if I saw all of those bats above my head.

What do you think?  Let me know below.

Now on to that prize!!

DTDare2candy-547x232

All you have to do is leave a comment on the YNS blog by September 26th for a chance to WIN a YNS stamp set of your choice!!  Super simple and easy!!  You will get to see my fellow DT’s projects as well.

So head on over, you don’t want to miss this one!!

Supplies used:

batty-background-splatter spooktacular-halloween

Thank you for stopping by!!

~Kymona

YNS August 2016 Release Sneak Peek

Hello everyone!!! I’m back again for this month’s Your Next Stamp Sneak Peek!!

We are getting ready for our August Release Blog Hop tomorrow with a sneak peek today. Are you excited? I am!!

Take a look at my card that I’m giving you a sneak peek of:

Happy Birthday 16 (YNS)

YNS Supplies: Happy Birthday 2016 stamp set and die, YNS Swirly Fun Paper Pack, Circle Panel Die

Other Supplies: Recollection White Heavyweight Cardstock, Clearsnap Colorbox Archival Wicked Black Ink, Plus Adhesive

Happy Birthday to YNS!!

Creating this card was a breeze!!  Here’s how:

  1. Using an A2 card size, cut the YNS Swirly Fun Paper Pack to fit the front of that A2 card, 4.5 by 5.5.
  2. Attach the pattern paper to the front of the card base using adhesive.
  3. Then use the Circle Panel Die and cut out a panel out of the white cardstock.
  4. Adhere that to the front of the patten paper.
  5. Stamp the sentiment on the circle panel using black ink.
  6. Die cut three balloon shapes out of scrap cardstock and adhere them to the front of the card, draw strings using a black pen.

Then your done. Nice and easy.

I hope I see all of you tomorrow for the August 2016 Blog Hop and Birthday Celebration.

Thanks for stopping by!

~Kymona


Mutli-Stamping for the Right At Home Blog Hop

Hello everyone!!  I’m excited to be here with you today to sharing an amazing multi-stamping project created for the Right At Home April Release Blog Hop!!  The design team are delight to full you with inspiration.

july-release

This month Nicole released four clear stamp sets and one background stamp! Super cute all around! For this released I used Right at Home Stamps Banner Alphabet and Banner Alphabet Add-On.  I also used Right At Home very first stamp set Happy Mail.

If you arrived here from Joan’s blog, you are on the right path!!  If you arrived on your own, you will want to start from the beginning, the Right At Home blog as to not miss out on any of the fun.

Take a look at my postcard:

handmade postcard

While looking at the stamp sets, I wonder what could I do differently with these stamps.  It hit me that I could create postcards where the image and message is on the front of the card.

Check out how I created these easy to create postcards:

I started with the banner string.  I used the Mini Misti to do all of my stamping so that I could create more then one postcard at a time. I stamped the string with Versafine Black Ink.

Multi-stamping banner (RAH)

Then I lined the banner stamps on the stamped line so that they are perfectly placed for easy stamping with the Mini Misti.

I left a space for the second “L”.

Line up the pennent stamps (RAH

Using Clearsnap Colorbox Bluebells, I stamped the banner letters on each of the postcards.

I also placed the second sentiment on the bottom of the postcards so that I can stamp both sentiments at the same time.

Stamping the banner stams (RAH)

Then I lined the second L up on the banner line.  Using the Mini Misti to get the L in the right place on all of the postcards.

Stamping second L stamp (RAH)


Take al look at one of the finished cards with my handwriting on it.

Postcard Message (RAH)

This one is going out to Nicole the young lady behind these stamps!!

So this one layer postcard is super easy to create but even easier with a Mini Misti!!

So what do you think? Please let me know below.

Giveaway time!!

Make sure to leave a comment on all of the DT’s blog to be entered into the giveaway. Giveaway will close in a week so make sure to hop along today!!

july-bh-prize

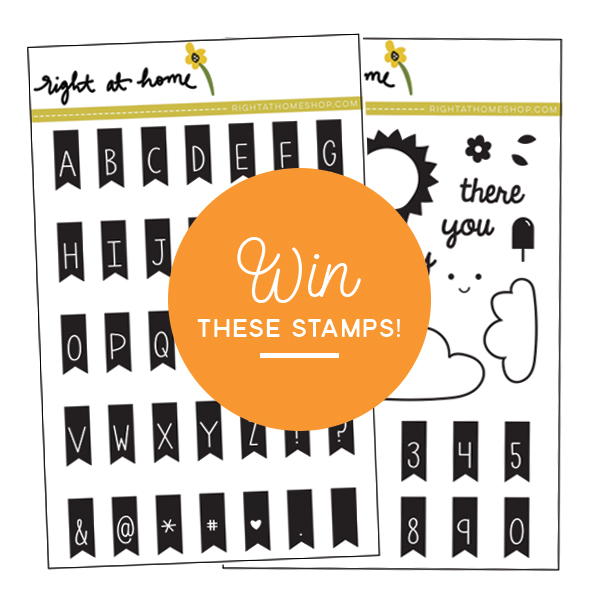
Prize: Banner Alphabet Stamps Set and the Banner Alphabet Add-On Stamp Set

Here is the list of all of my talented teammates blog, just in case you get lost along the way:

Right At Home 
Holly
Laurie Willison
Amy T.
Joan
Kymona ← you are here
Amy K.

 Thank you so much for stopping by!!

~Kymona

{Clean and Simple} CASology 203 – Congratulations

Hello everyone!!  It’s CASology Tuesday!!  We are back with another Clean and Simple Cue Card just for you!!

This week’s cue card:

Week 203 - Congratulations

Take a look at my card:

Congratulation ink splatters

I plan on having fun with this cue card this week.  My son’s big day is this Saturday and he has inspired me!  He is such a great son.  He has stayed focused to the very end.  Good grades and dominate in all the sports he played.  He walks away from high school as an All County Football Player, an All County Lacrosse Player and an All Conference Basketball Player.

INSPIRING right!!

This card is for him!

I used STAMPlorations Art Marks Stamp Set, who happens to be our sponsor  this week, to create this card.

Here’s how:

  1. I stamp the different ink splatters and the stars with Versafine ink.
  2. Then I stamped the sentiment using So Suzy Stamp Plum Passion Ink Bite.
  3. To finish the card off I rounded the top corners using the We R Memory Keepers Envelope Punch board.

Nice and easy!

What do you think?  I can’t wait to see what you come up with!

For more inspiration, check out my fellow Design Team members blog for more awesome work.

DT Badge

CS Take It Make It: Watercoloring with Inks

Hello everyone!! I’m here with CS Take It Make It: Take a Technique Challenge Inspiration for June.

Our theme is Take a Technique: Lets Get Inky!!

For this month’s challenge the technique we would like you to use more then one type of ink on your project (ink pads, ink sprays, stains, acrylic inks, etc.)  Or more then one color of ink on your project…and don’t forget to include stamping somewhere too!!

This should be super fun to see what you come up with.

Take a look at my card:

Truth (CS Take It Make It)

My new Alex and Ani Art Infusion Feather bracelet is the inspiration for my card this week. When I saw this bracelet, I knew I had to have it.  Its purple and the feather was so pretty.  I immediately wanted to make a card that represented my bracelet.

I stamped the feather from Papertrey Ink What the Doodle: Feather Mini Stamp Set using Versafine Ink.

Then I sprinkled Colorbox Sterling Silver Embossing Powder and heat set it.

Then I used Distress Ink Seedless Preserve to watercolor the feather and the card. I heat set the card then colored more ink on top give the different saturation of this pretty purple color.

Once the card dried, I stamped the sentiment using Concord and 9th Sophisticated Script stamp set using Versafine Black Ink.

The feather represents Truth, Light, and Virtue!!

“Keep Your Heart Light” is what the motto!

So what do you think? I love how this card turned out.

We have two prizes to offer this month, the first is our sponsor prize. This winner will be chosen randomly from all of the entries in the challenge! The sponsor for June: PaperArtsy!

paperartsy

bottles

Prize: 5 bottles of Infusions

Infusions are water soluble particles with 2 components: dye color pigment suitable for paper/ fabric, mixed with Walnut Stain. The color powder particles dissolve faster than the walnut crystals, so you can control the color-to-brown stain ratio!

infusion

Color Chart Reference

Our second winner is our Design Winner. This winner is chosen by our DT, who all vote for their favorite design from all of the entries. This winner will have their winning project published in Craft Stamper Magazine, they will have a GDT slot for an upcoming challenge, and will also feature in their very own Winners Profile blog post!

Now if that isn’t a reason to play along I’m not sure what is!!

I can’t wait to see what you come up with.

Supplies used:

PTI What the Doodle FeatherSophisticated Script heavyweight cardstock

Thanks for stopping by!!

~Kymona

Clean and Simple Copic Coloring

Second post for today
If your looking for Your Next Stamp Sketch and Color Challenge, click here

Hello everyone!!  I’m here today with the Sparkle and Shine Challenge!!!  How exciting is this!!! 

Since its the fifteen of the month, its time for our new challenge!!!

Here is the inspiration photo that guided us this time around:

color image

Take a look at my card:

Happy Day (SS)

I was so unsure what I was going to create for this challenge.  Then my new stamp set from Darkroom Door Fine Flowers arrived and I had to try it out.

I love this whimsical flower and thought it would be perfect for this challenge.

To create this card, all I did was score the top of the card front randomly. Then I stamped the flower image using My Favorite Things Hybrid Ink. After that I colored the flowers using Copic V15, V06, V09 and Y19. Once that was completed, I used Concord and 9th Sophisticated Script stamp set to stamp the sentiment.

What do you think?

Now its your turn to give this challenge a try!! I can’t wait to see what you come up with!!

Our sponsor for this challenge is Right At Home!!

The winner of this challenge will receive a $25 gift card to their online store and will be asked to be our Guest Designer for the next month.

Supplies used:

Darkroom Door Fine Flower Sophisticated Script  MFT Hybrid Black Ink

Thank you so much!!

~Kymona

CS Take It Make It: Take a Technique Inspiration Photo

Hello everyone!! I’m here with CS Take It Make It: Take a Technique Challenge Inspiration Photo.

Our theme is Take a Technique: Sharing the Season!!

For this month’s challenge the technique we would like to see Seasonal creations: Winter/icy themed, or even Christmas projects if you’re not bored of these already! For those readers who live in different climates: Why not share your December seasons with us!

This should be super fun to see what the whether looks like in different parts of the world.

Take a look at my card:

Oh Joy

I just love this Mama Elephant Twinkle Towns stamp set.  I pick it up a couple of months ago and haven’t had a chance to play with it.

My question to everyone is, “Where is the snow and cold weather”?  By the time your read this it will be 60 degree.  Don’t get me wrong, snow is pretty but it’s hell to get around it in.

All I did was stamp the images and colored the ornament in with Copic markers.

I love how this card turned out!! Super pretty!

Now it your turn!!

We have two prizes to offer this month, the first is our sponsor prize. This winner will be chosen randomly from all of the entries in the challenge! The sponsor for December: Polkadoodles

pd

The prize is a £25 voucher to spend in the online store.

Our second winner is our Design Winner. This winner is chosen by our DT, who all vote for their favorite design from all of the entries. This winner will have their winning project published in Craft Stamper Magazine, they will have a GDT slot for an upcoming challenge, and will also feature in their very own Winners Profile blog post!

Now if that isn’t a reason to play along I’m not sure what is!!

I can’t wait to see what you come up with.

Thanks for stopping by!

~Kymona

CS Take It Make It: Take a Stamp Challenge

Hello everyone!  I’m here today with CS Take It Make It Design Team for our CS Take It Make It: Take a Stamp Challenge for the month of May.

This month’s theme is Take a Stamp!!  That means take any stamp and create something, anything goes!! Now if that isn’t easy, I’m not sure what is!!

Take a look at my card:

There is Beauty in Simplicity (CS)

OMG!!  That butterfly is super amazing.  That butterfly comes from the new Tim Holtz’s Perspective stamp set.  I’m so glad I ordered it.  I will get a lot of mileage with that stamp.

Here is how I created this card:

1. I cut my card base to an A2 size card (4.25 x 5.50 scored at 4.25).

2. I stamped the butterfly and the sentiment from Tim Holtz’s Perspective stamp set using My Favorite Things Hybrid Black Ink.

3. I colored the butterfly using Copic Markers: BV02, BV04, BV08 and R81.

4. I added Clear Wink of Stella to the butterfly for extra shimmer.

5. I cut a mask out of the butterfly to cover my pretty butterfly up.

6. I used WPlus9 Bloomsberry Spray Mist and the Shimmer Spray Mist to add splatters to my card front.

Those sprays are awesome.  Such a great added touch to my card.

7. I rounded the corners with the We R Memory Keepers Corner Chomper.

Pretty neat right!!  Now its your turn to play along with us.

We have two prizes to offer this month, the first is our sponsor prize. This winner will be chosen randomly from all of the entries in the challenge! The sponsor for May is: WOW! Embossing Powders.

Wow

Here are the prizes this month:

A set of 6 vintage embossing glitters in a case and a lace stamp!!

Wow embossing powder               Wow Stencil

Our second winner is our Design Winner. This winner is chosen by our DT, who all vote for their favorite design from all of the entries. This winner will have their winning project published in Craft Stamper Magazine, they will have a GDT slot for an upcoming challenge, and will also feature in their very own Winners Profile blog post!

Now if that isn’t a reason to play along I’m not sure what is!!

I can’t wait to see what you come up with.

Supplies used:

Tim Holtz Perspective MFT Hybrid Black InkCopic BV02 Copic BV04 Copic BV08 Copic R81Wink of Stella clearWPlus9 BloomsBerryWPlus9 Shimmer Spray MistWe R Memory Keepers Corner Chomper

Thank you so much for stopping by!

~Kymona