I’m here today with Your Next Stamp (YNS) and the Sketch and Color Challenge #51!!
Each challenge has a sketch and a color combo to choose from.
Take a look at the color combo:

Take a look at the sketch:

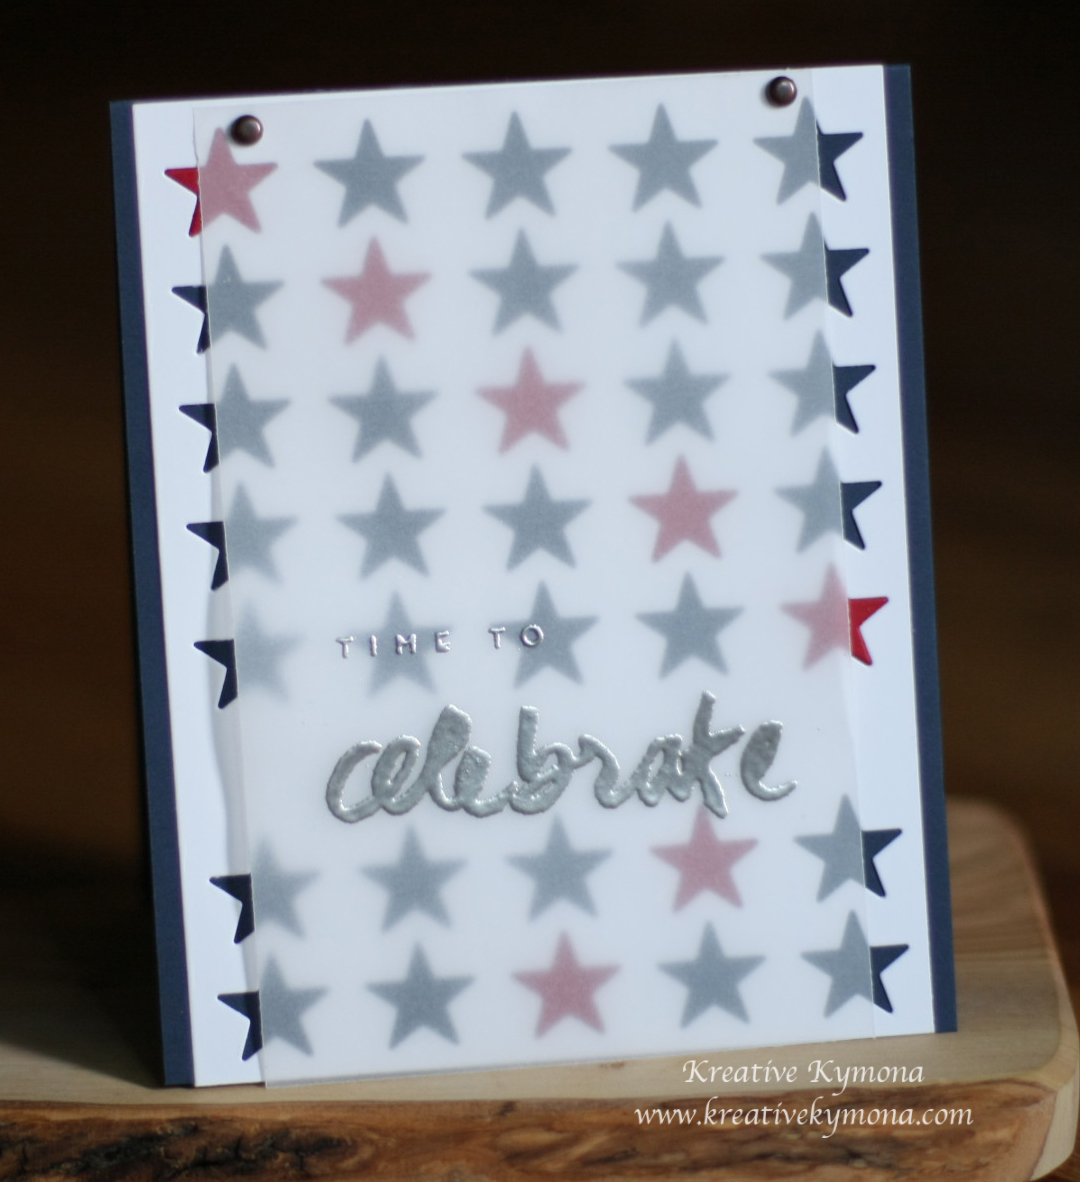
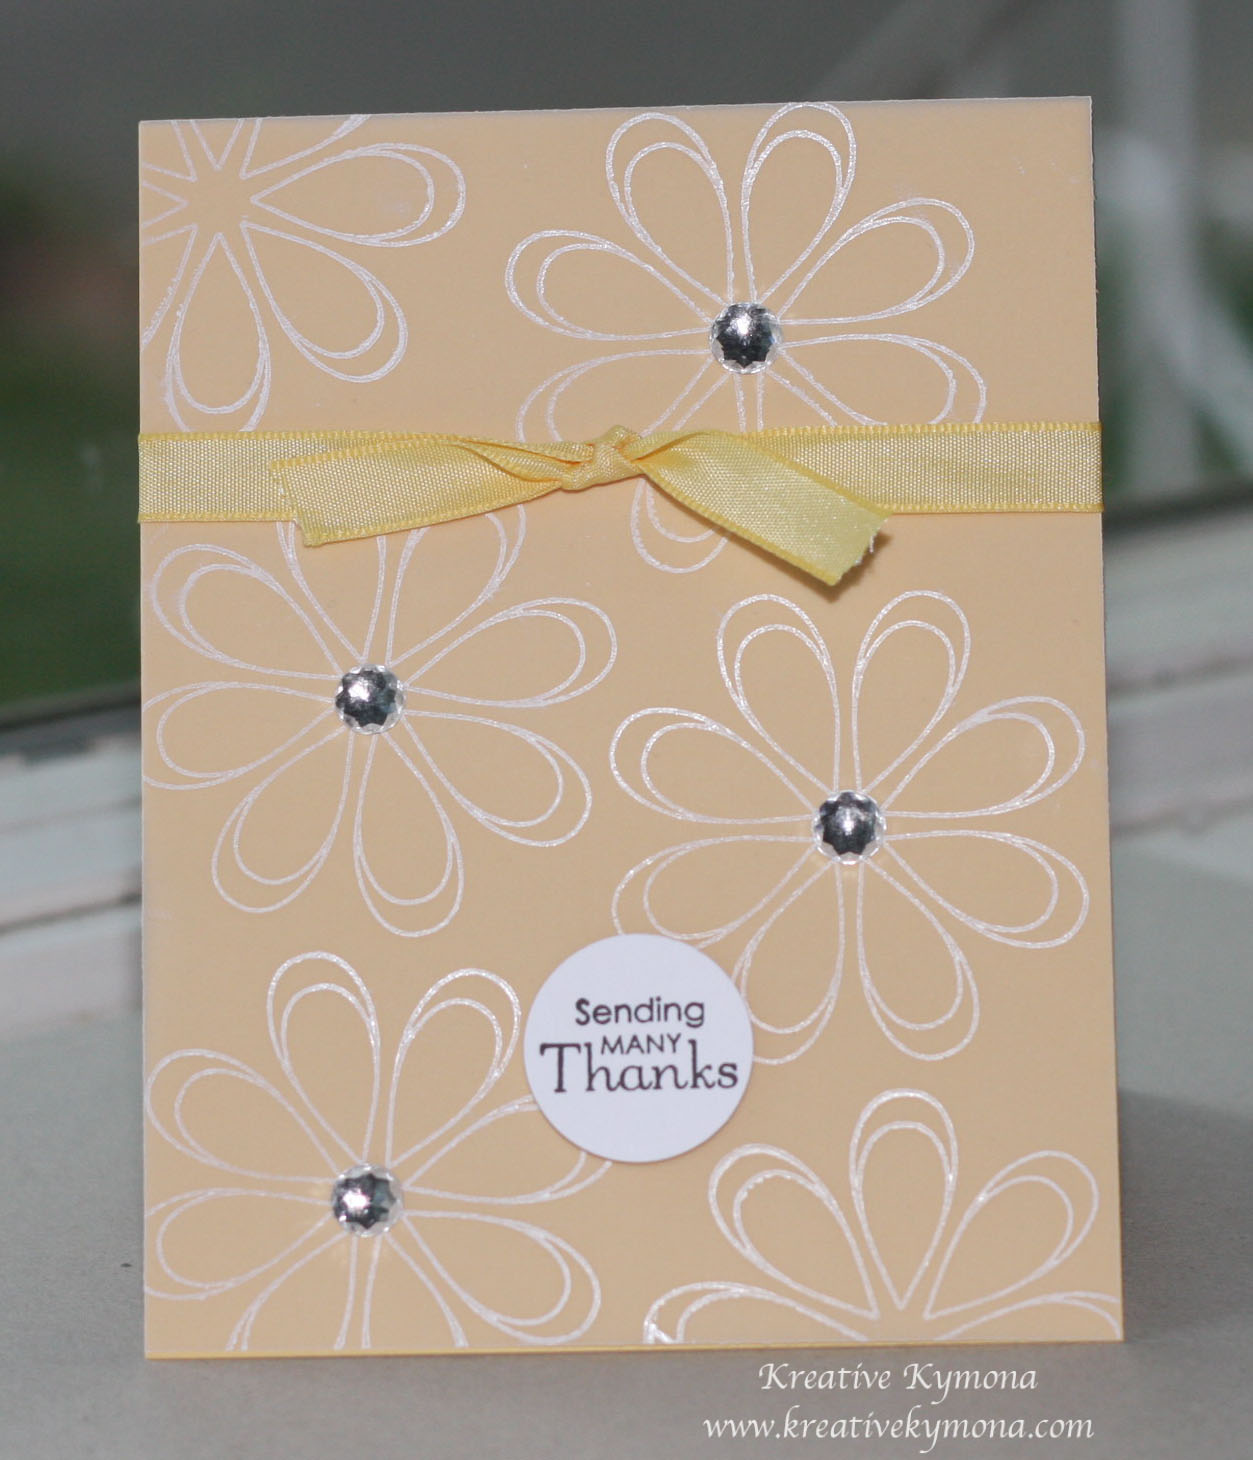
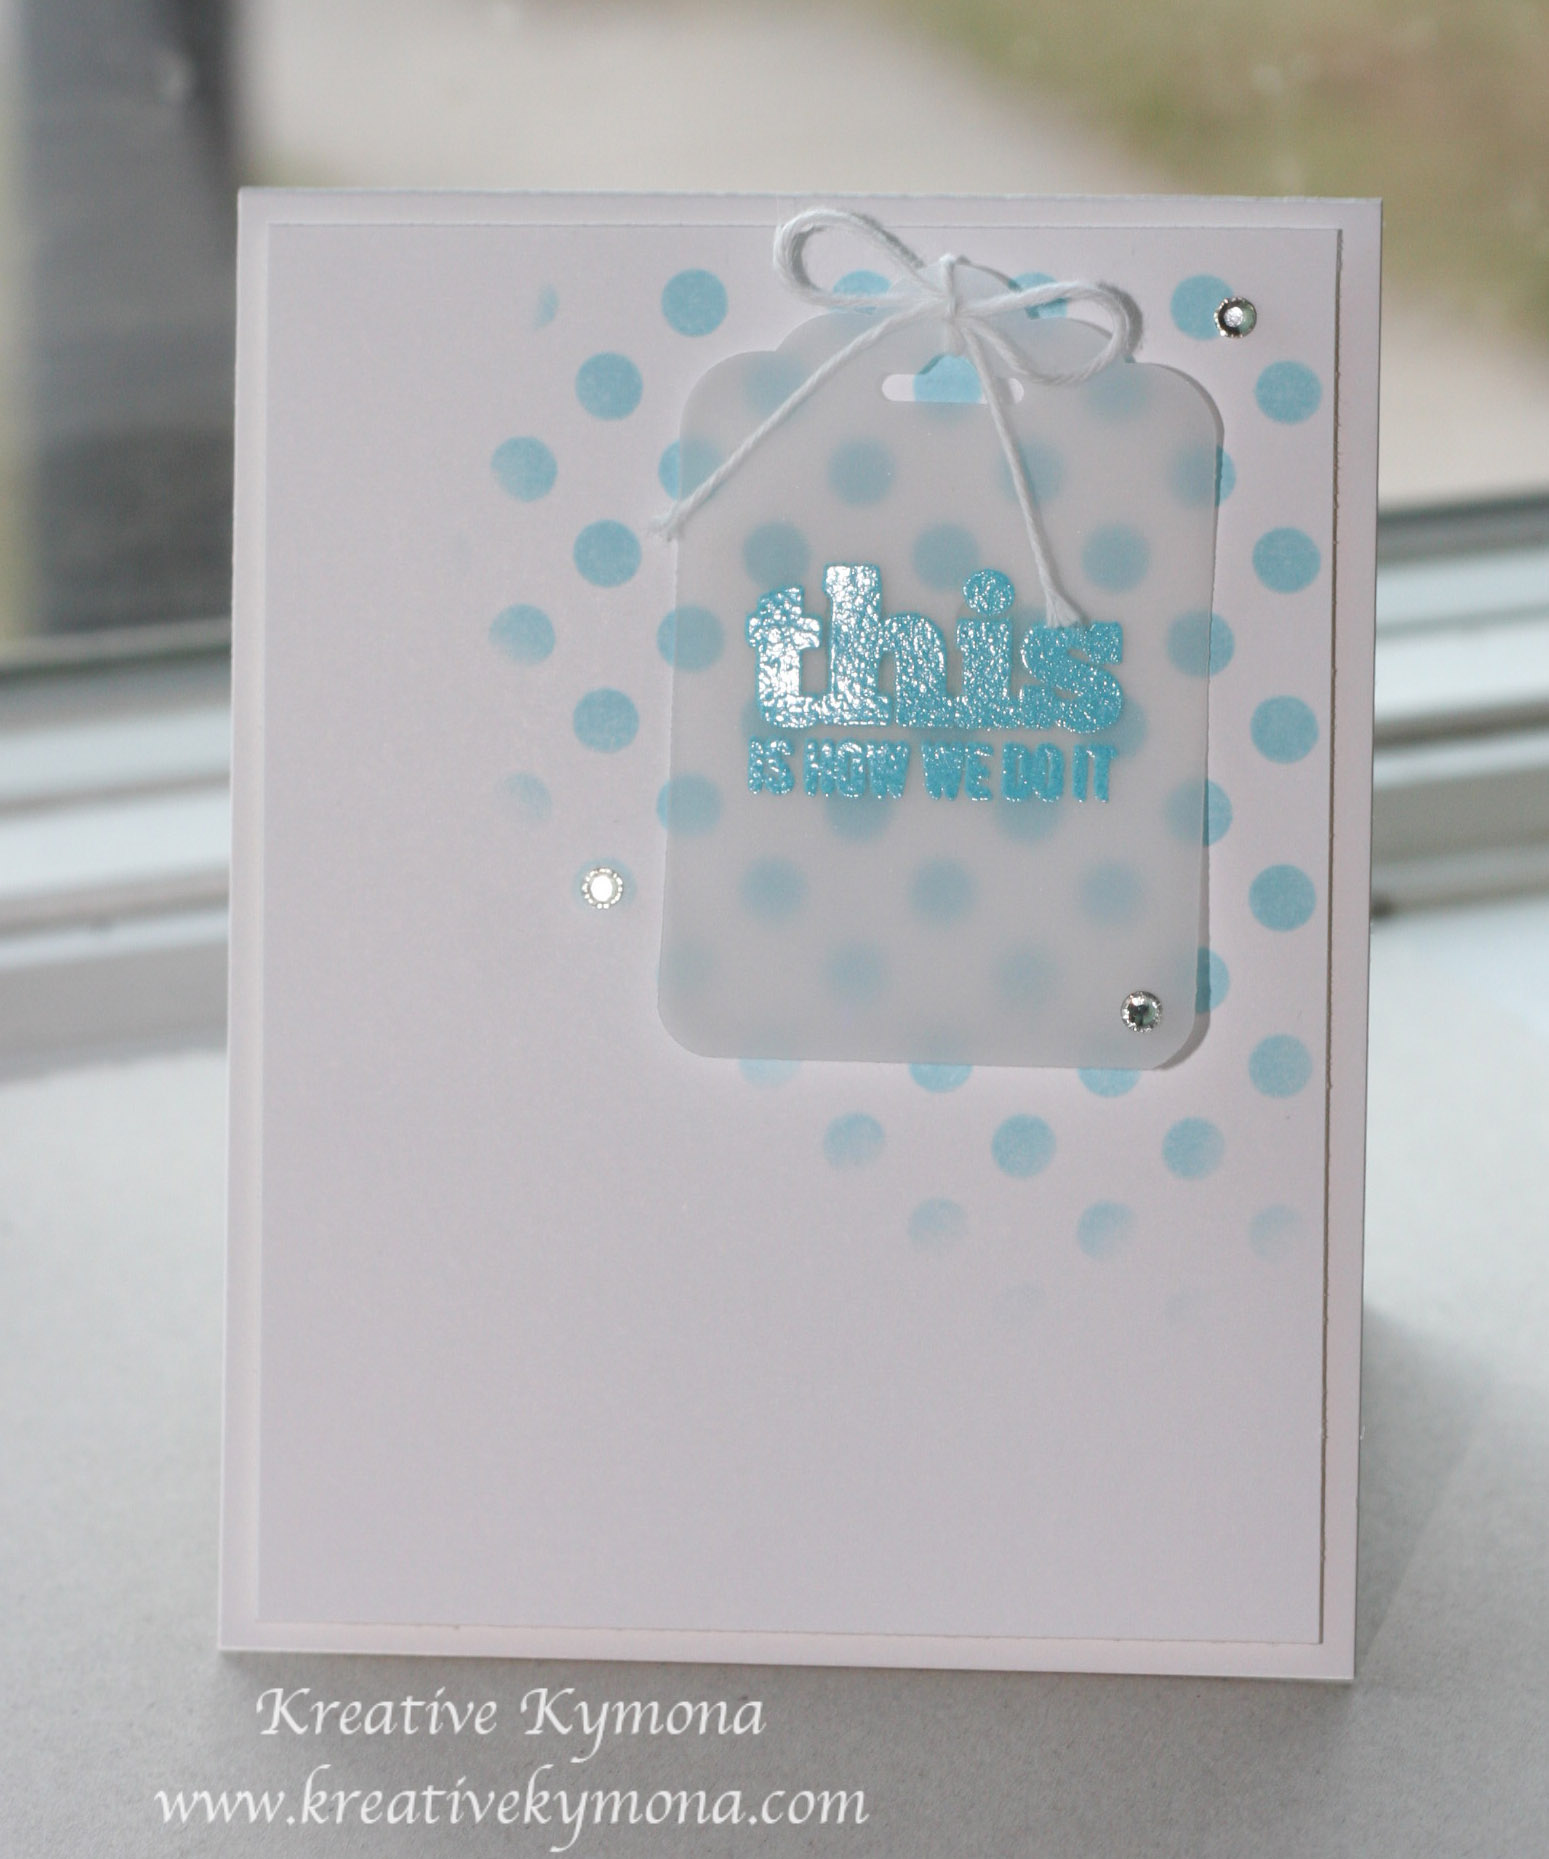
Take a look at my card:

YNS Supplies: Snowfall Panel Die, Scallop Circle Die Set, Whatnot Sentiments Set Five
Other Supplies: Distress ink Hickory Smoke, Canidad Apple, Squeezed Lemonade, Vintage Photo, Twisted Citron
What do you think? Super easy sketch! Let me know below.
So are you ready for the new challenge?
You have until November 10, 2016 at midnight EST to play along and submit your project on the YNS Blog post. One random participant will win a $15 gift certificate to the Your Next Stamp Store. If YNS stamps or dies are the focal point then the winner receives and additional $5 gift certificate f0r a total of $20. The winner will be announced on the YNS Blog the Sunday after the challenge closes.
I hope to see your projects!!
Supplies listed above!!
Thanks for stopping by!
~Kymona