CASology 179 – Simple

Second Post for today
If your looking for Home is Where the Heart is Blog Hop, click here

Hello everyone!!  It’s CASology Tuesday!!  We are back with another Cue Card just for you!!  

This week’s cue card is :


Week 179 - Simple

Take a look at my card:

Sweetheart (CAS)

I love this cue card!!  Simple is so easy, or at least it should be.  The more you think about something simple the easiest it is to make this more complicated.  LOL!!

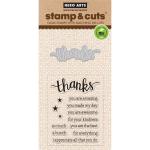
I had so many thought in my head and decided to go with the stamp set I was already working with.  Its the new stamp set from Right At Home Kiss Kiss!!

As a matter of fact, we are doing a blog hop today, so you can see this set used in different ways here.

To create this card:

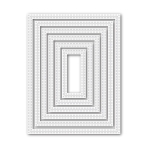
  1. I used Simon Says Stamp Stitched Heart College Die to cut out the stitched hearts in the center of my paper.
  2. I mounted the card panel to the black card base.
  3. Then I die cut the hearts a second time out of Real Red card stock.
  4. I placed them in the white card panel, popping some of them up with 3M foam tape.
  5. Then I stamped the sentiment using Versafine Black ink.
  6. I added Clear Wink of Stella to all of the hearts.

Nice and simple!! The hearts look like they are beating sort of! LOL!!

For more inspiration, check out my fellow Design Team members blog for more awesome work.

DT Badge

Our Guest Designer this week:

Rachel

Our Sponsor this week is Cindy B Designs!

Supplies used:

SSS Stitched Heart College DieRAH xoxo stampOnyx Versafine Ink Wink of Stella clear3M Double Coated Foam TapeRecollections White HeavyweightReal Red CSPlus tapeRecollections Black Heavyweight

Thank you so much for stopping by!!

~Kymona

Home Is Where the Heart Is Blog Hop // Right at Home January Release!!

Hello everyone!!  I’m excited to be here with you today to share some amazing projects created for the Home is Where the Heart is Blog Hop!!  This is the design team first blog hop so you know we are full of delight.

home-is-where-the-heart-is-blog-hop-graphic

So without further ado, here are the cards I created for all of you:

Love youThis card was created with the Kiss Kiss stamp set!!

Here’s how I created this card:

Stamped hearts (RAH)

Cut Hearts (RAH)

  • Once the hearts dried, I stamped the small sentiments in the middle of each heart.
  • Then the sentiment was also stamped and then cut out using the Brother Scan and Cut.
  • The sentiment was adhered first using 3m foam tape.  I double the tape so that it stands higher then the hearts.
  • Once the sentiment was in place, it was easy to place the hearts behind it.
  • A few rhinestones were added and Clear Wink of Stella to finish the card off.

Super cool card for valentines day.  The person receiving this card would totally feel love!!

So what do you think? Are you ready for card number two?

Here you go:

Sweetheart be mine 3 (RAH)

I love how this card turned out!!  Shakers cards are my favorite, so how could I not create one for this hope!!

Check out the matching envelope:

Front:

Sweetheart be mine 2 (RAH)

Back:

Sweetheart be mine (RAH)

I have to say, I love how this card turned out. I’m excited about this one.

Here is how I created it:

  • The card base was cut to a standard size A2 card.
  • The retired Stampin’ Up! DSP is the first card panel that was cut to the same size as the card base 4.25 by 5.50. It was adhered to the card base with Plus tape.
  • The outer card panel was cut to 3.25 by 5.50.
  • I stamped the sentiment from the Kiss Kiss stamp set using Versafine Black Ink.
  • Then I embossed the card panel with the retired Stampin’ Up! Polka Dots embossing folder.
  • I used My Favorite Things Die-namics Pierced Heart STAX to cut out a heart in the front card panel and then to cut a separate heart out of black cardstock.
  • I created a heart shaker pocket to go behind the die card card panel. To see how I created the shaker pocket check out this post. I used the exclusive RAH and Pretty Pink Posh XOXO sequin mix for the shaker pocket.
  • Before adding the shaker pocket, I adhered the black die cut onto the card base right where the shaker pocket will be.
  • I adhered the shaker pocket to the back of the red card panel. I added pieces of foam tape onto the panel and then adhered it to the card base.
  • The envelope was created using We R Memory Keepers Envelop Punch Board.
  • I used Right At Home Sending Love stamp set to stamp my sentiments on the envelope.

So tell me what you think?  I can’t wait to hear what you think of these creations!!

Guess what?  I have another card created using the Kiss Kiss stamp set.  That card will go live in a few hours so stay tune if your on the fence about these stamp sets!!

Now onto my super cool and talented design team member Holly to see what she has in store for you!!  You will not be disappointed!!

What is a blog hop without a great giveaway!! Here are the rules: Leave a comment on all of the blogs participating in this hop for a chance to win a great prize.  That’s it, super simple and easy!!

Supplies used:

Recollections White HeavyweightRecollections Black HeavyweightRAH xoxo stampPlus tapeBrother Scan and Cut2mft pierced heart staxOnyx Versafine InkRAH happymail 2envelope punch boardppp xoxo mix

Thank you so much for stopping by!!

~Kymona

Something New – Brush Lettering

Hello everyone!!!  I’m here today sharing one of my new ventures in 2016!!

Many of you know that my one little word for 2016 is “forward”, and with that one olw I’m trying new things that will bring me forward in life.

The first thing I’ve decided to start is Brush Lettering!!!  I met Olivia on Instgram as @randomolive in 2015. After watching her on Instagram and on Periscope I knew I wanted to try brush lettering so I and brought her brush lettering practice guide from her website.  

I was so excited about it and promised her I would start and guess what I didn’t!!  My main reason for not starting was fear!!  Yes, I was afraid and I don’t know why.  I continued to watch and leave comments but still was afraid.  Then December 2015 I saw her post on a brush letter challenge for 2016 and knew this was my time, especially since I know I wanted move forward for the new year.

So I reached out to her and let her know I will participate come January 1st!  She said great.  I wondered if she believed me but it didn’t matter since I knew in my heart I was going to start!  So I bought the brush letter challenge practice sheets, printed them and prepared everything I need for January 1st.

IMG_6953

I had everything ready for January 1st, then I thought, how can I incorporate my one little word into this brush letter.  I sent Olivia and email asking if she could create some sheets for me with my name and one little word.  Guess what, she did!!  Totally awesome of her!

IMG_7008

I was so excited about my new sheets!!  January 1st come two days ago and I started my new journey and I have to say I love it totally.  I don’t know what I’m doing but I love learning.  If I practice everyday, I can and will master this!!

Here is a video of my first sheet for January 1st:

Nice right!!  I sped that up because it took me 10 minutes to do the first two words!!  Don’t laugh at me!!  Ok, ok, you can laugh because I am!

So yesterday was day two and I had my nieces over they wanted to join in with me.  Take a look at us attacking the word growth for January 2nd!!

FullSizeRender (37)

They were so excited to try this.  They do not know how to write in script yet so they were happy to give it a try.  The littlest one, bottom left of the picture, was upset because she couldn’t form the words correctly.  I had to tell her to take her time and just trace the letters for now.  She is 5 and finally got the hang of it!!

I’m excited about finish up this month, getting stronger every day.  Tomorrow is courage and I’m ready!! I will share my pictures here once a week so you can see my weeks worth of writings.

Thanks for stopping by!!

~Kymona


Sparkle and Shine Challenge

Third Post for the day
If your looking for a2z Scrapbooking  January Challenge, click here
If your looking for So Suzy Stamps January Challenge, click here

Happy New Year for the third time today!!

Hello everyone!!  I’m here today for the first time with the Sparkle and Shine Challenge as a Design Team member!!!  How exciting is this!!! Pretty exciting for me!!  The women on this team is amazing!!

Since its the first of the month, its time for our new challenge for the year!!!

Here is the inspiration photo that guided us this time around:

S&S Jan

Now take a look at my take on this photo:

Happy Birthday (S&S)

Take a closer look at that bling (wink of stella):

wink of stella

Here is how I created this card:

  1. I used Papertrey Ink Shaker Shapes Balloon Die to create a mask for my balloons.
  2. Then I used Distress Ink Seedless Preserves and Peacock Feathers to the masked area to create the balloons.
  3. Then I stamped the sentiment from WPlus9 Unforgettable stamp set in Ranger Archival Black Ink.
  4. I die cut the balloon ends out of silver paper (I don’t know who made the paper).  I used Stick It to adhered them to my card front.
  5. After that I added the finishing touches, the “bling”!! I added Clear Wink of Stella to the balloons and Rhinestones to the card front.

That easy!! It sure was.  After creating my card, I felt like I’ve seen it before.  Then I remembered Laura Basson’s card using the balloon die.  That card was the reason I bought that die back in June!!  This was the first time using it so it worked out perfectly!!

What do you think?

Now its your turn to give this challenge a try!! I can’t wait to see what you come up with!!

Our sponsor for this challenge is Create a Smile Stamps!!

Create A Smile Badge

The winner of this challenge will receive a $25 gift card to their online store and will be asked to be our Guest Designer for the next month.

Supplies used:

Balloon shaker die Seedless PreservesDistress Ink Peacock Featherswplus9 unforgettable Archival Jet Black Stick ItWink of Stella clear

Thank you so much for stopping by!!

~Kymona


a2z Scrapbooking January 2016 Challenge

Second Post for the day
If your looking for So Suzy Stamps January Challenge, click here

Hello everyone!!  I’m here with a2z Scrapbooking today with our January Challenge!!!

Happy New Year to all of you!!!!  Our new challenge is all about Fireworks (add some glitter and bling)!!!!!

Check out the card I created for this challenge:

Thanks a bunch (a2z)

I used Wink of Stella and Hero Arts Pearls and Gems for my Fireworks!!  I went with a thank you card instead of a New Years card because thank you cards are in order for all of the gifts my children received from their relatives.

Creating this card was easy!!

Here’s how:

  1. My card base is from Michael’s Recollections Heavyweight cardstock.
  2. Then I used Simon Says Stamp Stitched Rectangles Die to cut my card panel from Neenah Desert Storm Cardstock.
  3. Then I used Hero Arts Stamp and Cut Thanks and stamped the sentiment and stars.
  4. Then I die cut the Hero Arts Swallowtail Butterfly Fancy Die out and adhered the butterfly to the card panel using glue dots.
  5. For the bling, I added Clear Wink of Stella to the butterfly and the Hero Arts Pearls and Gems Natural Mixed Accents to the card front.

Lets take a closer look:

Thanks closeup (a2z)

So what do you thing?  Please let me know.

Amazing isn’t it!! I hope you love what you see and that it inspires you to join us this month. You have the entire month to create a new project and enter it into our challenge. By entering you will have a chance to win a $25 Gift Certificate to the a2z Scrapbooking Store. Winner will be announced on the 7th of February.  Good Luck!

The butterfly die that I used can be found at the a2z Scrapbooking Store. If you would like to purchase any thing please head on over to the store and use the coupon code KYMONA15 to get 15% off your purchase.

Supplies used:

Recollections Black HeavyweightNeenah Desert Storm CS  Hero arts stamp cuts thanksSSS Stitched Rectangles DieOnyx Versafine Ink

Thank you so much for stopping by!!

Kymona

So Suzy Stamp January 2016 Challenge

Happy New Year Everyone!!!

Hello everyone!!  I’m here with So Suzy Stamps and our first challenge for 2016!!!  I can’t believe this!!  It feels like 2015 was just starting.

Check out our new challenge:

So Suzy Stamps challenge

Check out my card:

I'm sorry (SSS)

I’m super excited about this card!!  I’m super proud of myself and this coloring!!  I used the Derwent Inktense Pencils to coloring my image in!!

This new stamp is called Surf Shack!!  I love it for a couple of reasons.

  1. Its a pretty big stamp with plenty of space to color!
  2. It reminds me of the beach which is a super fun place to spend time at during the summer.

Here is how I created this card:

  1. I stamped the image on watercolor paper and used Intense pencils to color the image in.
  2. The colors are Iron Blue 0840, Deep Blue 0850, Oak 1730, Saddle Brown 1740, Burnt Orange 0260, Tangerine 0300, Mustard 1700, Amber 1710, Indian Ink 2020, and Chinese Ink 2030.
  3. Once my piece dried, I proceed to have my Brother Scan and Cut cut out the image but the watercolor paper wouldn’t stick to my mat, so I had to fussy cut the image out.
  4. I used Lil’inker designs Quilted Stitched Pattern Cover Plate to die cut the front panel of the card.
  5. I stamped the So Suzy Stamps I’m Sorry stamp using Versafine Black ink.
  6. I added foam tape to the front panel and the cut out stamped image.

Take a closer look:

I'm Sorry closeup (SSS)

What do you think?  So are you asking why the sentiment says, I’m Sorry.  Well, some of you are dealing with snow, cold weather and storms.  Here in NY, its seasonable warm, it feels like summer.  This one time I get to brag about not being cold!! LOL!!

Let me know what you think and I can’t wait to see what you create!!

Supplies used:

Intense pencils Onyx Versafine Ink LID Quilted Stitched Pattern Die 3M Double Coated Foam Tape Recollections White Heavyweight

Thanks you so much for stopping by!!

~Kymona