Right At Home Stamps One Year Celebration Blog Hop

Hello everyone!!  I’m so excited today!!  A year ago today, Nicole from Right At Home released her first stamp set called Happy Mail.  Totally amazing and fun.  So today the Design Team and some special guest are celebrating with an amazing blog hop.

one-year-graphic

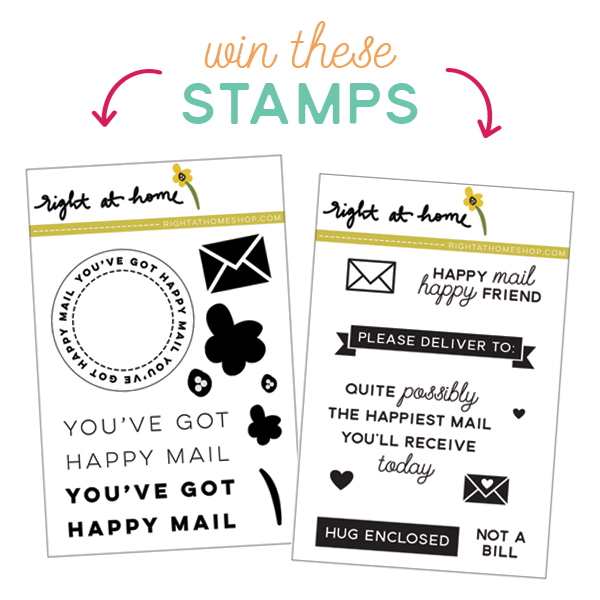
We have some amazing projects for all of you using the new Happy Mail Year 2 combined with the original Happy Mail stamp set.

Take a look at my card and envelope:

You've got Mail

Congrats Nicole on making a year of totally greatness.  Your stamp sets are super cute and fun to play with.  I’m super happy to work along side you and the rest of the team.

I created a clean and simple card and envelope using both stamp sets!

I stamped the tiny envelopes using Versamark ink and heat embossed Clearsnap Clear Embossing Powder. Then I stamped the You’ve Got Mail and a tiny heart stamp with Clearsnap Home Colorbox Petal Point and heat set it with clear embossing powder.

After that, the circle was fussy cut and adhered to the card front.

For the envelope, I simply stamped the flowers and sentiment using Clearsnap Petal Point Ink and heat set the clear embossing powder.

Nice and simple!!

What do you think?  Please let me know below.

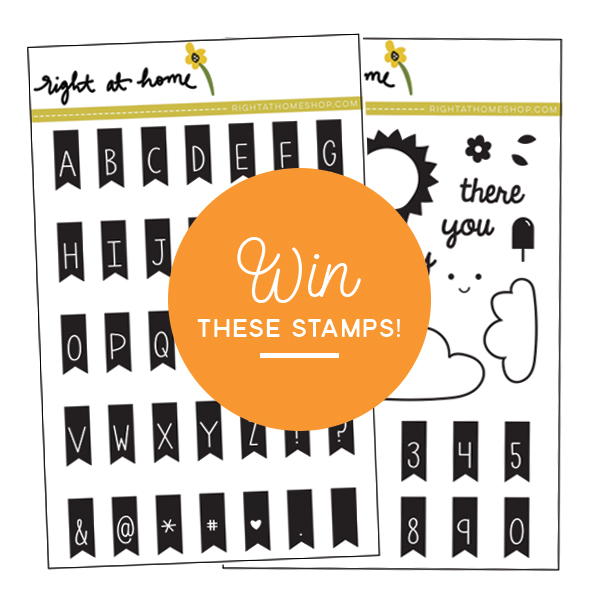
What is a blog hop without a giveaway!!

All you have to do is:

  1. Create a new project specifically for this hop using any of your favorite Right At Home Stamps.  Bonus points if you use Happy Mail or Happy Mail Year 2.
  2. Link up your project and it’s accompanying blog post in the link-up on Nicole’s blog.
  3. The link-up will be open until July 28th, 2016.
  4. Leave a few comments along the hop to support everyone who participated.

one-year-giveaway

If you get lost along the way here is the list of participants:

Nicole

Joan

Teresa

Farhanna

Bonita

Holly

Kymona ← you are here

Amy K

Amy T

Laurie

Now head on over to see what my other design team members have created!!

Supplies used:

Wicked Black Clearsnap Pinwheel Home Clearsnap Ink happy-mail-stamp-sqhappy-mail-year-2-sqClearsnap white embossing powder

Thank you so much for stopping by!!

~Kymona


Mutli-Stamping for the Right At Home Blog Hop

Hello everyone!!  I’m excited to be here with you today to sharing an amazing multi-stamping project created for the Right At Home April Release Blog Hop!!  The design team are delight to full you with inspiration.

july-release

This month Nicole released four clear stamp sets and one background stamp! Super cute all around! For this released I used Right at Home Stamps Banner Alphabet and Banner Alphabet Add-On.  I also used Right At Home very first stamp set Happy Mail.

If you arrived here from Joan’s blog, you are on the right path!!  If you arrived on your own, you will want to start from the beginning, the Right At Home blog as to not miss out on any of the fun.

Take a look at my postcard:

handmade postcard

While looking at the stamp sets, I wonder what could I do differently with these stamps.  It hit me that I could create postcards where the image and message is on the front of the card.

Check out how I created these easy to create postcards:

I started with the banner string.  I used the Mini Misti to do all of my stamping so that I could create more then one postcard at a time. I stamped the string with Versafine Black Ink.

Multi-stamping banner (RAH)

Then I lined the banner stamps on the stamped line so that they are perfectly placed for easy stamping with the Mini Misti.

I left a space for the second “L”.

Line up the pennent stamps (RAH

Using Clearsnap Colorbox Bluebells, I stamped the banner letters on each of the postcards.

I also placed the second sentiment on the bottom of the postcards so that I can stamp both sentiments at the same time.

Stamping the banner stams (RAH)

Then I lined the second L up on the banner line.  Using the Mini Misti to get the L in the right place on all of the postcards.

Stamping second L stamp (RAH)


Take al look at one of the finished cards with my handwriting on it.

Postcard Message (RAH)

This one is going out to Nicole the young lady behind these stamps!!

So this one layer postcard is super easy to create but even easier with a Mini Misti!!

So what do you think? Please let me know below.

Giveaway time!!

Make sure to leave a comment on all of the DT’s blog to be entered into the giveaway. Giveaway will close in a week so make sure to hop along today!!

july-bh-prize

Prize: Banner Alphabet Stamps Set and the Banner Alphabet Add-On Stamp Set

Here is the list of all of my talented teammates blog, just in case you get lost along the way:

Right At Home 
Holly
Laurie Willison
Amy T.
Joan
Kymona ← you are here
Amy K.

 Thank you so much for stopping by!!

~Kymona

{Clean and Simple} CASology 204 – Row

Third Post for today
If your looking for the Clearsnap Planner Post, click here
If your looking for the Right At Home Post, click here

Hello everyone!!  It’s CASology Tuesday!!  We are back with another Clean and Simple Cue Card just for you!!

This week’s cue card:

Week 204 - Row

Take a look at my card:

PicTapGo-Image (24)

What an easy cue card this week.  My new stamps from Papier Projekt arrived just in time for this challenge.  I fell in love the feather border die stamp and thought this set was perfect for this challenge.

To create this card:

  1. I cut the cardstock down smaller then a A2 size card.
  2. Then I stamped the feather stamp four times starting with the darkest color Colorbox Envy Pigment ink to the lightest Colorbox Envy Pigment ink.
  3. After that I stamped the sentiment from the With Love stamp set using the darkest blue ink.

Perfect, right?

Nice and easy!

What do you think?  I can’t wait to see what you come up with!

For more inspiration, check out my fellow Design Team members blog for more awesome work.

DT Badge

Deidre Payne

Hannelie Bester

Hazel Hodgkins

Jacquie Southas

Jen Wills

Joyce Mehrberg

Judy Marino

Kymona Tracey

Melissa Chipperfield

Sherrie Mannion

Tracey McNeely

Guest Designer

Monika

Our sponsor this week is Mint Owl Studio!

Supplies used:

papier projekt with lovepapierprojekt border08033-Envy heavyweight cardstock

Thank you so much for stopping by!

~Kymona


Planner Stamping with Pigment Inks

Second post for today
If your looking for the Right At Home post, click here

 Hello everyone!!  I’m up on the Clearsnap blog today sharing a couple planner pages I decorated.  I’m a newbie at decorating my planner and since my style is clean and simple I wanted to make sure I stay true to that, if possible. LOL!!!

Here is a sneak peek:

Wood Block Stamping KTracey

I’m loving these pigment inks!!  Super vibrant and fun. Do you want to see more?

You do??  Ok, head on over to Clearsnap’s blog to check out my process and the finished project.  Please let me know what you think.  I would love to hear from you.

Thanks for stopping by!!

~Kymona

Congratulations!!!

Happy Saturday everyone!!  I’m super excited today!!  My first born is graduating from high school today!!  I’m super excited and overcome with emotion.  I feel happy, excited, sad, scare and curiosity all at the same time.  I knew this day would come but it sure seems like it came so super fast.  Just yesterday he was walking with me to my college classes. Now he will be off to his own college.  Totally a full circle moment for me.  I love him with all my heart and soul!!  I know that he will do well on this new journey in his life.  I hope he loves college as much as I did!!


Kymona2

CONGRATULATIONS E!!

Sticking to the CASology challenge, I created a fun card for my son to let him know that he made it and this is just the beginning!!

Take a look at my card:

Hooray (CAS)

I’m having fun with this cue card this week.   I’m not sure if you know, I love owls.  My favorite one is the white owl from Harry Potter.  I wish I could have one.  My daughter said she would buy one for me some day.  Yes!!

For this card, I used Gerda Steiner Designs Graduation Owl.  Its a free digital stamp from her store.  Super cute and fun to color!!

  1. I downloaded the image and used photoshop to place him on my cardstock.
  2. I printed the image onto the heavyweight cardstock, cut and scored to create a top folding card.
  3. I used Copic markers to color him in: Body: E31, E35,E37, White Gel Pen Stomach:R20, W0, W1, White Gel Pen Nose: 100 Eyes: BG0000 Cap: N5, Clear Wink of Stella
  4. Then I stamped the sentiment from Papertrey Ink Lunch Box Notes using Versafine Black Ink.
  5. I used the Envelope Punch Board to round the corners.

Nice, Easy, Clean and Simple!

I’m playing along with Gerda Steiner’s Share Your Design Challenge!

Screenshot_2016-03-21_11.55.59_compact

Supplies used:

Graduation Owl Digital Stampheavyweight cardstockPTI Lunchbox Love  Copic Markers

Thanks for stopping by!

~Kymona

Stamp and Stencil on Basswood

Second Post for today
If your looking for the Your Next Stamp Color Challenge, click here

Hello everyone!!  I’m on Clearsnap’s Blog today sharing how to stamp and stencil on Basswood!!!

I totally had fun with this project!! I love how the Colorbox Pigment Ink dried super fast on the basswood allowing me freedom to move the stencil around without smearing the ink.

Here’s a sneak peek look at what I created:

two tone stamping on basswood

For the full tutorial please head on over to the Clearsnap Blog to see what I’ve come up with.  This tray will hold my kids drink while we are outside enjoying the sunshine this summer.

While you’re there, let me know what you think and if you will give this a try!!

Thanks for stopping by!!

~Kymona


YNS Sketch and Color Challenge #42: Shape Card

I’m here today with Your Next Stamp (YNS) and the Sketch and Color Challenge #42!!

Each challenge has a sketch and a color combo to choose from.

Take a look at the color combo:

YNScolor-42

Take a look at the sketch:

YNSSketch42

Take a look at my card:

Happy Everything

YNS Supplies: Happy Everything Stamp Set, Happy Die, Cool Tag Three Die Set, Candy Corn Gumdrops

Other Supplies: Recollection Heavyweight Cardstock, Colorbox Black Embossing Powder, BoBunny Believe Pattern Paper


What do you think?  Did I follow the color photo? Let me know below.

So are you ready for the new challenge?

You have until July 7th, 2016 at midnight EST to play along and submit your project on the YNS Blog post.  One random participant will win a $15 gift certificate to the Your Next Stamp Store.  If YNS stamps or dies are the focal point then the winner receives and additional $5 gift certificate f0r a total of $20.  The winner will be announced on the YNS Blog the Sunday after the challenge closes.

I hope to see your projects!!

I’m also entering Virginia’s View Challenge #22 (Summer Challenge)

V V Challenge #22

Supplies listed above!

Thank you so much for stopping by!

~Kymona

Your Next Stamp June Feature Day

Hello everyone!!!  I’ here today with another YNS creation to inspire you and a chance to win a stamp set of your choice!!

On the 22nd of the month, YNS Design Team creates more samples featuring YNS products and shares them with all of you!!

The super duper awesome part of it all besides our awesome samples, you could win a stamp set of your choice!!  Now how super cool is that!!

Scroll to the bottom to find out how!!

This month we are focusing on the color “Yellow”!!  The DT created projects using the color yellow on them.

Now take a look at the card I created to inspire you:

Cheers (YNS)

YNS Supplies: Fancy Cheers Die, Stripe-tastic Star Die Set

Other Supplies: Lucy Abrams Lemon Sherbet Sparkly Shaker, Recollection Heavyweight White Cardstock, We R Memory Keepers Fuse Tool, Avery Elle Storage Pockets, 3M Foam Tape

What do you think?  Let me know below.

Now on to that prize!!

DTDare2candy-547x232

All you have to do is leave a comment on the YNS blog by June 24th for a chance to WIN a YNS stamp set of your choice!!  Super simple and easy!!  You will get to see my fellow DT’s projects as well.

So head on over, you don’t want to miss this one!!

Thanks for stopping by!

~Kymona

{Clean and Simple} CASology 203 – Congratulations

Hello everyone!!  It’s CASology Tuesday!!  We are back with another Clean and Simple Cue Card just for you!!

This week’s cue card:

Week 203 - Congratulations

Take a look at my card:

Congratulation ink splatters

I plan on having fun with this cue card this week.  My son’s big day is this Saturday and he has inspired me!  He is such a great son.  He has stayed focused to the very end.  Good grades and dominate in all the sports he played.  He walks away from high school as an All County Football Player, an All County Lacrosse Player and an All Conference Basketball Player.

INSPIRING right!!

This card is for him!

I used STAMPlorations Art Marks Stamp Set, who happens to be our sponsor  this week, to create this card.

Here’s how:

  1. I stamp the different ink splatters and the stars with Versafine ink.
  2. Then I stamped the sentiment using So Suzy Stamp Plum Passion Ink Bite.
  3. To finish the card off I rounded the top corners using the We R Memory Keepers Envelope Punch board.

Nice and easy!

What do you think?  I can’t wait to see what you come up with!

For more inspiration, check out my fellow Design Team members blog for more awesome work.

DT Badge