YNS Sketch and Color Challenge #46 Paper Layering

I’m here today with Your Next Stamp (YNS) and the Sketch and Color Challenge #42!!

Each challenge has a sketch and a color combo to choose from.

Take a look at the color combo:

YNScolor-46

Take a look at the sketch:

YNSSketch46

Take a look at my card:

Tweet News (YNS)jpg

YNS Supplies: Tweet News, Tweet News Die SetCircus Fun Matte Gumdrops

Other Supplies: Recollections Black Heavy Weight Cardstock, Tombow Irojiten Colored Pencils, BoBunny Believe Pattern Paper

What do you think?  Did I follow the sketch pattern? Let me know below.

So are you ready for the new challenge?

You have until September 1, 2016 at midnight EST to play along and submit your project on the YNS Blog post.  One random participant will win a $15 gift certificate to the Your Next Stamp Store.  If YNS stamps or dies are the focal point then the winner receives and additional $5 gift certificate f0r a total of $20.  The winner will be announced on the YNS Blog the Sunday after the challenge closes.

I hope to see your projects!!

Supplies listed above!!

Thanks for stopping by!

~Kymona

Clearly Planned Week and Custom Post-It Note

Hello everyone!!!  Today is the day for the big Clearly Planned Release!!

CpLogo-500x394

I have a lot to share so lets get started!

Full Planner Spread KT

My weekly pages need to be full of detail so that I don’t miss all of the important things I have to do each day.  Repeat stamping with the By Appointment stamp set allows me to see and remember the small task that can get lost during the day.  My favorite stamps set from this collection is the Sneak a Peek stamp set.  I love coloring those little animals.  They make my pages fun.

To see the entire Clearly Planned Collection, click here.

Here is a closer look:

First Page KT

I went with the color scheme of the pages, which was pink and black.  I added gold because it adds pop to the pages.  So I added washi tape to start off with.  Then I stamped the little animals from the Sneak a Peek stamp set to fill in some pages.  Coloring these images allowed me to bring in some my cardmaking skills to my planner pages.

Page Two.1 KT

Having a full time job, doesn’t allow me to do much during the week.  The weekend is where most of my action happens.  Its shameful that I only have two days.  For this page, you can see what I have to do around my house and with my children.

Let take a closer look at some of my own personal style:

Page Two.2 KT

Close up of Watercolor stamping KT

Watercoloring is my favorite medium to work with.  It is fun and free of judgment.  I created my own journaling card out of watercolor paper.  I stamped and embossed using the Makin’ a List stamp set. I love how it turned out.  It adds a piece of who I am to the pages.

Close up of a die cut KT

I created another watercolor panel to die cut some butterflies out to add to the pages as embellishments.

Closeup of extended stamp KT

For this cute giraffe for the Sneak a Peek stamp set, I extended the giraffe’s neck by masking what I already stamped and stamp only the neck again. Another card making technique.

Besides the new stamps and dies, the Clearly Planned line also has a collection called Sticky Situation. They are these super cute sticky notes that works well with the Makin’ a List stamp set. I absolutely love them.

Currently Post It by Kymona Tracey

I added the sticky note directly on my page to list out all of the things I need to do for the week using the same Makin’ a List stamp set.  Its a check list so as I complete the task I can check it off and move on to the next thing.

Currently Post It attached to page by Kymona Tracey

Since my list is long, it will take me a couple of days to complete these task so adding it to two days in my spread is awesome.  I can see what I have to do for those two days.  Also if I need to change or add to those days, I can lift the sticky note and write directly on the page.

I have to say for a newbie, I really love how my pages turned out!!  I’m impressed with myself and how pretty these blank pages turned out!!

Will you give this method of planning a try?  Let me know below.  Don’t forget to leave a comment below for a chance to win a $10 Gift Certificate to the TE Store!

CP Giveaway

The giveaway ends on Sunday, August 21, 2016 at 11:59pm EST.

To receive all of the Clearly Planned Update, I encourage you to sign up for our newsletter. Just click here and sign up.

eNewsletterCoupon-500x339

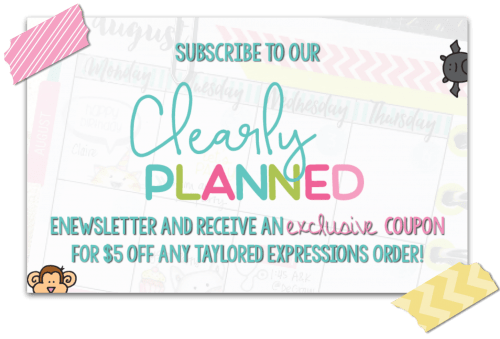
After you subscribe, you will receive an email with a coupon code good for $5 off any one order placed in the TE web store between now and 11:59pm PST on Sunday, August 21st. It’s just one way we want to say thank you for joining us on this new adventure!

I hope you join us on this new planning journey!!  Please share your planner pages with me.  I would love to see.

Thank you so much for stopping by!!

~Kymona

DIY Teachers Notecards and a Farewell

Hello everyone!!  Kymona here for the last time as a design team member.  I had so much fun working with Nicole and all of my fellow teammates.  All of these ladies are talented and I’ve learned so much.  Thank you Nicole!

For my last project, I create some DIY Notecards for my daughter’s teachers to use at her leisure.

Take a look:

RAH Notecards copy


To see the entire post, please head on over to the Right At Home blog for all of the details.

Thanks again for all the support while on the team. So long Nicole and my fellow teammates.  I will see all of you in crafty-land.

Thanks for stopping by!!

~Kymona


Clearly Planned Monthly August Spread

Hello everyone!!  I’m so excited to be here today.  This is my first official post as a design team member for the Clearly Planned Creative Team.

Clearly Planned DT

I have a couple of sneak peek photos to share with you so let me get started.

August 2016 Montly with Sticky Note by Kymona Tracey

I’m a planner newbie so trying to decide what I wanted to do on my pages took some thought.  I decided that my monthly spread needed to be easy to see at a quick glance.  The majority of my time is spent at my full time day job so being able to see what days are free makes it easy for me to plan all of my events.

Take a closer look:

August 2016 Monthly Page One by Kymona Tracey

The beginning of the week. Packed with a couple of the new stamps sets that will amaze you.

August Monthly Page Two Sticky Note by Kymona Tracey

The end of the weeks with my goal sheet.
This goal sheet and the die cut frame are two of the accessories of the Clearly Planned release.

August 2016 Montly Page Two without Sticky Note by Kymona Tracey

The end of the week minus the goal sheet.
I also added some of Taylored Expressions already released stamps to my page to show you how you can combine the old with the new.

All of the new Clearly Planned stamps are amazing.  I love all of the color-in images.  I can customize the colors that I use on my pages. I can see myself using the color-in stamps the most.  I also love how all of the stamp sets can be used separately or together.

 I can’t wait for all of you to see the new release.  You will love them.

Here are some of the details:

All of the new products will be available for purchase at the Taylored Expressions webstore on Thursday, August 18th, at 7am PST.

To receive all of the Clearly Planned Update, I encourage you to sign up for our newsletter. Just click here and sign up.

There’s also a giveaway!!  Who doesn’t love those?

CP Giveaway

Each design team member will give away a $10 Gift Certificate to the webstore.
So be sure to check out my teammates blog or social media post!

For my giveaway, all you have to do is leave a comment letting me know
if your a planner user, thats all!!!

The giveaway ends on Sunday, August 21, 2016 at 11:59pm EST.

Come back tomorrow for the entire release and more from my planner!!

Thanks for stopping by!!

~Kymona

Clearly, We Have Something Big Planned

Third Post for today
If your looking for the CASology post, click here
If your looking for the YNS Birthday Showcase post, click here

I have a huge announcement for all of you.  I’m super excited to share this news with you.  I’ve had to hold this secret for an entire month and a half.

Are you ready? Here goes:

A month and a half ago, I received an email from a talented young lady and business owner about joining her new design team called Clearly Planned.  I was totally intrigued. So she sent me all of the info and can I tell you how excited I was.

Do you want to know more?  Of course you do.

Taylor from Taylored Expressions add a new line of stamps to her store and they are called Clearly Planned. Can I tell you, how cute they are!!  What makes them even better is that fact that they are for your planner!!  Yes, I’m a new planner girl!!

Clearly Planned DT

Shocked right!!!  So am I!

I have so much to share with you.  The new release goes live in a couple of days so stay tune for all of the upcoming events we have PLANNED for you!!

To see who else made the team and more info, please head on over to the Taylored Expressions Blog.

So what do you think?  Are you ready to see more?

Thanks for stopping by!!

~Kymona

{Clean and Simple} CASology 211 – Dream

Hello everyone!!  It’s CASology Tuesday!!  We are back with another Clean and Simple Cue Card just for you!!

This week’s cue card:

Week 211 - Dream

Take a look at my card:

Dream (CAS)

When I saw this week’s cue card, I knew right away that I wanted to use Neat and Tangled Making Waves – Nice and Neat Dies.  I love how the clouds are particle cut out of the card stock.

Creating this card was a breeze.  I die cut the front of the white Bristol Smooth card panel using the Making Waves Die. Then I used a pencil to outline the circle, so that I knew where to apply the distress ink.  I started with Distress Ink Tumbled Glass to create the sky.  Then I came in with Distress Ink Broken China to darken it just a bit closer to the top of the sky.  After that I used Distress Ink Forest Moss to create the ground.

Once all of the colors were down, I applied tumbled glass again over the entire scene to lighten the sky and the grass.  Once I was satisfied with the way the scene looked, I used Concord & 9th Sophisticated Script Stamp Set and Clearsnap Colorbox Wicked Archival Ink to stamp the cue card word.

Then I placed a couple of dimensionals on the back of the card panel and placed it on top of the card base. Perfect!!!

I truly love how this card turned out. I think is absolutely perfect for this challenge. What do you think?

Are you inspired to play along?  Please let me know below!

For more inspiration, check out my fellow Design Team members blog for more awesome work.

DT Badge

Our sponsor this week is STAMPlorations!

I’m also playing along with AAA Cards Game #71:

#71

Supplies used:

Making Waves Die  Sophisticated Script Wicked Black

Thank you so much for stopping by!!

~Kymona

YNS Birthday Project Showcase

Hello everyone!!  How are you enjoying Your Next Stamp month long Birthday Celebration?  I hope your having a blast!

This week the design team is is doing something special.  We are showcasing all different types of birthday projects!!  To see my fellow design team members work, head on over to the YNS Blog.

My daughter’s birthday is coming up so fast.  She will be 10 in a couple of weeks so we are getting ready for her big birthday.  So I decided to make a couple of favors for her friends.

Take a look:

HB2U (YNS) copy

YNS Supplies: Bookmark/Tag Die Set, Swirly Fun Paper Pack, Happy Birthday YNS 2016

Other Supplies: Tombow Extreme Adhesive, Mini Misti, Hole Puncher, Brads, Fiskars Paper Crimper

Do you remember those sour cream packets?  Yes, I’m bringing them back again, LOL.  She is to young to know what these were used for in the past, so this will be fun when her friends get there hands on these.

Tell me these are the cutest favors you’ve seen today!!

Here’s how I created these:

  • I used the full sheet of pattern paper, which is 4.25 x 5.50.
  • Add the strong adhesive to the backside of the paper, only on three sides.
  • Then I took my time and roll the paper to met the long strip of adhesive on the other side.
  • After that, pinch one end together.
  • Fill the pouch with goodies.
  • Now close the open end opposite of how you closed the bottom end.  If you close them the same way, you will create a pouch that looks like the dark pink one, flat.

That’s it.  Nice, easy and perfect to repeat over and over.

Guess what!!

At the end of the week YNS is giving away a stamp set to one lucky person who leaves a comment on the YNS Blog.  The more days you comment on, the greater your odds of winning.  You have until Saturday, August 20th to leave all of your comments.  The winner will be announced on Monday, August 22nd.

Thanks for stopping by!!

~Kymona


CS Take It Make It: Masking and Stenciling

Hello everyone!!  I’m here today with CS Take It Make It Design Team for our CS Take It Make It: Take a Stamp Challenge for the month of July.

This month’s theme is Take a Technique: Stenciling or Masking!!  That means you can use a stencil or mask somewhere on your creation with a stamped image or sentiment anywhere on your creation.

Take a look at my card:

Hello (masked stencil) (TIMI)

So stenciling is pretty but mix that with masking and you have a great design.

Here is how I created this card:

I used Your Next Stamp Circle die to cut a circle out of some masking paper.

Then I placed the Inkadinkado masking paper on top of the card front.

After that I placed the stencil on top of the masked card front.

Once those two were in place, I blended the two distress ink colors on top of the stencil.

Stenciling and Masking (TIMI)

Then I took the mask off to reveal the beautiful circle of dots.

Completed (TIMI)

To finish the card off, I stamped the sentiment from a retired Stampin’ Up! stamp set on top of the masked/stenciled dots.

Super simple and easy!!!

Sooooo, what do you think? Please let me know below.

Prizes:

We have two prizes to offer this month, the first is our sponsor prize. This winner will be chosen randomly from all of the entries in the challenge! The sponsor for August is: GiogioCraft!

Prize: Bundle of 4 Stencils

Our second winner is our Design Winner. This winner is chosen by our DT, who all vote for their favorite design from all of the entries. This winner will have their winning project published in Craft Stamper Magazine, they will have a GDT slot for an upcoming challenge, and will also feature in their very own Winners Profile blog post!

Now if that isn’t a reason to play along I’m not sure what is!!

I can’t wait to see what you come up with.

Supplies used:

YNS circle dies Hello stamp set

Hero Arts Colorful Butterflies

Hello everyone!!  I’m on the a2z Scrapbooking Blog today with a colorful butterfly card today.

Here is a sneak peek of my card:

Primary Color Butterflies (a2z) 1

Head on over to the a2z Scrapbooking Blog to see the entire card and how I created this card.

I hope you love what you see and that it inspires you to join us this month. You have the entire month to create a new project and enter it into our challenge. By entering you will have a chance to win a $25 Gift Certificate to the a2z Scrapbooking Store. Winner will be announced on the 7th of August.  Good Luck!

If you would like to purchase any Hero Arts products please head on over to the store and use the coupon code KYMONA15 to get 15% off your purchase.

Supplies used:

Stamp and Cut ButterfliesTombow Irojiten Vivid Coloring Set

Thanks for stopping by!

Kymona

Distress Techniques Day 4

Hello everyone!!  I’m back again with another days work from the Creative Chemistry 103 class.

I skipped Day 2 and 3, but I will come back to it.  Today I will show you what Day 4 is all about.

Day 4 was all about Distress Crayons.

I bought two sets when they came out but I wasn’t a fan of them.  I couldn’t get them to do what I wanted.  Another design team member showed me how I could use them and I was ok with that.  Then this class really set the record straight.

Take a look:

Distress Tags 4

The different techniques are:

  1. Distress Crayon Smudge
  2. Distress Crayon Textured Resist
  3. Distress Crayon Watercolor Resist
  4. Distress Crayon Blended Background
  5. Distress Crayon Layered Coloring

Totally awesome right!!  I love these different techniques!!

Supplies used:

Thank you so much for stopping by!

~Kymona