CS Take It Make It: Multicoloring Stenciling

Second Post for today
If your looking for the YNS Color and Sketch post, click here

Hello everyone!!  I’m here today with CS Take It Make It Design Team for our CS Take It Make It: Take a Stamp Challenge for the month of July.

This month’s theme is Take a Technique: Stenciling or Masking!!  That means you can use a stencil or mask somewhere on your creation with a stamped image or sentiment anywhere on your creation.

Take a look at my card:

Hello Hey You (TIMI)

Stenciling is so pretty to me.  I just love how easy it is to create a super nice and simple background that looks so elegant!!

Here is how I create this card:

  1. I place Create a Smile Boxes Stencil on top of an A2 size card and held it down with post it tape.
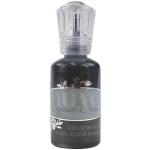
  2. Then I used Distress Ink Wild Honey and Scattered Straw and applied ink using an ink blending tool.
  3. I started in the bottom right hand corner with wild honey and move my way up the card getting lighter with scattered straw.
  4. Then I stamped the sentiments from a retired Stampin’ Up! stamp set with Clearsnap Colorbox Archival Wicked Dye Ink.

Super simple and easy!!!

Sooooo, what do you think? Please let me know below.

Prizes:

We have two prizes to offer this month, the first is our sponsor prize. This winner will be chosen randomly from all of the entries in the challenge! The sponsor for August is: GiogioCraft!

Prize: Bundle of 4 Stencils

Our second winner is our Design Winner. This winner is chosen by our DT, who all vote for their favorite design from all of the entries. This winner will have their winning project published in Craft Stamper Magazine, they will have a GDT slot for an upcoming challenge, and will also feature in their very own Winners Profile blog post!

Now if that isn’t a reason to play along I’m not sure what is!!

I can’t wait to see what you come up with.

Supplies:

Create a Smile Boxes Stencil   Wicked Black

Thanks for stopping by!!

~Kymona

Your Next Stamp July Feature Day

Hello everyone!!!  I’ here today with another YNS creation to inspire you and a chance to win a stamp set of your choice!!

On the 24nd of the month, YNS Design Team creates more samples featuring YNS products and shares them with all of you!!

The super duper awesome part of it all besides our awesome samples, you could win a stamp set of your choice!!  Now how super cool is that!!

Scroll to the bottom to find out how!!

This month we are focusing on “Water”!!  The DT created projects featuring water or watercoloring on them.

Now take a look at the card I created to inspire you:

Happy Hello (YNS)

YNS Supplies: Fairytale Friends

Other Supplies: Recollection Heavyweight White Cardstock, Derwent Watercolor Pencils

What do you think?  Let me know below.

Now on to that prize!!

DTDare2candy-547x232

All you have to do is leave a comment on the YNS blog by July 26th for a chance to WIN a YNS stamp set of your choice!!  Super simple and easy!!  You will get to see my fellow DT’s projects as well.

So head on over, you don’t want to miss this one!!

Thanks for stopping by!

~Kymona

Mutli-Stamping for the Right At Home Blog Hop

Hello everyone!!  I’m excited to be here with you today to sharing an amazing multi-stamping project created for the Right At Home April Release Blog Hop!!  The design team are delight to full you with inspiration.

july-release

This month Nicole released four clear stamp sets and one background stamp! Super cute all around! For this released I used Right at Home Stamps Banner Alphabet and Banner Alphabet Add-On.  I also used Right At Home very first stamp set Happy Mail.

If you arrived here from Joan’s blog, you are on the right path!!  If you arrived on your own, you will want to start from the beginning, the Right At Home blog as to not miss out on any of the fun.

Take a look at my postcard:

handmade postcard

While looking at the stamp sets, I wonder what could I do differently with these stamps.  It hit me that I could create postcards where the image and message is on the front of the card.

Check out how I created these easy to create postcards:

I started with the banner string.  I used the Mini Misti to do all of my stamping so that I could create more then one postcard at a time. I stamped the string with Versafine Black Ink.

Multi-stamping banner (RAH)

Then I lined the banner stamps on the stamped line so that they are perfectly placed for easy stamping with the Mini Misti.

I left a space for the second “L”.

Line up the pennent stamps (RAH

Using Clearsnap Colorbox Bluebells, I stamped the banner letters on each of the postcards.

I also placed the second sentiment on the bottom of the postcards so that I can stamp both sentiments at the same time.

Stamping the banner stams (RAH)

Then I lined the second L up on the banner line.  Using the Mini Misti to get the L in the right place on all of the postcards.

Stamping second L stamp (RAH)


Take al look at one of the finished cards with my handwriting on it.

Postcard Message (RAH)

This one is going out to Nicole the young lady behind these stamps!!

So this one layer postcard is super easy to create but even easier with a Mini Misti!!

So what do you think? Please let me know below.

Giveaway time!!

Make sure to leave a comment on all of the DT’s blog to be entered into the giveaway. Giveaway will close in a week so make sure to hop along today!!

july-bh-prize

Prize: Banner Alphabet Stamps Set and the Banner Alphabet Add-On Stamp Set

Here is the list of all of my talented teammates blog, just in case you get lost along the way:

Right At Home 
Holly
Laurie Willison
Amy T.
Joan
Kymona ← you are here
Amy K.

 Thank you so much for stopping by!!

~Kymona

Simple Stamping with Your Next Stamp July 2016 Release

Hello everyone!!! I’m back again for this month’s Your Next Stamp Sneak Peek!!

We are getting ready for our July Release Blog Hop tomorrow with a sneak peek today. Are you excited? I am!!

Take a look at my card that I’m giving you a sneak peek of:

set of stamped cards

YNS Supplies: Fairytale Friends

Other Supplies: Recollection Heavyweight White Cardstock, Copic Markers, We R Memory Keepers Corner Chomper, Mini Misti, Versafine Ink

 Who needs a set of just because cards?  I always do!!  My family members are always asking me for cards that they can send to people so sets like these are perfect for those times.  They are also great to give away as gifts.

To create these cards:

  1. Cut your cardstock to 4 x 8 card size, scored at 4.
  2. Using the Mini Misti, place the stamps exactly where you want them to appear on your card front.
  3. Ink the stamps up and stamp!!
  4. Change out the sentiments and stamp.

Super easy and fun!!

I hope I see all of you tomorrow for the July 2016 Release Hop.

~Kymona

Clearsnap and CardMarker Mag Blog Hop

Third post for today
If your looking for The Ton’s Summer 2016 Release Blog Hop, click here
If your looking for Your Next Stamp Summer Fun post, click here

Hello everyone!! I’m excited to be here today!!  Clearsnap and CardMarker Mag have teamed up to bring you this great blog hop today!!

clearsnap
pub_cardmaker

If you’ve been hopping along, you would have arrived from Lisa’s blog and if you’d like to start from the beginning, head on over to the CardMaker’s blog.

I was challenged to use Clearsnap Chalk Ink to create a project.  So, I decided to show you how to achieve an Ombre effect using Clearsnap Chalk Ink.  I love this affect because it shows a gradual light to dark color that is so super easy to achieve.

Colorbox ink and stamp

Supplies used:

Lets get started:

Use the lightest pink to ink up the stamp.

Stamp the image to the bottom left corner of the white card base.

Adding the first ink

Then re-ink the stamp with the first color and the middle pink color towards the tail.

Stamp the inked stamp to the right of the first stamped image.

adding the second ink

Then ink up the stamp one more time in the solid darker pink color and stamp the image on the cardstock.

Take a look at all three of the stamped images from dark to light.

stamped images

Stamp your sentiment using Clearsnap Archival Ink in Wicked Black and sprinkle clear embossing powder on top.  Heat set the sentiment for a glossy look.

Take a look at my finished card:

finished cards

Here is another view of my card with the supplies:

finished card with props

Super fun and exciting right!! Wait till you see what everyone else has come up with.  You are going to love all of their projects.

Just in case you get lost on the hop here is a list of all of the participants:

CardMaker
Rose Powell
Dawn Lusk
Dana Tatar
Carisa Zglobicki
Jennifer Priest
Pamela Haskin
Chana Malkah Harris
Lisa Silver
Kymona Tracey ← you are here
Kim Klinkovsky
Linda Beeson
Clearsnap

So what do you think?  Would you give this ColorBox Chalk Inks a try in your when creating and ombre look? Please let me know in the comments.

Thank you for stopping by!

~Kymona

{Clean and Simple} CASology 201 – Sunshine

Hello everyone!!  It’s CASology Tuesday!!  We are back with another Clean and Simple Cue Card just for you!!

Before I jump in with this week’s cure card, let me say THANK YOU to all of you who stopped by my blog and played along with us this week!!  If I can speak for the team, we really appreciate all of the love that each of you showed us.  You make creating a card each week worth it!!  So thank you once again!!

Congrats to Kim S from Lily Patch Stamps for winning the Owls stamp set!!  Thank you so much for playing along with us last week and leaving a great comment. Please use the contact me form above so that I can get that stamp set to you.

Now this week’s cue card is:

Week 201 - Sunshine

Take a look at my card:

Hello Sunshine (CAS)

Hello Sunshine!! I’m so glad summer is on its way.  I do not like the cold. I hate the cold.  I prefer 85 degree and above weather everyday of the week.

The “Sun” Rubber Dance Art Stamp is perfect for this week’s cue card!!  The sun can shine down on me all day long!!

Creating this card was a snap.

I used the Mini Misti to stamp the sun and part of the sentiment from WPLUS9 Sending Sunshine stamp set using My Favorite Thing Hybrid Black Ink and the last part part of the sentiment using Lawn Fawn Sunflower Ink.

Super easy, clean and simple!!

What do you think?  I can’t wait to see what you come up with!

For more inspiration, check out my fellow Design Team members blog for more awesome work.

DT Badge

{Clean and Simple} CASology 197 – Tear

Hello everyone!!  It’s CASology Tuesday!!  We are back with another Clean and Simple Cue Card just for you!!

This week’s cue card is:

Week 197 - Tear

Take a look at my card:

Hello cut 1 (CAS)

Lets take a better look:

Hello cut (CAS)

When I saw the cue card, I thought of tearing paper, but then I thought that wouldn’t be clean and simple.  So I decided to use my paper trimmer to cut the paper to give the tear a nice straight edge, LOL!!

This card can be sealed to be a try one layer card or left open and your message can be on the inside of the card.

I used retired Lawn Fawn Just My Type stamp set to stamp the scissors using Versafine Ink.

Then I used my paper trimmer to cut the paper as if the scissors cut it.

I used my bone folder to bend the paper.

After that, I stamped the sentiment on the inside using the Mini Misti.

Super easy, clean and simple!!

What do you think?  I can’t wait to see what you come up with!

For more inspiration, check out my fellow Design Team members blog for more awesome work.

DT Badge

Deidre Payne

Hannelie Bester

Hazel Hodgkins

Jacquie Southas

Jen Wills

Joyce Mehrberg

Judy Marino

Kymona Tracey

Melissa Chipperfield

Sherrie Mannion

Tracey McNeely

Guest Designer

Lisa

Our sponsor this week is Right at Home.

Supplies used:

Just My Type  Stampin' TrimmerMini Misti

Thanks for stopping by!!

~Kymona

How to Decorate a Photo Frame with Ink

Fourth Post for today
If your looking for the Sparkle and Shine post, click here
If your looking for a2z Scrapbooking post, click here
If your looking for So Suzy Stamps post, click here

Hey everyone!! I’m up on the Clearsnap Blog today sharing how I decorated a photo frame with ink for the May Color Challenge.

Take a look at the Inspiration photo:

Clearsnap-MAY-2016-Color-Challenge

My project today is a super cool project.  I decorated a photo frame with ink and had a blast doing it. The best part about this photo frame is its a gift for my dad!

Now onto my photo frame:

Oh I love how this frame turned out!! The colors are fantastic!! The best part of this process is no drying time!! The ink dries almost immediately!

Here’s how this frame was created:

Cover your workstation up with a craft mat! I can’t stress that enough.

Then apply the ink directly to the frame using the ink pad itself.

With the second color, press the ink pad down onto the craft mat, leaving some ink residue behind.

Second color

With a craft paint brush pick up the ink and apply it to the edge.

NOTE: You have to move fast because this ink dries super fast.

Pick up ink

Once your done applying the color to the edges, add color to white cardstock to create a matching flower.

Create a flower using a die and the color cardstock.

Create a flower

Then you stamp whatever sentiment you want on the frame.  The frame is complete.

Take a look at it again:

I gave the frame to my dad and he loved it!!  Something to hold onto for a long time to come.  Now my brothers and sister know that I’m the favorite so they don’t mind not being included.  LOL!!!

So what do you think? Please let me know below.

Supplies used:

Sophisticated Script Spiral Flower Die Surfacez Tiki Teal Surfacez Passion-Purple

Thanks for stopping by!!

~Kymona


Simple Watercoloring for the Sparkle and Shine Challenge

Third Post for today
If your looking for a2z Scrapbooking post, click here
If your looking for So Suzy Stamps post, click here

Hello everyone!!  I’m here today with the Sparkle and Shine Challenge!!!  How exciting is this!!!

Since its the first of the month, its time for our new challenge!!!

Here is the inspiration photo that guided us this time around:

Sparkle and Shine

Now take a look at my card:

From my garden (YNS)

I had so much fun watercoloring this Dahlias from WPlus 9 Beautiful Bouquets: Dahlias stamp set.

I used these amazing Daniel Smith dots:

Daniel Dots

Those small dots packs a big punch.  This was the first time I used them and I like them.  If I wanted to purchase any colors I have a true sample to guide me.

Here is how I created this card:

I used the Mini Misti to stamp the image and sentiment on Tim Holtz Watercolor papers using Ranger Archival Black Ink.

Then I used the watercolor dots to color the image in.

Nice and easy.

What do you think?  I would love to hear from you.

Now its your turn to give this challenge a try!! I can’t wait to see what you come up with!!

Our sponsor for this challenge is Create a Smile Stamps!!

Create A Smile BadgeThe winner of this challenge will receive a $25 gift card to their online store and will be asked to be our Guest Designer for the next month.

Supplies used:

wplus9 BeautifulBouquets Dahlia  Mini Misti

Thank you so much for stopping by!

~Kymona

Simple Stenciling with So Suzy Stamps

Hello everyone!  I’m here with So Suzy Stamps.  This month the design team is doing a year in review and I was given the month of February to showcase.  Do you remember what stamps were released in February of this year?

No worries, I’m going to refresh your memory.  Starting with this Hello Friend Stamp set!! I’m going to show you how to combine simple stenciling with stamping.

Take a look at my card:

Hello Friend (SSS)

See, simple stenciling with stamping.  I used a retired Stampin’ Up! Stencils and Distress Inks Scattered Straw, Fossilized Amber, Spiced Marmalade and Barn Door.  I took my time and blend the colors together from both directions.

Once the blending was complete, I stamped the sentiment using Versafine Black Ink.

I used the Nuvo Crystal Drops to create the black accented dots the the card front.

How fun was this!!

What do think? Please let me know below.

Now don’t forget to check out So Suzy Shop for all of her new goodies in her store.

Supplies used:

Nuvo Ebony Black

Thanks for stopping by!

~Kymona