Hello everyone! I’m here today with CS Take It Make It Design Team for our CS Take It Make It: Take a Stamp Challenge for the month of September.
This month’s theme is Take a Stamp!! That means take any stamp and create something, anything goes!! Now if that isn’t easy, I’m not sure what is!!
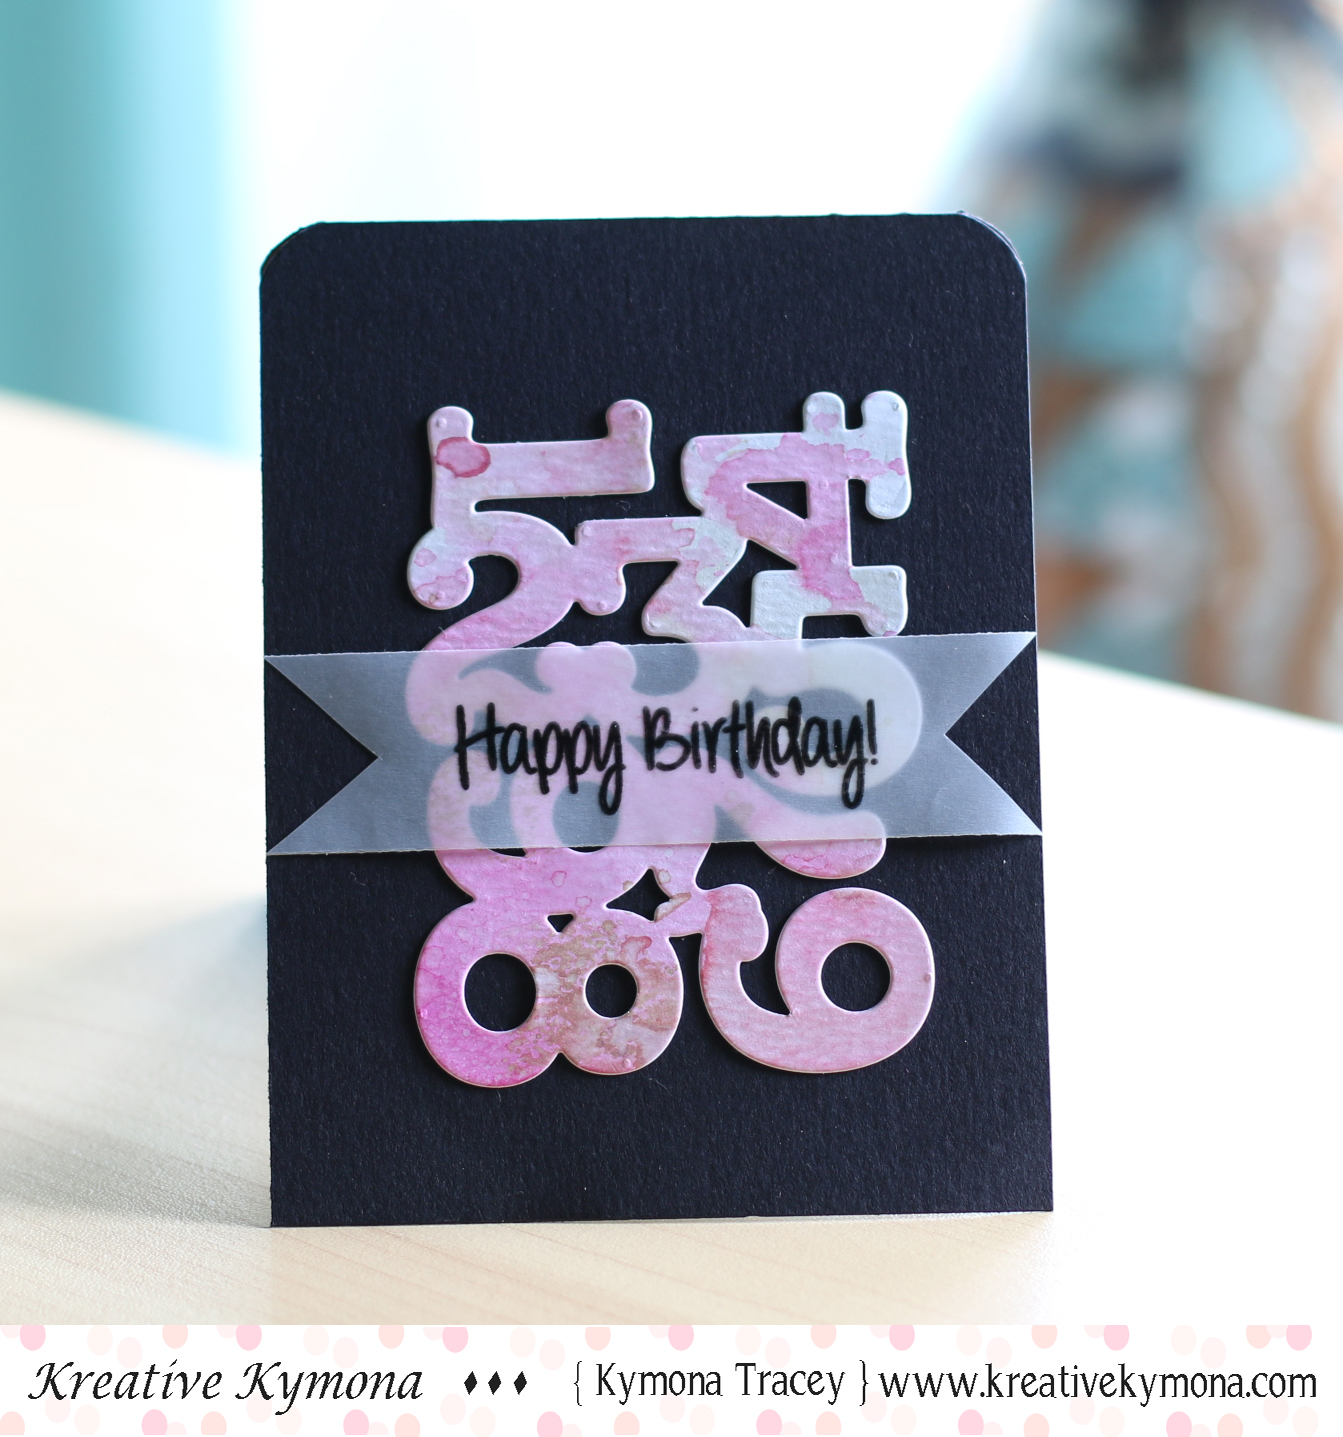
Take a look at my card:
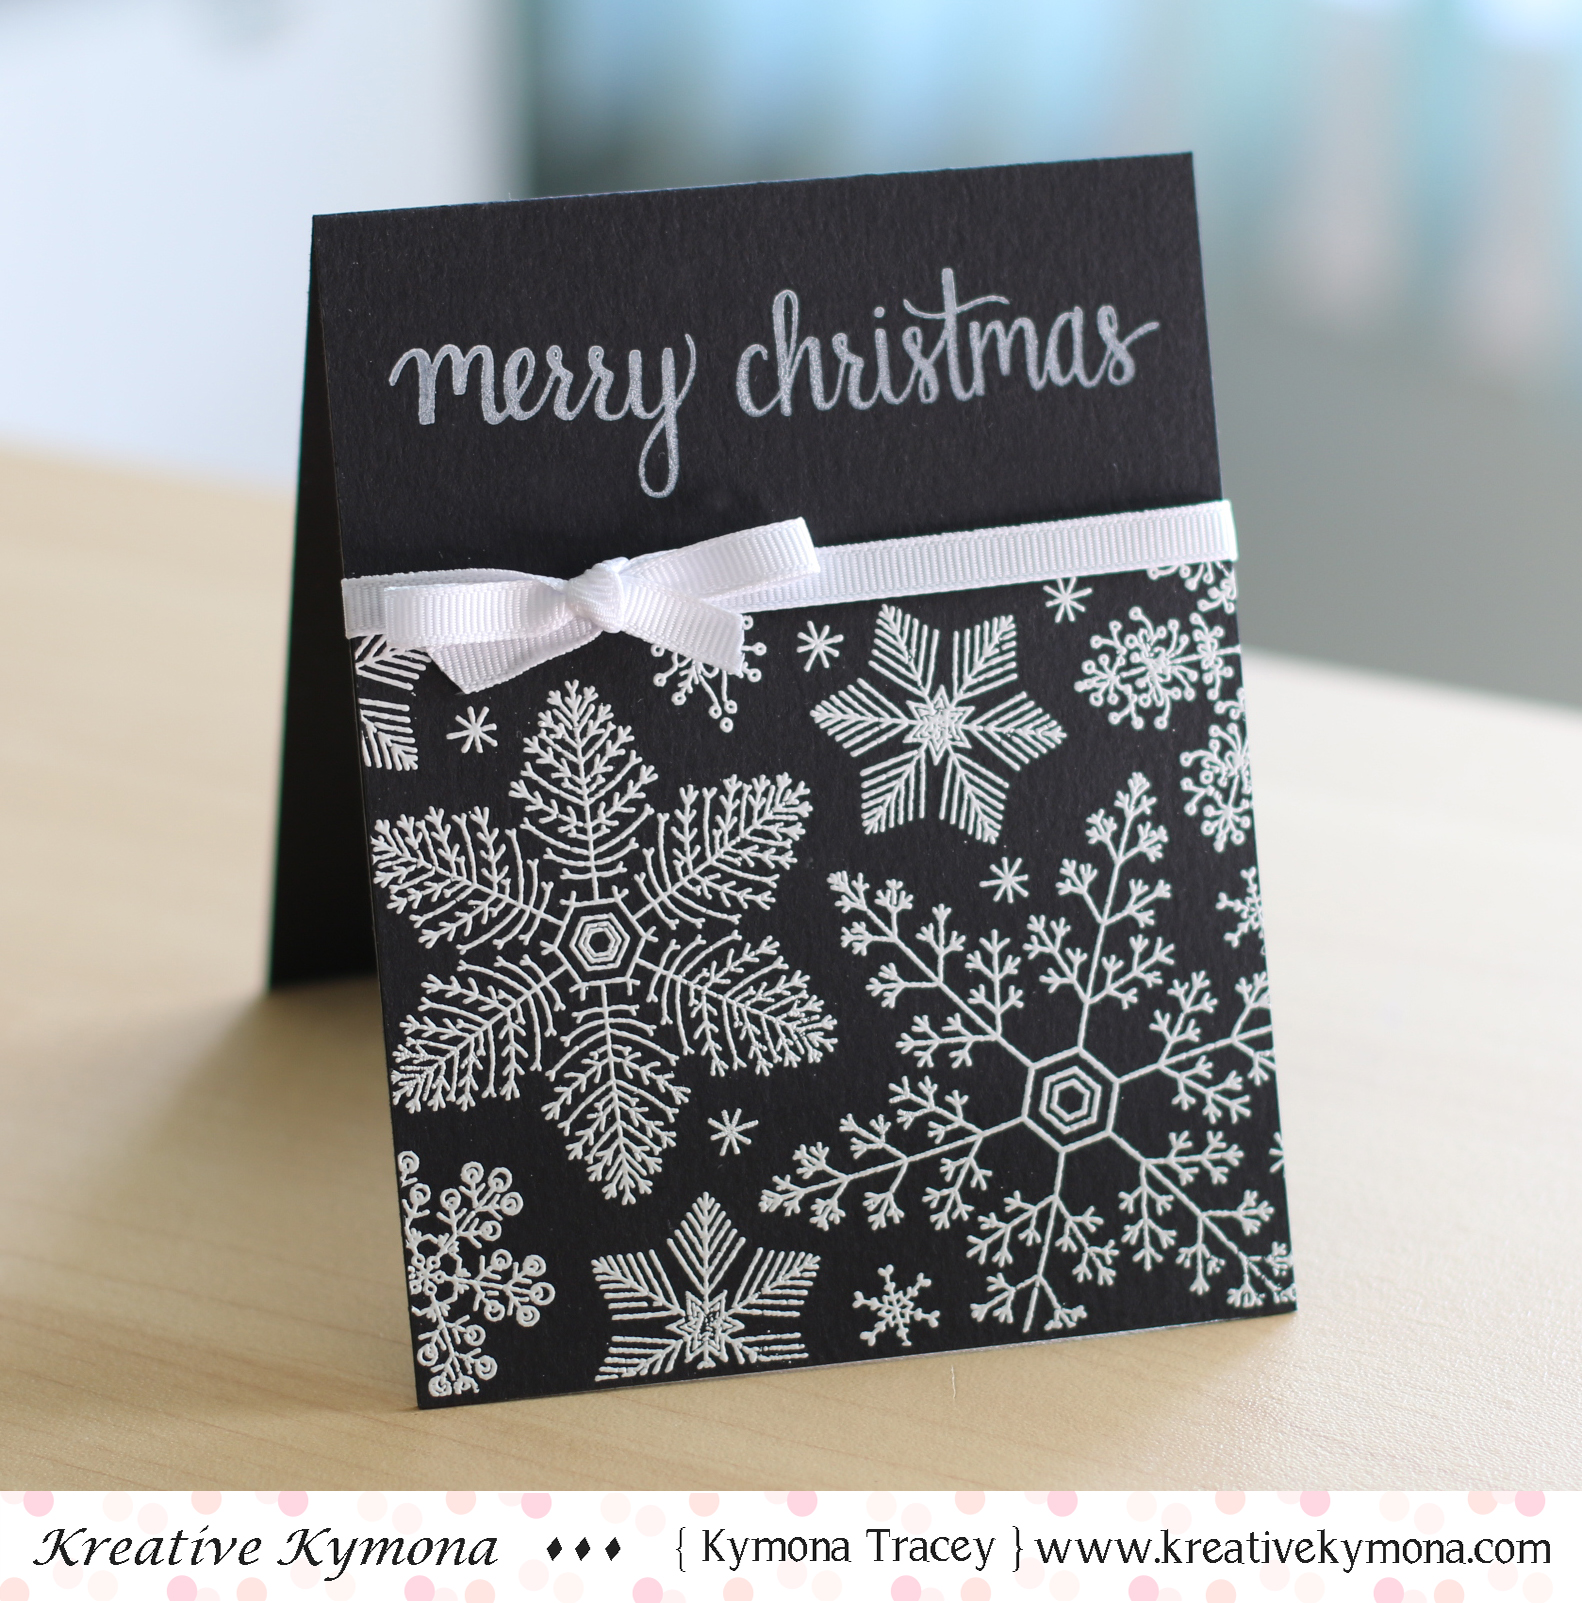
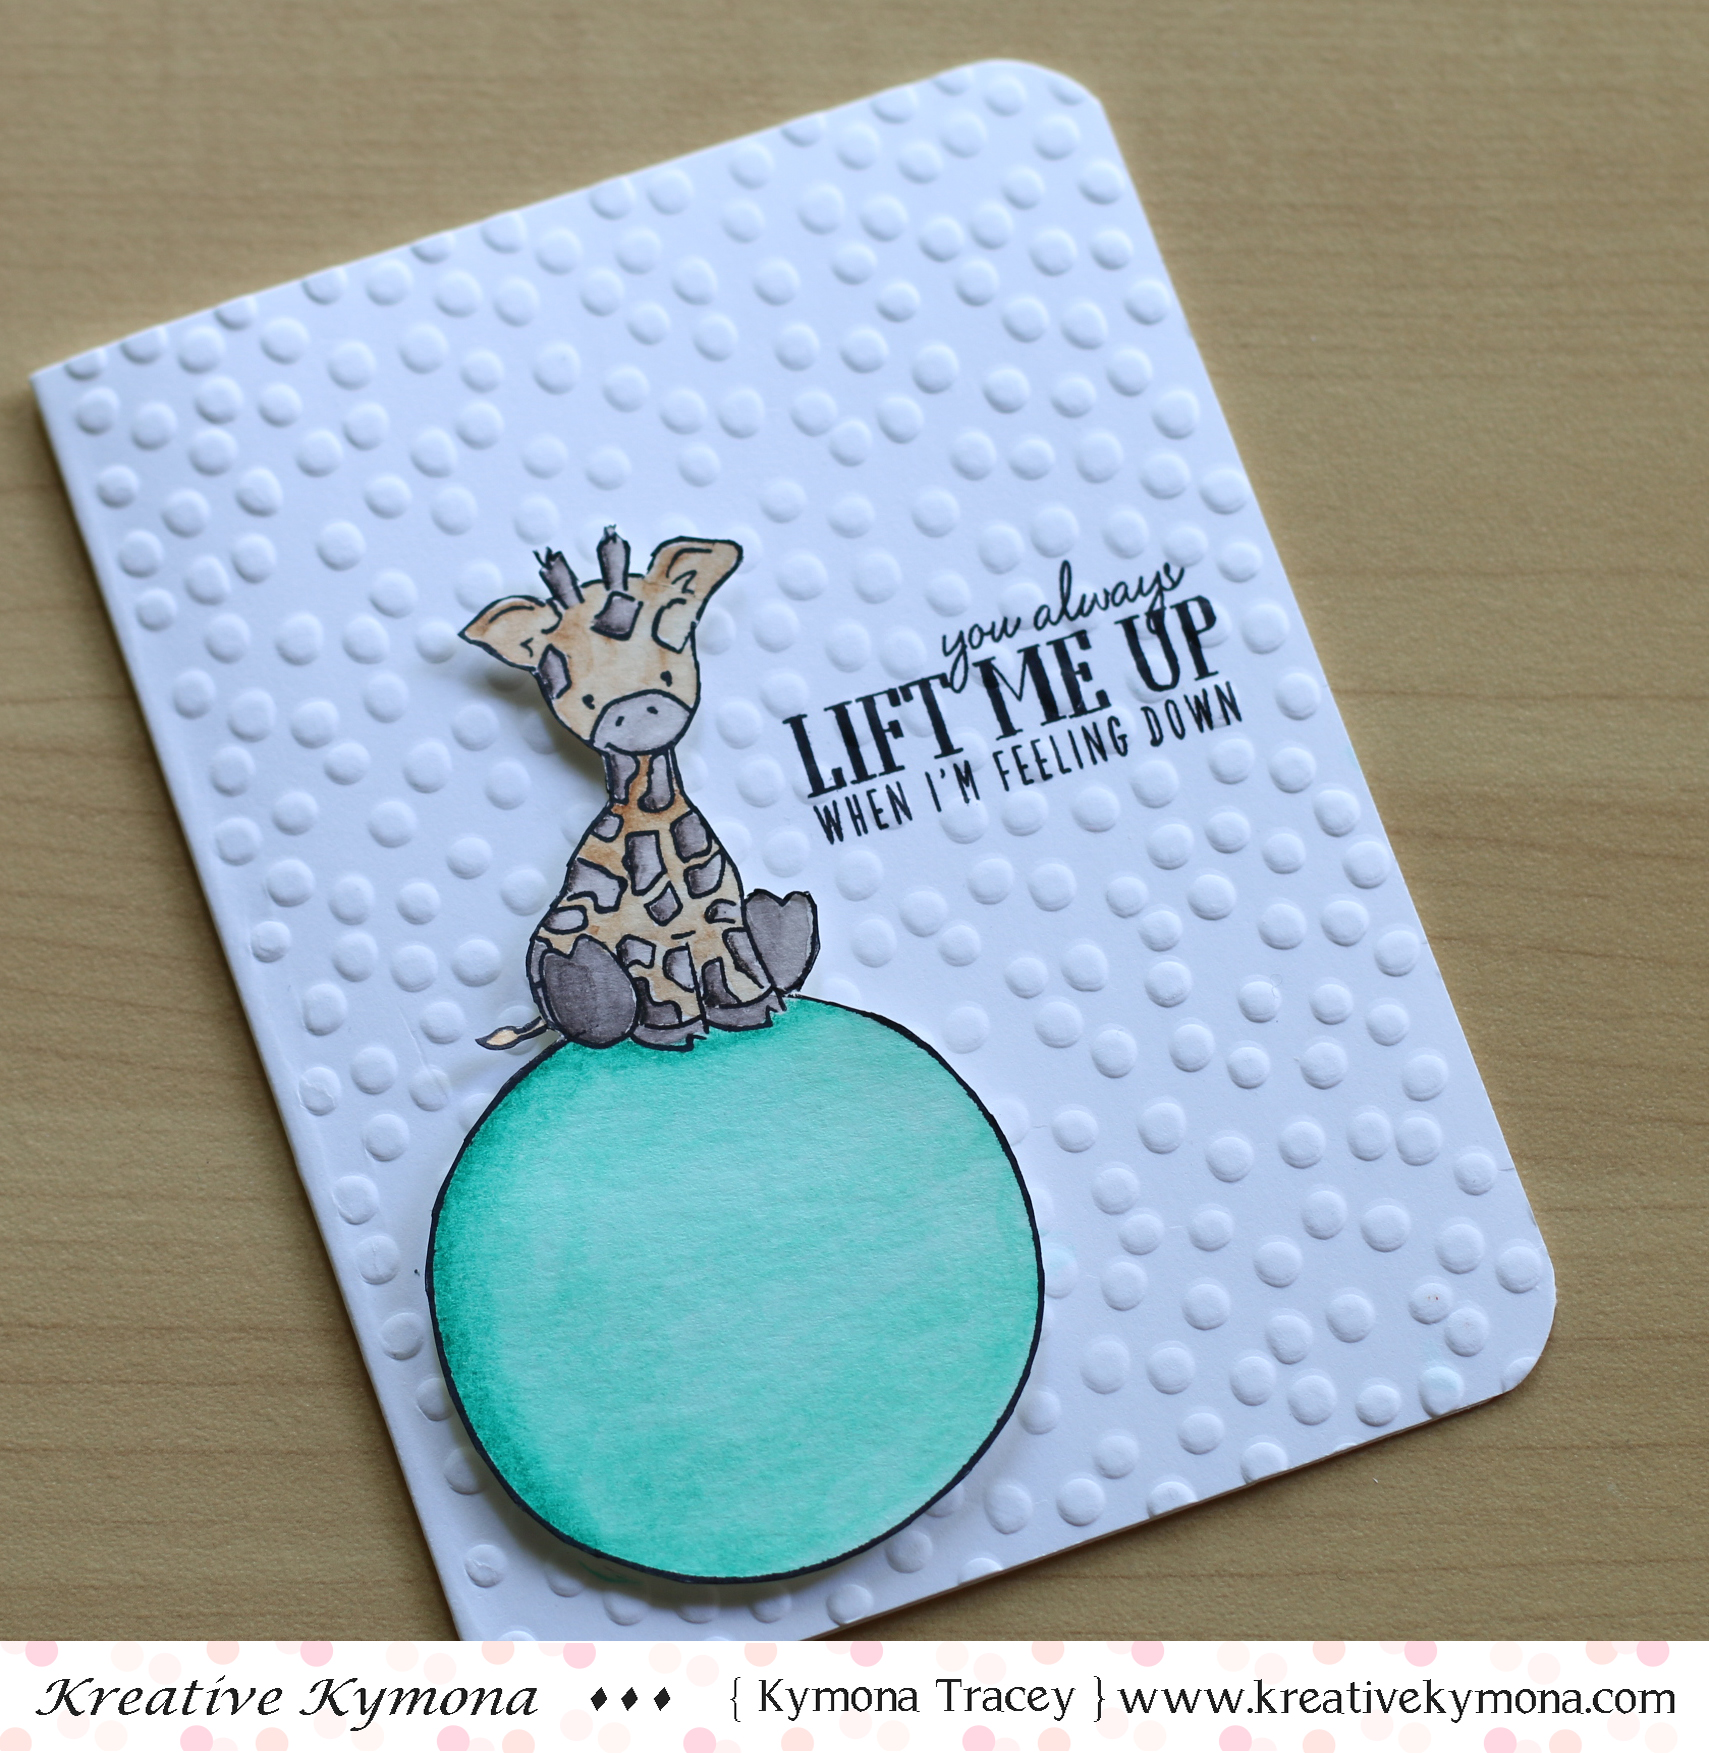
Man oh man, I love how this Christmas card turned out. I didn’t want to use traditional colors, the black and white is so pretty!
- I knew I wanted to use Versamak Ink so I prepped my Hero Arts Black Note Cards before stamping.

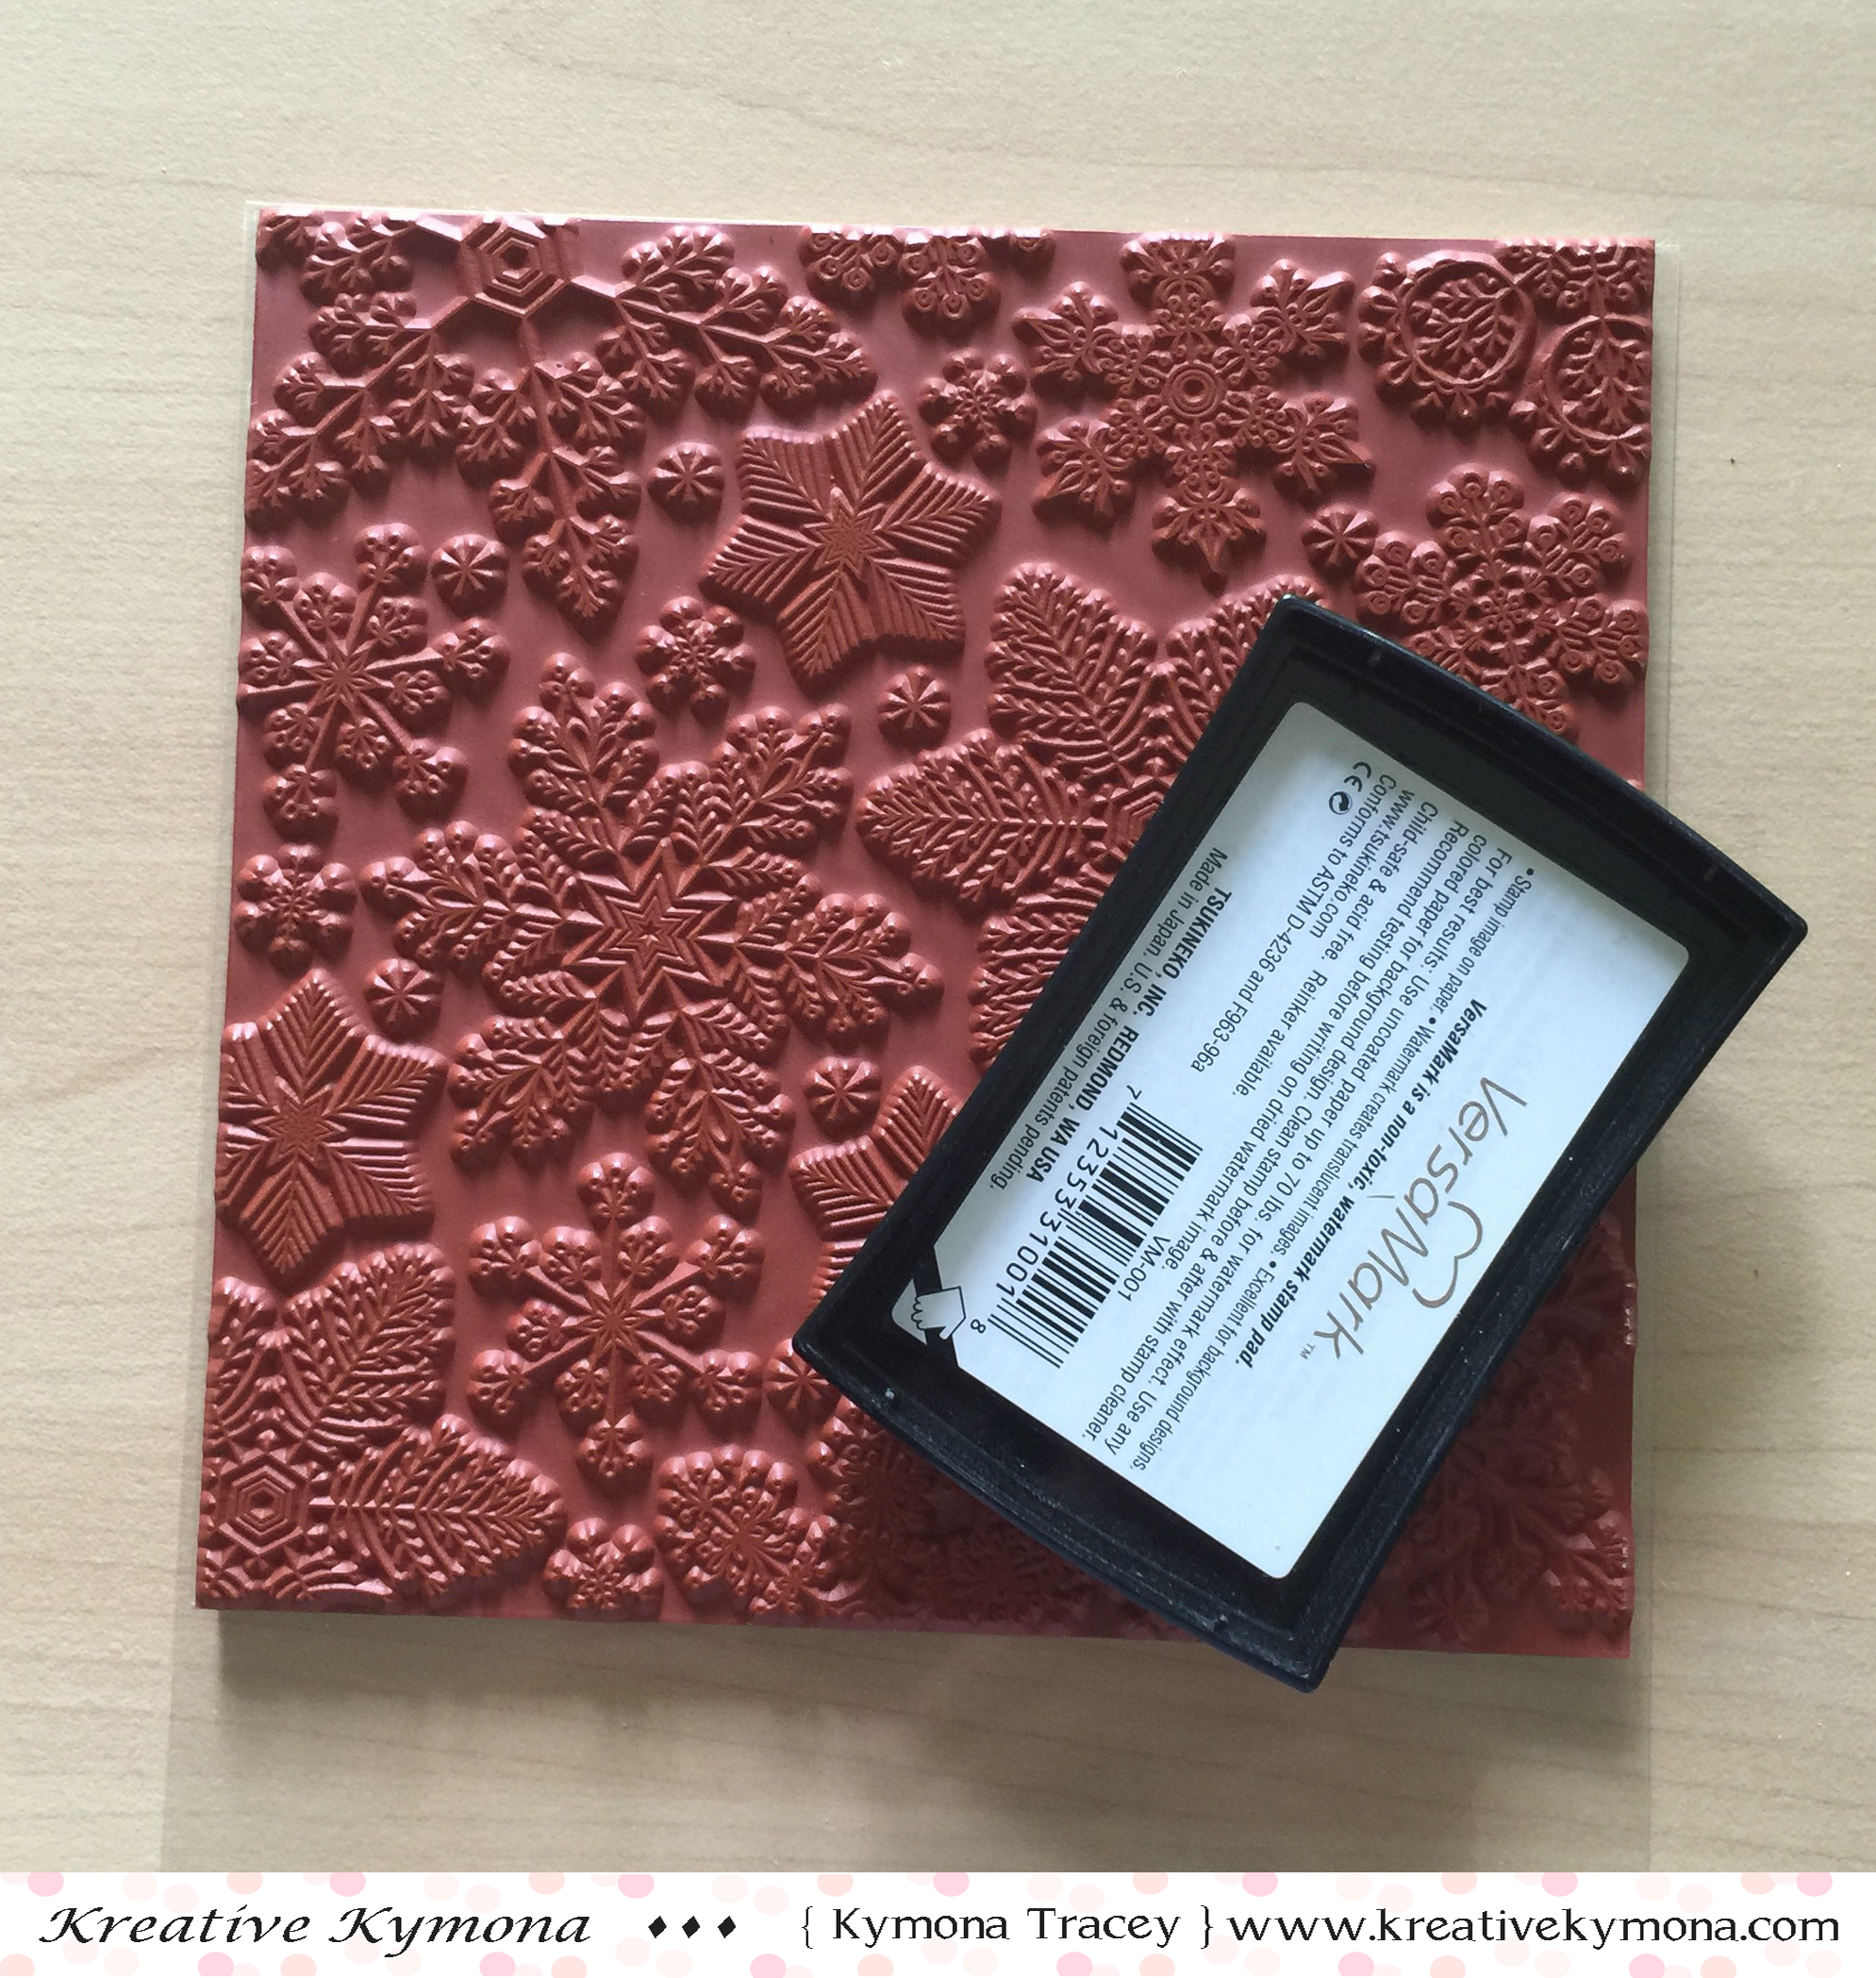
- I used the new Hero Arts Hand Drawn Snowflakes Bold Prints Stamp Set and stamped it on my black cardstock using Versamark ink.


- I added Hero Arts Ultra Fine White Embossing Powder and heat set it.

- I cut my panel down to 3/4 and adhered it to the bottom of my card panel using Tombow Multipurpose Glue.
- I stamped the sentiment from Hero Arts Joy to the World Stamp Set on the top portion of my card using Hero Arts Unicorn Pigment Ink.
- I added white ribbon to the card base and tied a bow.


Super easy but very elegant. I love how crispy this card turned out.
I love how this turned out!! Now its your turn to play along with us!!!
All of the Hero Arts supplies that I used can be found at the a2z Scrapbooking Store. If you would like to purchase any of these supplies I used, please head on over to the store and use the coupon code KYMONA15 to get 15% off your purchase.
Prizes:
We have two prizes to offer this month, the first is our sponsor prize. This winner will be chosen randomly from all of the entries in the challenge! The sponsor for July is: STAMPlorations!
STAMPlorations have been incredibly generous and have supplied a coupon code for Craft Stamper challenge players to take advantage of free shipping from the store! The code is: CSTAKEITMAKEIT and is good for free shipping on orders over $20 (£12.90). The coupon will work all through September, and can be combined with any other STAMPlorations coupon.
Here are the prizes this month:
2 Stencils: Bold Florals and Leaf Print
2 Stamp Sets: Boxed Blooms and Bold Sentiments
Our second winner is our Design Winner. This winner is chosen by our DT, who all vote for their favorite design from all of the entries. This winner will have their winning project published in Craft Stamper Magazine, they will have a GDT slot for an upcoming challenge, and will also feature in their very own Winners Profile blog post!
Now if that isn’t a reason to play along I’m not sure what is!!
I can’t wait to see what you come up with.
I’m entering my card in the NBUS Challenge #5:

Supplies used:


Thank you so much for stopping by!!
~Kymona